We are committed to make our API testing easy and reliable for everyone; and we believe in making our APIs available for testing by you. That is why we are glad that you have taken the first step towards testing our APIs.
Below are the two ways to test our APIs:
Dev Portal
Postman environment
Either ways, you get to see the same functionality .
Pre-requisites
Our APIs are secured by WSO2 API manager and can be accessed only through a subscription. The subscriptions will be provided by UBS.
Upon subscribing to an API, you will be furnished with a bearer token for authorization. This bearer token has to be passed in every request as a header attribute.
Testing in Dev Portal
-
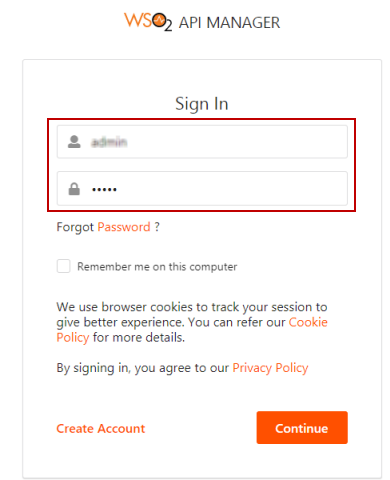
Open the Dev portal link and provide your credentials to Sign in.
-
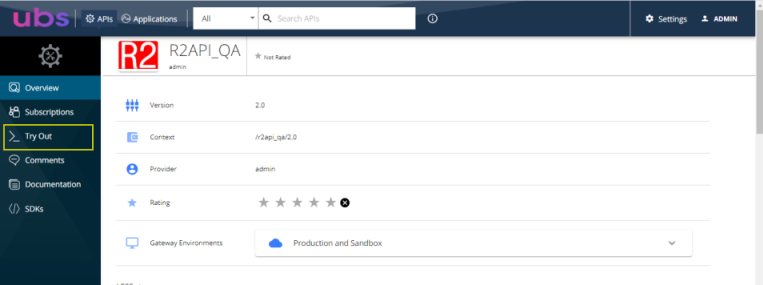
Click Try it Out in the menu bar.
-
All the supported Resources are listed here. Choose any one resource to try.
Sample test is shown for the below.
-
Create a Customer
-
Search for a customer using filter options
Create a Customer
-
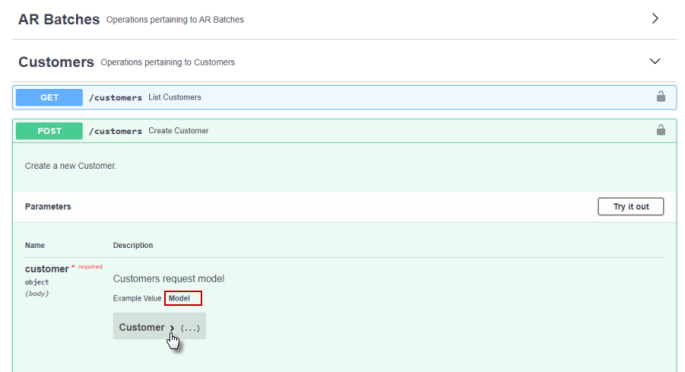
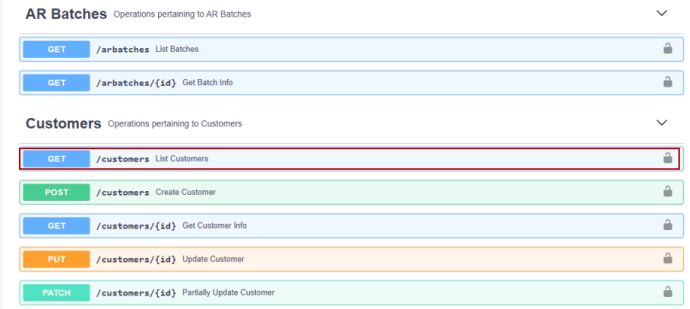
Click Customers resource.
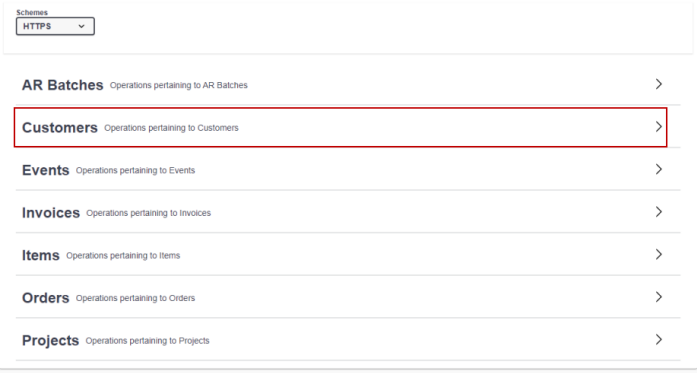
Figure 1.3: Customer resource
-
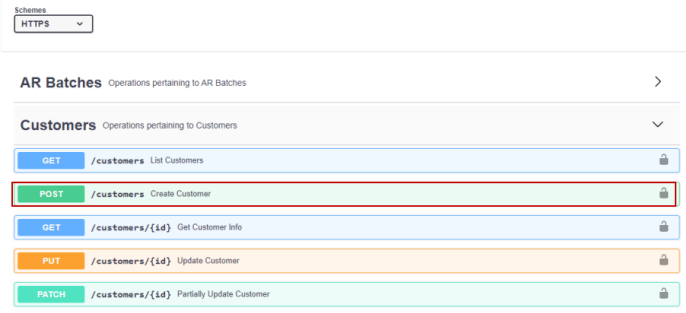
Click POST method.
-
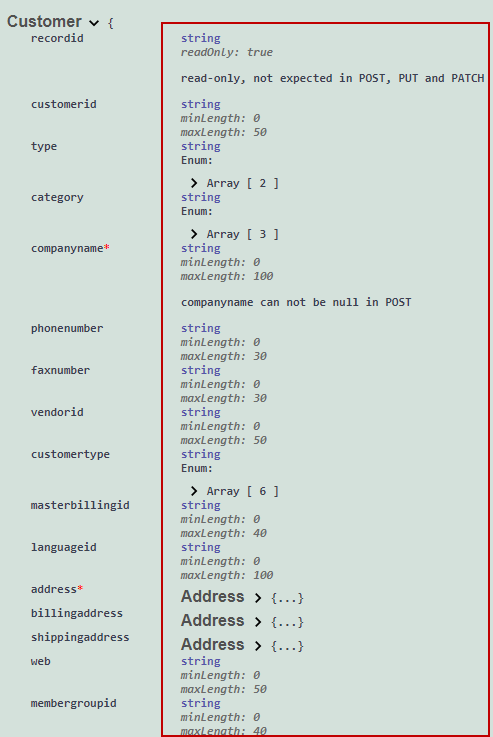
Each method has a Model. Click Model and expand it to see the details.
-
Follow the model when you are testing. Model gives you which of the fields are mandatory and what its data type as shown below.
-
-
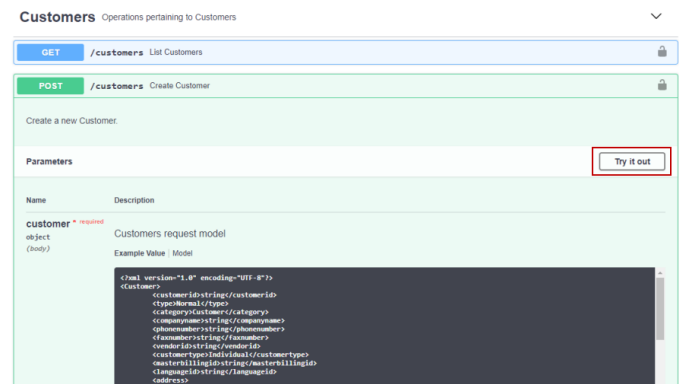
Click Try it out button.
-
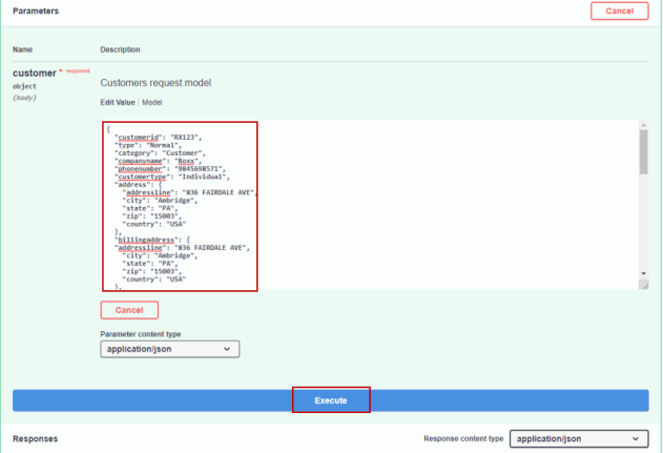
Choose the Parameter Content type and Response content type —— application/json or application/xml. Both the content type should be same.
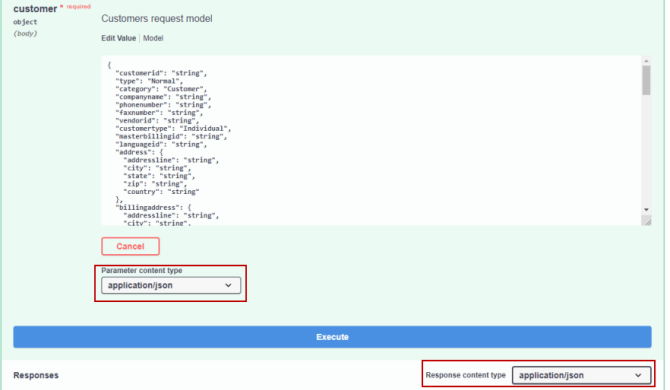
-
Input the data as required and click Execute button.
-
The results can be seen in the response body.
-
If any error occurs during execution, it is displayed in the response body.
-
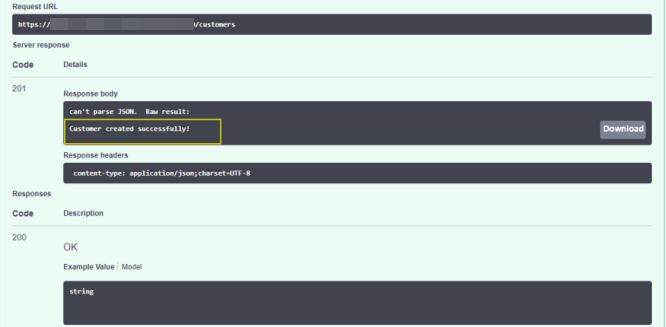
You have successfully created a Customer!!
Next, lets try to fetch the customers list using filters.
Fetching Customer list using filters
-
Click GET method of resource Customers .
-
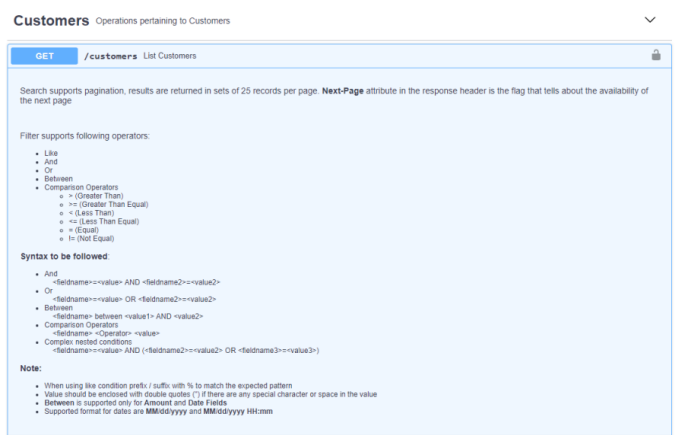
The key points guides to retrieve the data using the filter options and conditions.
-
Click Try it Out.
-
Choose the Response content type —— application/json or application/xml.
-
Search the Customers list using the filters.
For example: To search a customer whose Customer status is potential and customer type is Corporate, provide the filter as customerstatus= "potential" and customertype= "Corporate" .
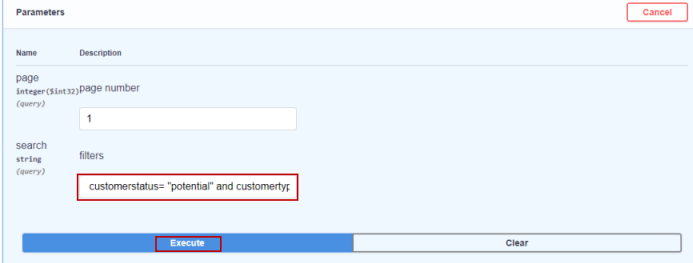
-
The customer list will be listed in the response body based on the provided filter
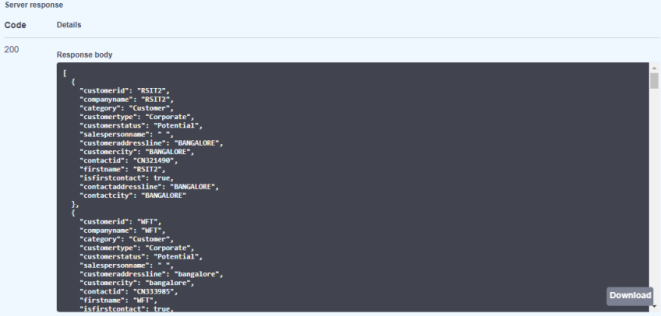
You are done with fetching the customer list using filters!!
Similarly, you can test all the resources in Dev portal.
Testing in Postman environment
-
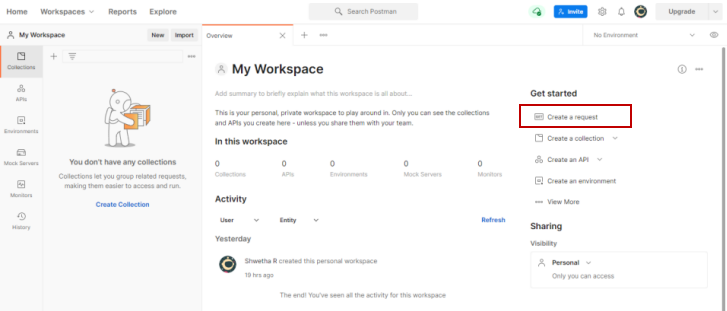
Open Postman and provide the credentials to sign in.
-
Select the workspace and click Create a request.
Sample test is shown for the below.
-
Create a Customer
-
Search for a Customer using filter
Create a Customer
-
Select POST method from dropdown and provide the URL as shown below.
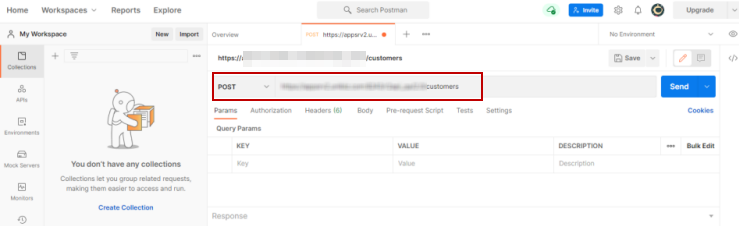
-
Click Authorization. Select the type as Bearer Token from dropdown and enter the bearer token.
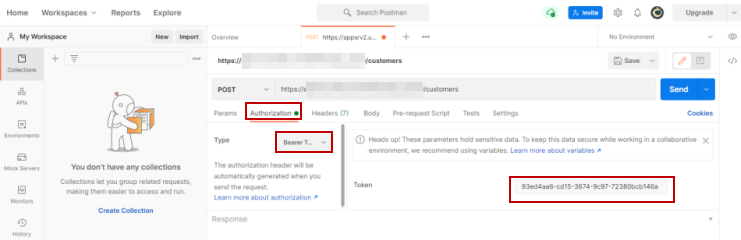
Figure 2.3: Authorization -
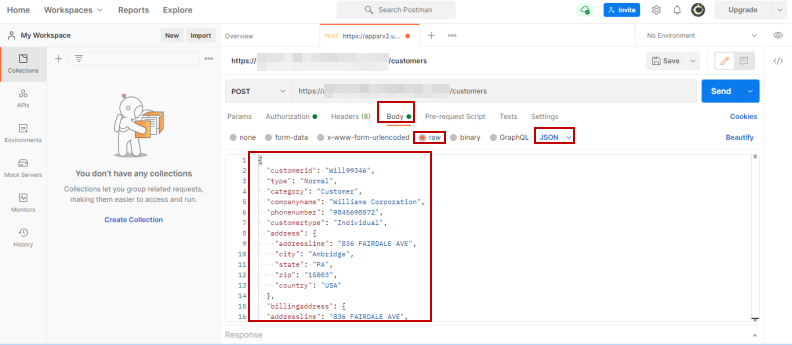
Go to Body, enable Raw, and select JSON from the text dropdown as shown in Figure 2.3.
-
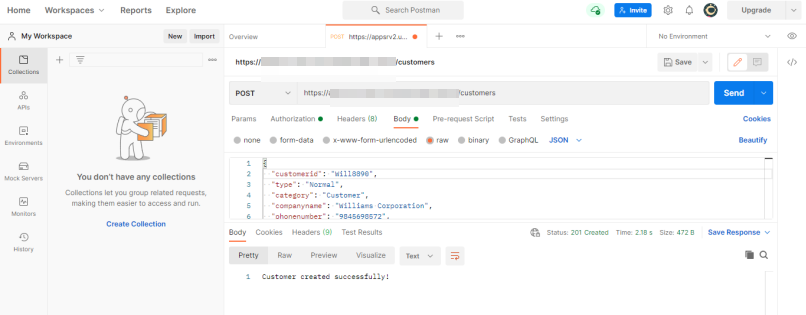
Input the data in the body and click Send button.
-
Result is displayed in the Body.
Fetching Customer list using filters
-
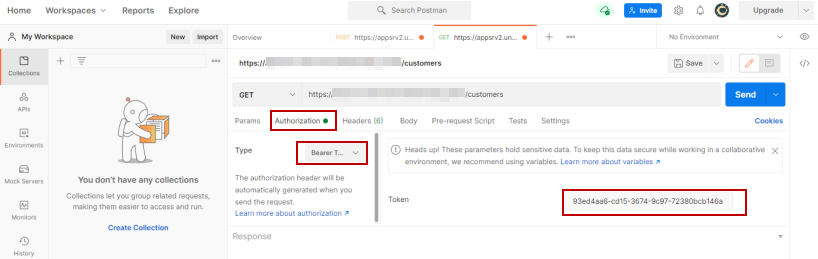
Click GET method from dropdown and enter the URL.
-
Click Authorization, select the type as Bearer Token from dropdown, and enter the bearer token.
-
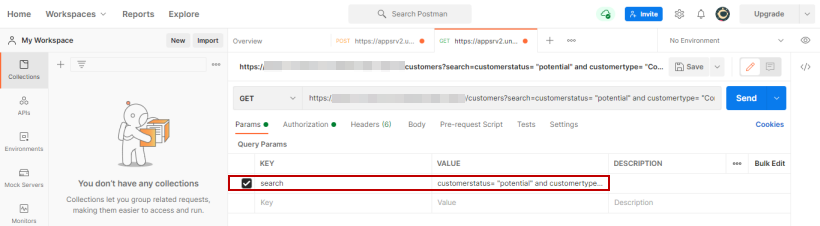
Click Params, enter 'search' in the key column and provide the filter in the value column.
For example: To search a customer whose Customer status is potential and customer type is Corporate, provide the filter as customerstatus= "potential" and customertype= "Corporate" .
-
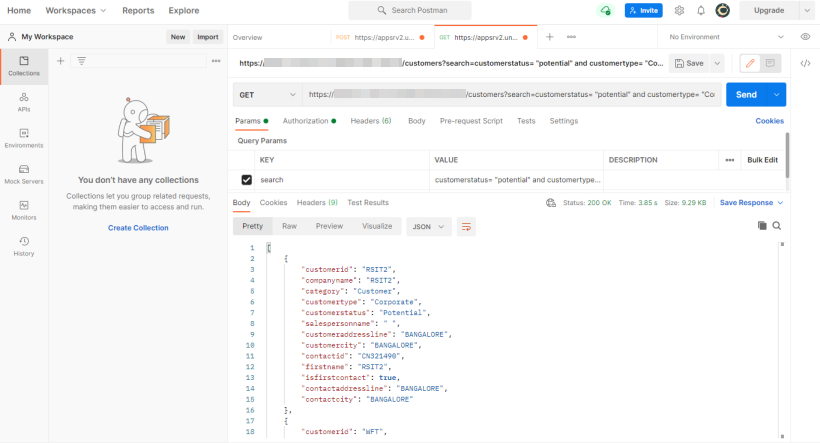
Retrieved data displays in the Body.
Similarly, you can test all other resources through Postman.