View 'Notes' from R2 in Planning Order, Graphical Scheduling, and Whiteboard
Support is added to have the text mentioned in ‘Notes’ column in R2 Order Labor grid and the same to be displayed in R2Labor Planning Order, Graphical Scheduling and Whiteboard.
Functionality Covered
'Notes' column in R2 Order Labor Grid is a writable field. It allows to mention notes about the respective labor line.
By default, the ‘Notes’ column will be the last column in the Labor Grid. [See Figure 1.0]
The text in the ‘Notes’ column appear as 'Pop-up' on mouse hover action, adding the ability to read the complete notes. [See Figure 1.0]
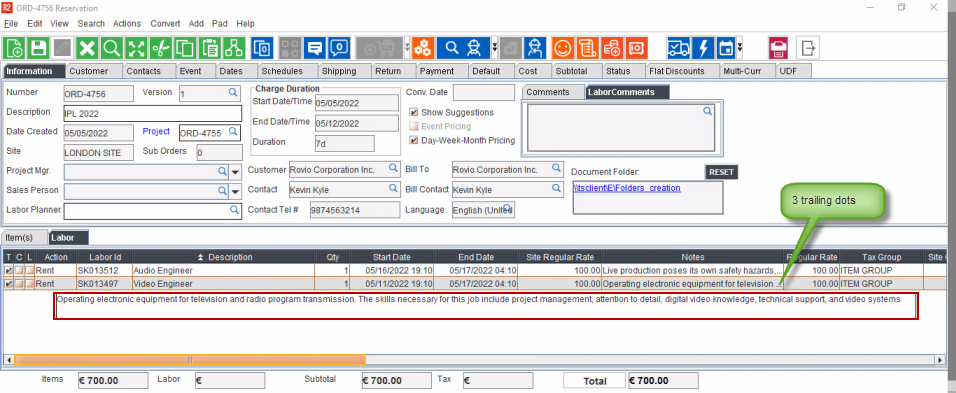
Figure 1.0: Text in ‘Notes’ column in the R2Core Labor Grid showing as ‘Pop-up’ on Mouse Hover
If the text is long enough not to contain within the width of the ‘Notes’ column, only a portion of the text is visible in the column with a series of 3 trailing dots, as highlighted in the figure above.
The length of text visible in the ‘Notes’ column depends on the configured width of the ‘Notes’ column, which can be modified by the user if required.
However, the user can read the entire text in a horizontally scroll-able pop-up bar, on mouse hover action. As shown in the following figure.
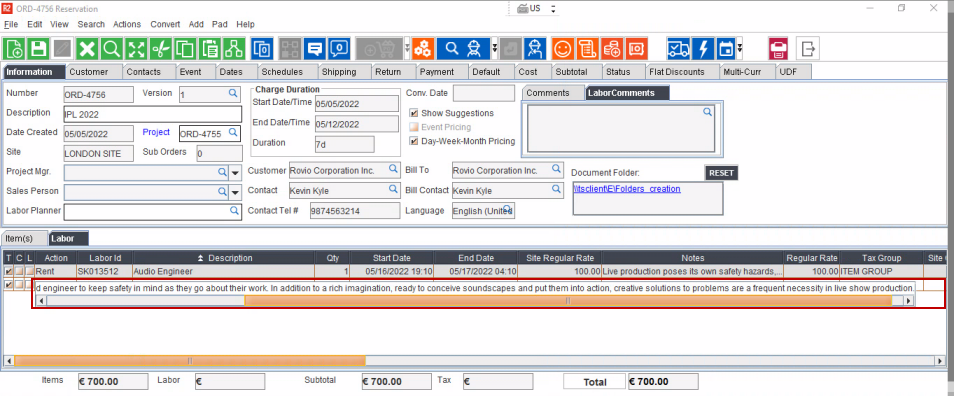
Figure 2.0: Text in ‘Notes’ column in the R2Core Labor Grid showing as Horizontally Scroll-able Pop-up Bar on Mouse Hover
'Notes' column in R2 Labor Planning Order Grid displays the 📄 icon indicating that Notes exists for the specific Booking Line. Mouse hover of the icon reads the Notes entered from R2 Order Labor grid in the respective contract labor line. Clicking outside the Notes pop up gets back to Planning Order window.
When Split Labor Line by Quantity flag in Configuration is TRUE, it displays the Notes from the one-to-one mapped Contract Labor line.
When Split Labor Line by Quantity flag in Configuration is FALSE, all the Labor Lines in Planning Order will display the respective single Contract Labor Line they are mapped to.
Go to R2Labor Graphical Scheduling > Bookings/Resources Time Bars double click to view tooltip where ‘Notes’ is displayed in read-only.
The Notes can also be viewed in the side panel that is displayed on click Graphical Scheduling > Bookings Time Bar > Right Click > View menu.
Just like any other information in Tooltip, the ‘Notes’ also are displayed if they are configured to be displayed in the tool tip Configuration..
Go to R2Labor Whiteboard > Side Panel, Click the i icon; the tool-tip shows ‘Notes’ in read-only mode.
The Notes can also be viewed in the side panel that is displayed on click the 📖 icon on Whiteboard cell.
Notes Field Behavior:
System does not allow to enter ‘Notes’ text for Blank Lines, Section Total, Section Header, and Subtotal.
While creating a duplicate order – it copies and carry forwards the ‘Notes’ text into the newly created order from source.
Text in ‘Notes’ column in R2 Order Labor Grid is retained while Converting an Order to Quote, Hold, or Reservation or while turning it into a Billing Order.
While doing copy from order – it does not copy or carry forwards the ‘Notes’ text.
While creating/replacing a new version of the order – it copies and carry forwards the ‘Notes’ text.
In R2Core > Accounts Module, the field will display the entire text in a horizontally scroll-able text-bar.
In R2Labor, notes can be viewed in Planning Order, Graphical Scheduling, and Whiteboard Windows.
When then ‘Notes’ are displayed, the text is shown auto-wrapped if the size of the text is more than generic width of the field.
Note Text Characteristics:
Notes can be entered in any language along with the use of special characters is allowed
Maximum length of notes text allowed is 2000 characters.
The Notes text can ONLY be in 'Single Line' . Thus, any text after the 'New-Line Character' will be ignored.
Go to R2 > Accounts Module > Create a new Quote/Order.
In Labor Order Grid add a few Labor Positions, and assign Skills, Start and End Date, EWT details etc.
Add ‘Notes’ to a few Labor Positions.
Add other additional and relevant details such as – Project Manager, Salesperson, and Labor Planner as required.
Some fields such as Schedules, Payment Information, and UDFs may be mandatory to fill.
Convert the order to a reservation.
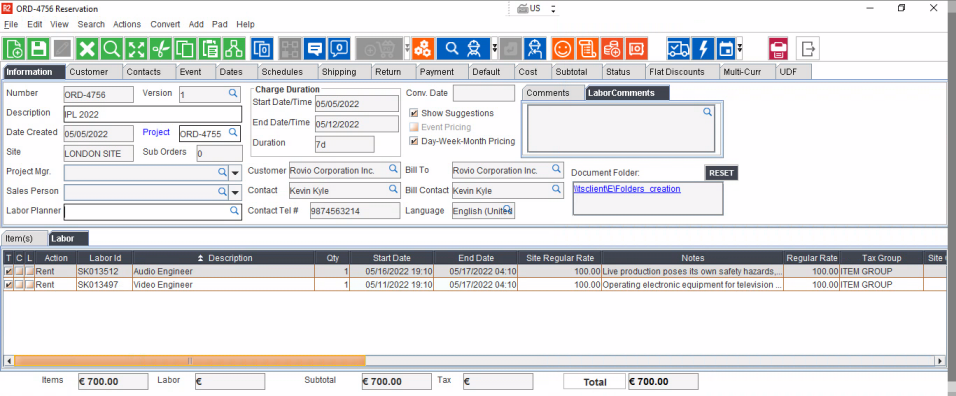
Figure 1.0: ‘Notes’ added in the R2Labor Grid
Open the R2Labor > Main Menu > Planning > Order > Order Search Menu.
Search for the Order ID mentioned in R2Core and open any of the below options.
From this screen you can view the following details about the Order:
Planning Order Tab
To view the Booking Lines along with their individual details, click the Planning Order Tab button in Order Search window.
This window displays the Booking Lines assigned on various dates.
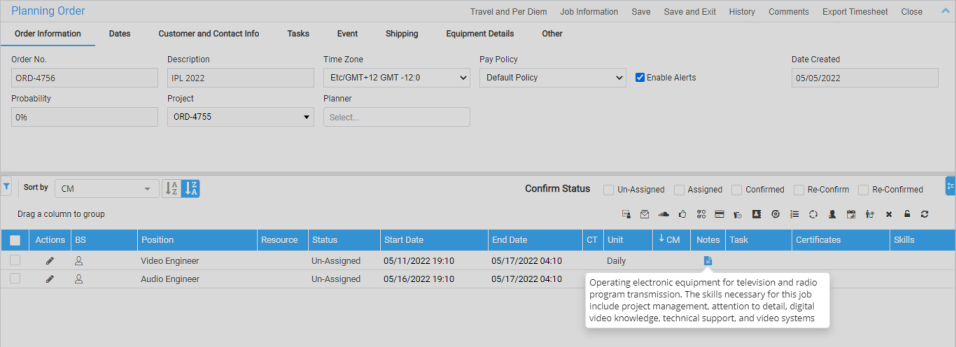
Figure 1.1: Booking Lines added to Searched Order [Booking Lines Details Along With Notes Field]
Graphical Scheduling Tab
To view the Booking Lines along with their individual details, click the Graphical Scheduling Tab button in Order Search window.
This window displays the Booking Lines assigned on various dates.
Double Click on a specific ‘Booking Line’ > View to view the details of the Order and the ‘Booking Line’, as shown in Figure below.
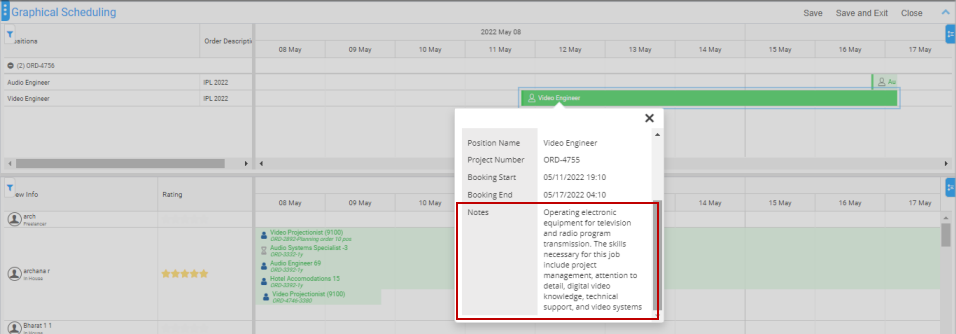
Figure 1.2b: Notes Text Displayed In The Side-Panel For Graphical Scheduling Window
Right Click on a specific ‘Booking Line’ > View to view the details of the Order and the ‘Booking Line’, as shown in Figure below.
If the text in the ‘Notes’ column is too lengthy, then it appears along with a vertical scrollbar to accommodate the entire text, as shown in both the screenshots Figure 1.2a and 1.2b.
Whiteboard Tab
To view the Booking Lines along with their individual details, click the Whiteboard Tab button in Order Search window.
This window displays the ‘Booking Lines’ assigned on various dates.
icon appears only on a mouse-hover event on a ‘Booking Line’ cell, otherwise by default only the i icon is visible.
Click ![]() Icon of a specific ‘Booking Line’ cell to view the details of the Order and the ‘Booking Line’, as shown in figure below.
Icon of a specific ‘Booking Line’ cell to view the details of the Order and the ‘Booking Line’, as shown in figure below.
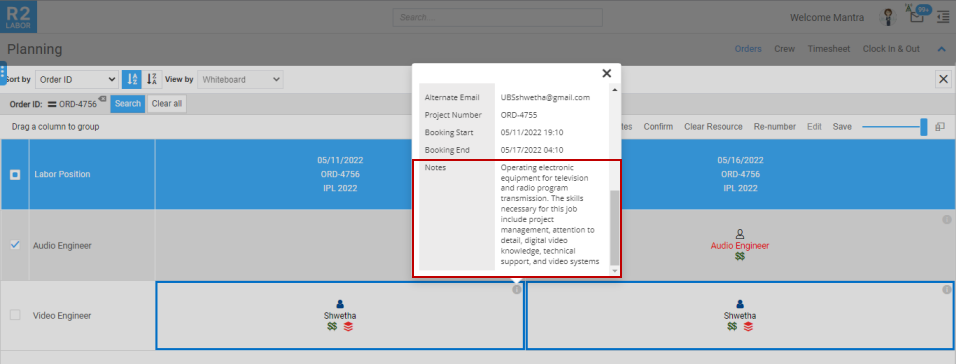
Figure 1.3a: Notes Text Displayed In The Tooltip For Whiteboard Window
Click 📖 Icon of a specific ‘Booking Line’ cell to view the details of the Order and the ‘Booking Line’, as shown in figure below.
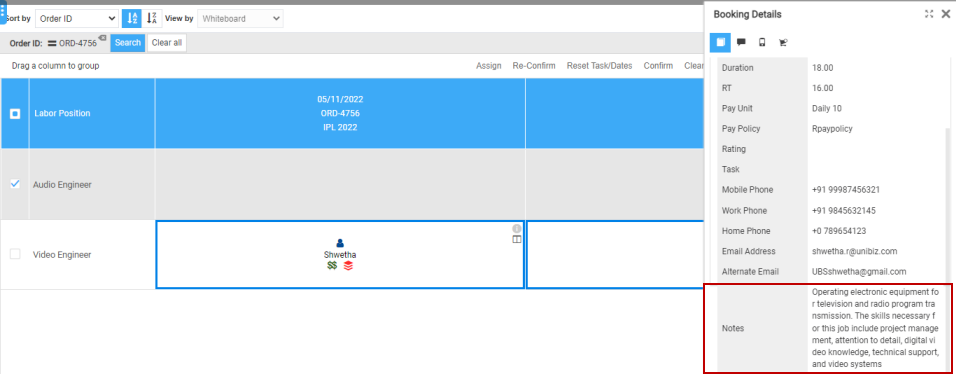
Figure 1.3b: Notes Text Displayed In The Side-Panel For Whiteboard Window
If the text in the ‘Notes’ column is too lengthy, then it appears along with a vertical scrollbar to accommodate the entire text, as shown in both the screenshots Figure 1.3a and 1.3b.
A similar ‘Notes’ column is also available in both: R2 > Accounts > Order as well.
However, the text entered in ‘Notes’ column in R2 Labor Grid (within R2 Order Module) can also be viewed in the 'Notes' field for Labor Lines in Planning Order, Graphical Scheduling, and Whiteboard screens in R2 Labor.