Table of Contents
R2 Labor dashboard home page
-
Upon login, the dashboard page appears.
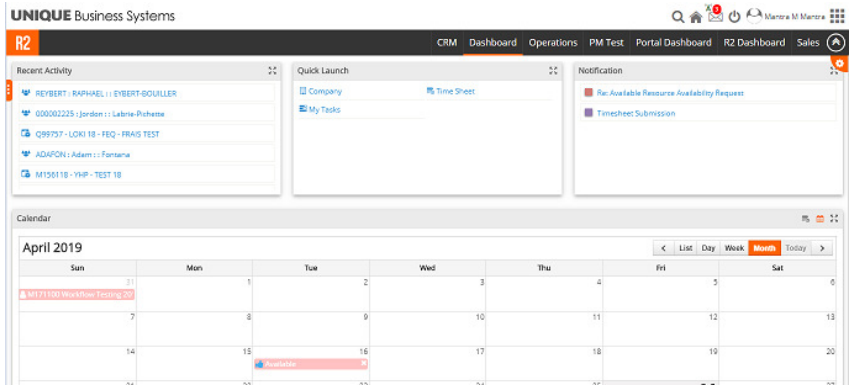
The dashboard components
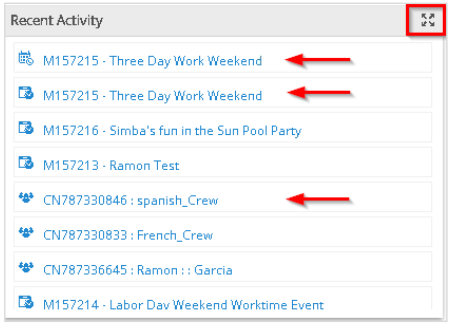
Recent Activity
The Recent Activity window lists all recently opened crew profiles, planning orders or timesheets. Each item is shown as an hyperlink which opens the crew profile, planning order or timesheet.
The Recent Activity window can also be expanded by clicking on the ‘expand’ icon on the top right corner.
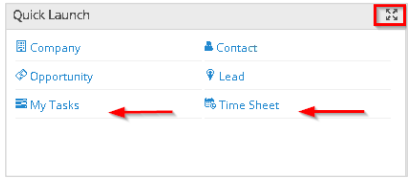
Quick Launch
The Quick Launch window is a shortcut launch pad for common used items. As an example, the planner is able to quickly navigate to the Tasks and Timesheets functionalities from here.
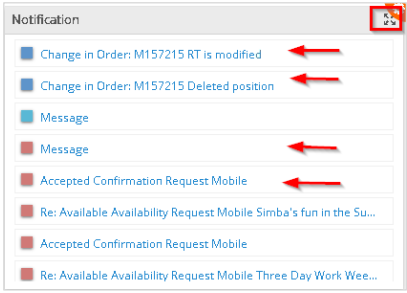
Notifications
The Notifications window lists all incoming notifications for any job that has been assigned to you as a Planner. Notifications included changes to status, date changes, deleted positions, responses to availability requests, confirmations and other messages show here. These notifications are displayed as hyperlinks which link to that job or message.
Planner’s Activity Calendar
There are two views for the Planner Calendar which are set by the two top right options on the top toolbar (shown in screenshot). The default view from this menu is to display your planner calendar. Alternatively you may view activities of all Planners by clicking on the adjacent menu item on the toolbar. The default view is the current month view. This can be changed to view the past month (“<”), list view, a daily view (Today), Weekly View, a Month view or move to a future view (“>”).
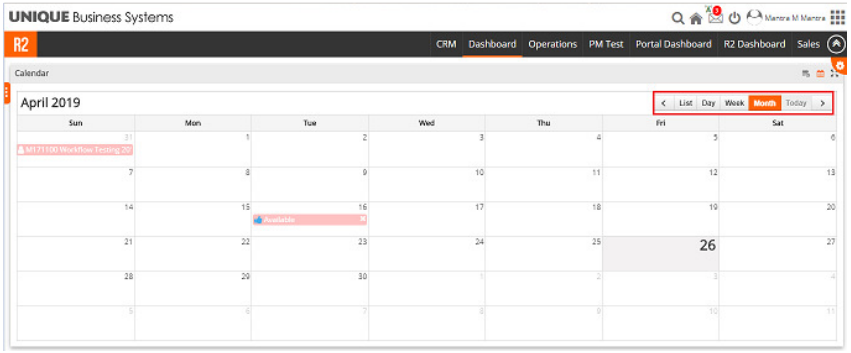
The types of Activities shown on this calendar include position assignments to jobs and resource calendar updates. The Planner can also add Calendar Events to a Resource’s Calendar (see the crew document for further details on this functionality).
Reports
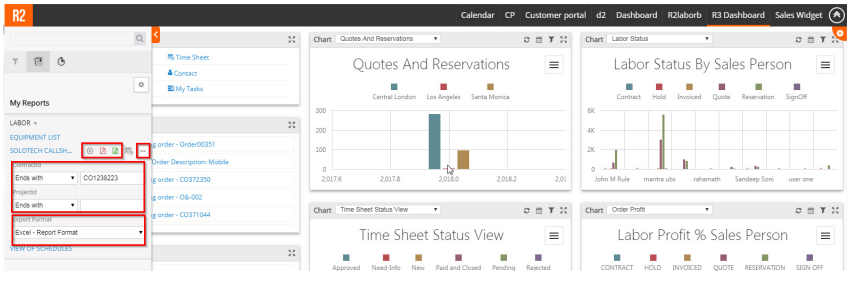
Reports created in R2 are easily generated from the Dashboard. To access this menu item, roll your cursor on the left side of the screen to bring up the left toolbar.

List of available custom reports will appear. Click on the report that needs to be generated. Report filters will appear underneath the Report Name. Enter filter criteria, select export format and run the report. Once the system has generated the report select the Excel or PDF
Search Labor Orders
From the Dashboard click on the top right grid icon (shown in image). This brings down the menu. Select Planning and then Orders

Labor Orders View: Menu items
The Labor Orders menu contains these items:

-
PLANNING – Opens a planning view of the selected job
-
PLANNING NEW TAB–Open a planning view of the selected job in new browser tab
-
GRAPHICAL SCHEDULING – A graphical view of the selected order(s)
-
WHITEBOARD – Opens a planning board for the selected orders(s)
-
UNLOCK ORDER – Allows a system administrator to unlock a locked order
-
RATINGS – Planners can rate resource(s) on their job performance
-
TIMESHEET – Opens all timesheets created for the selected Order. If a timesheet doesn’t exist, the application will prompt the user if they wish to create a timesheet for the selected order.
-
EXPORT TIMESHEET – Export the timesheet of the selected job which is explained in below sections
-
COMMUNICATE – Opens communicate window which is used by the planner to communicate with Resource assigned to the positions of the selected order
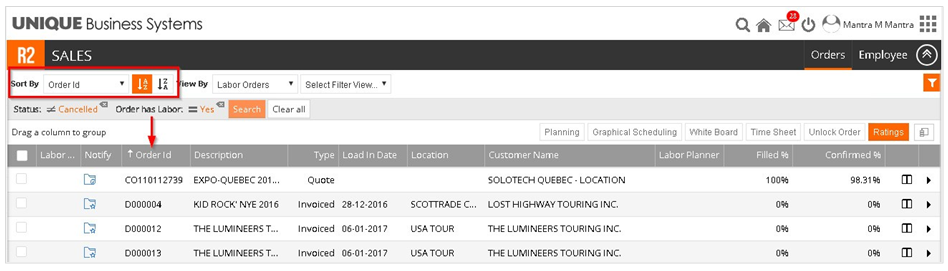
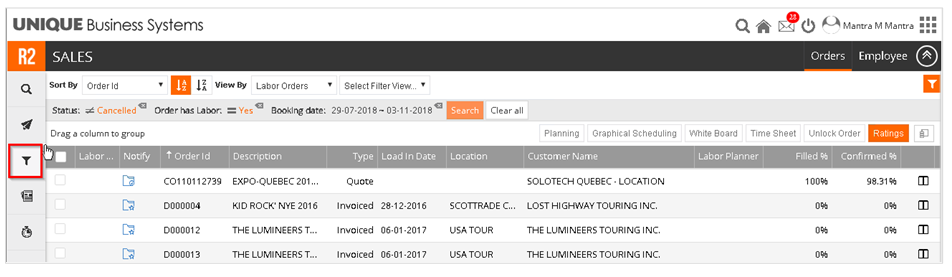
Labor Orders View: Filters
Default filters for your system can be configured by your system administrator. These default filters are shown in orange font. User added filters are shown in black font (see the image). To remove a filter from the view click the ‘X” next to the filter name.
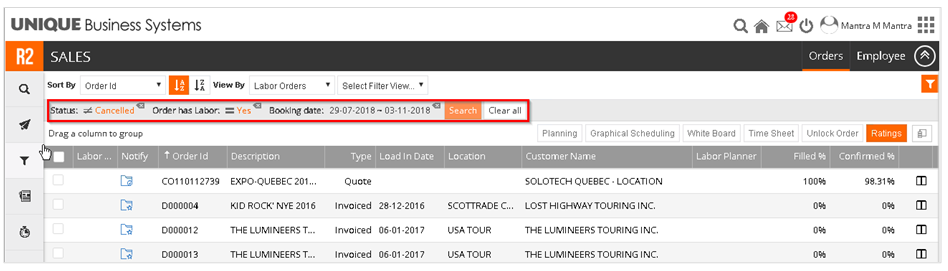
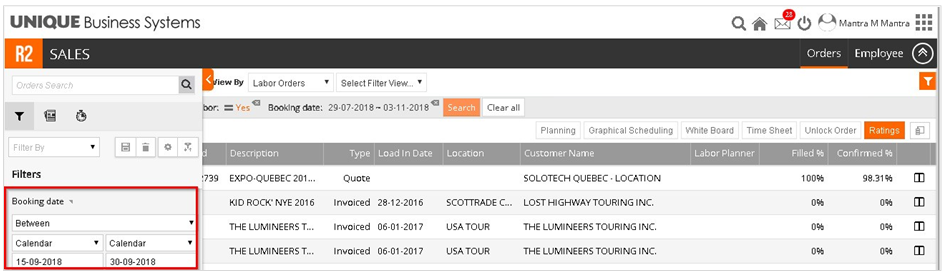
To add an additional filter to the screen, click on the filter icon on the left panel (shown)
Select the appropriate criteria and hit the enter key. This new filter will now be added to the filter list. Now click the orange search button to fetch results matching all the filters, including the newly added filter.
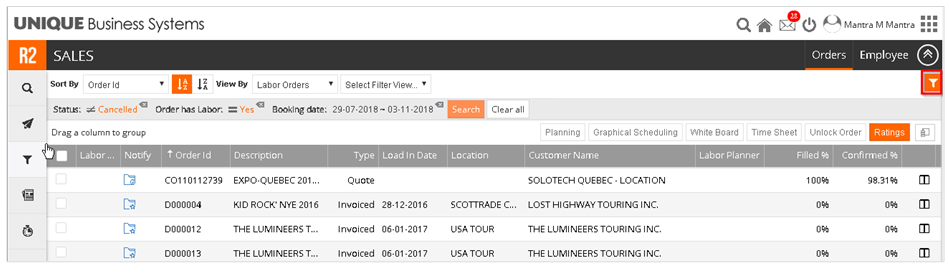
Labor Orders View: Quick Filters
Quick filters are a simple way to quickly filter your view. To access Quick Filters, click on the orange filter button on the top right side of the screen. This brings down a list of filters. Check as many options as you wish and then click the orange Search button to fetch results matching the selected filters.
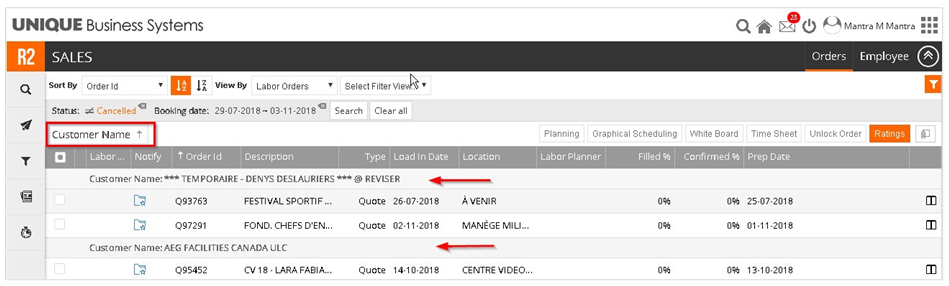
Labor Orders View: Pivot Tables
To create a Pivot Table, click and drag a column header below the default filters area to the field labelled “Drag a column to group” . To undo the Pivot Table, drag and the drop the moved field back to a column header position. Note: Multiple column headers may be placed in the “Drag a column to group” area.
Labor Orders View: Sorting
Use the “Sort By” field at the top left to display the records in an ascending or descending order. In addition, the Planner may also click on each column header to sort data in ascending or descending based on that field.