Support has been provided for Grid pricing and Setup for Revenue and Pay policy in R2 Labor application.
The details are explained in the sample workflow given below:
Prerequisites
-
Run the Data Conversion programme to load the Grid Pricing definitions in the R2 application.
-
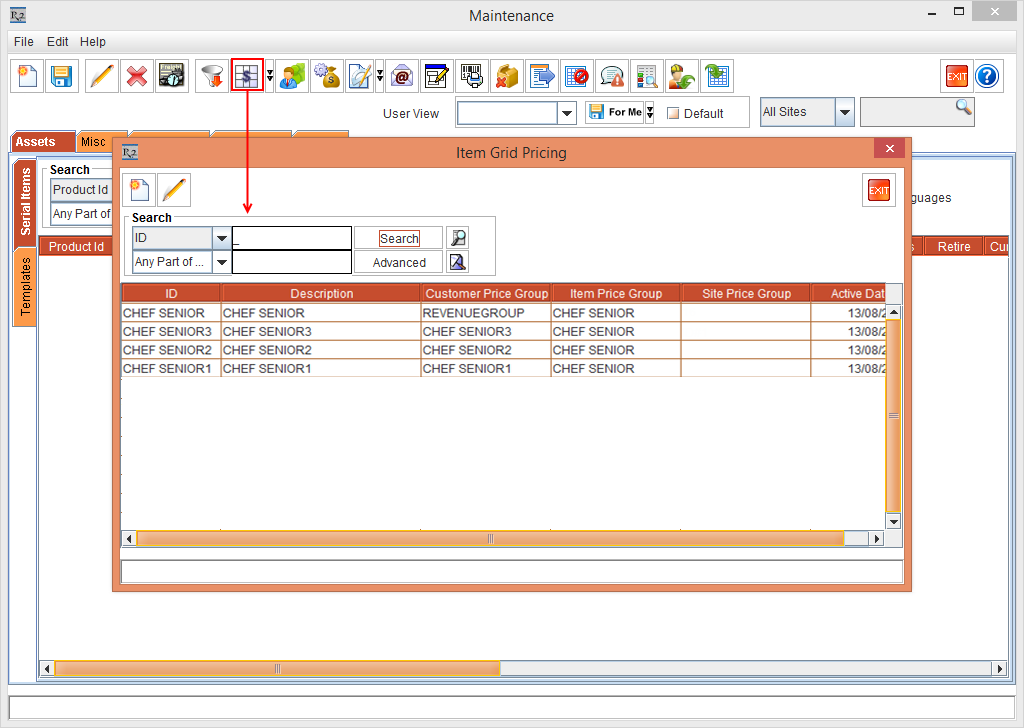
Select the Maintenance module > Grid Pricing icon. The Grid Pricing window is displayed. The defined Grid Pricing [CHEF SENIOR], [CHEF SENIOR1], [CHEF SENIOR2], and [CHEFSENIOR3] is displayed, as shown in Figure 1.0.
-
Double-click and open the Grid Pricing definition [CHEF SENIOR1].
-
The system displays the Grid Pricing Amount and Hours based on the upload in the data conversion.
-
Tag the Customer Price Group and the Item Price Group, as shown in Figure 1.1.
The Total Labor Amount in the Order is displayed based on the tagged Customer Price Group and the Item Price Group that is applicable only in the R2 application.
-
Select the Maintenance module > Items tab > Labor tab.
-
Create the Labor Positions [SK013521], [SK013518], and [SK013515].
-
In the Labor Edit window, click the Price importable button. The Price Group List window is displayed.
-
Tag the Price Group List [CHEF SENIOR] for all the Labor Positions [SK013521], [SK013518], and [SK013515].
-
Save and Exit the Maintenance module.
Sample workflow
-
Select the Account module > tag a Company [FOX SPORTS].
-
Create a Quote Order [Order00033] for 1 day duration.
-
Select the Default tab. The Labor field of the Price Group section automatically displays the default Customer Price Group [CHEF SENIOR1] based on the Site or Customer.
-
Select and tag the Grid Pricing ID [CHEF SENIOR1]. The system displays a prompt with the message “ Do you want to override the pricing of labor lines?” with Yes, No, and Cancel buttons.
-
Select Yes. The Grid Pricing ID [CHEF SENIOR1] is tagged to the Order [CAN100203].
-
Search and select the Labor Positions [SK013521], [SK013518], and [SK013515].
-
Select all the Labor lines > right-click > Assign Dates option. The Estimated Work Time window is displayed.
-
Select the Add New Line icon. A new line gets included.
-
Click OK. The dates are assigned to the Labor lines.
-
Click the Total button in the Order, the Amount for each of the Labor line is displayed, as shown in the Figure 2.0.
The Total Labor Amount in the Order is displayed based on the tagged Customer Price Group, as shown in Fig 1.1.
-
Save and Exit the Order [Order00033] in the R2 application.
-
Login to the R2 Labor application.
-
Select Planning > Crew.
-
Edit the Crew [Mike Campbell]. Select the Crew Information Accordion.
-
Edit the Crew Position [Audio Engineer].
-
Select the Price Group [CHEFSENIOR1] and the Effective From 01/01/2018 12:00 AM.
-
Click Apply.
-
Click Apply in the Crew [Mike Campbell] Edit screen.
-
Repeat the Step 14 to Step 18 for the Crew [Roger McGuinn].
-
Search and open the Order [Order00033] in Planning.
-
The Order [Order00033] displays the R2 Labor default Pricing before assigning the Resource.
-
The default Pricing in R2 Labor can be defined in R2 Labor Settings > Configuration > Config. Parameters > General section > Labor Cost Price Group, as shown in Figure 2.1.
-
Select each of the Labor line and Assign the Resource, as shown in Figure 2.2.
-
The Rate column displays the modified Rate for each of the Labor Position as per the Assigned Resource and the Unit tagged.