Entering Clock-In/Clock-Out Time
In Dashboard, under Bookings, go to the schedule (last week or this week) for which you want to log time.
Select the assignment for which you want to log time.
The screen shows list of days for which you can log time for the selected assignment.
Tap on the date for which you want to log time.

Figure 1.0: List of Work Order itinerary for selected 'Booking'
Tap on the Çlock In' button to create a blank row, and start logging your In/Out time.
The app by-defaults picks the current system time as 'In' time, where if required you can manually modify the 'In' and 'Out' time as shown in Figure 6.0

Figure 1.1: Making timesheet entry
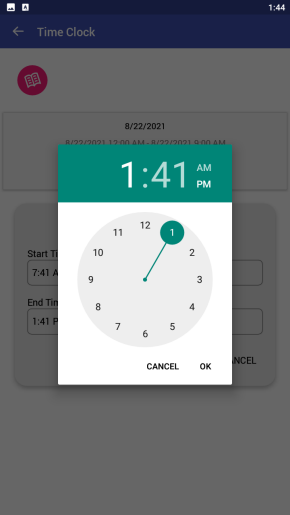
Tap on Start Time and use the Clock Wheel, to pick the desired time, Tap Ok on the clock wheel when done.
Similarly, Tap on End Time and pick time using the Clock Wheel. Tap Save button.
 Figure 1.2: Logging time — Manual Time Entry |  Figure 1.3a: Logging time — Using Clock Wheel |  Figure 1.3b: Logging time — Using Clock Wheel |
Once saved the list of time entries for a day (with possible multiple entries in a single day), will look like Figure 1.4
To Close the time entry use back arrow to go back to previous screen.

Figure 1.4: Time logging — Saving timesheet
To Add Comment to your time entry, Tap on the pen icon in the row. (As highlighted in Figure 1.5)
Add comment and Tap on the Save.

Figure 1.5: Add comment in timesheet entry
You can log your time in parts. Each new time entry for the day is displayed as a separate row. (See Figure 1.6)

Figure 1.6: Time logging for the selected 'Day in itinerary
