Picklist
R2 PackNShip supports to generate and print reports that are necessary for operations.
During Prep operation, you can generate and print Pick List so that you have a list of items that you are prepping.
You can view the pick list report in the app
You can print the pick list report from the app
Pre-Requisite
The folder where all the UI Form reside, must be a shared folder, so that It can be accessed by PackNShip app via your R2 deployment and vice-versa.
Also, within the shared folder, one of the UI Forms must be tagged as ‘Default’ so that the PackNShip app consumes it whenever a picklist has to be generated.
The step of defining the ‘default’ is mandatory, because as of now the app does not have any method to chose a specific UI Form while generating the picklist.
Alongside, in most cases the above folder is configured locally within the deployment of R2, and modifying the file path for multiple UI forms can be a cumbersome task.
That's why we have an automated script available to modify file paths. Read more about it here.
And reach out to UBS Tech Support to help you with it.
Workflow
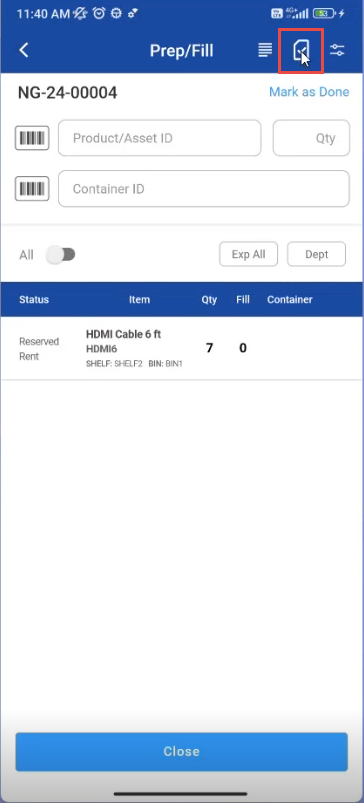
Go to Prep/Fill
Click on Picklist icon

Figure: 1.0 Picklist Icon
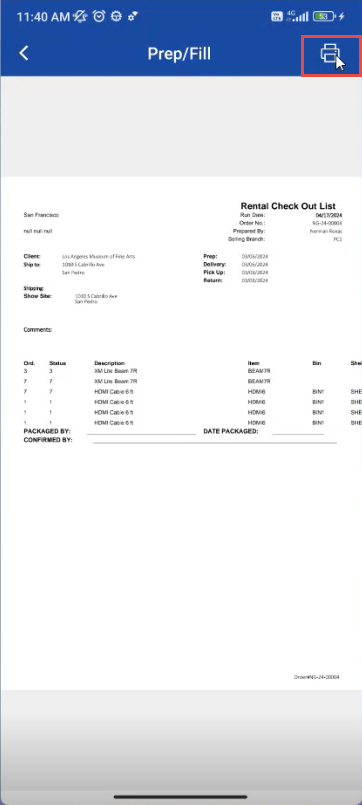
3. Click on Picklist Print option to print picklist

Figure:1.1 Print Picklist
Picklist print report is generated
Figure: 1.2 Picklist report
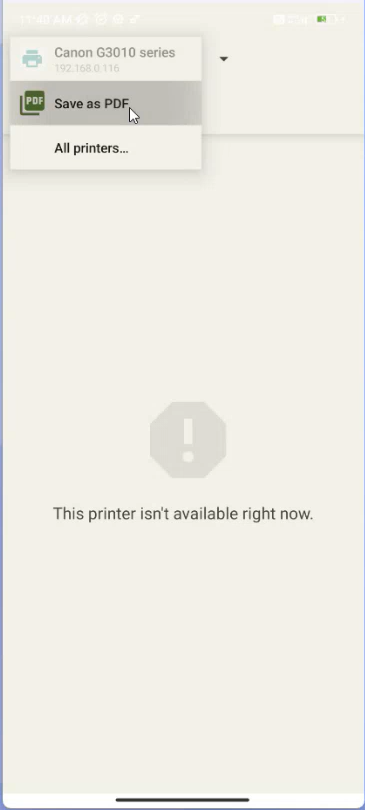
Select Print options

Figure: 1.3 Select Printers
You can select “Save as PDF” or select printer device from the list.
