Displaying and Printing 'Financial Summary' for Events
With this enhancement you can now View and Print an Event’s Cost Summary directly from the Accounts' Module Home Screen. To facilitate this feature, we had added the following:
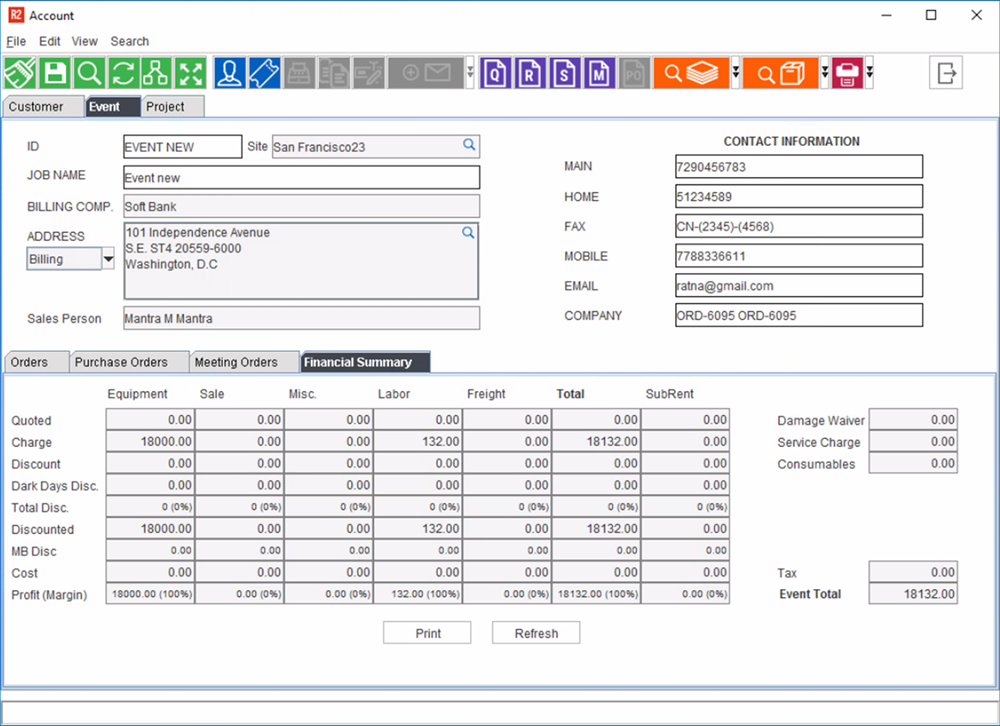
A tab (Financial Summary) on the Accounts > Home Screen.
The tab has a grid displaying the breakup of all chargeable components of ‘Event Cost’
A separate field outside the grid displays the Event Total.
A Print button on the above tab.
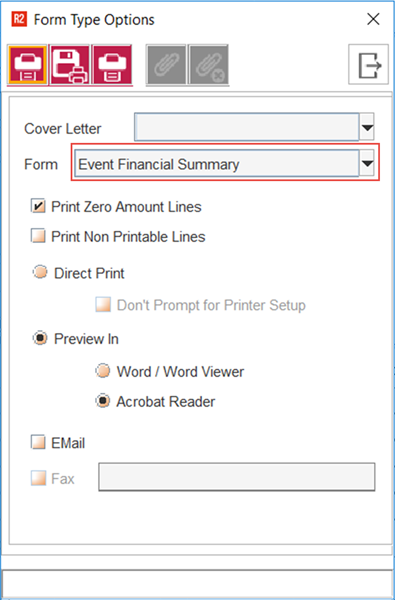
When you click this button, it opens the ‘Form Type Options’ dialog.
It displays the list of forms setup for Order Type 'Event Cost Summary' (new type).
Upon performing the required form setup you will be able to generate the print file.

Accounts > Events > Financial Summary Tab showing
Displaying data in the ‘Financial Summary’ Grid
Go to Accounts > Search > Events.
From the list of displayed Events, click on the select ‘Event’ and go to the Accounts > Financial Summary tab.
R2 fetches the related Financial Information for the selected ‘Events’ and the relevant financial information gets deployed in the Grid.
Printing the ‘Financial Summary’ Report
Prerequisite
Go to Configuration > Form Setup > New.
Click the ‘Form UI’ select button. Create a new folder and add the following 3 forms to it.
Form UI | What is it being used for? |
|---|---|
152450UI | To print the Event' Header Information. |
152451UI | Event's Order Header and Cost Summary |
152452UI | Event Header and Cost Summary Details |
In the Form UI field, select 152450UI. Select ‘Form Type’ as Order.
Save the Setup as 'Event Financial Summary’ or any other name as per your discretion.
The same name will appear in the ‘Form Type Options’ dialog box while printing the report.
Each of the three Forms mentioned above have several internal ‘Field' and ‘Component’ level configuration possible within it. Please refer the CID Master document to know about them and do your custom configuration accordingly.
Generating the report
Click on the ‘Print’ button in Accounts > Events > Financial Summary Tab, the following dialog box displayed.

For the field ‘Form’, the corresponding value selected must be, ‘Event Financial Summary’.
This ‘Form’ name is auto-populated in the dialog box. However, if you have to manually select, it must be the same one which you would have used during the ‘Form Setup’ step in Configuration.
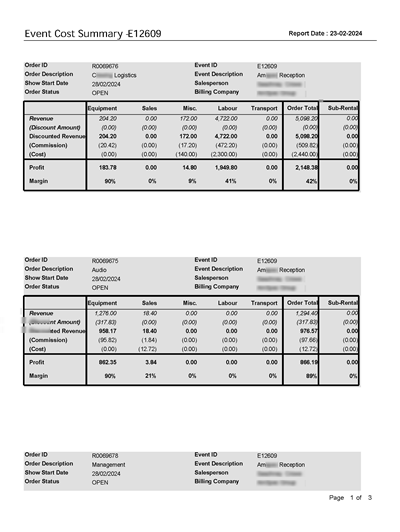
Click the ‘Print’ button. Based on the above settings, the system generates a PDF file.
The content and layout of the PDF resembles this file. See below, the screenshots of one of the pages from the report
 Page 1 Sample Report |
The print will include all orders of the Event irrespective of the Site it belongs to. However, it will exclude the Lost, Closed and Cancelled Orders.
The Profit and Margin% will no longer be rounded to nearest whole number. From now on, it will be shown with precision up to 2nd place in decimal. For Example: 1778.82$ or 34.71%.
