Reference No: R2-5230
Version No: 06.00.04-00
Prior to Version 06.00.04-00
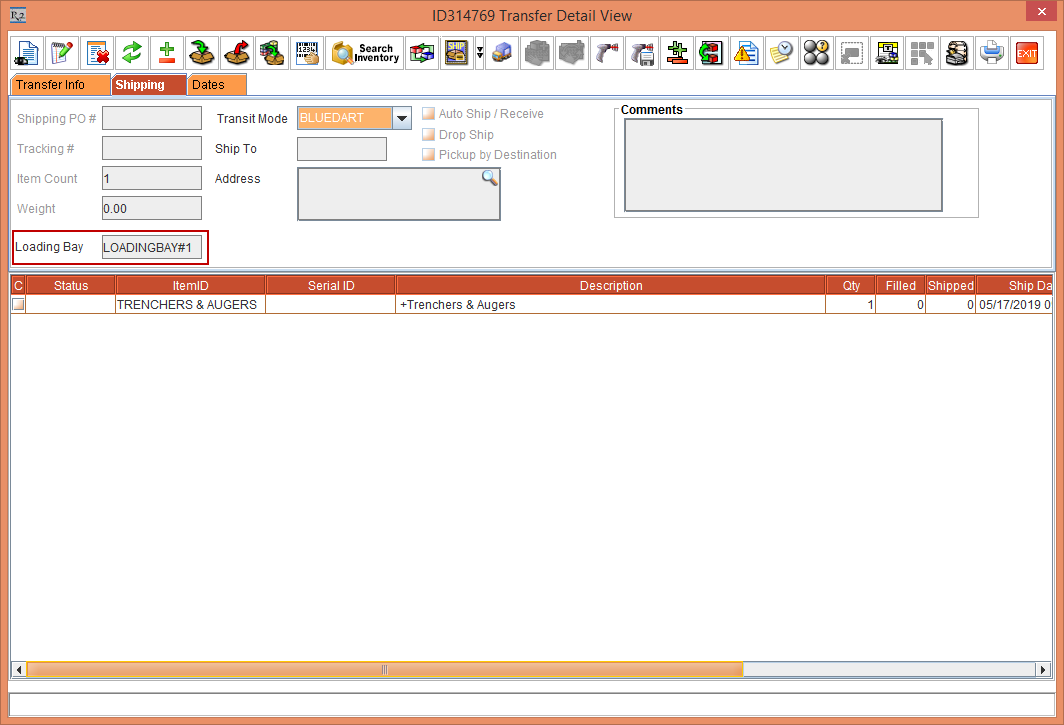
The Loading Bay field in the Transfer Detail View window was a read-only field, as shown in Figure 1.0.
With Effect from Version 06.00.04-00
Now, the Loading Bay field in the Transfer Detail View window is an importable field where the Loading Bay can be tagged or modified.

The functionality is explained in the below Sample Work Flow:
Prerequisites
-
Select the Maintenance module.
-
Create a Serial Item [JACK PLANER] and receive some Qty of Assets.
-
Click OK.
-
Save and Exit the Maintenance module.
Sample Workflow
-
Select the Account module. Tag a Company [EVERGREEN AV RENTALS] and create Transfer Out [ID317167] From [SANFRANCISCO] To [NEWYORK] with the Return Order check box selected.
-
Enter the Shipping Date [30-May-2019].
-
Select the Return tab. Enter the Return Date [31-May-2019]. The Return Order [ID317168] is created.
-
Search and add the Serial Item [JACK PLANER].
-
Click the Detail View icon. The [ID317167 Transfer Detail View] window is displayed.
-
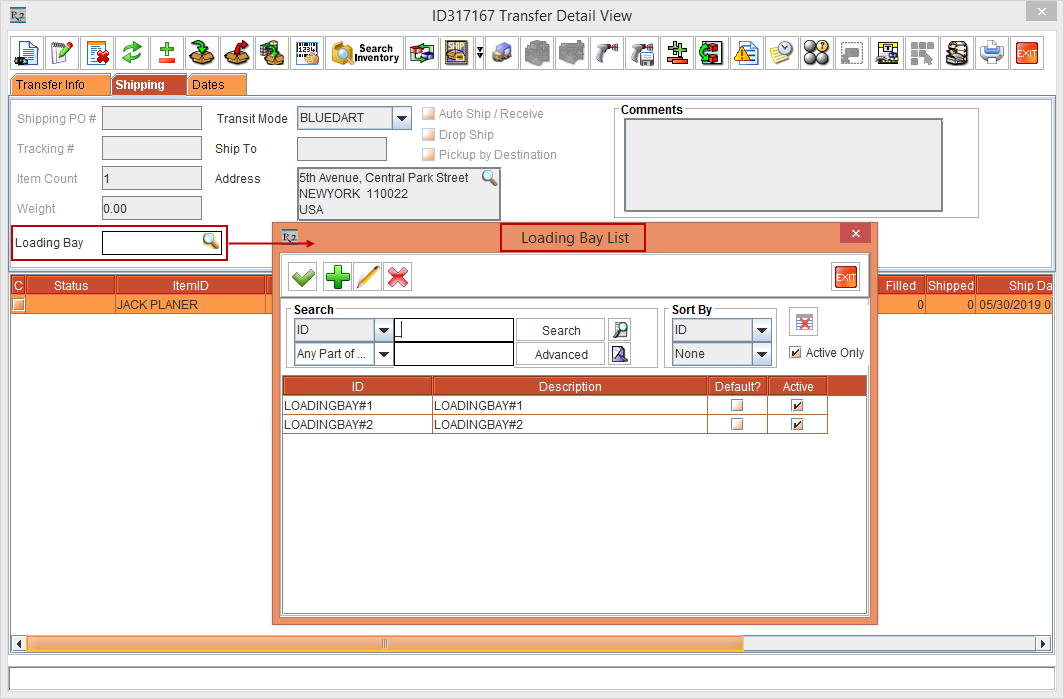
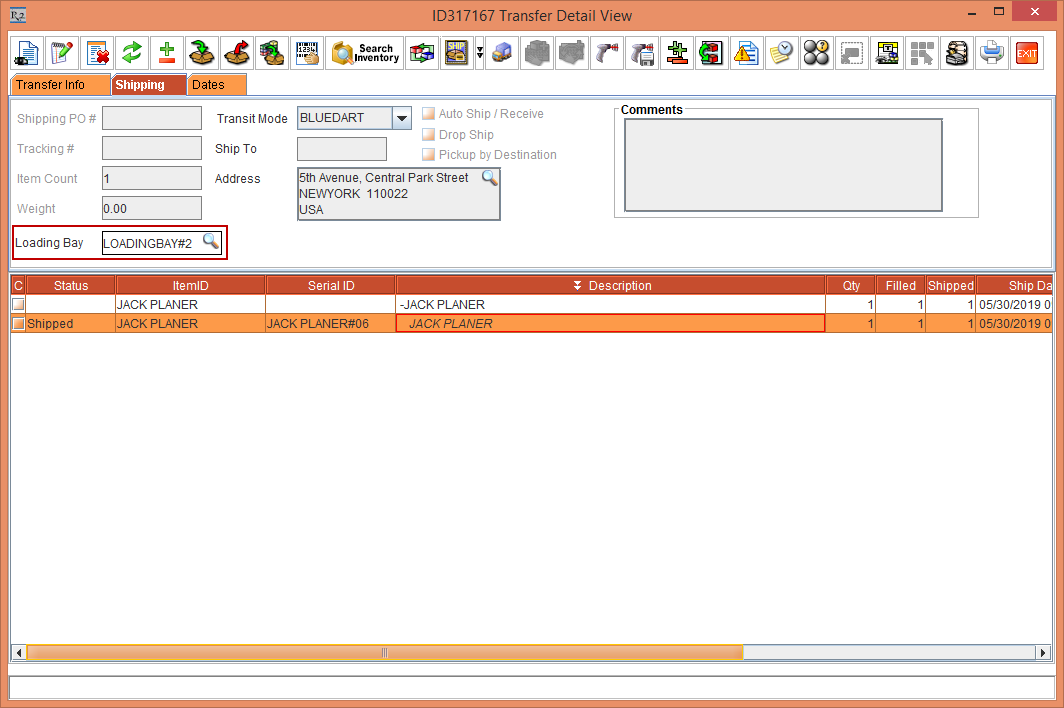
Select the Shipping tab. The Loading Bay field is now modified to an importable button, as shown in the Figure 2.0.
-
Click the Loading Bay importable button. The Loading Bay List window is displayed, as shown in the Figure 2.0.
-
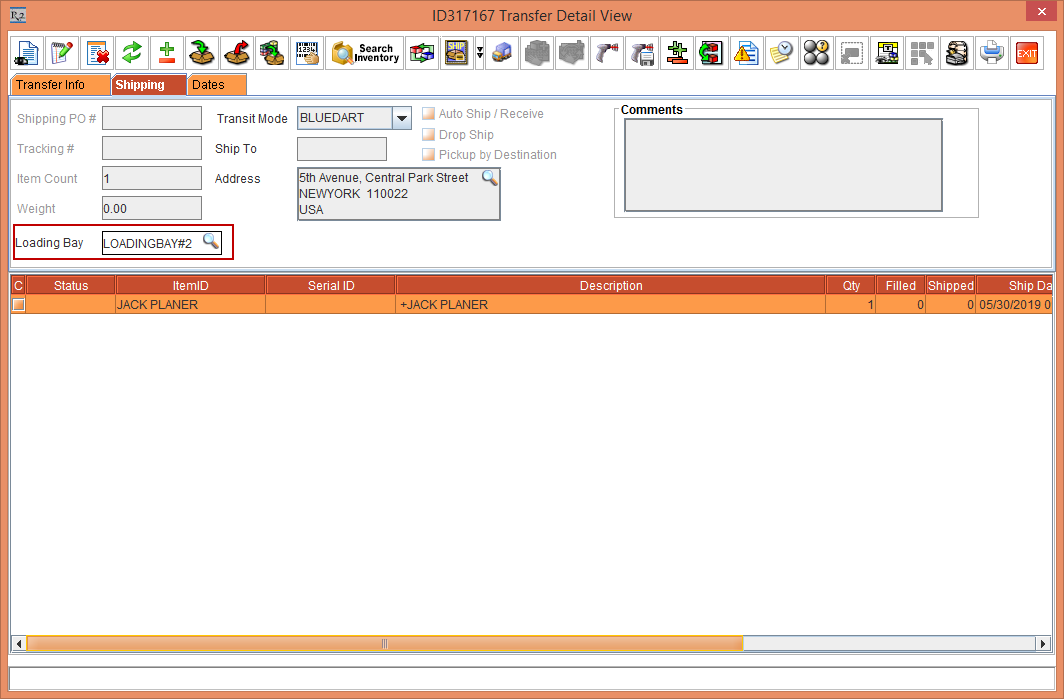
Double-click the ID [LOADINGBAY#2]. The [LOADINGBAY#2] gets tagged in the Loading Bay field of the [ID317167 Transfer Detail View] window, as shown in Figure 2.1.
-
Fill and Ship the Serial Item [JACK PLANER] with the Asset [JACK PLANER#06].
-
Exit the [ID317167 Transfer Detail View] window.
-
Exit the [ID317167] window.
-
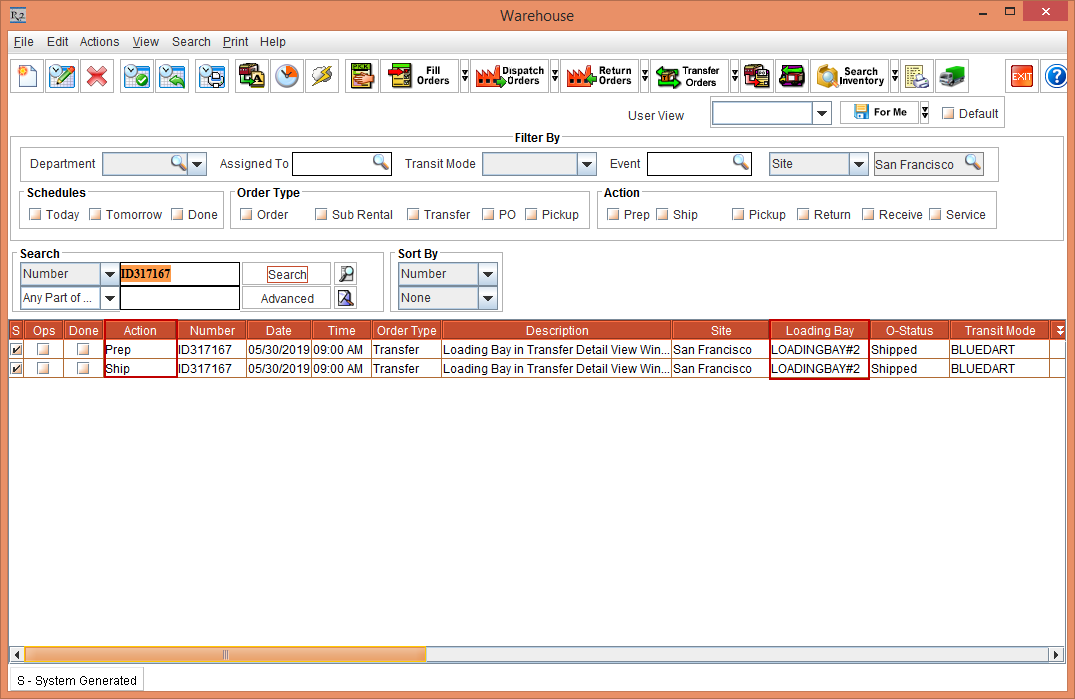
Select the Warehouse module.
-
Search for the Transfer Out [ID317167]. The Prep Task and Ship Task of the Transfer Out [ID317167] with the Loading Bay [LOADINGBAY#2] column is displayed, as shown in Figure 2.2.
-
Open the Prep Task of the Transfer Out [ID317167] and select the Shipping tab. The Loading Bay [LOADINGBAY#2] importable button is displayed, as shown in Figure 2.3.
-
Modify the Loading Bay field to [LOADINGBAY#1] by selecting the Loading Bay importable button.
-
Open the Ship Task of the Transfer Out [ID317167] > Shipping tab. The modified Loading Bay field [LOADINGBAY#1] is displayed, as shown in Figure 2.4.
The Loading Bay gets updated in the Prep Task and Receive Task.
