Table of Contents
To start a new reservation, begin from the Account module and click on the New Reservation ![]()
-
A reservation is much different than a quote in the following ways:
-
A reservation holds all of the inventory you add to the order for the duration between the Prep date and Return date of that order. A quote only shows inventory and pricing for the purpose of quoting only.
-
Once exiting the reservation screen, the four main dates set forth on the Dates tab of the order will be created as warehouse tasks. This means the warehouse will see a task to prep (pick/fill) the order on the Prep Date you’ve set and to ship it on the Ship Date you’ve set. If you don’t want to send orders to the warehouse, do not create or convert to reservation!
Reservation Screen
Information
Now that the order is firm, you can capture more detail on the order. Begin at the main Information tab by selecting a Project Manager and assigning the Sales Person:
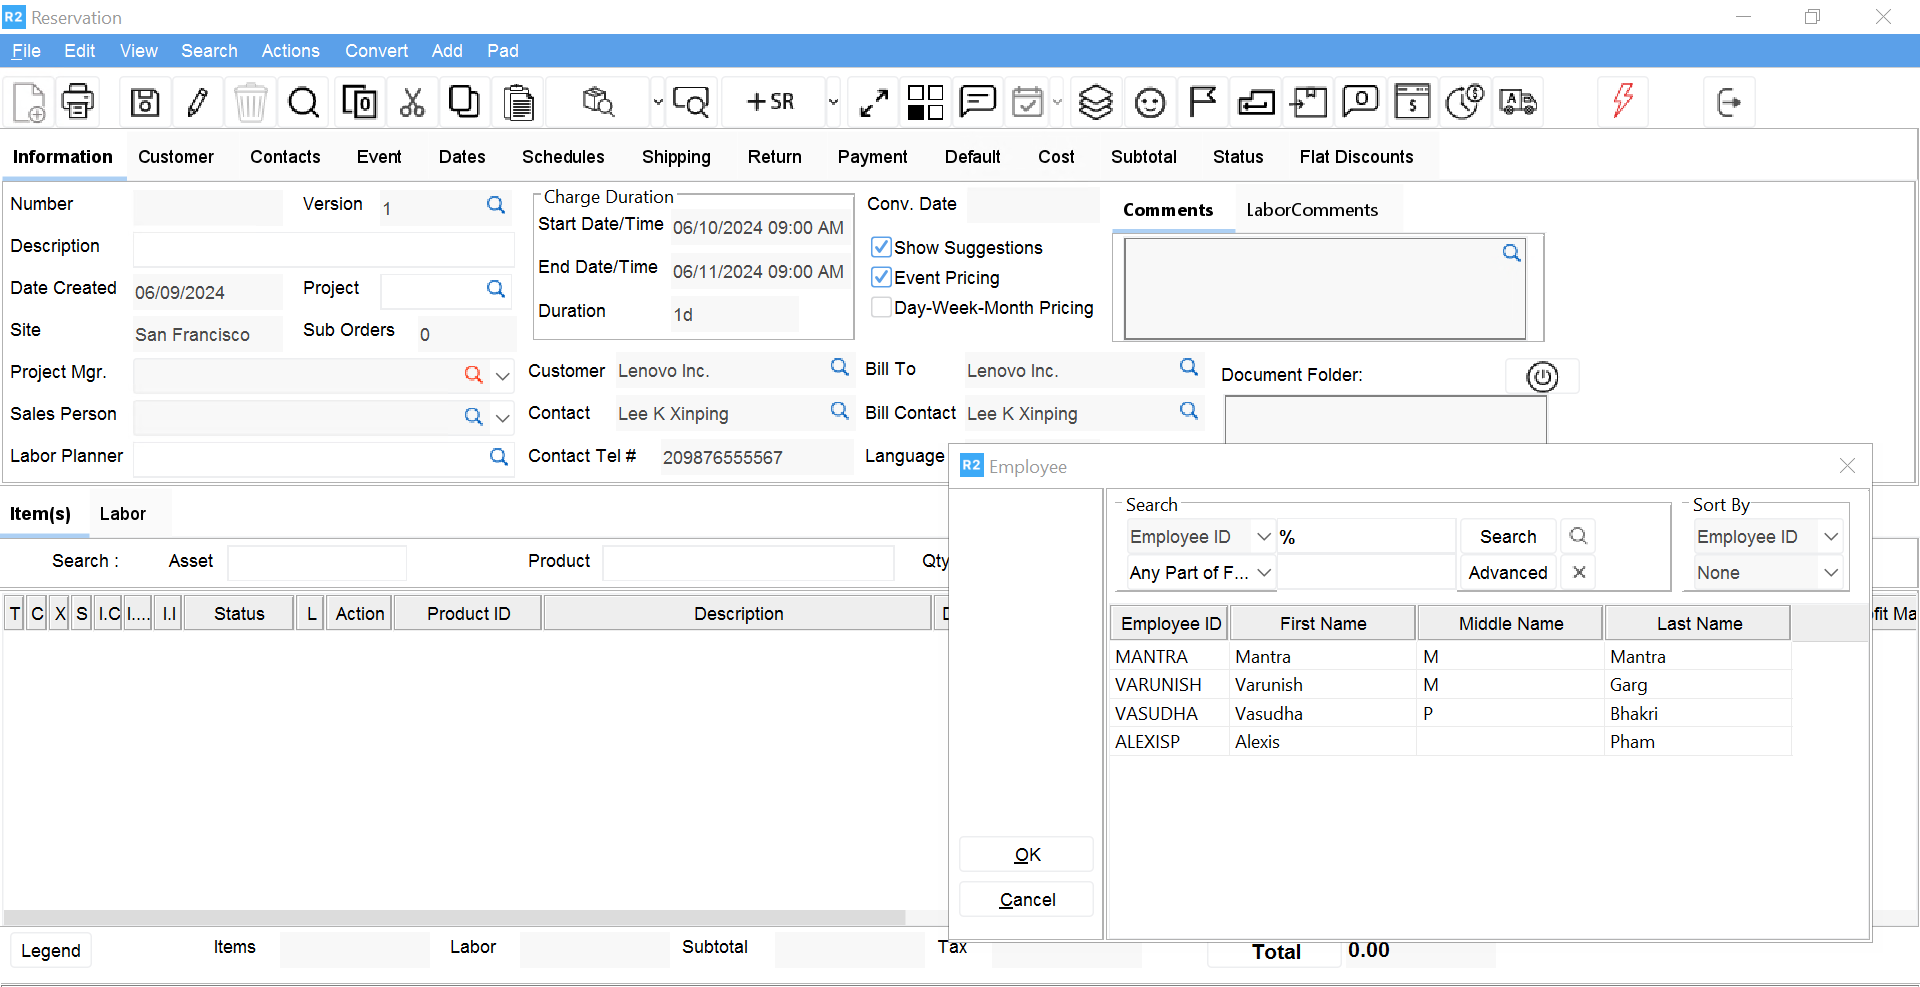
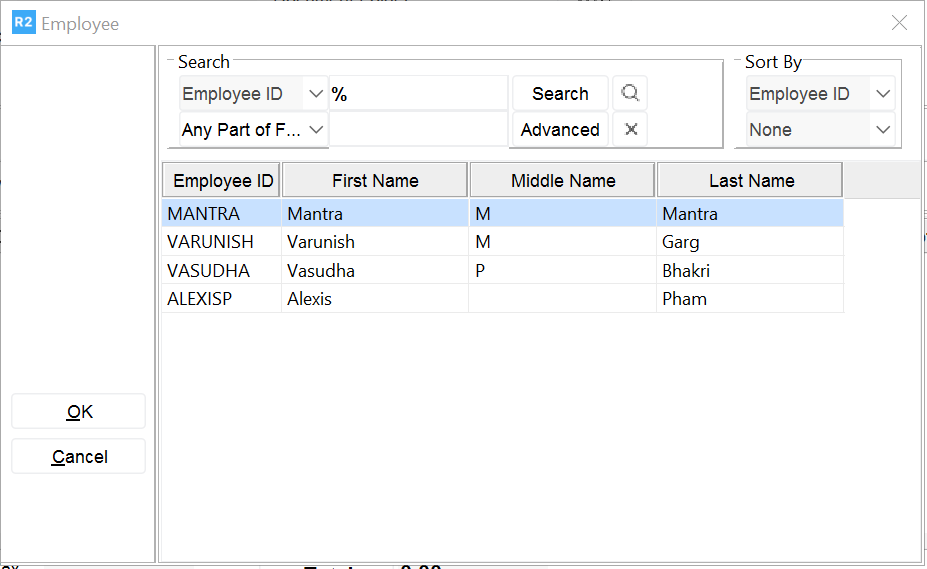
Click on the magnifying glass next to the Project Mgr. or Sales Person field. Currently selected employees will appear tagged in blue. Double-click on already-tagged employees de-select them, upon doing so they will turn from blue to black.
Use the Employee search to find one or more project managers and/or salespersons. As with other areas, to tag an employee from the list, double-click on them individually and they will turn blue as you do:
Employees: Tagged
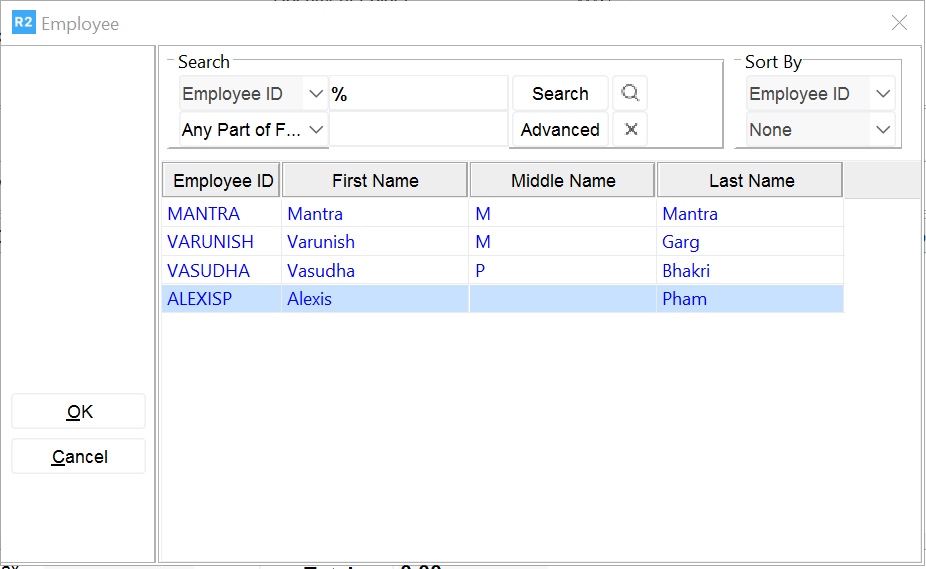
Not Tagged
Enter Comments and/or Labor Comments in the area provided. For more information on adding and editing comments here or anywhere in R2, please see the Comments Management training guide.
Shipping
The Shipping tab contains important delivery and tax information.
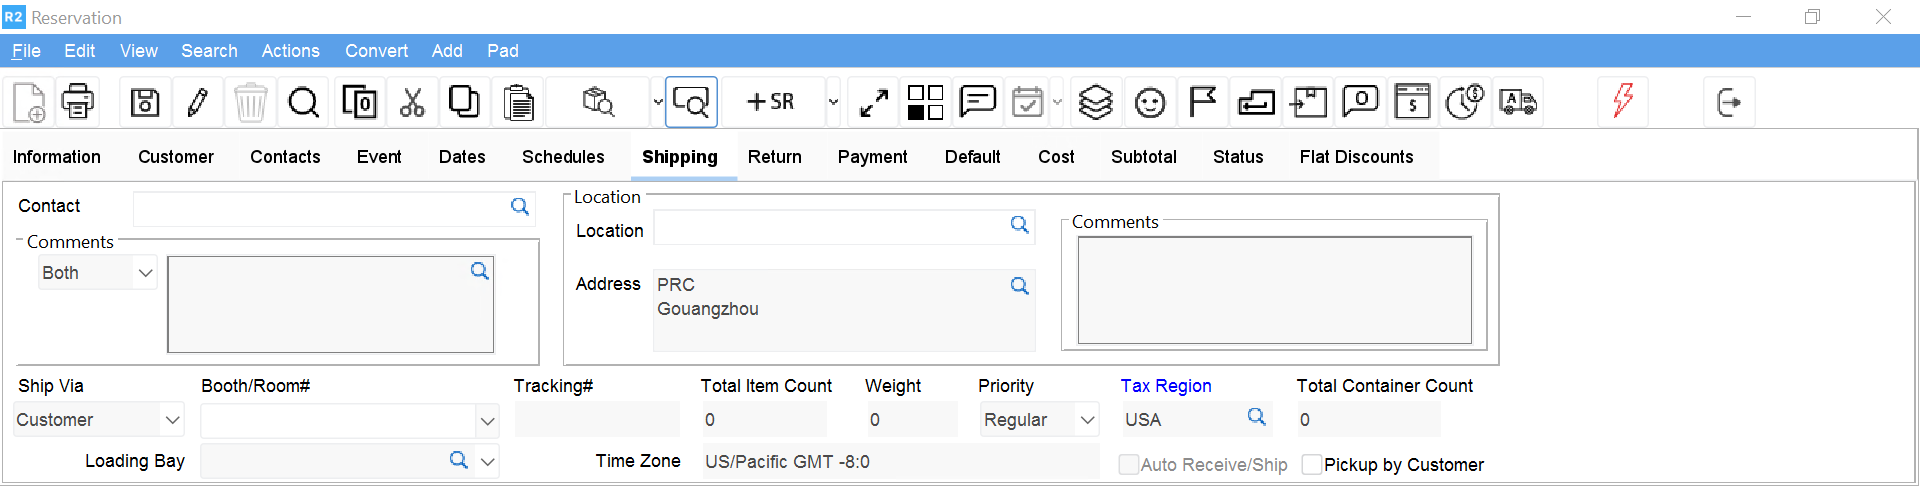
Begin by entering a shipping Address (click on the magnifying glass and enter the address) or by selecting a location. Clicking next to Location will display a list of commonly used shipping locations.
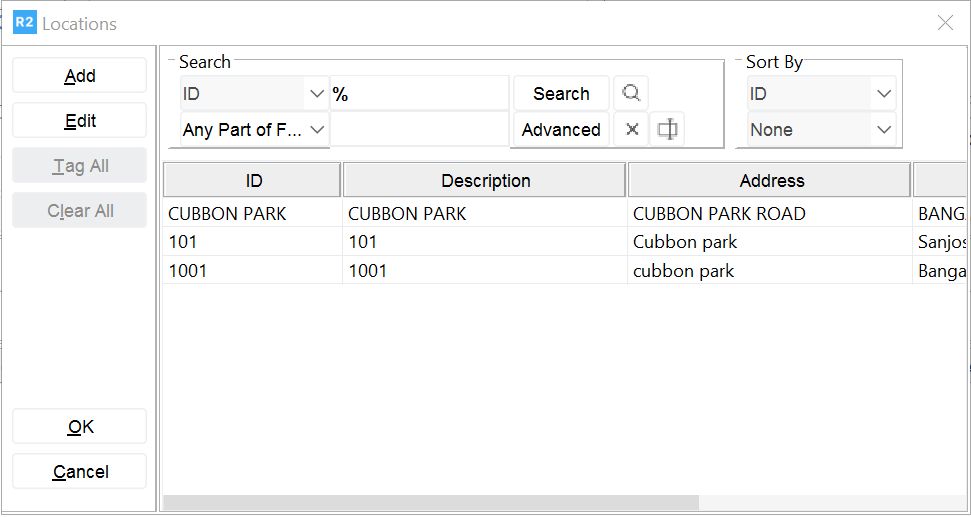
Double-click to select one of the existing locations, or if this location will be shipped-to frequently, add a new one if one doesn’t exist. For more information on Locations, please see the Locations training guide.
Type a Contact name or use the magnifying glass to find a contact from your R2 contact list.
Enter Pick List and/or Delivery Receipt Comments directly beneath the Contact field.
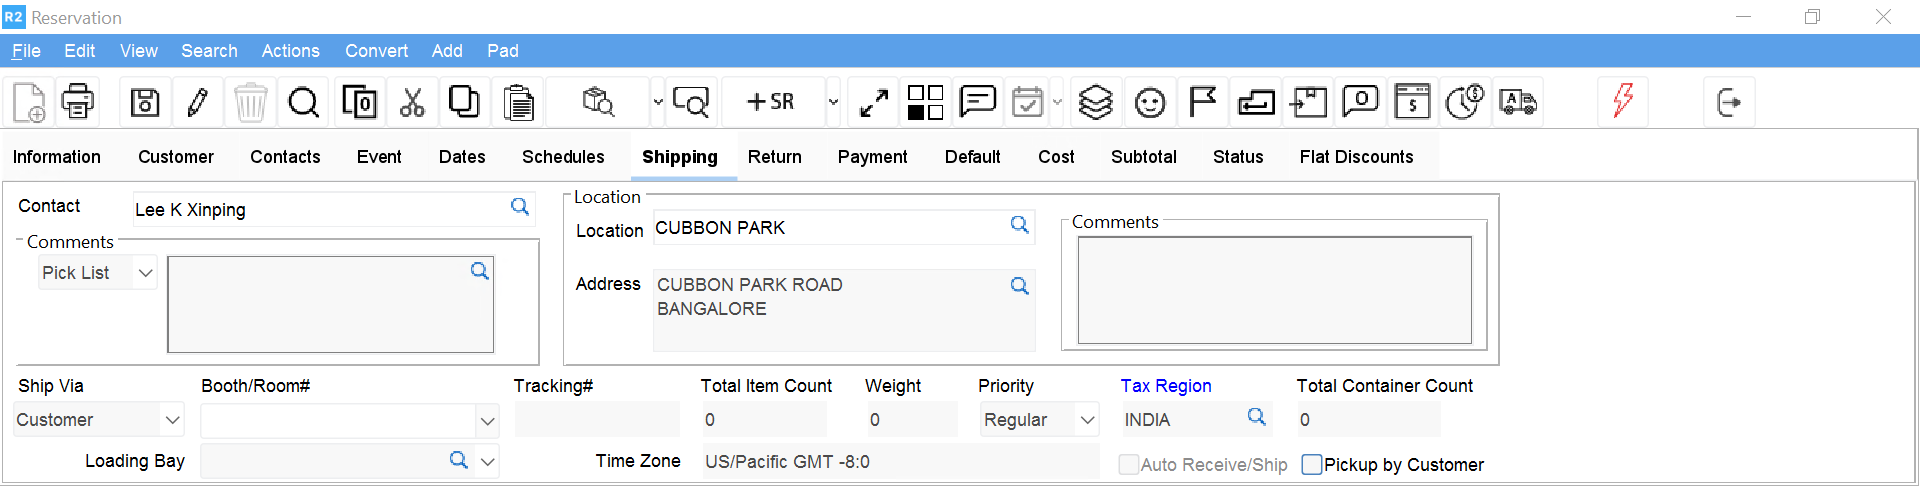
Select a Tax Region by clicking on the magnifying glass and double-clicking on one to select it. This should rarely be necessary as the Tax Region field will default to the correct region based on your login site. However, since this is a mandatory field, and if it ever gets blanked-out, you may need to select it.
Ship Via Select the method of transport that will be used to move your gear.
Pickup by Customer When clicking this checkbox, the shipping address will change to that of your local login site address. The assumption is that your customer is coming to pick up from you.
Payment
The Payment tab defines the order billing. Though many of the fields here can be defaulted by customer, you may need to change them.
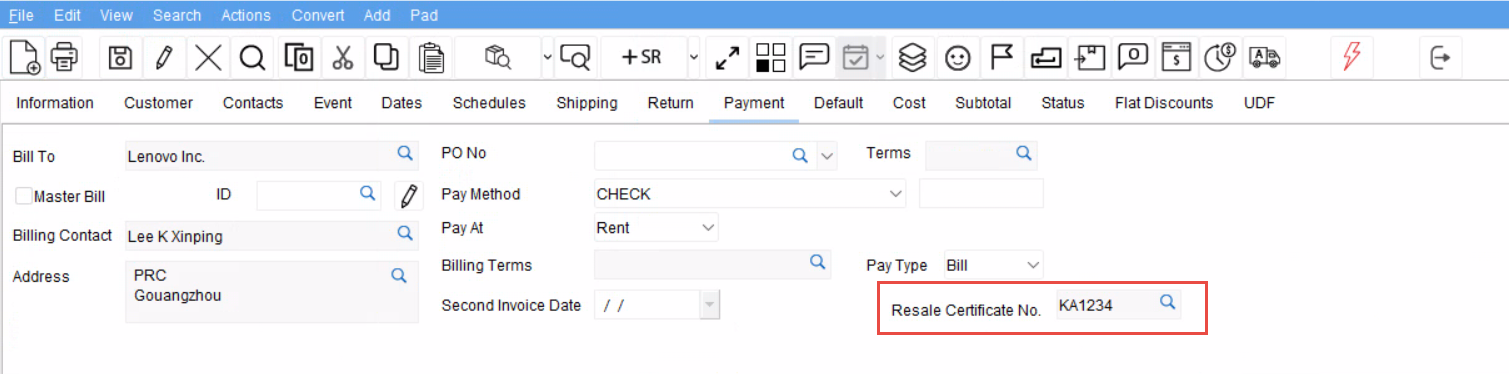
Bill To The Bill To customer is the customer who is paying for the order (receiving the invoice) whereas the Customer (on the Customer tab) is the one receiving the goods and services.
Bill Contact Select a different billing contact from the same company since the billing address, phone, etc. all come from the billing contact.
PO No. Enter the purchase order number from your customer.
Terms Click on the magnifying glass and select a payment term from the list.
Pay Method This is only relevant when the customer is paying by cash and is otherwise ignored.
Pay At Select Periodic Billing.
Billing Terms Select “Full Duration – All”.
Pay Type Bill means you will send the customer an invoice. This method checks the customer’s credit limit. Cash means the customer will pay you now for the invoice.
Resale Certificate no. R2 sets the Resale Certificate number automatically based on the certificated defined in Maintenance > Company > Accounts tab. Additionally, an Importable icon is provided for the ‘Resale Certificate No.’ field for you to choose the certificate from the list manually. Click here to see how Resale Certificates are applied on Orders?
If the State of the certificate does not match the State of the shipping address of the order, order tax will continue to be applied.
Resell Certificates are Company Specific. They are maintained State-wise under Company Edit screen in the maintenance module. See more information here.
Default
The Default tab allows you to track other aspects of the order.
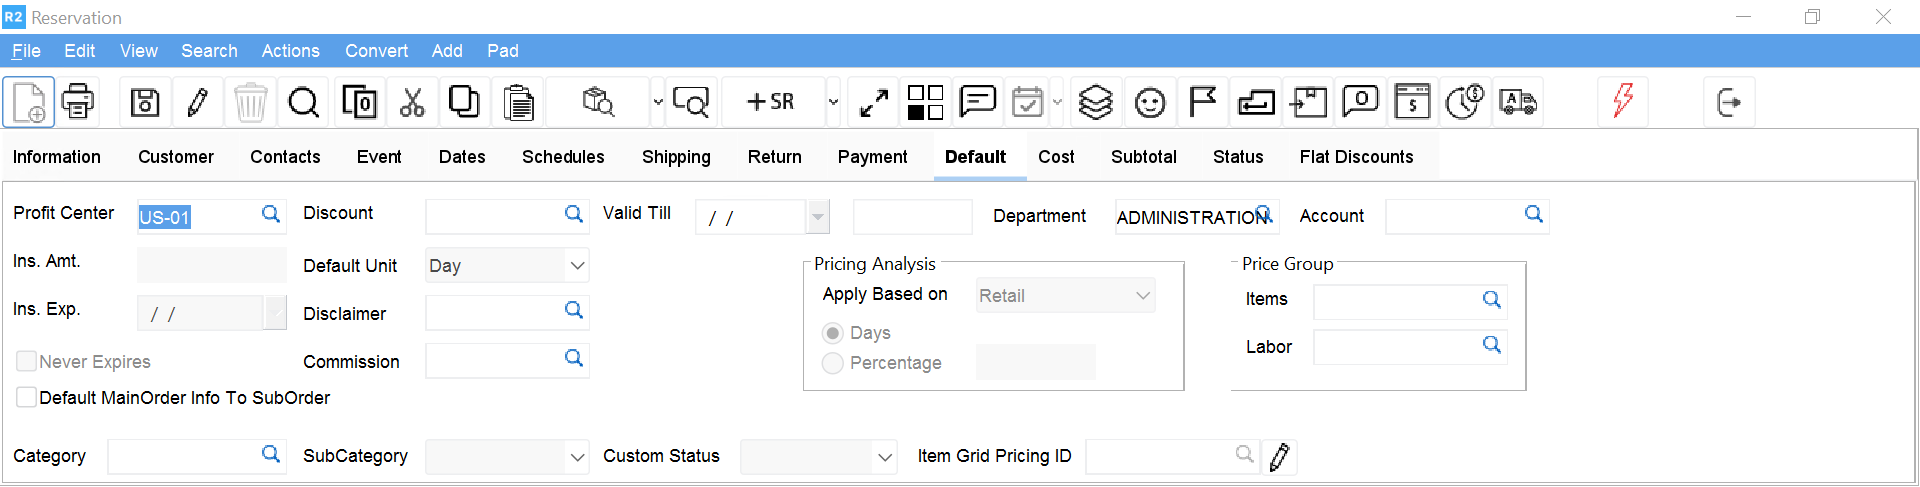
Profit Center Select a profit center.
Discount If discount groups are defined by management, they will appear in a list here. If a particular discount type does not appear here, management must set it up, you cannot add it here.
Valid Till From the Quote, this is the date and time the quote was set to expire.
Disclaimer Select a disclaimer (terms and conditions, etc.) that should accompany your quote/order printout.
Order Formatting
-
Section Headers and Section Totals
Open the order and click on Add → Section from the top menu. Then find and select by double clicking the desired section. Alternately, choose any section name and type-over it on the order.
.png?cb=fb33134898302549e1c0caeae973fb89)
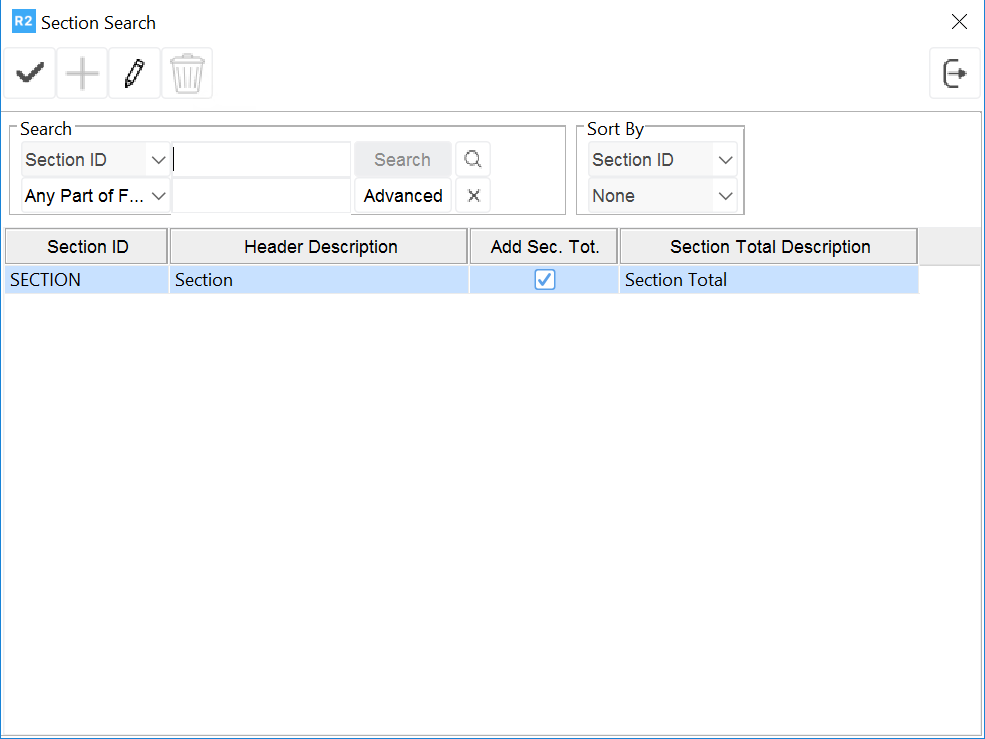
The order will show the section selected with the action of SecHead. Section header descriptions can be overridden.

Now you’ll add a corresponding Section Total. Add a blank line to the order by clicking on the New ![]()

Even though there is a SecHead as an option on the menu, do not use it. When adding Section Heading go to the top of the menu > Add > Section
Click on the Total icon to display Section Total amount
-
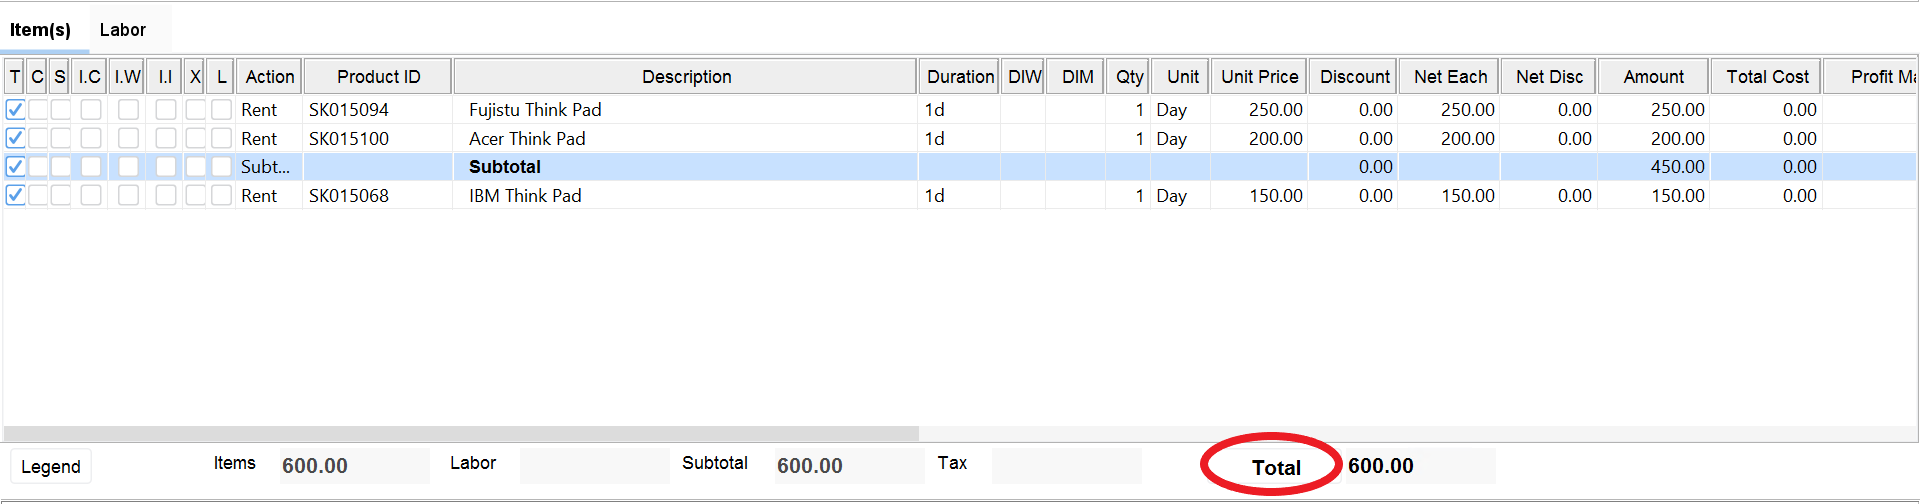
Subtotals
To add a blank line to the order, click on the New ![]()

Click on the Action column and select Sub Total from the pre-defined list
.png?cb=ebf6b2cb0922213cb24486859b16a252)
The subtotal will be shown adding all lines above. Click on the Total button to re-calculate
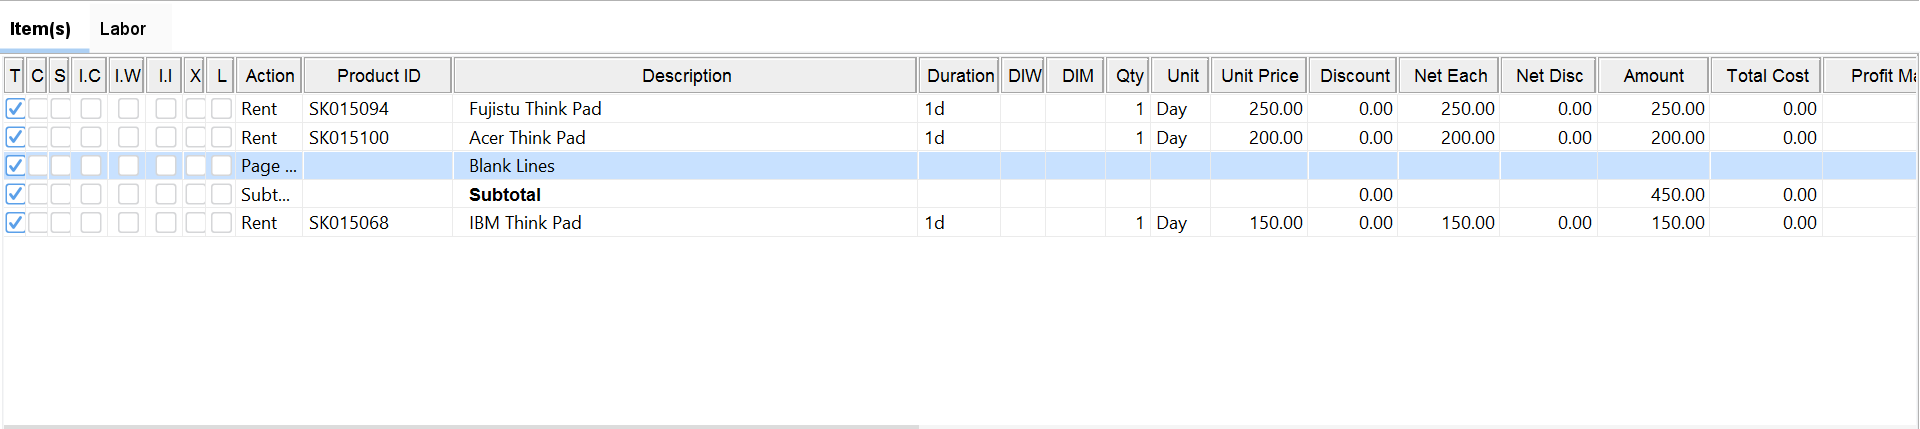
Page breaks can be added by adding a blank line. Click on the New icon ![]()
Click on the Action column and select Page Break option from the pre-defined list
.png?cb=6fba140a05b5df84ce7567295e993286)
User can create as many blank lines as needed with no action. User can type in a description
-
Flat Pricing
when an order needs to be totaled based on a particular budget, go to Actions → Flat Pricing and enter the order total amount. R2 will set up appropriate discounts per item to come up to the desired total amount.
.png?cb=84125ff94c03e9c30d57ba4c7e04c56b)
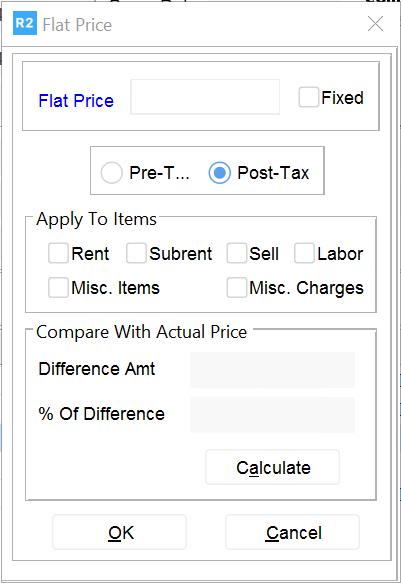
The Flat Price window will allow the user to set the amount before or after tax. The amount can be set up to be only equipment (exclude labor). The amount can be set up so that it will not change if if more equipment is added by checking on the Fixed box.
-
Checking for availability from a quote
From the Quote screen, click on Actions from the top menu and select Check Availability.
.png?cb=eb2b00dd5c853532f0d320ee43ef542c)
Items shown on red font mean that they are not available
Items shown on blue font mean that they are partially available (out 10, 3 are available and 7 are not)
Items show on blank font are available
