Reference No: R2-9130 1641682
Version No: 06.00.05-00
Details
Support is provided to print the Payment Details in an Order Print and Invoice Print as an individual grid. An additional Panel ID [625555] in the Order Form [153500UI] and Invoice Form [159500UI] comprising of the following new CIDs along with existing CIDs are provided to print the Payment Details.
The details of the additional CIDs are provided in Table 1.0.
Table 1.0 CID Details for Summary Invoice Print
|
CID |
Description |
|
8001 |
This CID prints the Payment ID. |
|
8002 |
This CID prints the MOP. |
|
2032 |
This CID prints the Date. NOTE: This is an existing CID. |
|
8004 |
This CID prints the Status. |
|
8005 |
This CID prints the Comments. |
|
8006 |
This CID prints the Amount. |
The details are explained in the sample workflow given below:
Prerequisites
-
Select the Maintenance module > Items tab.
-
Create the Items [FLOOR JACK], [DEMO SAW], and [ELECTRIC PLANER] with 2 Qty each.
-
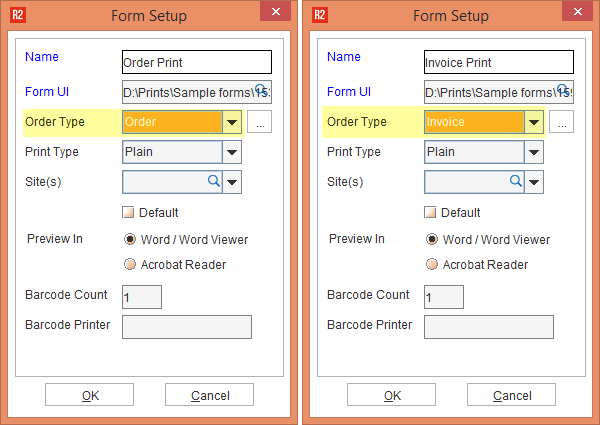
Perform the Form Setup for Order Print and Invoice Print from the Maintenance module > Form Setup button for printing the Payment Details using the Order Form[153500UI] and Invoice Form [159500UI] consisting of Panel ID [625555], as shown in Figure 1.0.
-
Save and Exit the Maintenance module.
Sample Workflow
The sample workflow for creating an Order, adding the Items in it and generating its Order Print and Invoice Print is given below:
-
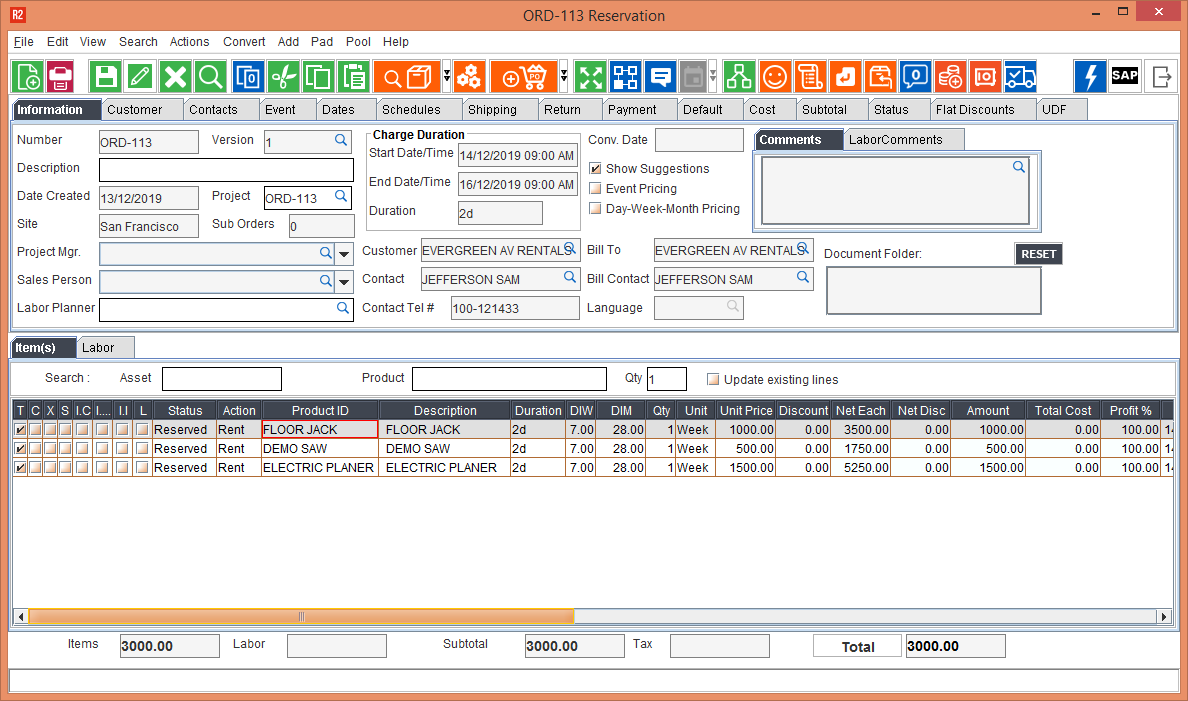
Select the Account module. Tag a Company [EVERGREEN AV RENTALS] and create a Rental Reservation Order [ORD-113].
-
Search and add the Items [FLOOR JACK], [DEMO SAW], and [ELECTRIC PLANER] and enter the Unit Price for each of the Item, as shown in the Figure 2.0.
-
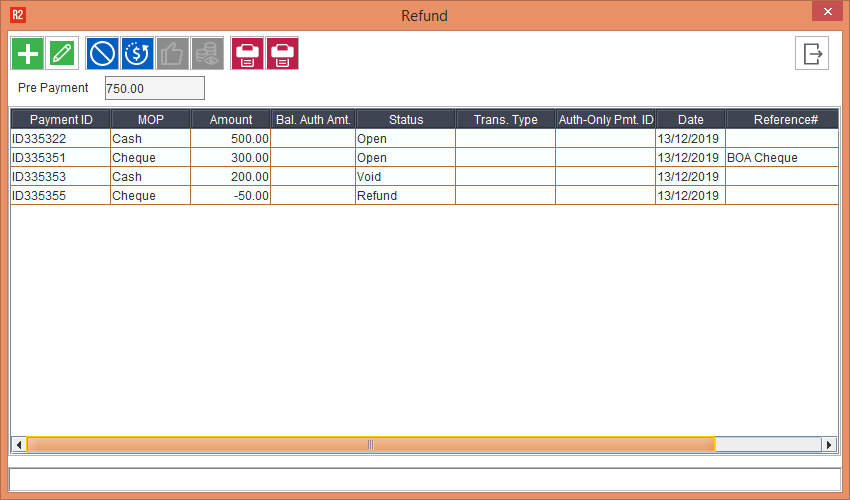
Click the Pay Advance icon. The Pre-Payment window is displayed.
-
Perform the transactions for each of the Items. The Payment details such as, Payment ID, MOP, Amount, Status, Date, and Reference are captured, as shown in Figure 2.1.
-
Exit the Pre-Payment window.
-
In the Order [ORD-113], click the Print icon. The Form Type Options window is displayed.
-
Select the Form drop-down as Order Print, as shown in Figure 2.2.

-
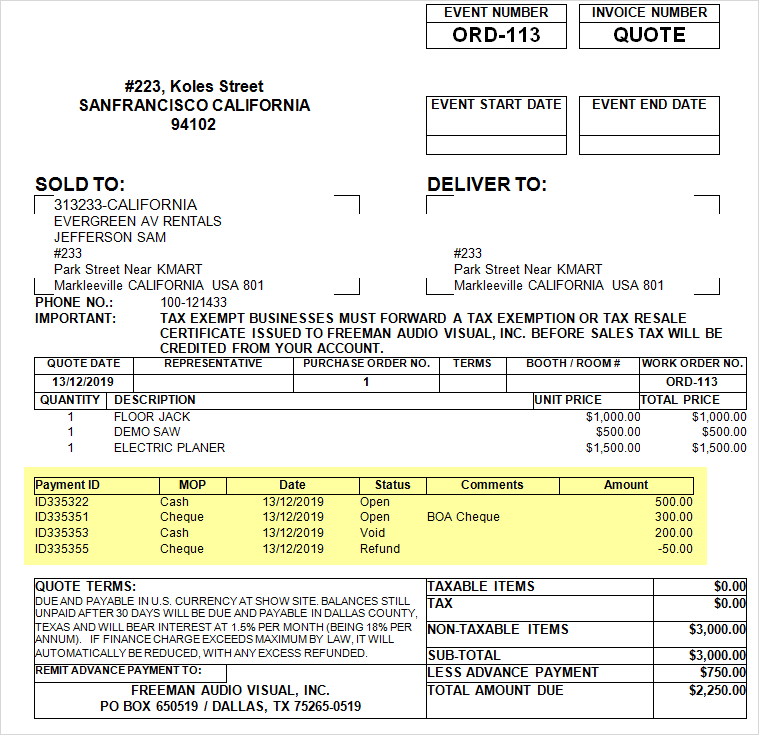
Click the Print icon. The Order Print [ORD-113.1.rtf] is generated displaying the Payment Details printed as an individual grid, comprising the Payment ID, MOP, Amount, Status, Date, and Reference, as shown in Figure 2.3.
-
Exit the Order Print [ORD-113.1.rtf].
-
In the Order [ORD-113], click the Done icon to generate the Invoice [INV-16].
-
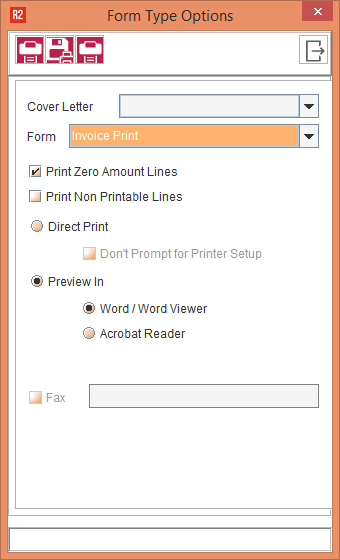
Click the Print icon. The Form Type Options window is displayed.
-
Select the Form drop-down as Invoice Print, as shown in Figure 2.4.
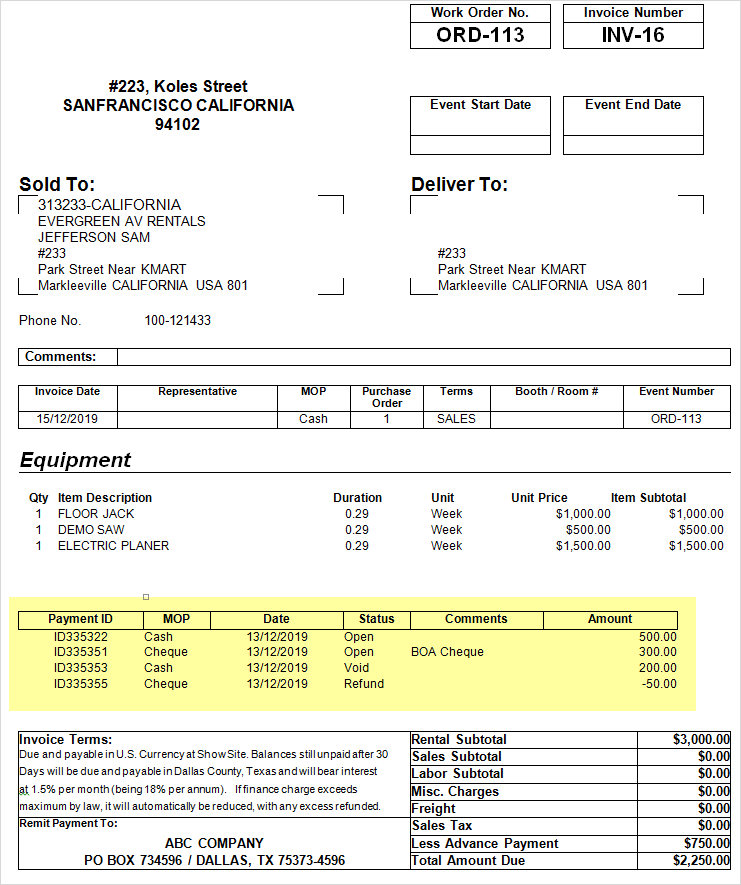
-
Click the Print icon. The Invoice Print [INV-16.rtf] is generated displaying the Payment Details printed as an individual grid, comprising the Payment ID, MOP, Amount, Status, Date, and Reference, as shown in Figure 2.5.
-
Exit the Invoice Print [INV-16.rtf].