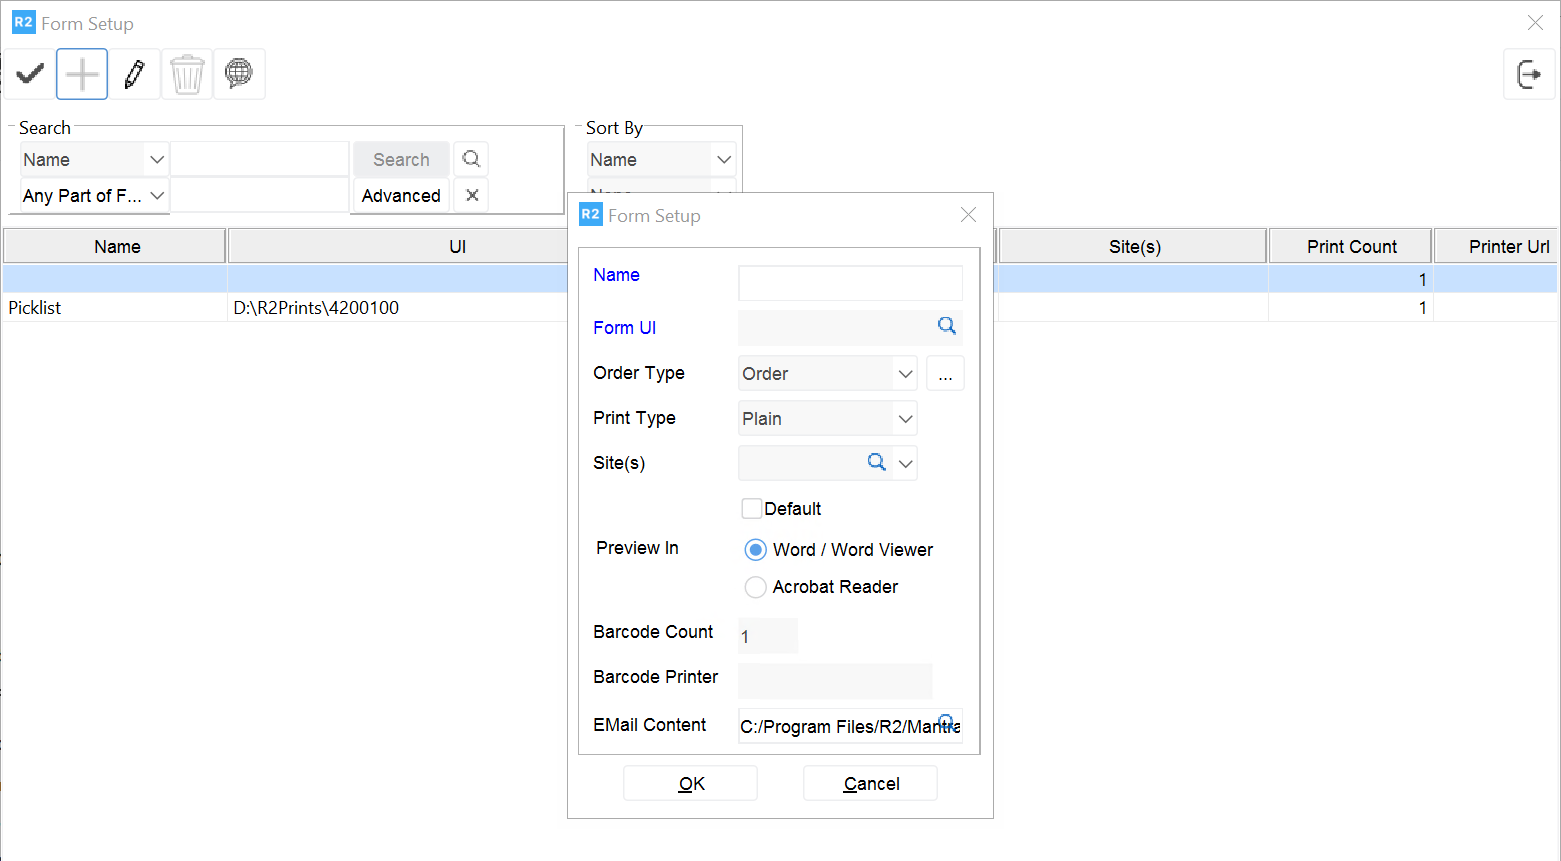
Form setup
Table of Contents

R2 allows you to setup multiple forms for Invoices and Orders.
In Form setup Dialog as shown above, user can define Form Types by specifying the Form name, Form UI, Order Type, Print Type and Site.
Order Type can be Invoice, Order or Deposit, Barcode Invoice – for printing Invoices Order – For printing Orders
Deposit – For printing Deposit invoices
Barcode – Barcode is used for setting up the forms for printing bar- codes. Print Type can be Plain or Pre-Format.
The Form Type defined will be available for the Site selected. If no site is selected the Form type defined will be available for all the sites.
Select path of the UI file to be used for printing, by clicking ellipsis beside the field Form UI. The Form UI will be based on R2’s existing logic of printing.
A Name can be given for each type.
Select Default check box if is necessary to show the Form by default on the Form Type Options dialog box opened while printing orders and invoices.
All Form Types defined for the type Order for a Site will be listed in the Form Type Options dialog as drop down, while printing orders from any place in R2 as shown above.
User Field Setup
R2 allows the user to create user defined fields. For example, contact birth date, contact company position.
To add a user defined field
Begin at the Configuration window.
Click on the User Defined Field button. A dialog appears to add the fields.
Click on Add button
Select a Position (1, 2, 3, etc to indicate the position of the user field)
Type in a caption
Select a type (text, number, date, boolean, choice)
If choice was selected, then click on the Add button
A blank line is added to the Options group box.
Type in the caption for the choice (for example, birth-date). Click OK to save.
