Table of Contents
Scheduling is the default functionality of the warehouse module. This functionality will allow the employee to view the task assigned at a glance. Schedules are automatically generated by R2 and can be edited to be assigned to employees.
Searching for Schedules
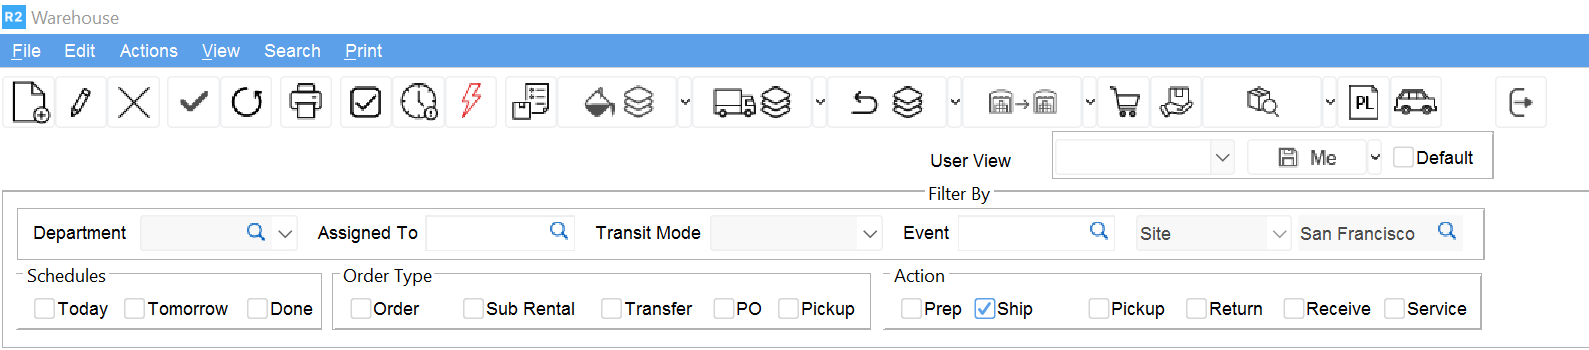
Schedules can be searched based on several criteria and by defining filters. By default R2 will search for schedules in the current site.
Schedules can be filtered by:
-
Department
-
Assigned To
-
Transit Mode
-
Event
-
Site
-
Order Type
-
Action
And by Schedules for Today, Tomorrow and Done.

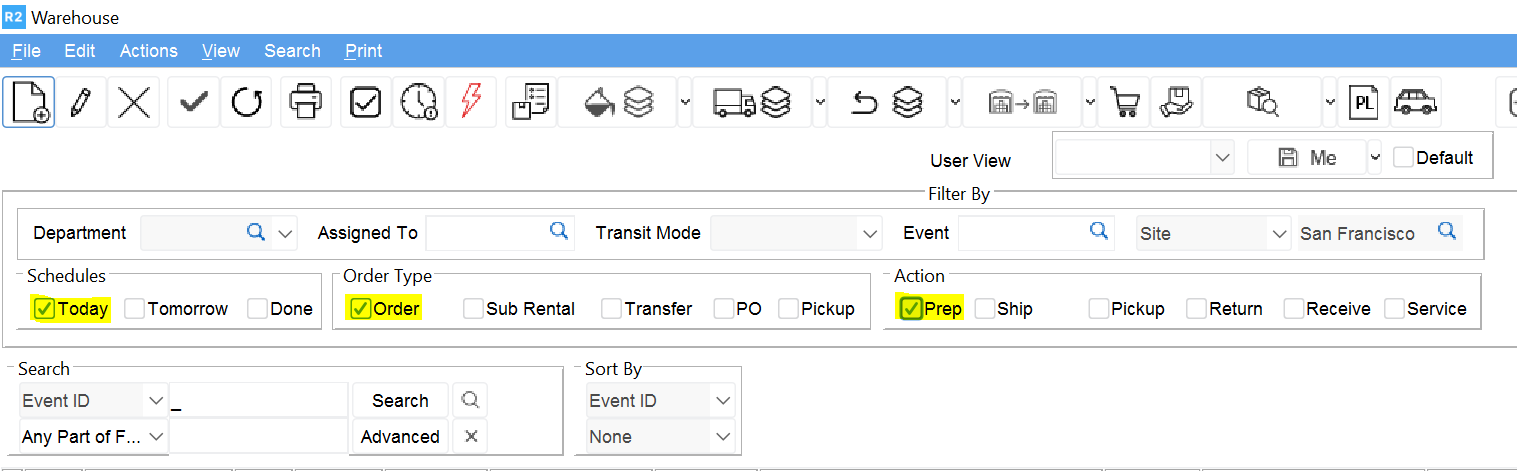
Schedules can also be searched by defining specific criteria such as time, prep date, ship date etc. in the Search area of the warehouse module.
Example:
To search for schedules of type “Order” and action “Prep” for “Today” the filters would be set up as follows:
Assigning task schedules
To assign a task schedule to an employee select the task row, click on the Edit Schedule button ![]()

Another method is to right click on the task and select the Edit option from the pop-up menu.
.png?cb=acdf25aa89c58bbbcd8643ca27f1d320)
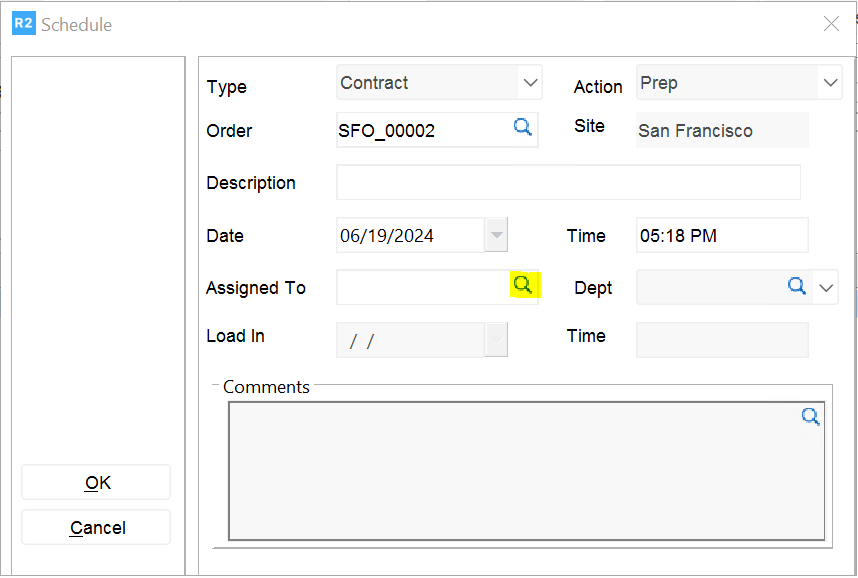
In the “Schedule” window click the Search button to select an employee. Enter comments in the comments section for the employee.
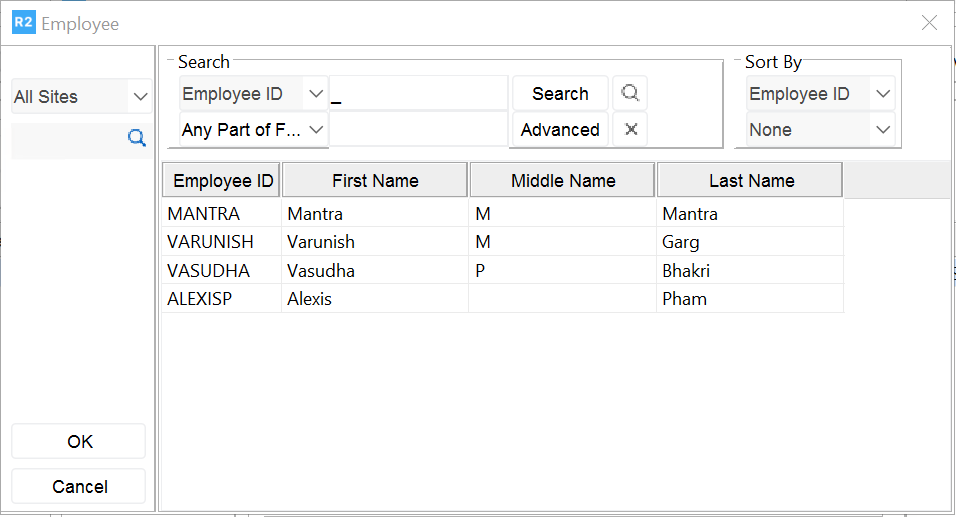
Search for the employee and double click on it to assign.
Once a schedule is assigned to an employee it cannot be changed back to un-assigned. However, It can be assigned to someone else.
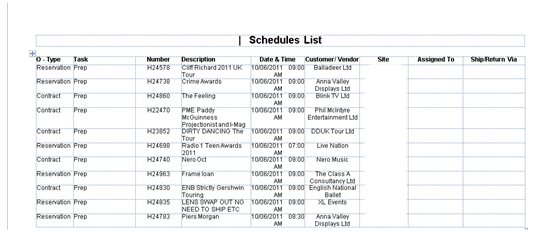
Printing Schedules
To print a schedule list, click the Print Schedule button ![]()

Marking a Task as Done
When scheduled tasks are completed, these must be marked as done to exclude them from displaying again in the schedule list.
To mark a task as done, click the Done button ![]()

The task will be flagged as “Done” by a check mark in the D column of the schedules grid.
Restoring a Task
If a task was marked as done but must be restored to its original status, click the Restore Schedule button in the tool bar. The task “Done” box will be unchecked.

The Prep Task (Filling an Order)
Once tasks have been assigned and shortages have been resolved the orders are ready to be prepped.
Search for the prep task to be completed and open it by double clicking on the task row.
The Pick List provides order details and a list of equipment required.
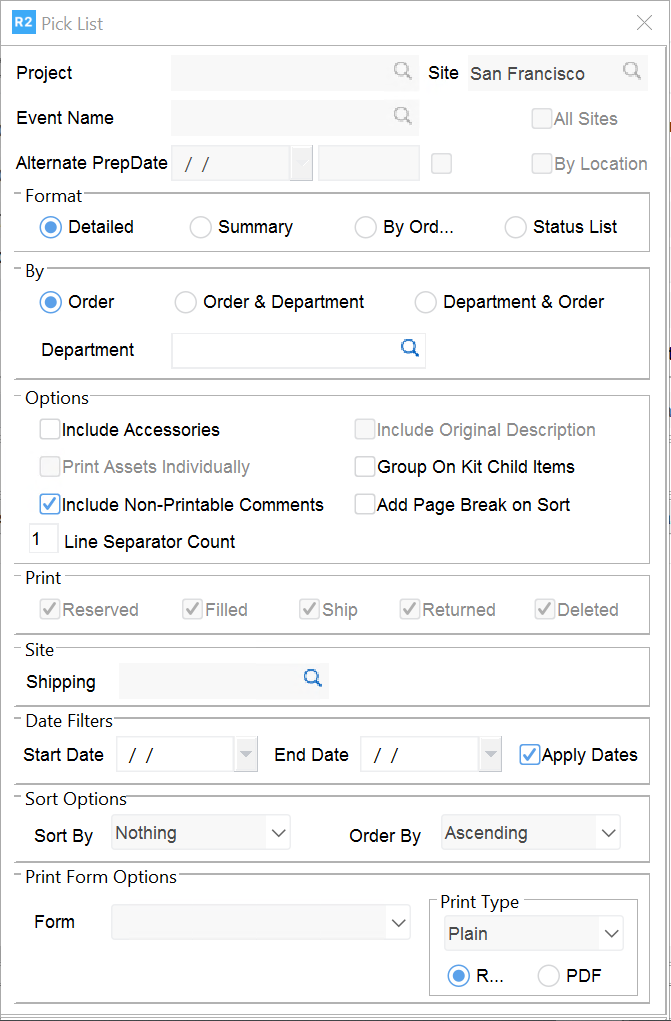
To print a pick list click the Pick List print button ![]()

The print dialog screen will be displayed. Select the preferred options and click the Run button to print the pick list.
Example Picklist Print:
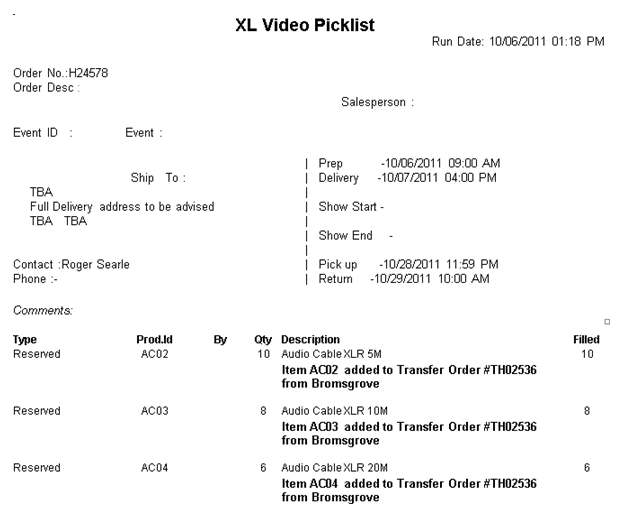
The first time the pick list is printed the items will print in bold face font. The next time is printed only newly added items will be printed in bold face. Multiple pick lists can be printed at the same time in the Pick List screen.
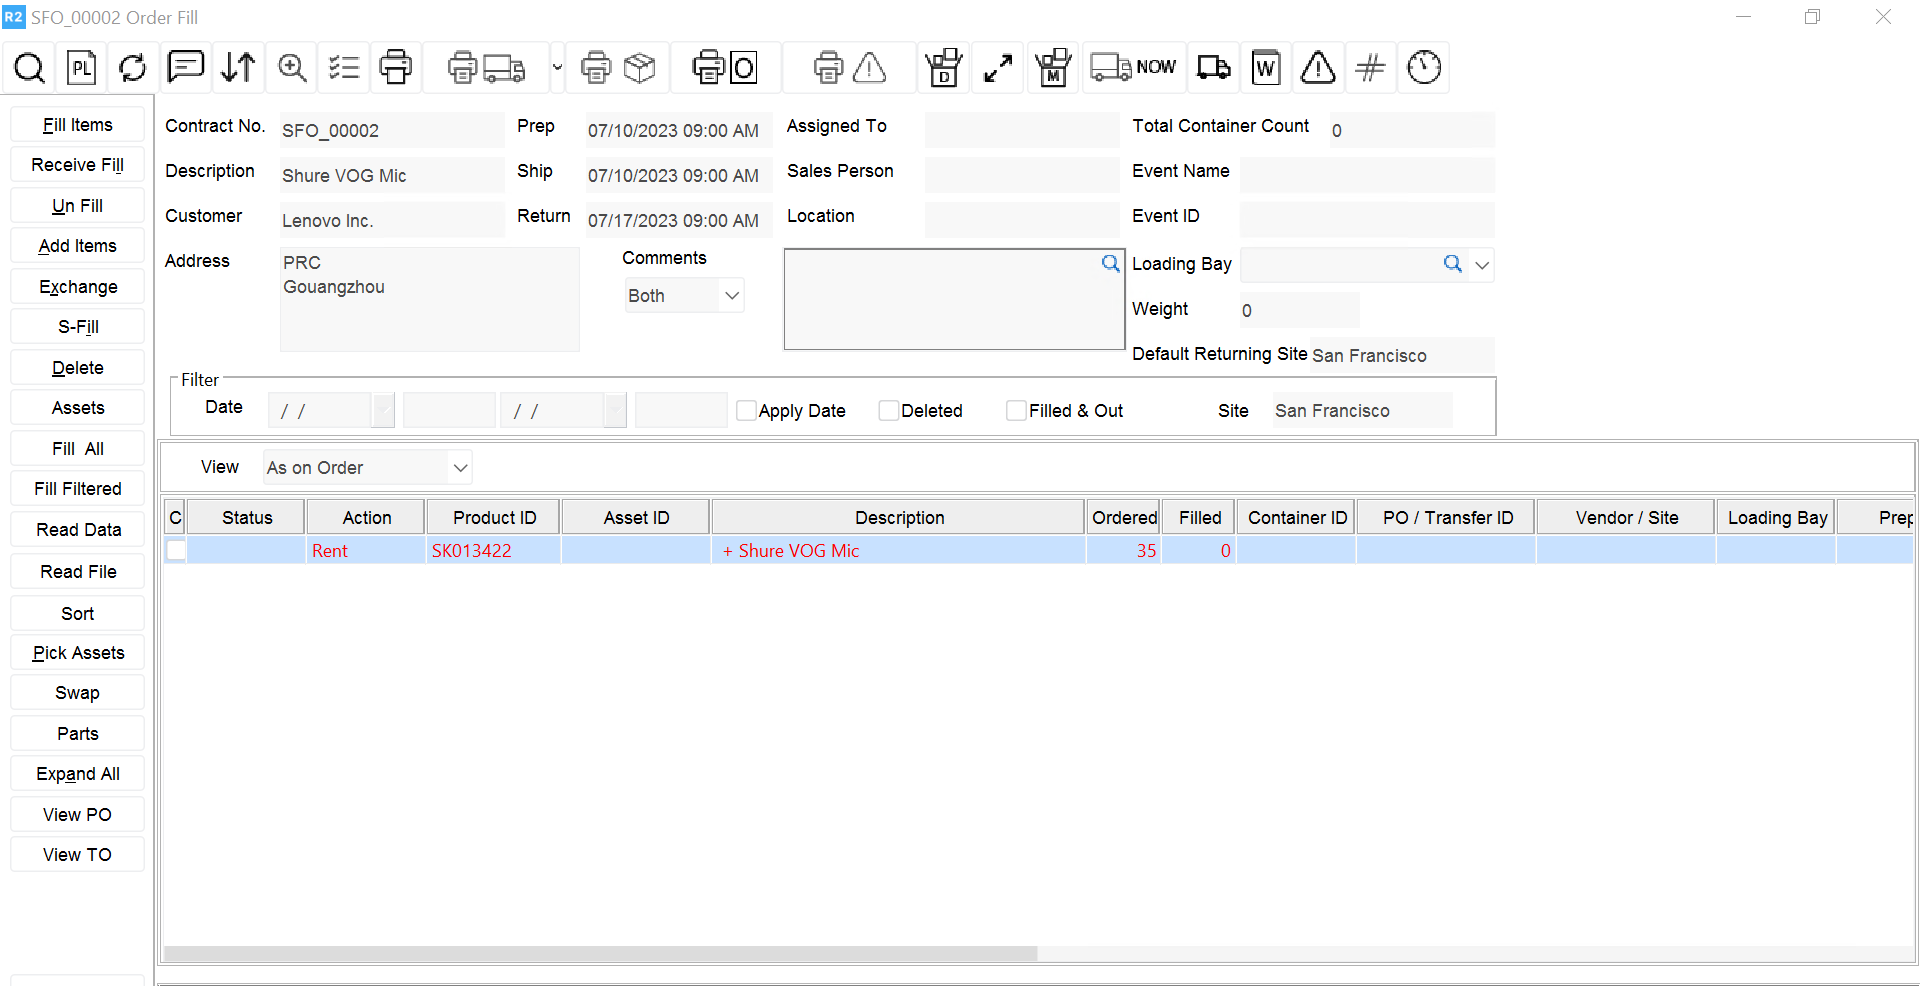
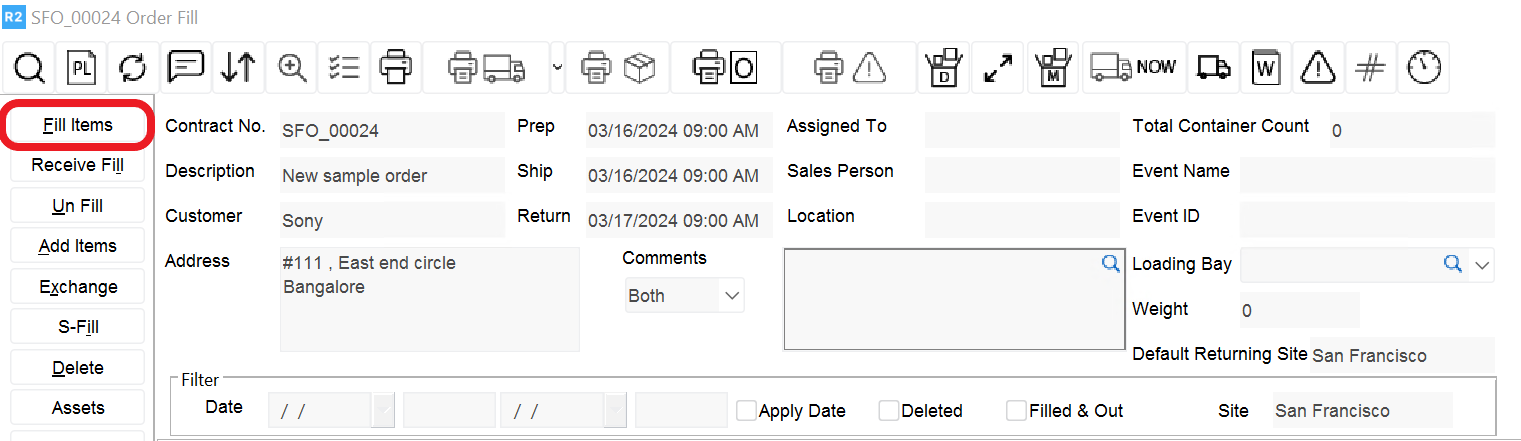
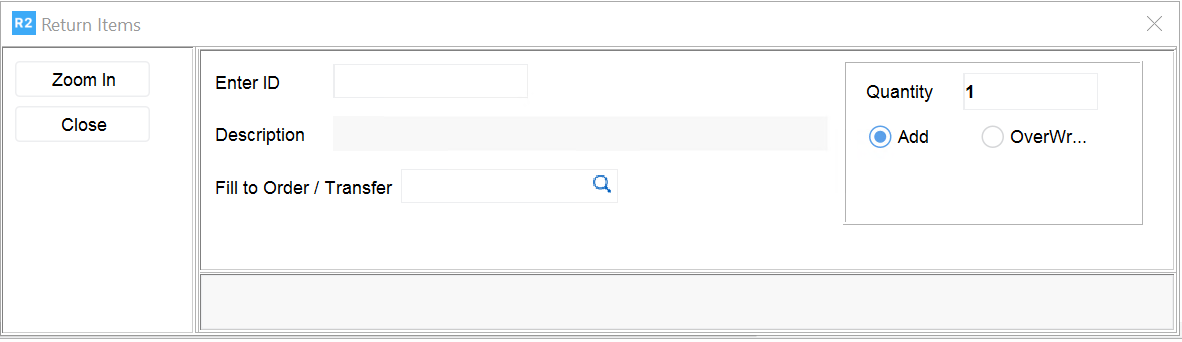
To fill serial items click the Fill Items button in the Fill Order screen.
In the fill items window select the Enter ID field and scan the first item. Both in house and transfer in items can be filled through this screen.
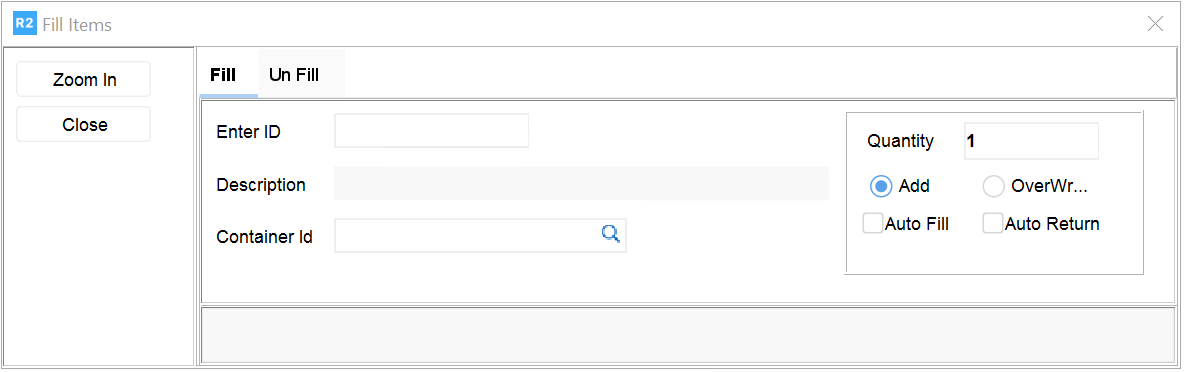
To fill non-serial items enter the quantity to be field in the Fill column. Non-Serial items can also be filled by entering the Product ID in the Fill Items window and entering the number to fill in the Quantity field.
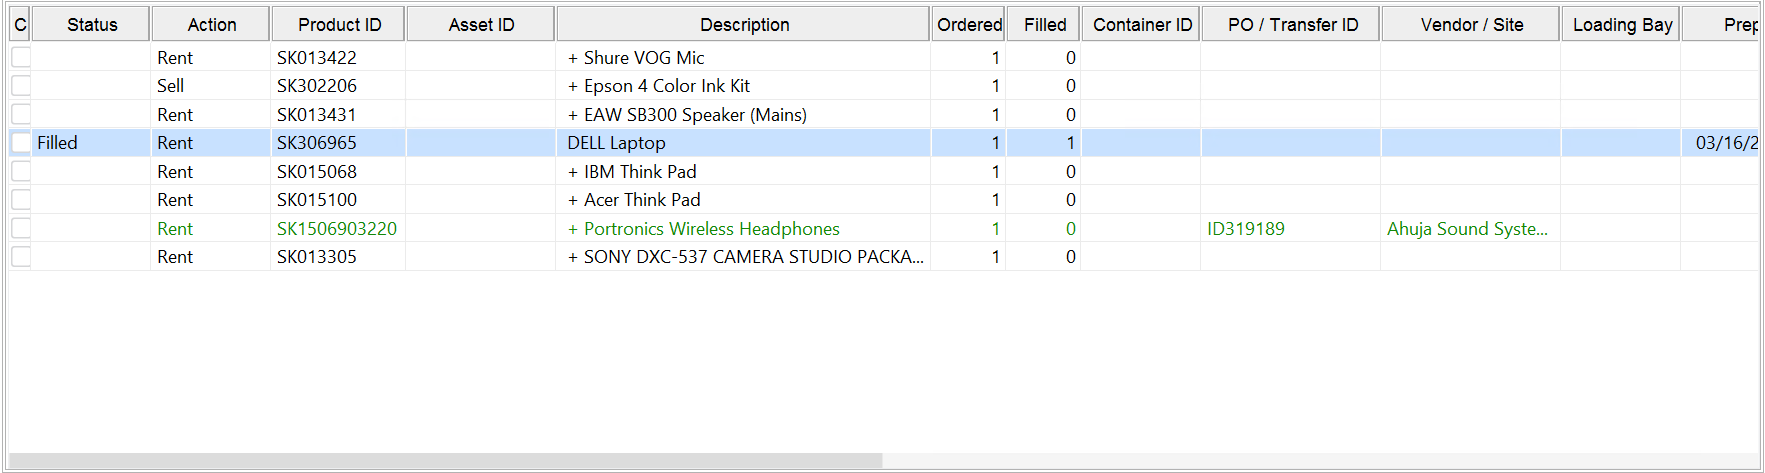
Serial items will show a + sign in front of the description while non serial items will not. Use the Expand button to look at the assets for a serial item
.png?cb=7b6eacf1a36eea34e57859000a999774)
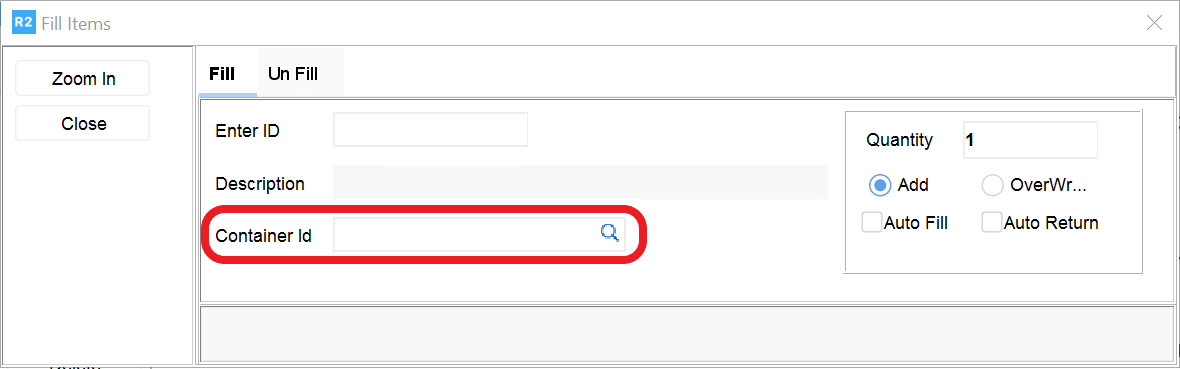
Filling by container – items can be filled by container
To fill by container click the Search button ![]()
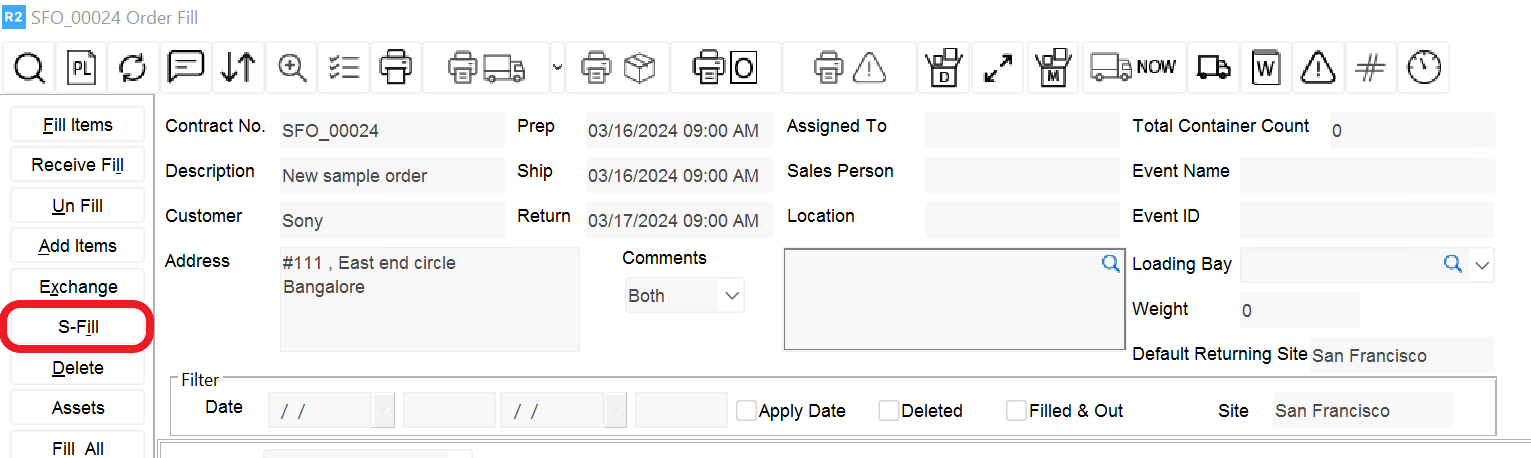
To fill sub rental items select the sub rented item then click the “S-Fill” button in the Fill Order screen.
If the order is not completely filled it will be in Partly Filled status. If it is completely filled, it will be in filled status. Orders can be searched by status in the Fill Orders screen.
After filling the order click the Close button ![]()
After filling the order, mark the Prep task as done.
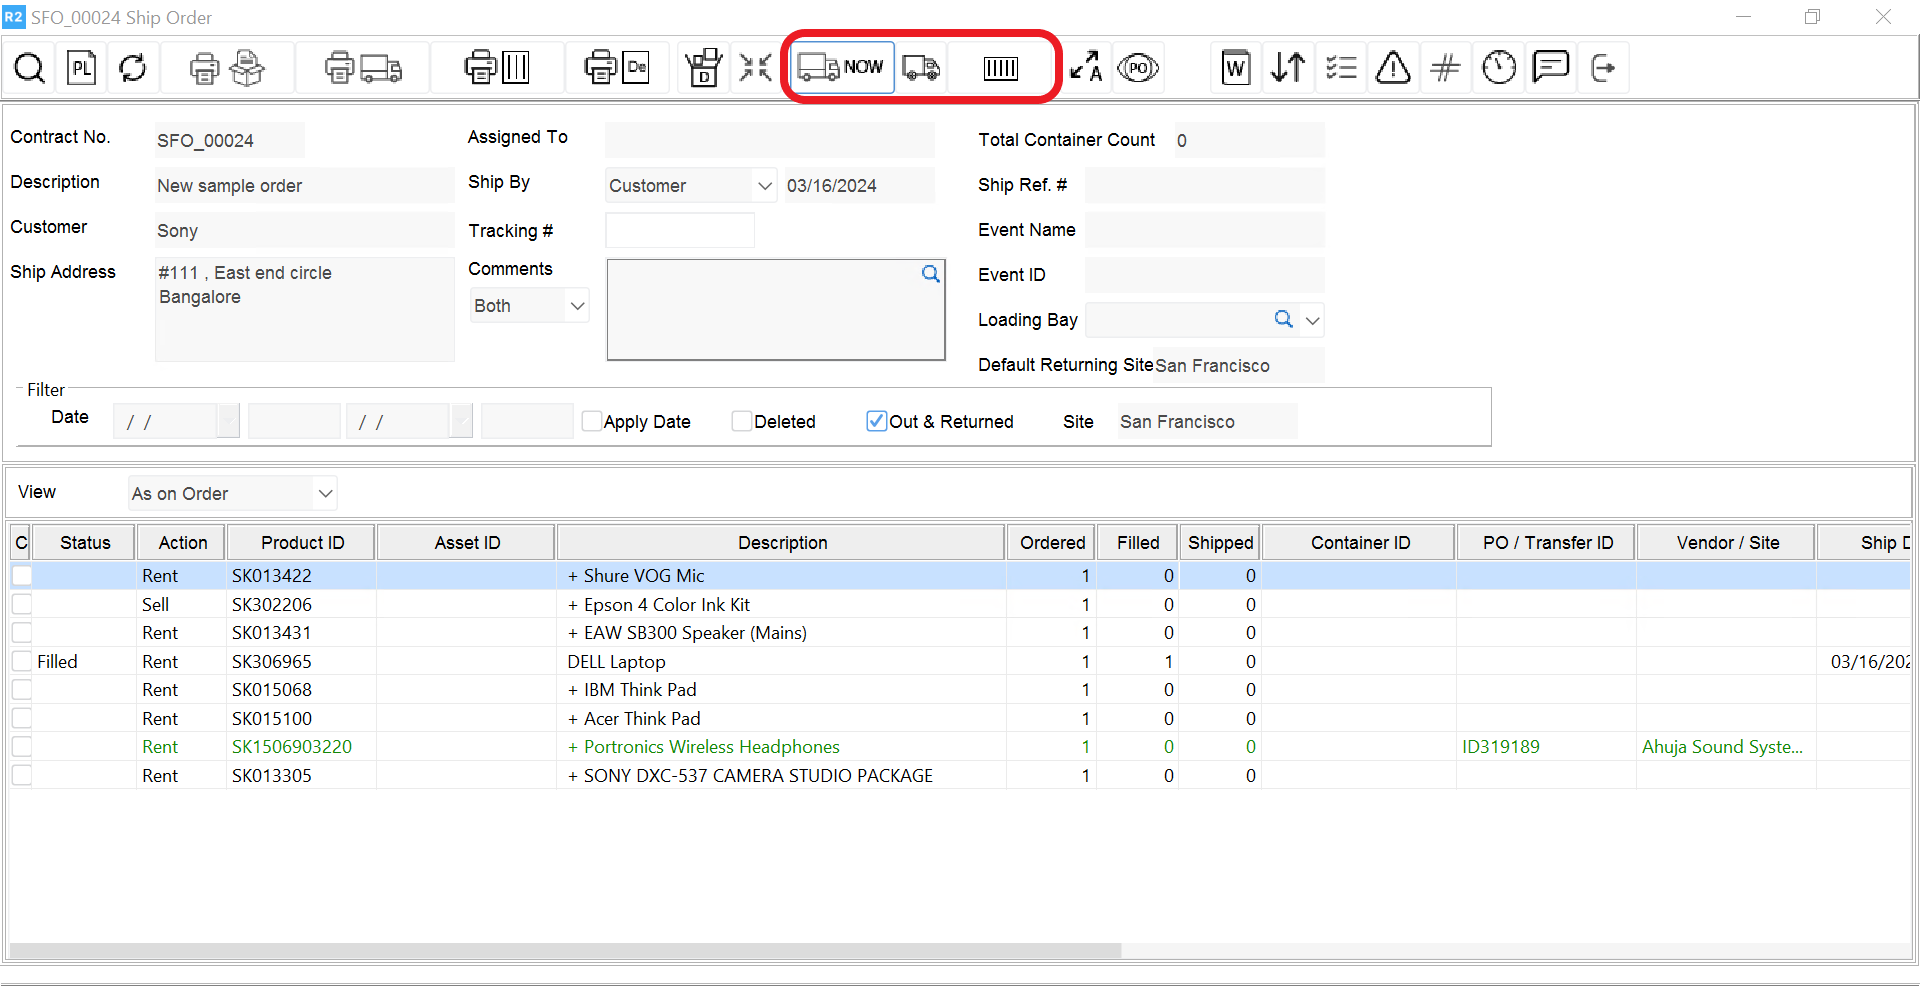
The Ship Task (Dispatching the Order)
To ship filled orders, search for the ship tasks. Open the ship task by double clicking on the task row.
Items can be shipped all at once or by container.
To ship all filled items click the Dispatch Now button ![]()
To ship by container click the Dispatch Container button ![]()
To ship S-Assigned and T-Out items only, select the item and click the Ship Assigned button ![]()
If any items were deleted from the order after the warehouse had already started to prep the order, the deleted items will be displayed in red font and any items added will be displayed in blue font.
The status of the items will change to “Out” after the order is dispatched.
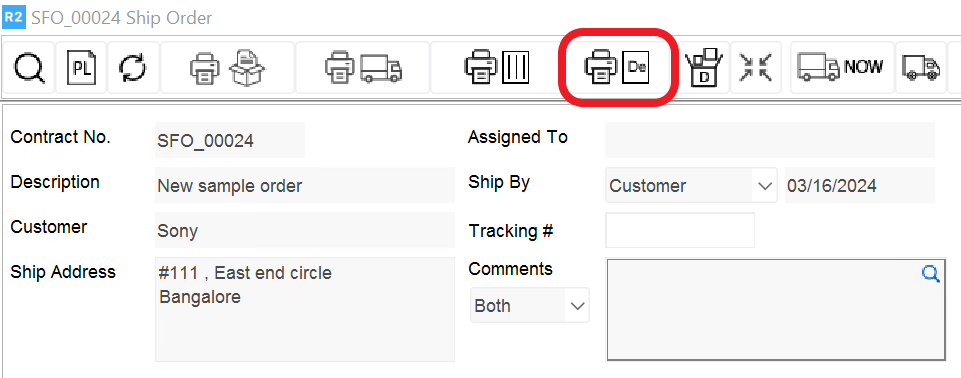
After the order is dispatched, print the delivery receipt. To print the delivery receipt, click the Delivery Receipt button ![]()
-
Print: user can print the order
-
Print and Save: user can print a new copy and also save it in the database
-
Print existing: user can print existing copy previously saved via “Print & Save” icon
-
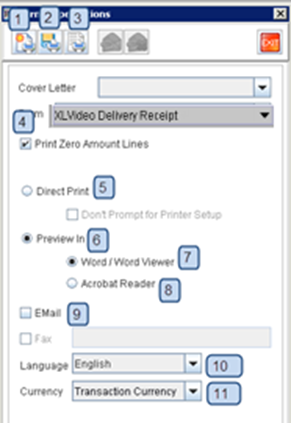
User is able to omit zero amount lines by uncheck the box
-
To print straight to the printer, select this option
-
To generate a preview select this option
-
Select to preview on Word
-
Select to preview on Adobe
-
Email: select this option to be able to email
10. Language: select language if needed
11. Currency: select different currency if needed
Click the Exit button ![]()
The Pickup/Return Tasks (Returning the Order)
After the show or event is completed the equipment needs to be returned to make it available for other orders. There are two tasks that can be selected to return an order, Pickup and Return.
Search for the Pickup or Return task and open it by double clicking on the task row.
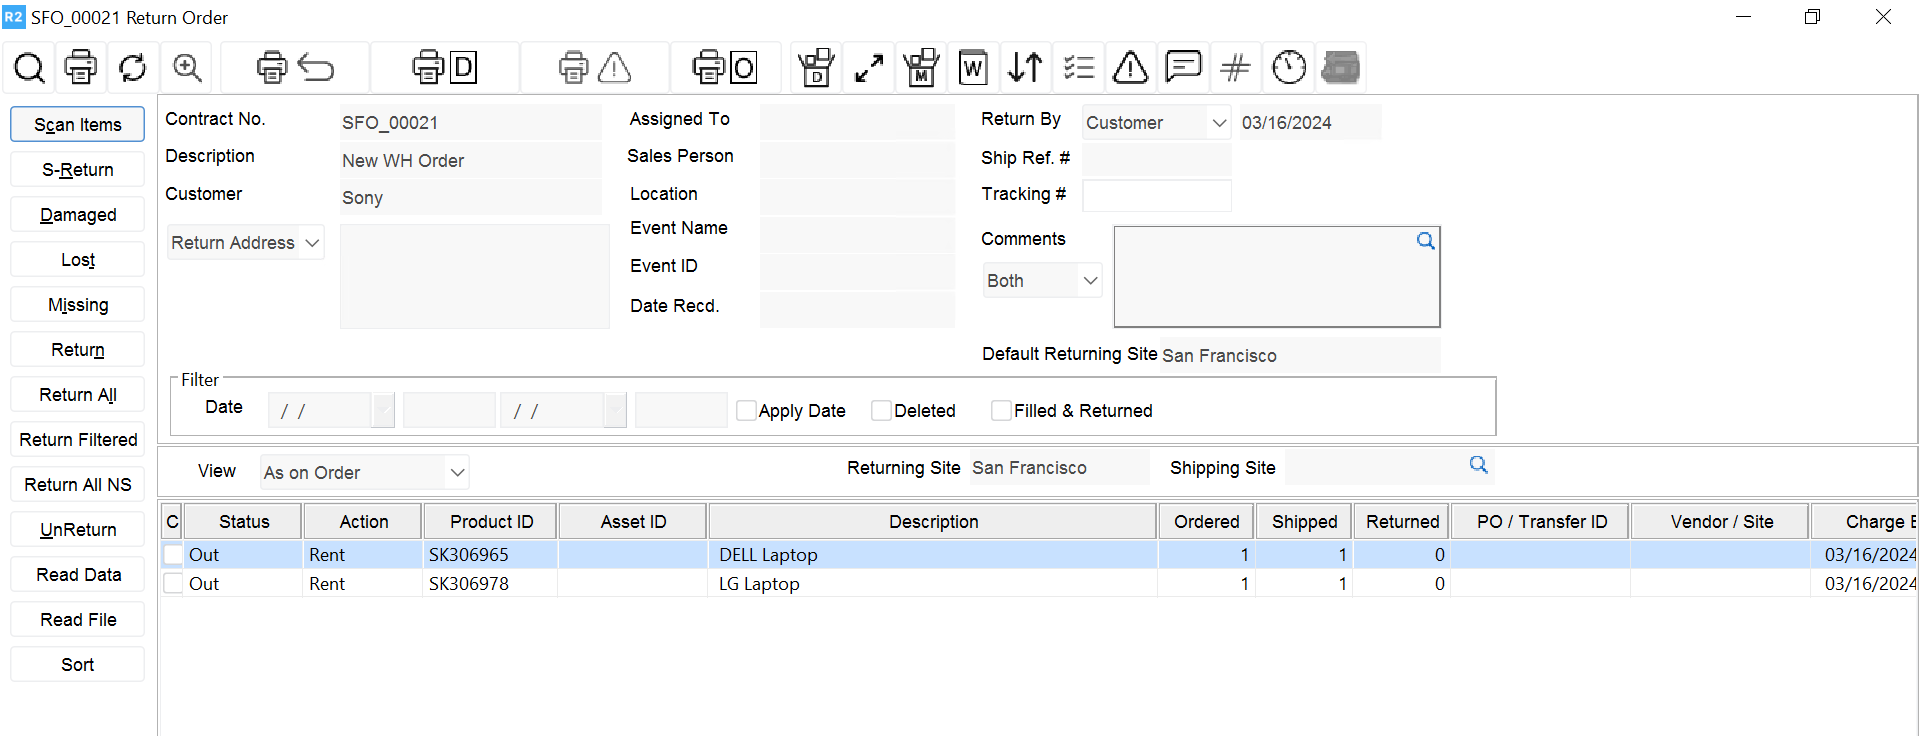
To return serial items click the Scan Items button. Select the Enter ID field and begin scanning items to return them to the order.
To return non-serial items enter the quantity to return in the Returned column. To return all non- serial items at the same time click the Return All NS button.

To return sub rented items select the item and click the S-Return button. The Returned column will be updated accordingly.
Damaged Items
As the order is being returned, any items found to be damaged can be returned as damaged. The item will be in ”Repair” status.
To return an item as damaged, select the item and click the Damaged button.
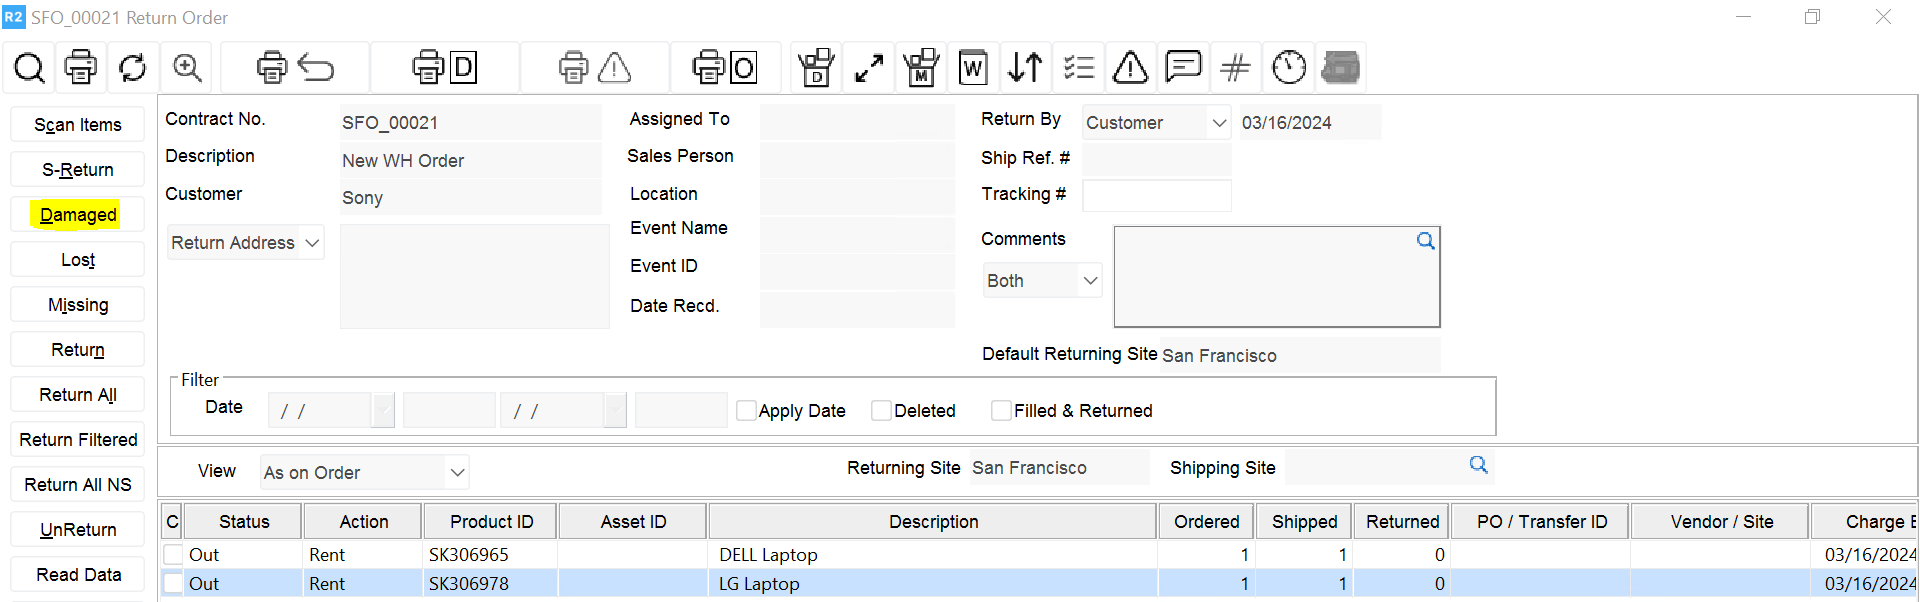
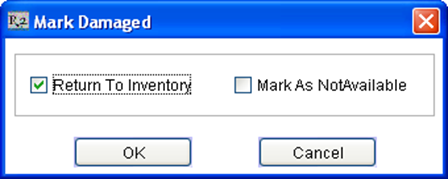
The Mark Damaged window will be displayed.
Check the Return to Inventory box. If the item cannot be rented again until it is repaired, check the Mark as Not Available box.
If the item can still be rented because the damage is minor, leave the Mark as Not Available box unchecked.
For Serial items the comments box will be displayed. Enter comments about the damage. These comments will be seen by the service department.
If the item should remain available, R2 will automatically make it not available when a service ticket is created for the item to be repaired.
Lost Items
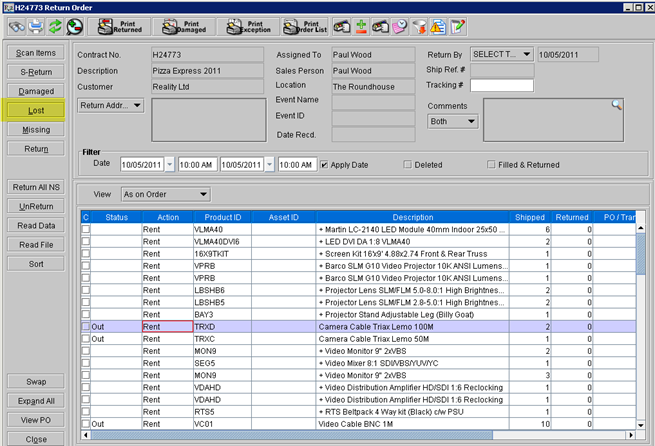
If after the full order is returned some items still remain in out status, and it is determined that the items were lost, they can be returned as lost items. Lost items will be taken out of stock.
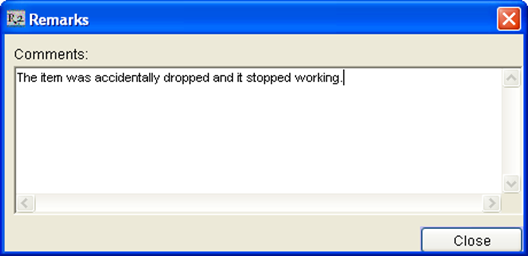
To return items as Lost, select the item and click the Lost button.
In the Remarks window enter details about the lost items.

Missing Items
If items could not be found and are believed to be missing but there is a confidence that the item will be found, the items can be returned as missing. Missing items will become not available but the stock count will not be reduced.
To return an item as missing, select the item and click the Missing button. The item status will change to Missing.
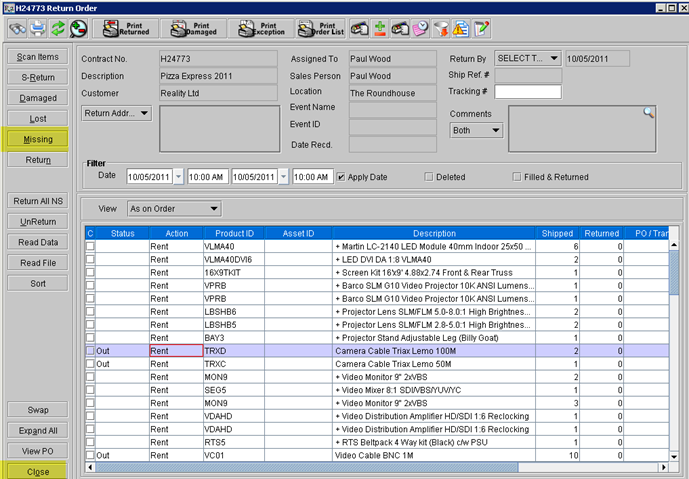
Click the Close button to exit out of the Return Order screen and mark the Return task as done.