Table of Contents
Accounting Process
Invoices that have been Approved and have Signoff status are ready to be processed by Admin and Posted.
Invoice Processing
Vancouver will process all invoices for Ontario and BC. Edmonton will process all invoices for Alberta.
During the signoff process a pro-forma invoice will be created for each order. Invoices will be dated as of the charge end date.
The pro-forma invoice number will be a temporary number. After posting, the invoices will receive an actual invoice number and a printed invoice for mailing.
Lost and Repair invoices will be created for equipment lost or damaged by the customers. Sales reps will create the invoices and notify Management when they are ready to be posted.
Invoice Posting
Invoices will be batched and posted daily by Admin. R2 will generate a unique batch number for each branch. The invoice integration files will be stored in a directory named with the batch number. With this process Accounting will be able to identify each site’s files easily.
Creating an Invoice Batch
Invoices are batched and posted in the Invoicing module. To create a batch, follow the next steps:
-
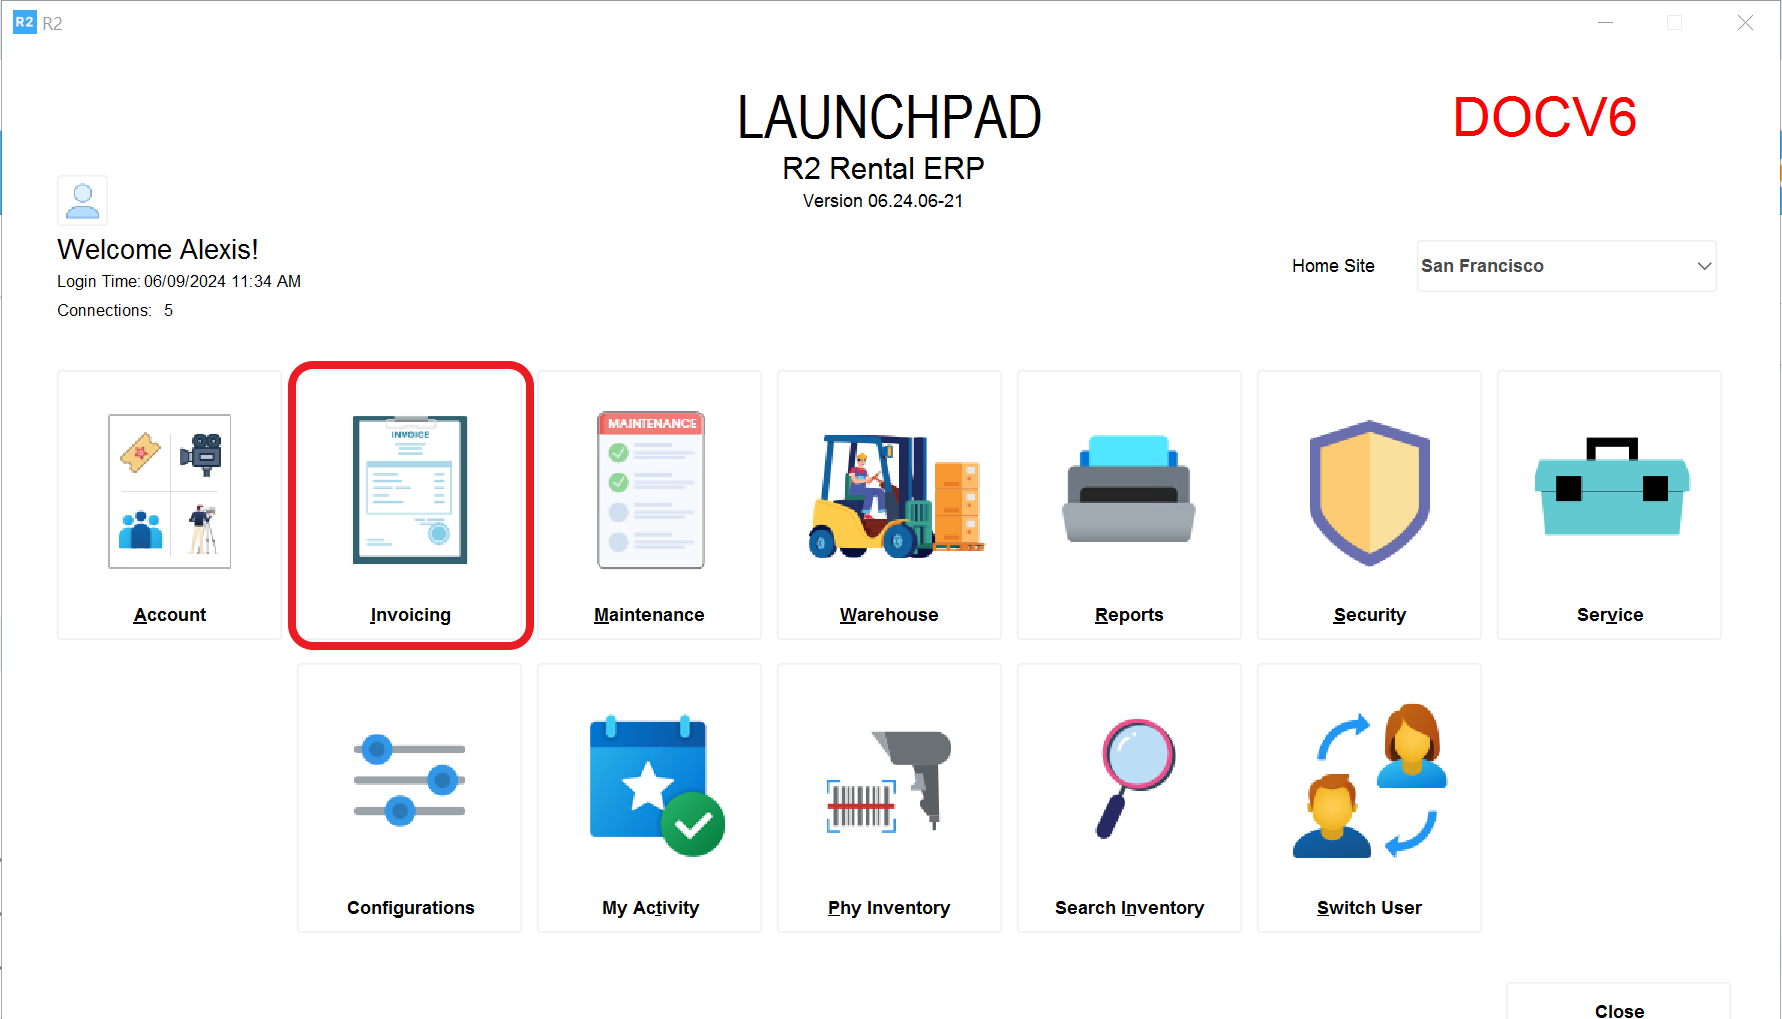
From the R2 Launch Pad, pick the site you are processing and access the Invoicing module.
-
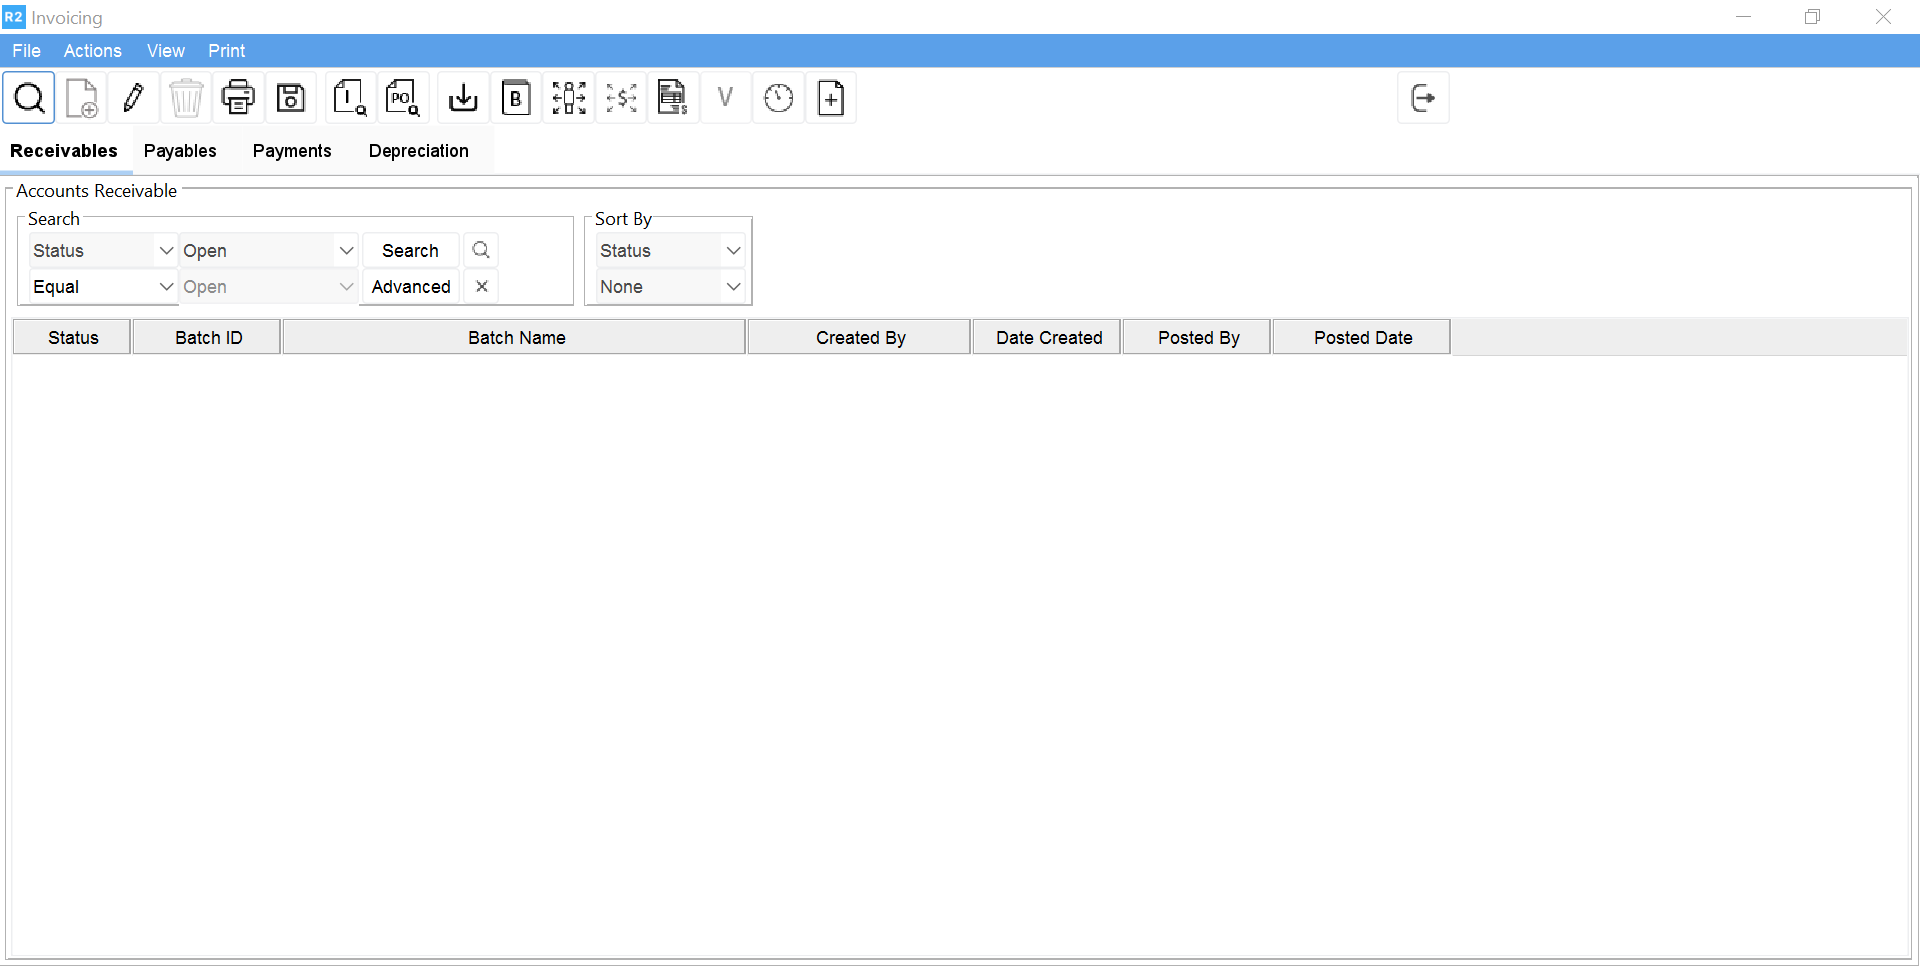
The Invoice screen will be displayed.
-
By default the Receivables tab will be selected.
-
Click on the New

-
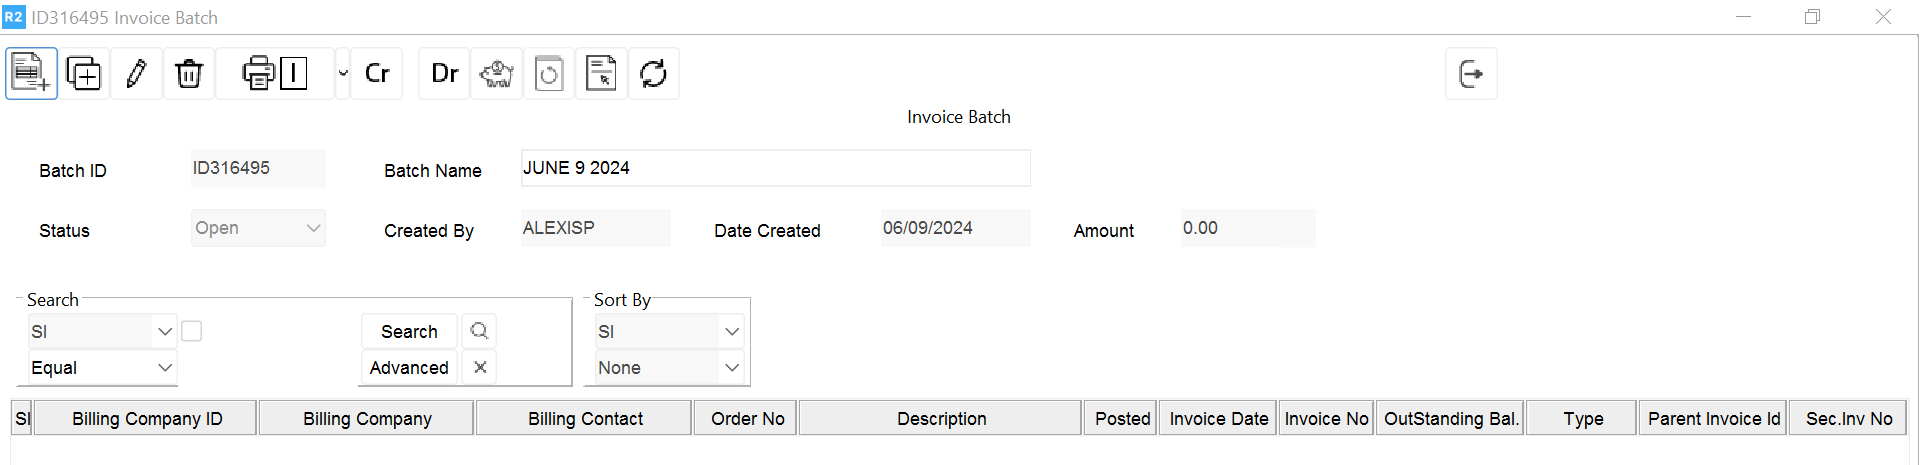
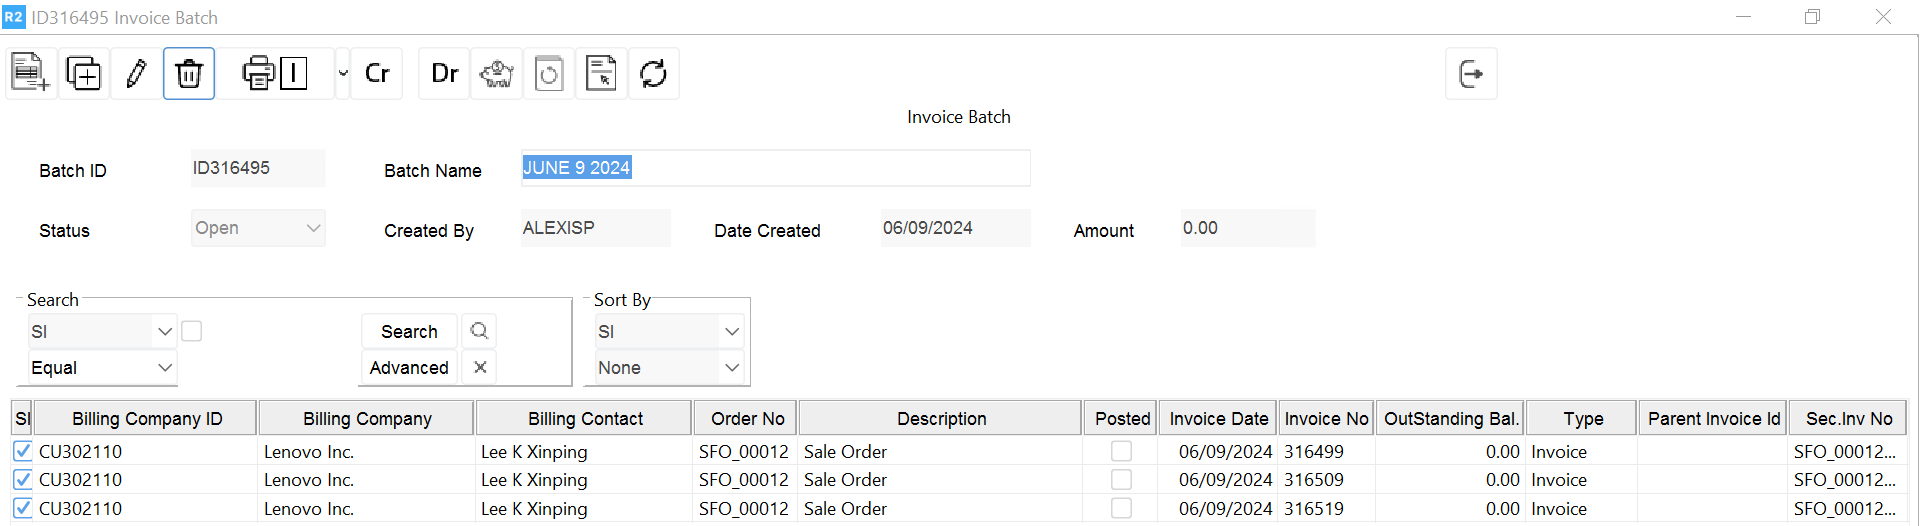
The Invoice Batch screen will be displayed.
-
Enter the batch name with a reference related to the invoices in the batch.
-
Click on the Add

-
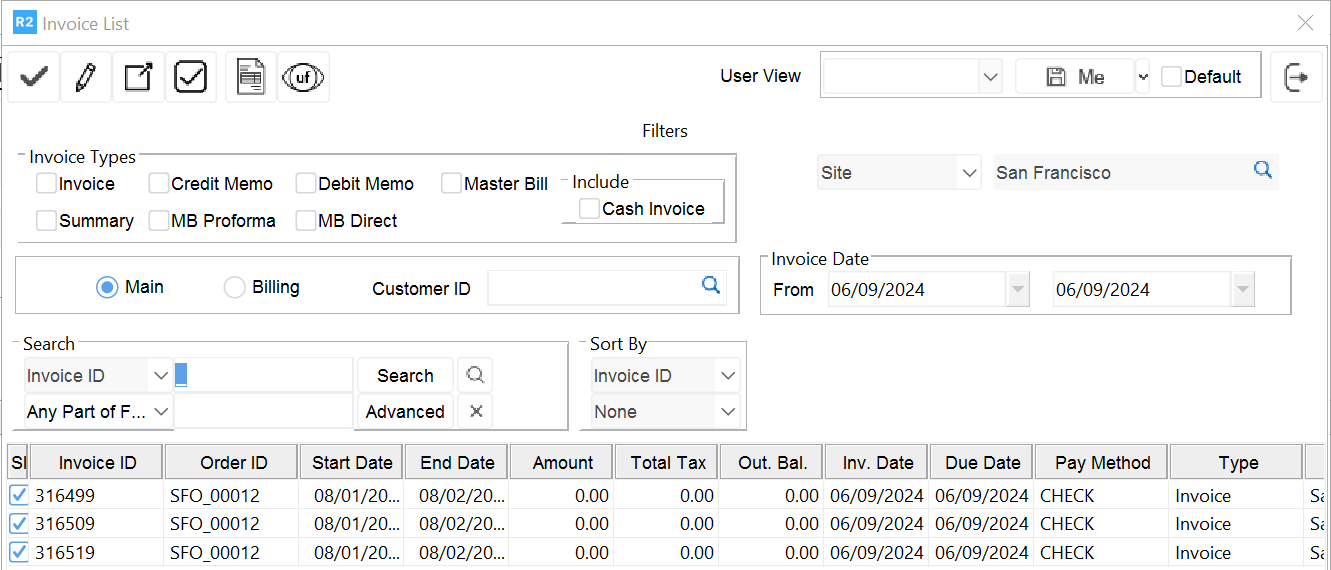
The Invoice List screen will be displayed.
-
The “From” and “To” date is defaulted to the system date.
-
Change the date range if posting invoices for a prior date.
-
-
All invoices with invoice date falling within the default date will be listed.
-
By default, only invoices within the current site will be listed.
-
Click the Tag All

-
The invoices will be tagged indicated by the blue font.
-
-
Click the Accept

-
The Invoice List will be closed and the invoices will be added to the batch.
-
Exit the batch by clicking the Exit

-
The batch will be displayed in the Invoice screen upon exiting.
-
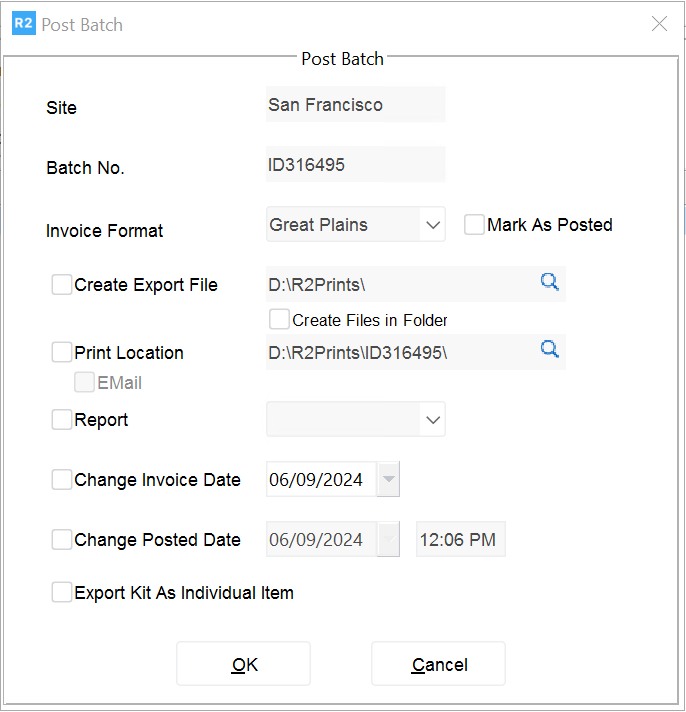
Highlight the batch, click on Actions in the menu bar and select the Post Batch option.
.png?cb=ab398baf9b397a3ef926c299d1a2136d)
-
The Post Batch dialog window will be displayed.
-
Check the “Create Export File” option to post the batch and create the export files for integration with QuickBooks.
-
Check the box “Create Files in a Folder” to save the files in their individual batch directory.
-
Check the box “Report” to print the posting register report after posting is done.
-
Check the box “Change Invoice Date” if the invoice date needs to be updated. Otherwise leave it unchecked and the invoices will keep their original invoice date.
-
Use the “Invoice Format” of Peachtree (which shares file structure with QuickBooks).
-
Click the OK button to post the batch.
-
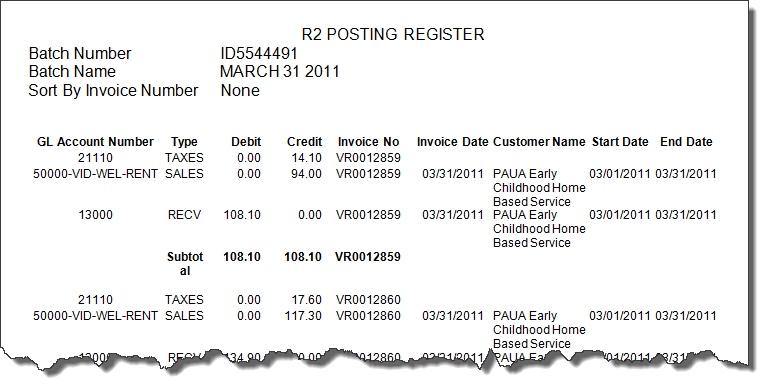
The batch will be posted and the posting register report will be displayed.