Table of Contents
UI DESIGN MODE
The UI Design Mode was created to allow customizations to nearly any screen in R2. It has been designed to allow unique appearances of the screens in R2 by removing, resizing and replacing the following screen components:
-
Text Box or Field
-
Importable Fields
-
Buttons and Icons
-
Tabs
-
Grid Columns
The following screen components cannot be resized:
-
Check boxes
-
Radio buttons
-
Menus
The following table describes the key features of enabling and using UI Design Mode:
|
Action |
Hot Key |
|
Enable UI Design Mode |
F12 |
|
Disable/Exit UI Design Mode |
SHIFT + F12 |
|
Drag-and-Drop Screen Components |
ALT + Drag-and-Drop Screen Component |
|
UI Command Center (available from the Launch Pad only) |
CTRL + F12 |
Note:
The UI Design Mode is enabled or disabled for the following scenarios:
-
It is enabled for the Mantra user initially by default
-
It is enabled to all screens in R2
-
It is disabled while in Runtime Security mode
-
It is disabled in the application’s login window and availability screens
How-To Use UI Design Mode
Starting and Stopping Design Mode
To enable Design Mode, press the F12 key. The top-left of the screen will show that Design Mode is activated and will stay this way until disabled:
UI Design Mode Not Enabled

UI Design Mode Enabled

There are two ways to disable UI Design Mode:
-
Right-click somewhere in the screen to get the control menu, and select Exit Designer
-
Press the hotkey SHIFT + F12
Note: exiting the design mode does not automatically save your changes. It will allow you to close design mode without saving changes, if they were not already saved.
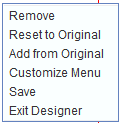
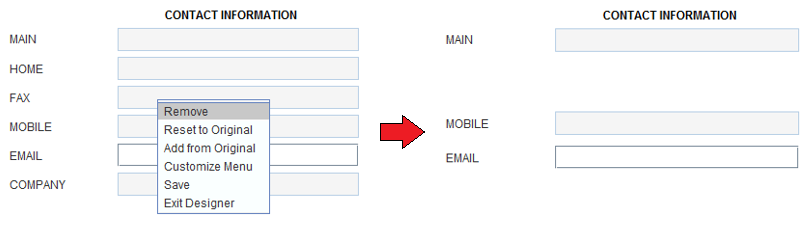
Accessing the Control Menu
The control menu provides several options toward designing the screen. To access the control menu from any screen, right-click in the screen while Design Mode is active:
The following table describes each of these control features.
|
Action |
Function |
|
Remove |
Right-click directly on the field, tab, column or button/icon to be deleted. This will remove the component from the screen. Make sure you don’t delete a field that is mandatory to your workflow.
|
|
Reset to Original |
Use this anywhere on a given screen to reset the entire screen back to factory settings. This includes all buttons, icons, fields, columns, column arrangements, etc. Be careful, this can undo a lot of work.
|
|
Add from Original |
This feature opens another panel identical to the screen that is currently open. This is called the Master UI, and it is clearly labeled at the top-left of the original window.
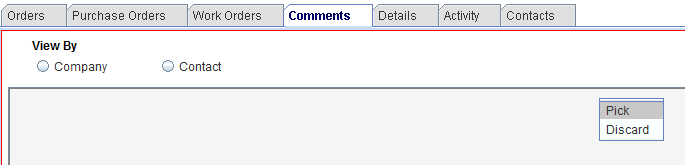
It is meant to allow selection of any component therein, and import it into the current screen. For example, this method can be used to move fields from other order tabs onto the main order screen, so that you can see all of your preferred fields together. On the Master UI screen that appears, right-click on a field or icon to be moved to the current screen. Select Pick: 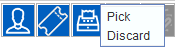
Then right-click on the current screen where the component should be placed and choose Drop: |
|
Customize Menu |
Menus on all screens can be modified for placement. Un-used menu selections can be removed from view. As an example, the Account screen’s “Search” menu will be used. When you first start using R2, the Search menu looks like this: 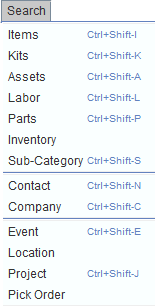
Customize this menu by selecting Customize Menu from the Control Menu. The Menu Designer will appear and allow you to edit all menus from the same screen:
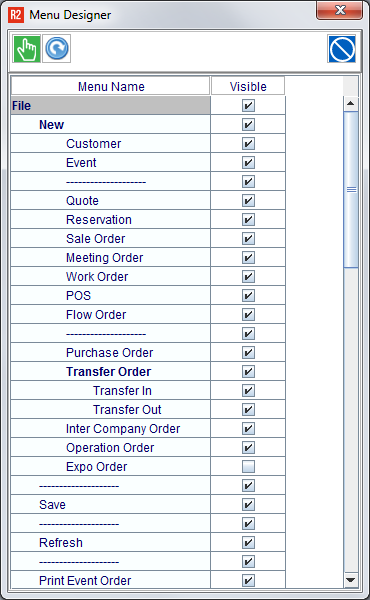
In this example, scroll down to the Search section. 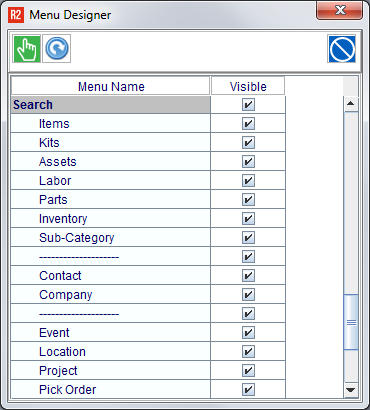
Drag-and-Drop menu options to appear in the order you desire. Use the Visible checkbox to make a column label appear or disappear. Note: some menus include break lines. Using this example, they are here, and here: 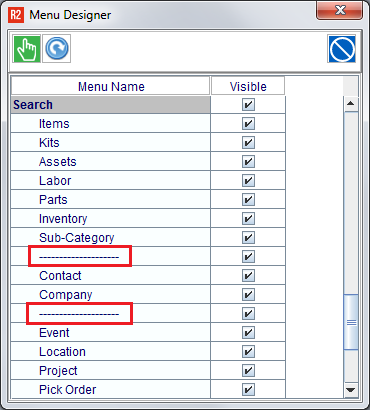
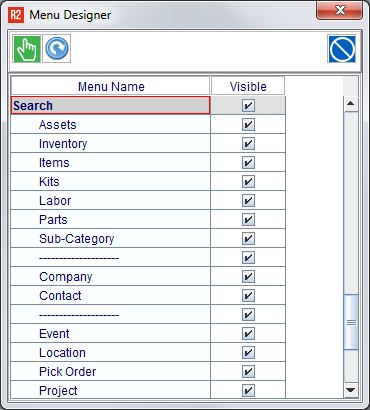
Use the menu line breaks to organize your menu into logical groups. In this example, the menu has been rearranged to have menu items appear in alphabetical order:
Click on the Select icon to save the menu customizations. Click on the Exit icon to leave the screen without saving changes. |
|
Save |
Select this to save your changes on a given screen. 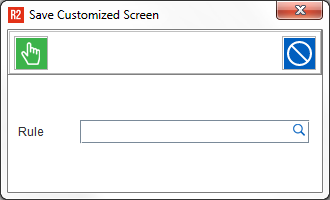
Confirming with no rule selected means the changes will apply globally.
Click on the magnifying glass to select a Rule: 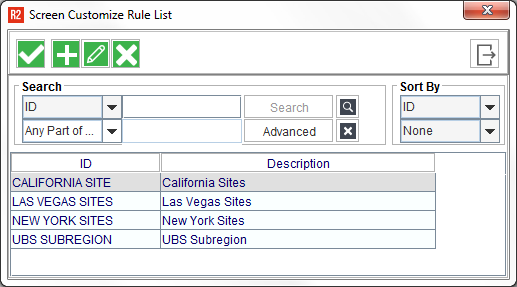
Double-click to save the screen designs to a given hierarchy.
|
|
Exit Designer |
Use this to safely exit design mode. |
Best Practice: Be careful with your changes and how often you save them. If you make a mistake in design by, for example, deleting too much, you can exit without saving changes. This can get you out of a more time-consuming resolution. Save your work frequently.
Control Features
Additional control features are available, including:
-
Resizing
-
Moving
-
Column Width, Order and View
|
Action |
Function |
|
Resize Field |
Move the mouse pointer near the edge of a field, and when the re-size arrows appear, drag-and-drop the window size of the field:
Columns can be resized vertically and horizontally: 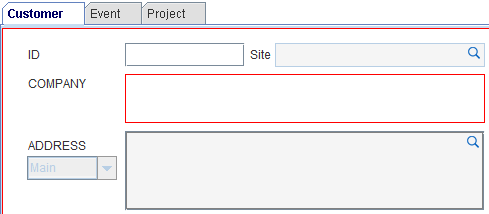
|
|
Move Field |
Hold the ALT key down while clicking on a field, label or icon that should be moved. Upon doing so, the cursor will appear with the four-pointed arrows indicating that the component can be moved:
Using this feature, the component can be dragged around and positioned anywhere within the current tab.
Note: when moving a field, the label moves along with it. However, the label can be moved independently of the field itself.
|
|
Column Configuration |
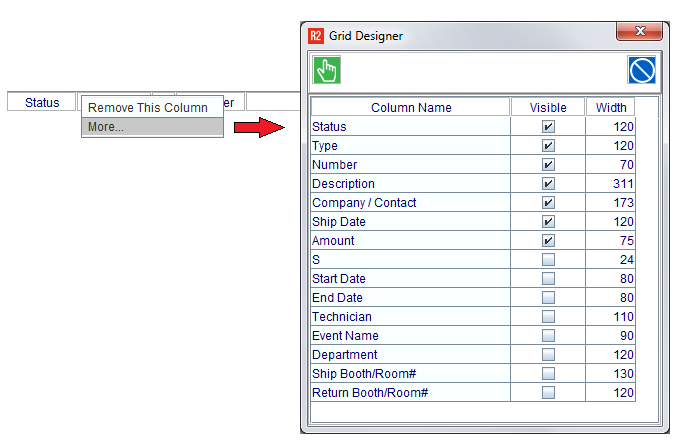
Column order and width is controlled by right-clicking on any column header in a grid: 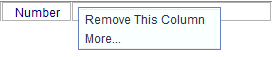
Remove This Column This feature makes the selected column hidden. Hidden columns can be recalled again by selecting More…
More… A list of all columns, visible and hidden, will appear: 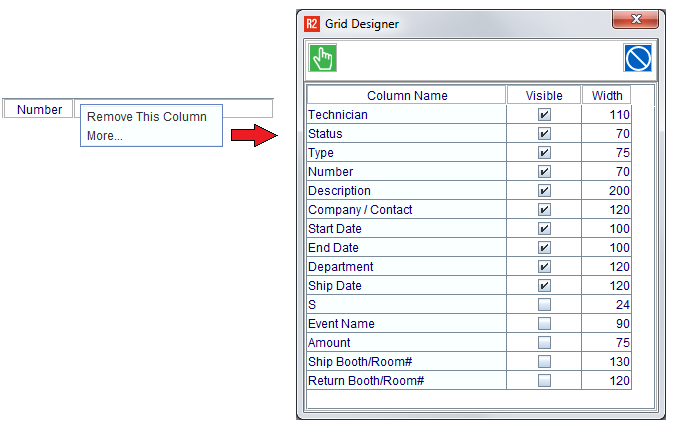
Column order can be controlled by dragging-and-dropping the rows to the desired placement. Columns can be made visible or hidden by using the Visible checkbox. The width can also be pre-set.
Click on the Select icon to save the menu customizations. Click on the Exit icon to leave the screen without saving changes.
|
Sample Screen Design
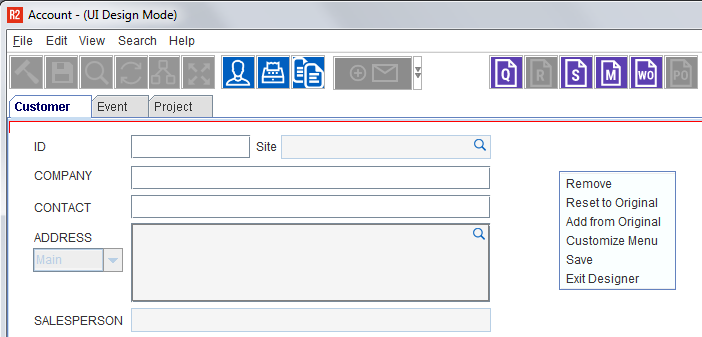
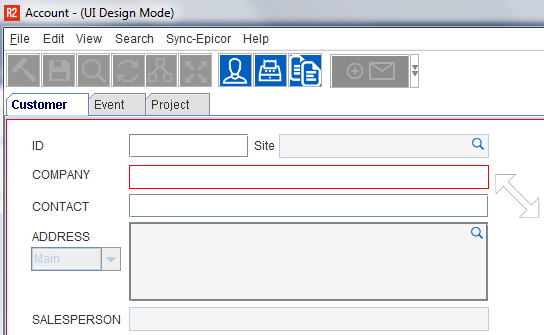
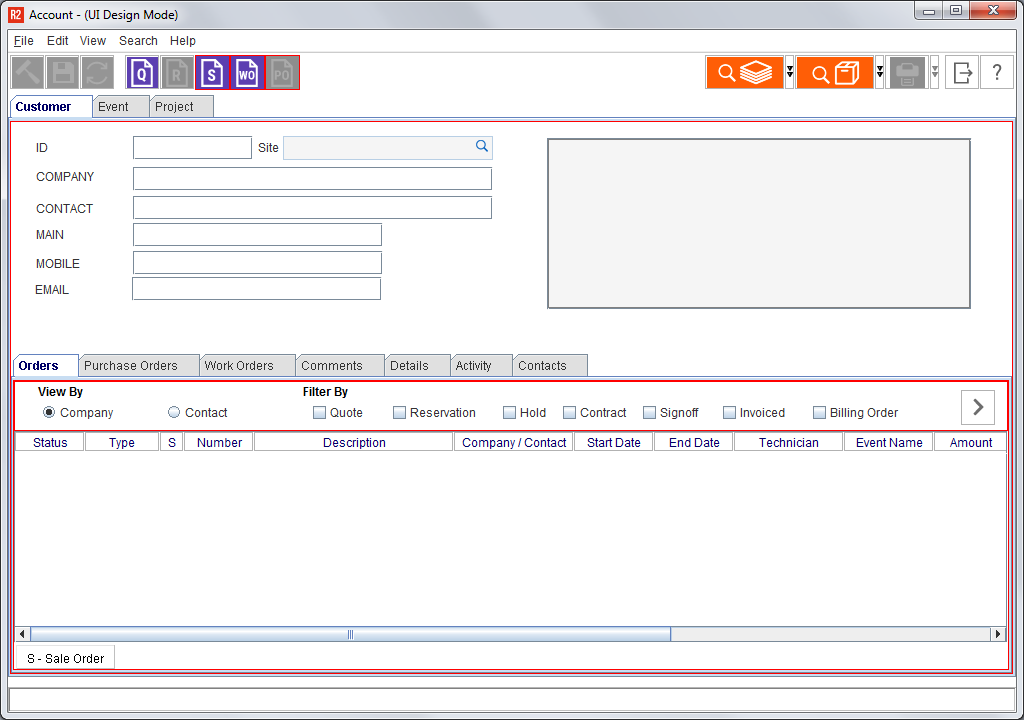
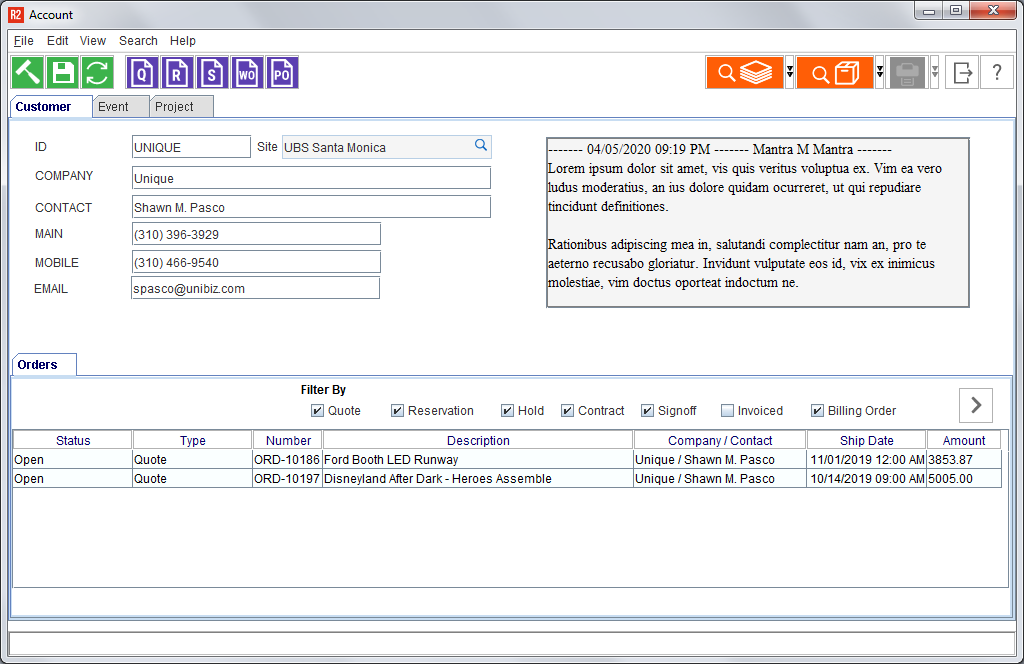
The following example screen design will be performed using the Account screen.
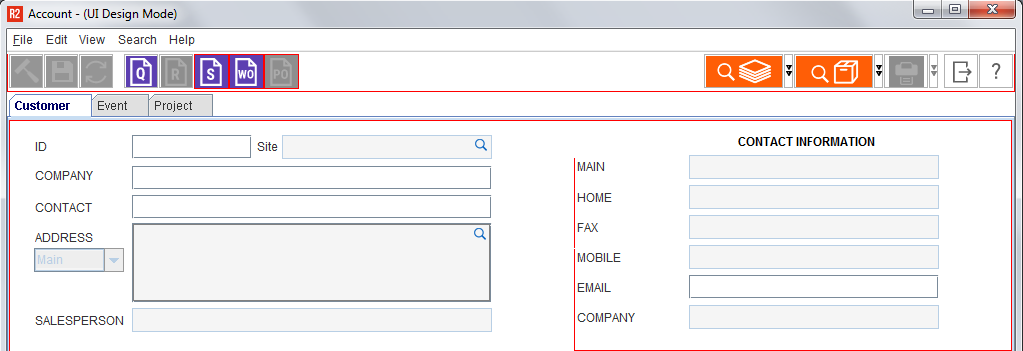
The original Account screen appears like this in R2:
The objective in this workflow is to simplify the Account screen by removing fields, tabs, and icons that are not used in my workflow. By removing unnecessary features, the workflow is streamlined by providing only the functions required.
Simplifying the Icons
Begin by removing all of the icons that are not used. To do this:
-
Right-click on each icon
-
When the Control Menu appears, click on Remove

Drag-and-drop the existing icons into an agreeable line-up:
-
Hold down the ALT key and,
-
click on the icon
-
drag it into place
-

Simplifying the Fields
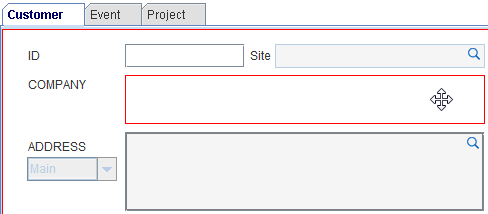
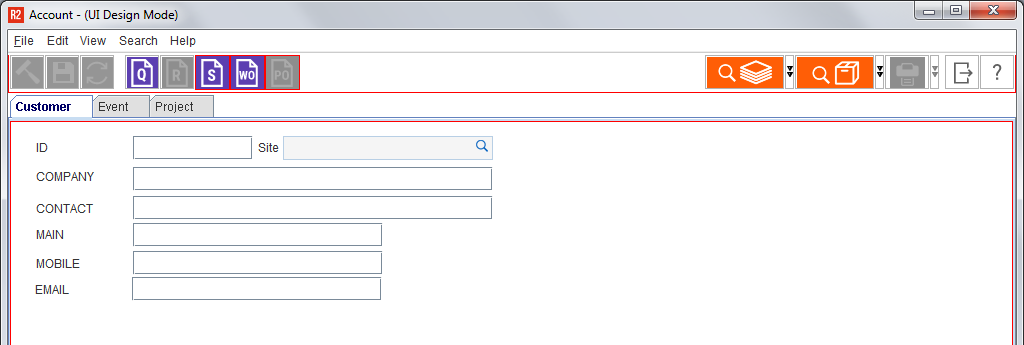
Remove, resize and move header fields as required.
Header before:
To remove fields, right-click on the field and click on Remove:
Drag-and-drop the existing icons into an agreeable line-up:
-
Hold down the ALT key and,
-
click on the icon
-
drag it into place
-
Add Features from Other Tabs
Bring all components required for business onto a common screen. To do this:
-
Right-click on each icon
-
When the Control Menu appears, click on Add from Original
-
The Master UI will appear in the foreground:
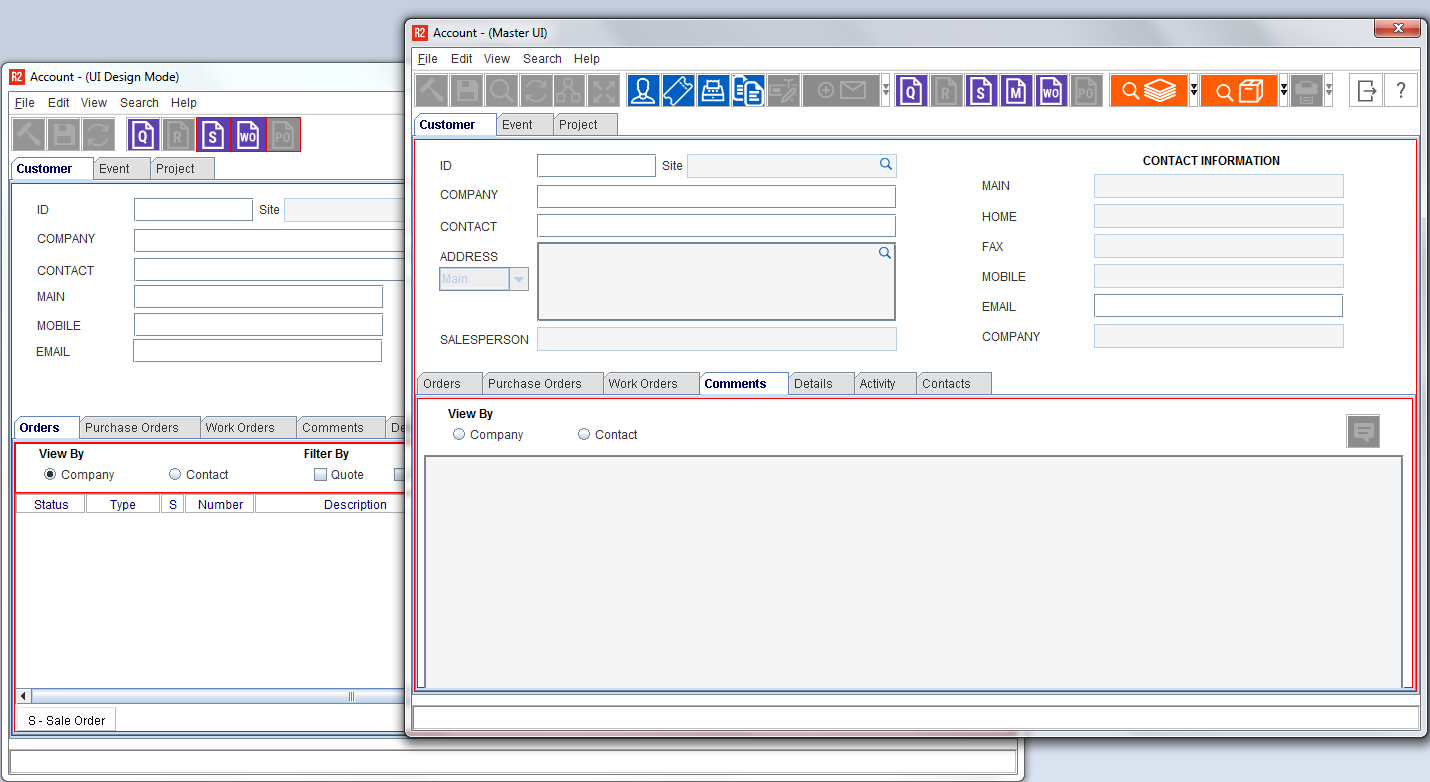
Find the feature you wish to add to the current design, then right-click on it and select Pick:
Click onto the current design, then right-click where you want to drop it and click Drop:
Resize the comments box by dragging the edge of the box into position.
Move the box around by holding down the ALT key, clicking on the box and dragging it into place.
Remove Additional Tabs
Right-click on tabs that can be removed and select Remove. The entire tab will disappear from view:

Configure the Column Order and Width
Right-click on any column header in a grid to configure the columns. When the option menu appears, click on More…
Drag-and-drop column rows into the desired order, and change their widths. Make some columns visible or hidden by using the Visible checkbox.
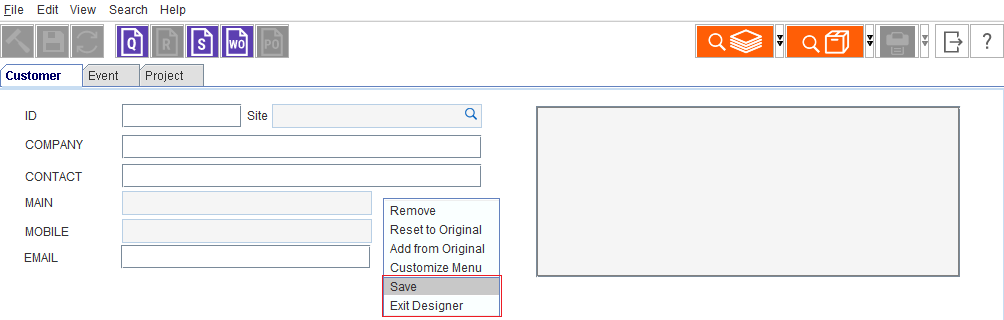
Save and Exit
Right-click and select Save. After selecting your save hierarchy preference, right-click again and select Exit Designer.
The re-designed screen is ready for use:
UI Command Center
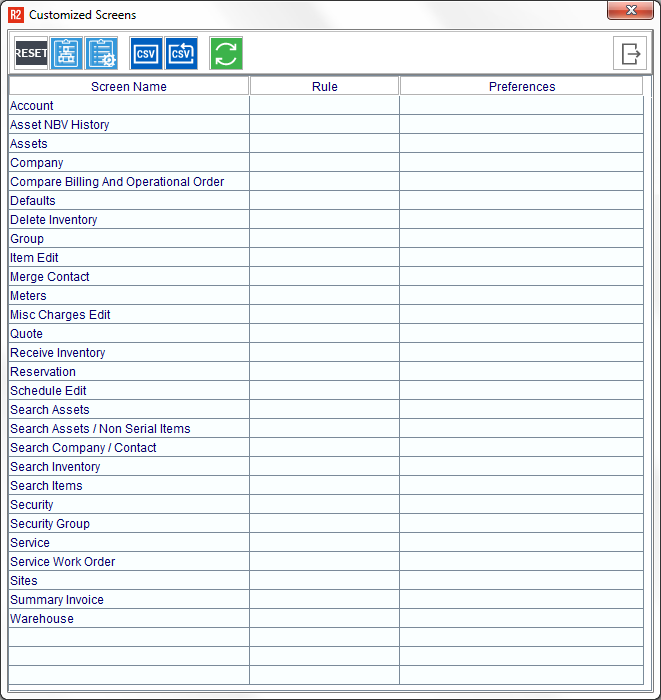
Access to all configured screens is available from a central location. From here, you can:
-
Configure/view already customized screens for all Rules
-
Define the hierarchy of “Rule Elements”. Rule elements are a list of R2’s business elements mentioned below:
-
Employee
-
Security Group
-
Site
-
Sub-Region
-
Region
-
-
Group the “Rules” so that specific sets of screens can be easily associated to multiple business elements. When any user logs in, screens will be loaded as per the screens configured for the specific user login and hierarchy defined.
-
Export customized screens as .CSV file.
-
Import exported customized screens to any system and associate with a Rule of current system.
-
Revert any customized screen to R2’s factory settings.
-
Double click any customized screen from the list to open UI Design Mode.
-
Leaving the Rule blank while saving Customized screen means the change is global.
From the R2 Launch Pad, press CTRL + F12 to open the UI Command Center:
See the details of each feature below:
|
Action |
Function |
|
Reset |
Resets (deletes) all screen changes for the selected screen. This action will completely remove the design on the screen in question, and cannot be recovered unless it was saved to a CSV previously.
|
|
Rule Hierarchy |
R2 uses five system entities to define the hierarchy: Employee Security Group Sub-Region Region Site 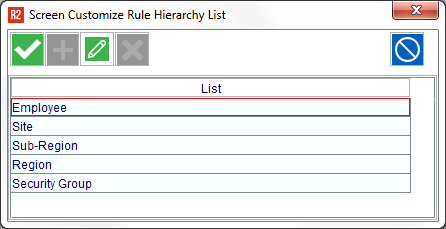
The Hierarchy names can be changed by highlighting the current name and clicking on the Edit icon.
New Hierarchy names cannot be added.
|
|
Rule Setup |
Rules can be added or edited from here. Plus Icon: To Add a Rule Pencil Icon: To Edit a Rule “X” Icon: To Delete a Rule Check Icon: To save deleted rules
When adding a Rule, it is required to provide an ID and Description. Click on the double-down arrows to select the Rule Hierarchy.
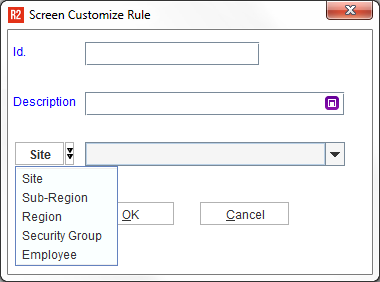
Upon selecting a Hierarchy, R2 will show the search screen for that entity.
|
|
Export to CSV File |
Highlight the screen design in question and click on Export to CSV File. Save the file somewhere it can later be accessed. This is the first step toward sharing pre-designed screens with other R2 systems (for example, moving a test system screen design to production.)
|
|
Import From CSV File |
Select the CSV file exported from the previous step during this process. Also select the Rule to which the imported screen should apply. R2 will replace the UI Design for screens in the current system based on the file that was selected.

|