Table of Contents
The main advantage of Custom Reports is the Import and Export feature of the Report Writer. This feature enables you to export a report that is generated and kept for future reference and can be shared to every one across the business. A report that is exported can be imported by any one from a different site, and by doing this, the report definition and the design will remain the same.
Importing and Exporting of Custom Reports helps in having a standard and uniform way of reporting across all the Sites.
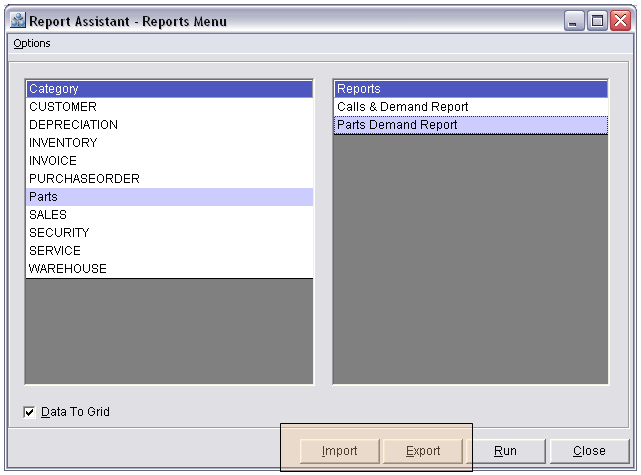
In the Reports Assistant - Reports Menu window of the Reports module, you can import and export the custom Report from one file to another.
To Import generated Reports
-
In the R2 Launch pad, click on the Reports module.
-
The Report Screen Generator window will be displayed.
-
Select File → Custom Reports to open the Reports Assistant - Reports Menu window.
-
In the Category section select a category.(System will display the reports generated for the selected Category in the Reports section).
-
Click on the Import Button to open the Importing dialog.
-
Click on the Ellipses button and search the custom report which has to be imported.
-
Click on OK to Import the selected Custom report and it will be added in the Reports section for the selected Category.
-
Click on 'Cancel' to cancel the importing of the Custom Report.
To Export generated Reports
-
In the R2 Launch pad, click on the Reports module.
-
The Report Screen Generator window will be displayed.
-
Select File Custom Reports to open the Reports Assistant - Reports Menu window.
-
In the Category section select a category.(System will display the reports generated for the selected Category in the Reports section).
-
Select a report in the Report Section and click on the Export button.
-
System will display the Exporting dialog.
-
Click on the Ellipses button and search the file where this selected report has to be exported.
-
Click on OK to export the selected Custom report else click on 'Cancel' to cancel the exporting of the Custom Report.
Button Information of the Report Assistant- Reports Menu
Import
On clicking on the import button, system will display the Importing dialog, by which you can import a custom report from a different file.
Export
On clicking on the Export button, system will display the Exporting dialog, by which you can export custom report to a different file.
Run
On selecting a report in the Report section and clicking on the 'Run' button will display the select report.
Close
On clicking on the Close button will close the Report Assistant- Reports Menu window.
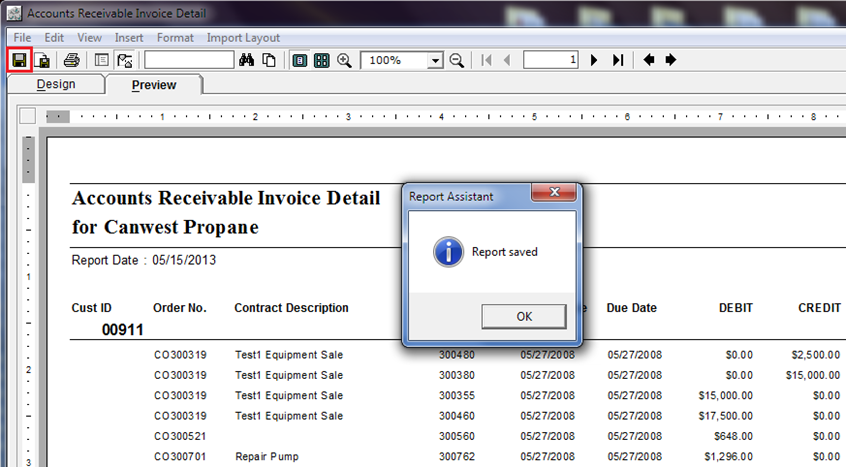
Saving Your New Reports
Save
After creating a report, you must first run it without the “Data to Grid” box checked. When the report appears, click on the save icon to save your work. After modifying the report further, you will also click on the save icon to record your progress.