Return/Receive by Schedule provides you the ability of returning and receiving items by task for Rental, Sales, and Transfer Orders. It also allows you to fill the returned/received item on to another order with a single scan.
Accessing the Return/Receive Screen
-
Click on ‘Return/Receive’ from the Dashboard.

Figure 1.0: Dashboard -
The Return/Receive screen displays a list of orders scheduled for return/receive on the current day.
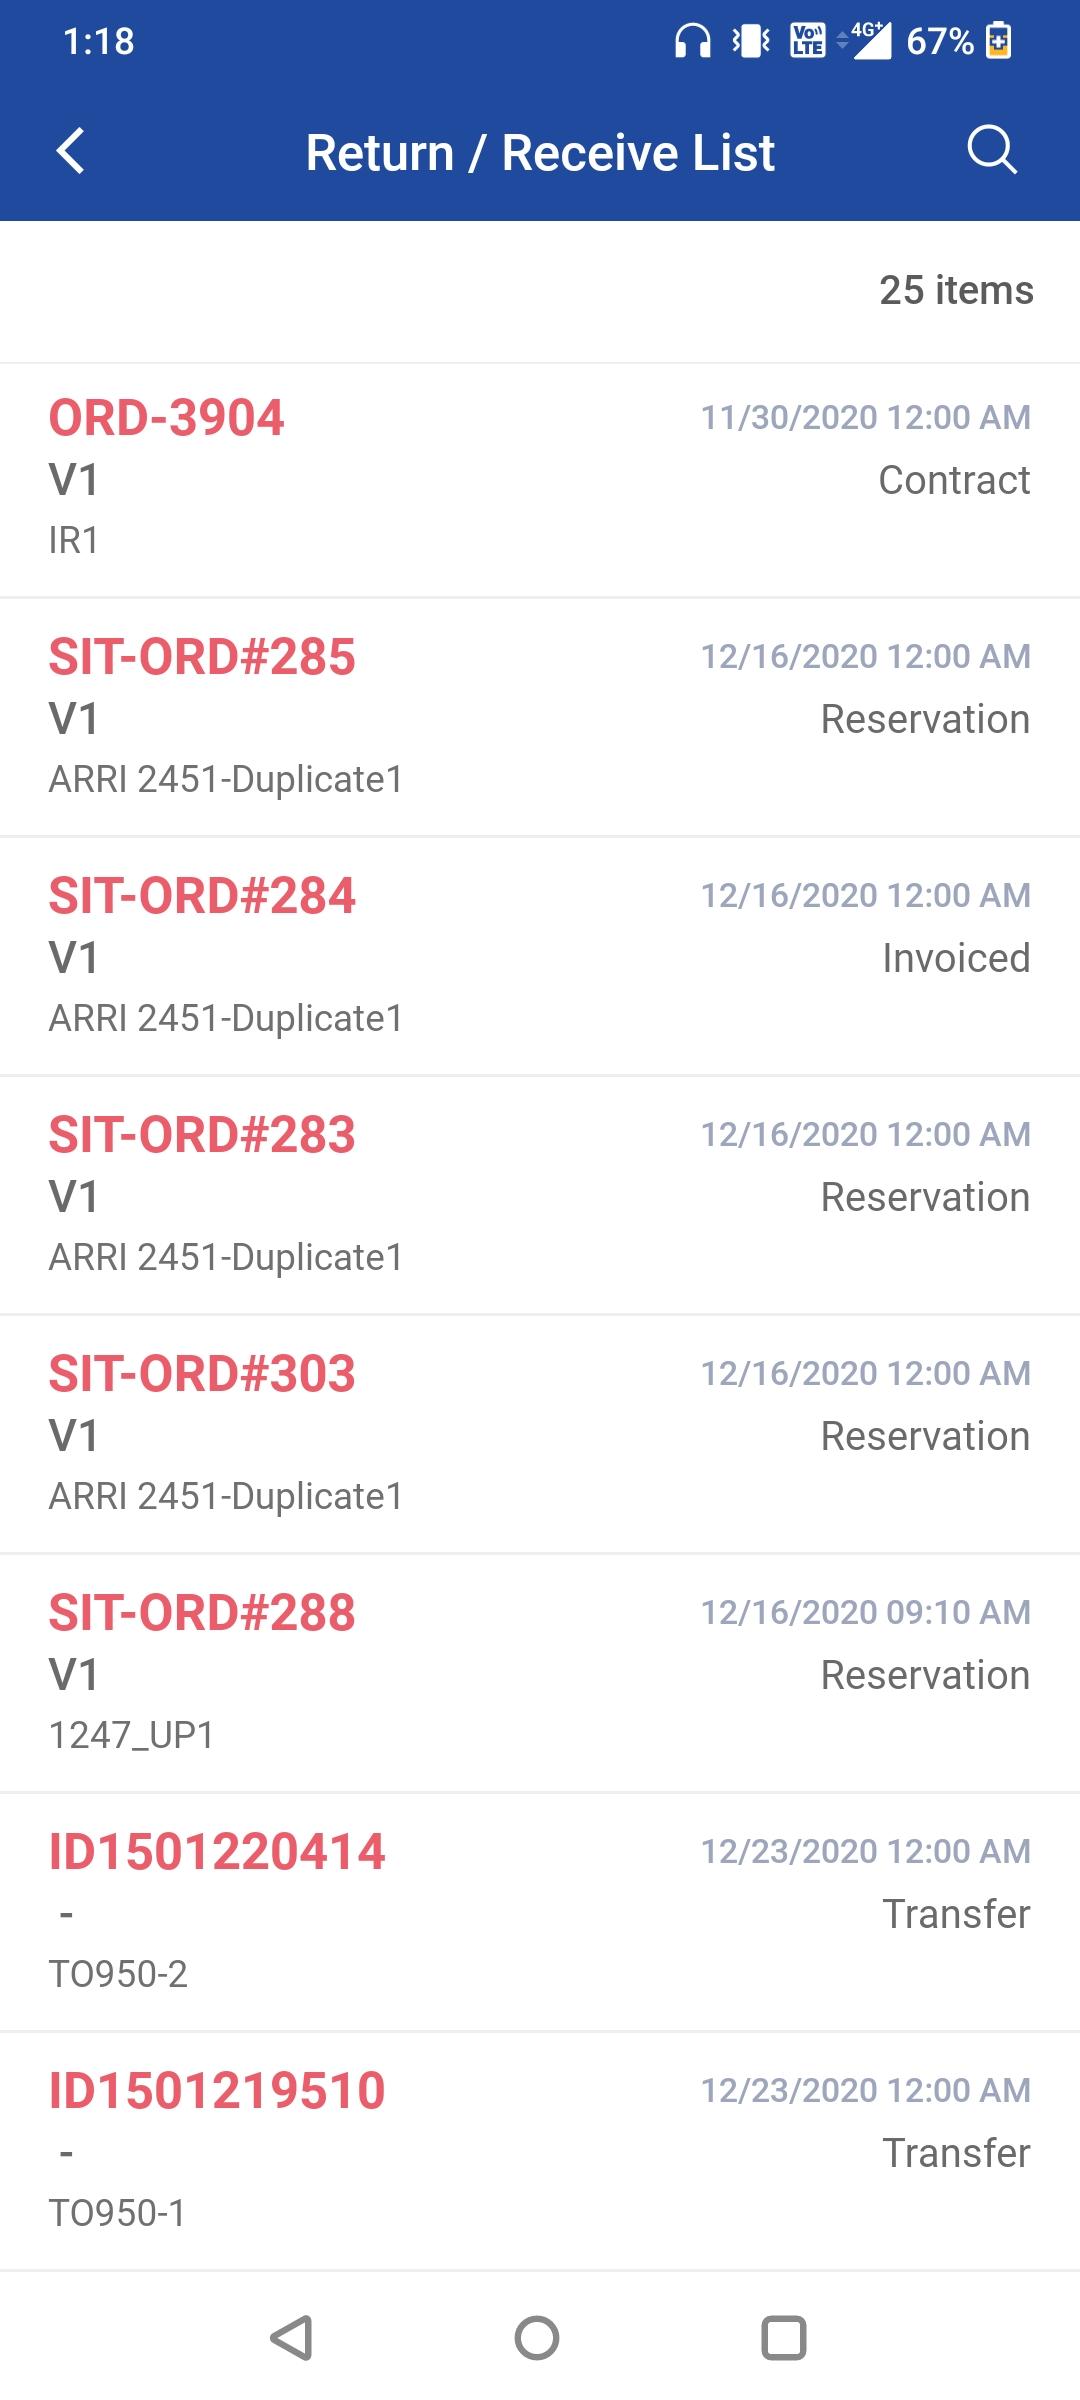
Figure 1.1: Return and Receive task list -
To filter the list, click on the Search icon. Know more…
Return/Receive Task
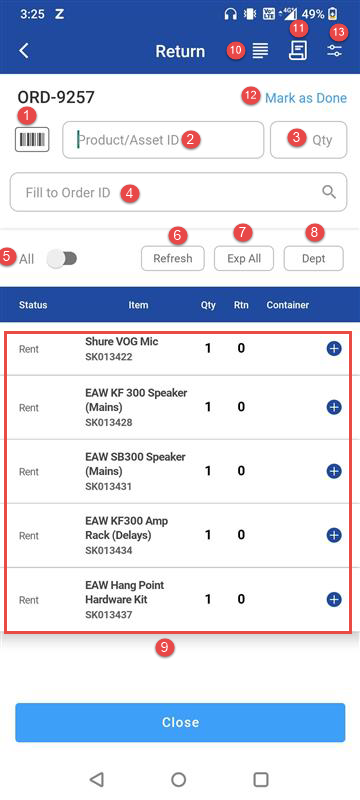
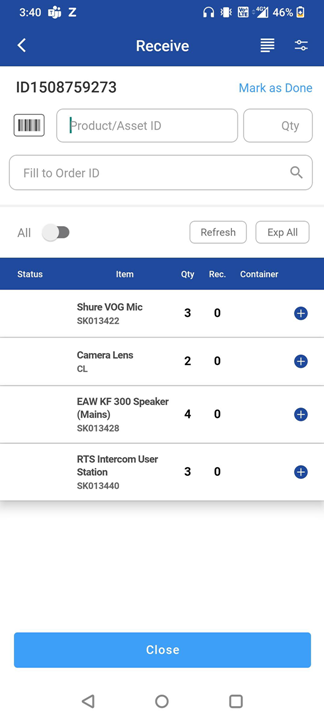
Choose any order (Rental or Transfer) from the list. The Return/Receive window is displayed with item details.
On the Return/Receive Screen
-
Scan Asset ID: Scan the asset/item using barcode or handheld RFID.
-
Product ID / Asset ID: Enter manually if needed.
-
Qty: Provide the number of quantities to return/receive.
-
Fill to Order: Search for an Order and fill in the returned/received item to the searched Order after returning/receiving item successfully.
-
All – Toggle to view all items in the order irrespective of its status.
-
Refresh – After returning items, click Refresh to update the quantity in the Qty column. To view the returned/received item count in the Rtn column, enable the 'All' toggle button.
-
Expand All– Expands all the item details.
-
Department – Filters items by department. Not applicable for Transfers Task.
-
Item list: Display the items on the Order with the following details.
-
Status: Displays the item status and the action.
-
Item: Displays all the items added to the Order.
-
Qty: Shows the quantity of the items which are in ‘Ship’ status.
-
Return/Received: Displays the quantity of items already returned/received.
-
-
Order Details – Displays order-level details and comments.
-
Return Receipt – Generate, save, and print a receipt. Applicable only for Rental orders.
-
Mark as Done- Marks the task as Done.
-
Options Menu – These are the same options you see in Prep and Fill schedule, and it works the same in Return/Receive schedule. Below table refer the option available for return and transfer tasks.
-
Close: To close the screen.
Options for Rental and Transfer Orders
|
Option |
Rental/Sales Orders |
Transfer Orders |
Notes |
|
Continuous Scan Mode |
✔ Applies |
✔ Applies |
If you enable this, it keeps the camera scanner open for continuous barcode scanning |
|
Hide Keyboard on Asset ID Focus |
✔ Applies |
✔ Applies |
If you enable this, it hides the on-screen keyboard when the Product/Asset ID field is selected. |
|
Auto Fill |
✔ Applies |
✔ Applies |
Automatically fills items to the order; prompts if disabled. |
|
On Service Due |
✔ Applies |
✘ Not Applicable |
When you try to add an item that’s due for service, a message display. You can’t add the item and must choose Yes or No. |
|
Fill Pre-Return Service Due Assets |
✔ Applies |
✘ Not Applicable |
If you try to return an asset already marked for service, a prompt appears. Choose Yes or No |
|
Show Future Orders |
✔ Applies |
✔ Applies |
If you enable this, the system shows future orders in which the product associated to the returning asset is reserved. By default, the value is set to 14 days. Days to check for: Enter the number of future days to look ahead when showing upcoming orders. Check based on: Allows you to specify what criteria to use when checking for future orders, it may be based on Order Ship date/Prep date. |