A product may have multiple physical views, sub-parts, etc. In such case, you may want to include all the views of the product, each as a separate image. Yes, R2Images supports this as well.
All changes (adding a new image, deleting an existing one, or setting an image as primary) done to the images through the R2Images mobile app, immediately reflects in R2 as well.
To enable capturing additional images for a product, the 'MediaFilesRootFolder' application setting for the R2Wcf Service should be configured in Internet Information Services (IIS), which is supported through 'Oracle File Storage Services'.
Contact us for the enabling the same.
Key Features

-
Add Image: To add the images. You have two ways to add images. Either select it from the device library or directly capture the image using the device camera.
-
Product Description: Displays the description of the product.
-
Product ID: Displays the ID of the product.
-
Image File Name: Displays the image file name along with it's format.
-
Primary: This option is to select an image as primary so that you can view the image as a first one when you view it.
-
The primary image is always stored in the database.
-
In case of a single image, by default, system selects the uploaded image as primary, and the 'Set as Primary' link is disabled.
-
When you add multiple images to a product, having the 'Media Files Root Folder' configured, you can select any one of those images as primary. Upon primary selection, that image will be pushed to database and the one residing in database will be copied to the media files root folder. Basically, it swaps the two images.
-
-
Delete: To delete the images if not required.. If you delete a primary image, then by default, the first added additional image is considered as primary image.
-
Image Count: This displays the total count of images uploaded for a product and the sequence number of the current image being displayed in the view port.
-
Options: This takes you to the application settings window. Click here to know more.
How to upload multiple images for a product?
To enable adding multiple images for a product, 'MediaFilesRootFolder' application setting for the R2Wcf service should be configured in Internet Information Services (IIS). Contact us for the enabling the same.
There are two methods to search for the product for which you want to upload the images.
Upload images by manual search
Ensure that a product is added in R2 so that you can upload the images from the R2Images app for the Item.
-
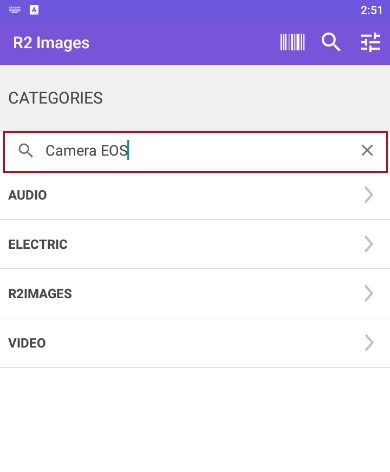
Go to R2Images app, and tap Search icon.

-
Search for a product by entering Product ID/Description in the search bar.
-
Tap the product ID for which you want to add the images.

-
Choose any of the below option to upload an image.
-
Take Photo: To capture the image from device camera to upload.
-
Choose from Library: To choose the images from the device library to upload.

-
After choosing the option and capturing the image, the preview of the image displays as shown below.

-
Tap Ok to upload the image. Otherwise, tap Cancel.
-
Again, tap Add to upload additional images.
-
The first added image will be selected as 'Primary' and pushed to database.
-
You can still select the other images as primary after adding the images if required.

-
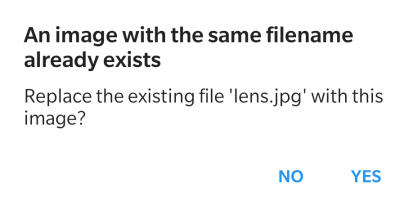
If you add an image which has the same file name that already exists in the folder, then system displays the below dialog window.
-
If you want to replace an image, then click Yes. Otherwise, click No.
-
All the added images displays in the view port and you can traverse through it by swiping on the screen.

Upload images using barcode
-
Go to R2Images app, and tap Barcode icon.

-
The camera of the mobile device opens, and scan the barcode of the product.
-
Once the system recognizes the product, it displays the product information.

-
Tap on the product and select the image source to upload the images.

-
Upload the relevant images for a product and click Ok.
-
After uploading the images, you will the images in the view port.
When 'Media Files Root Folder' is not enabled
When 'Media Files Root Folder' is not enabled, you can still add a single image to each product. Also, you can delete the image if not required.
Upload Images when Root Folder not configured
-
In R2Images app, search for a product by entering Product ID/Description in the search bar.
-
Tap Add to add an image to the product.
-
Image is added as shown below.
-
'Primary' option is disabled as you can only add a single image.

-
Again, if you tap Add button. then system displays the below dialog window.
-
If you want to replace an image, then click Yes. Otherwise, click No.
