Content was last updated in 06.22.06-00
Revision History
Version No.
|
Reference No.
|
Changes
|
|
06.22.05-00 |
R2-18825 |
Restricting item's availability whenever it is added to a Service Work Order, by enabling a 'due date' for all items.. |
|
06.00.04-00 |
R2-8647 |
Supported 'User View' feature |
|
06.22.01-00 |
NA |
Introduction to Generate Need service feature |
Creating a Service Work Order is the first step done whenever a customer request for a repair or maintenance.
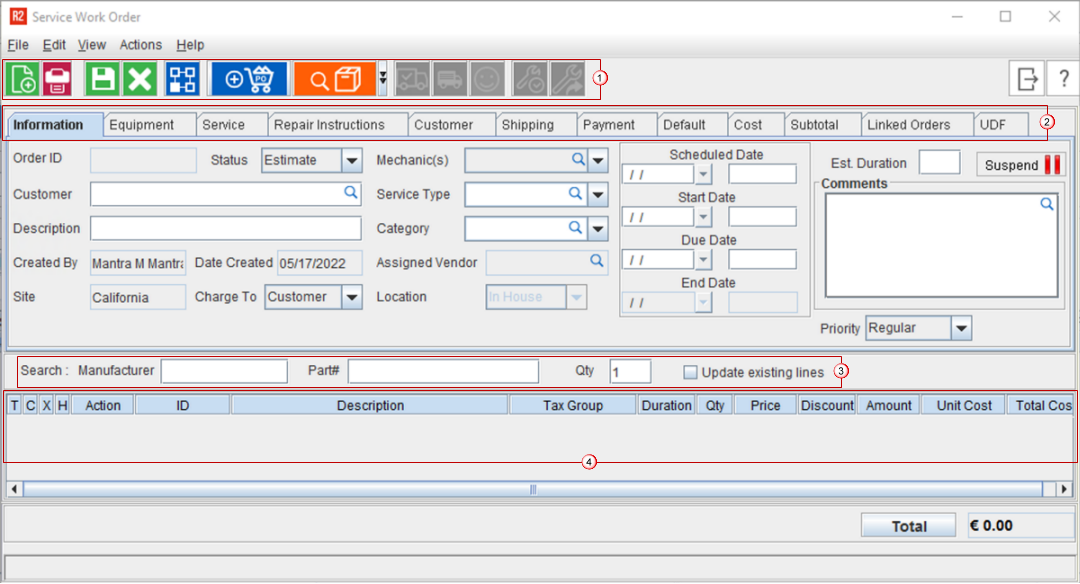
In R2, the Service Work Order window is the gateway to creating a SWO and then proceeding to track it to closure, including invoicing it.
A sample workflow explains how the life-cycle's dates affect the Availability/ Non-availability
Toolbar
Table 1.0: Icons on Service Work Order window and their description
Icon
|
Description
|
|
|
New icon to add a blank line to the Grid. |
|
|
Print icon to Print the Work Order. |
|
|
Save icon to save the changes made to the Work order. |
|
|
Delete icon to delete the selected lines (either a single line or multiple lines). |
|
|
Check Asset's Availability.
|
|
|
Use this button to do Purchase Assign |
|
|
Click this button to Search Inventory. |
|
|
Click this button to Ship selected Inventory. |
|
|
Click this button to Ship all of the added Inventory. |
|
|
Click this button to Invoice the SWO. This button gets enabled only when the Order is in Done status. |
|
|
Click this button to tag the SWO as completed. This button gets enabled only when the Order is in Open status. |
|
|
Click this button to re-open a Completed or Closed SWO. This button gets enabled only when the Order is in Done/ Cancelled status. |
Tabs
To create and process a SWO, you need to add details across 12 tabs in the following window.
To know all about the fields on each of the tab, you can click on the tabs in the figure below.

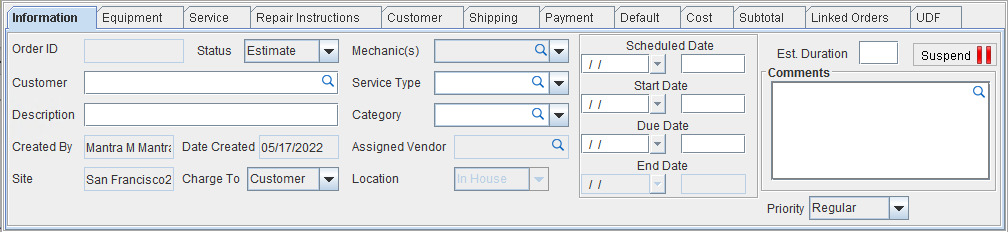
Information Tab
Field Name
|
Description
|
|
Order ID |
Unique identification number of the Work Order. |
|
Status |
This is Status of the Order. There can be the 5 statuses - Estimate,Scheduled, Open, Done. Invoiced, and Cancelled. The tentative/probable workflow, how a SWO may proceed through the statuses is explained here. The status of the Order decides how the Scheduled/ Start/ Due/ End dates behave. |
|
Customer |
Name of the customer for which the WO has been raised. |
|
Description |
Description of the Work Order as entered by the user. |
|
Created By |
Name of the person who has created the WO. This is the user who has logged in to R2. |
|
Date Created |
The date on which the WO was created. |
|
Site |
This is a non-editable field, it will display the Site in which the Work Order is created. |
|
Charge To |
Select to whom the cost of repair be charged.
|
|
Mechenic(s) |
Click the search button to pick the desired service technician type. System does not allow you to change the Status of SWO to Open, without assigning the Mechanic(s). |
|
Service Type |
Click the search button to pick one of the service types.These types are usually defined in the system's configuration.
|
|
Category |
|
|
Assigned Vendor |
Name of the vendor from which the spare parts required for the service will be sourced. |
|
Location |
This is the physical location where the repair/maintenance is expected to happen. |
|
Scheduled Date |
This is the expected/tentative date on which the repair/maintenance is expected to start. |
|
Start Date |
This is the actual date on which the repair/maintenance started. |
|
Due Date |
This is the expected/tentative date on which the repair/maintenance is expected to be completed.
|
|
End Date |
This date has to be entered only when the repair/maintenance has been completed and it is time to close the service ticket. |
|
Est. Duration |
Expected duration in Days/Hours which is needed to do the required servicing or maintenance on the given equipment. |
|
Suspend/ Resume |
You can click this button to Suspend the currently open SWO. And in suspended mode, you can click on the Resume button to revert. To know how the Suspend/Resume button work, see here. |
|
Priority |
This field allows you to set Priority for the Work Order that is being created, the available options are Regular and High. This ais alos a searchable column in Service window. |
|
Comments |
This field allows you to Add/ View / Edit / Delete Comments of the Work Order. |
Table 2.1: List and description for Fields on Information tab
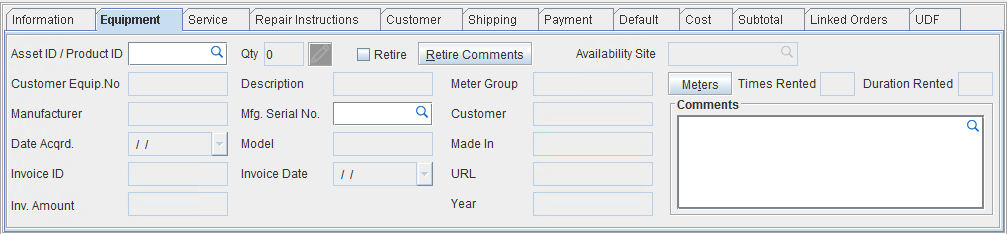
Equipment Tab
Field Name
|
Description
|
|
Asset ID/Product ID |
Unique identification number of the Asset or Product in repair |
|
Qty |
Quantity of the product being added. |
|
Description |
Text description for the Asset or Product in repair |
|
Customer Equip. No. |
Serial Number of any external equipment is brought in for service. Usually happens for 'Sold Items'. |
|
Manufacturer |
Name of the company that manufacturer that produced the product. |
|
Mfg. Serial No. |
Unique serial number for the product as quoted by the product's manufacturer. |
|
Model |
Model number for the product as quoted by the product's manufacturer. |
|
Date Acquired |
Date on which the product was acquired by customer. |
|
Invoice ID |
ID for the invoice of the SWO |
|
Invoice Date |
Date on which the SWO was invoiced |
|
Invoice Amount |
The final invoice amount of the SWO |
|
Meter Group |
Meter group (if assigned) to the equipment gets populated here, when the equipment is selected. |
|
Customer |
Name of the customer for which the service is being done. |
|
Made In |
Name of the location where the Item was produced. This field is auto-populated from the Item information |
|
URL |
An external URL which may have additional information about the item. This field is auto-populated from the Item information |
|
Year |
Year of production. This field is auto-populated from the Item information |
|
Retire |
This is a Yes/No checkbox. If you want to retire the equipment, then you must select the checkbox. |
|
Retire Comments |
If the checkbox is selected, then you are expected to add reasonable comments about why the equipment was retired. |
|
Availability Site(s) |
Name of the site at which the item in service is available. |
|
Meters |
Click this button to select the meter metrics defined for the equipment.
|
|
Times Rented |
The count of how many times the equipment has been rented.
|
|
Duration Rented |
The total duration for which the equipment has been rented.
|
Table 2.2: List and description for Fields on Equipment tab
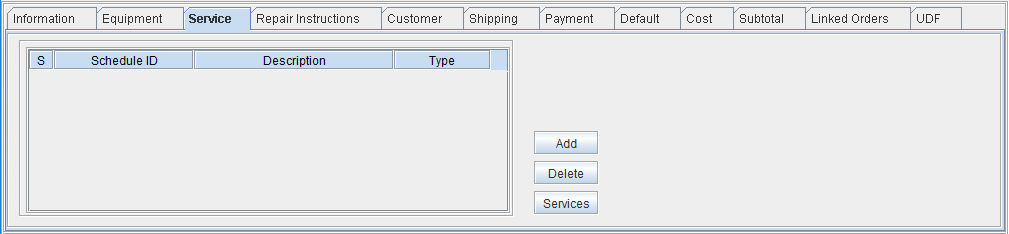
Service Tab
Field Name
|
Description
|
|
S |
Sequence number. |
|
Schedule ID |
Service Schedule ID or Serial Number. |
|
Description |
Description of the type of nomenclature of the Service Schedule |
|
Type |
Type of Service Schedule created or added. |
Table 2.3a: List and description for Fields on Service tab
Button Name
|
Description
|
|
Add |
Add a service schedule to the list. |
|
Delete |
Delete a previously added schedule. |
|
Services |
|
Table 2.3b: Buttons and description for Fields on Service tab
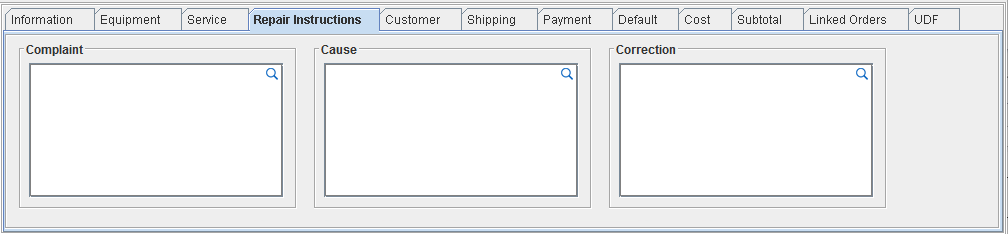
Repair Instructions Tab
Field Name
|
Description
|
|
Complaint |
Details of complaints or issues with equipment as narrated by the customer |
|
Cause |
Root cause of the issues/complaints as identified by the repair technician. |
|
Correction |
Details of the corrective fixes done to the equipment. |
Table 2.4: List and description for Fields on Repair Instructions tab
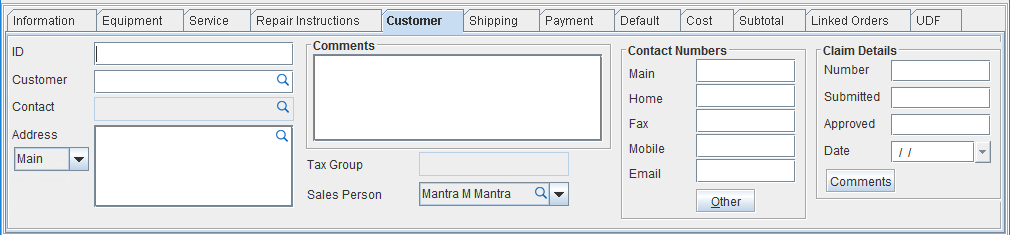
Customer Tab
Field Name
|
Description
|
|
ID |
This is a non editable field, which displays the unique identification number of the Company / Customer for whom the Work Order is created. |
|
Company |
This field displays the Name of the Company / Customer for whom the Work Order is created. The importable button in this field allows you to search and tag Customers /Company. |
|
Contact |
This field displays the Contact of the Company which is tagged to the Work Order. |
|
Address |
This field displays the Address of the Company which is tagged to the Work Order. This field will display either the Main Address / Billing Address / Shipping Address based on the selection of the options available in the drop down beside the address field. The options available are Main / Billing / Shipping |
|
Comments |
This is a free-text field where you can add comments. |
|
Tax Group |
The 'Tax bracket' to which the Invoice is attached. |
|
Sales Person |
Select the sales person who |
|
Contact Numbers |
|
|
Main |
This field displays the Main Phone number of the Contact as in the Company Edit window. |
|
Home |
This field displays the Home Phone number of the Contact as in the Company Edit window. |
|
Fax |
This field displays the Fax number of the Contact as in the Company Edit window. |
|
Mobile |
This field displays the Mobile number of the Contact as in the Company Edit window. |
|
|
This field displays the Email Address of the Contact as in the Company Edit window. |
|
Others |
Any other contact information. |
|
Claims Details |
|
|
Number |
Insurance or Damage claim number or Serial ID of the same |
|
Submitted |
D |
|
Approved |
|
|
Details |
Details of the Insurance or Damage claim |
|
Comments |
Additional comments or instructions for the Insurance or Damage claim. |
Table 2.5: List and description for Fields on Customer tab
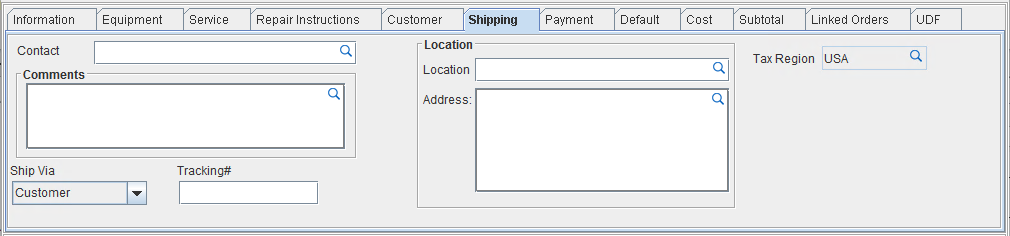
Shipping Tab
Field Name
|
Description
|
|
Contact |
This field displays the Contact of the shipping party to which is tagged to the Work Order. |
|
Comments |
This is a free-text field where you can add comments for the shipping team |
|
Ship Via |
Select the Shipping mode used. |
|
Tracking# |
Provide the tracking number or consignment number of the shipment |
|
Tax Region |
The tax region to which the shipping invoice will be billed. |
|
Location Name |
Name or ID of the location to which the shipment has been sent. |
|
Location Address |
Complete address of the location to which the shipment has been sent. |
Table 2.6: List and description for Fields on Shipping tab
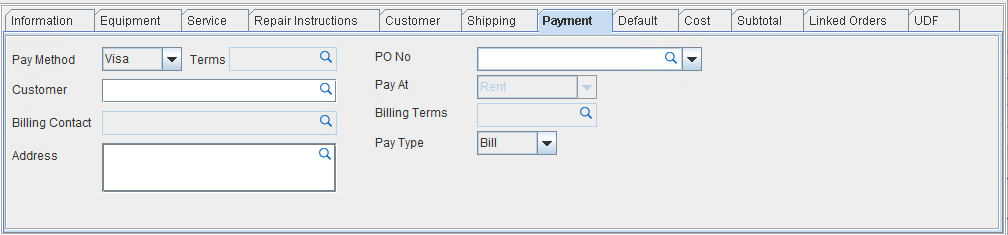
Payment Tab
Field Name
|
Description
|
|
Pay Method |
This field displays the Method used to make Payment. Clicking on the drop down button allows you to select the Method of Payment, like : Cash, Cheque, Card, Visa, Master. |
|
Terms |
This field displays the Payment Terms, if Payment Terms is defined in the Company edit window the same will be defaulted here. Clicking on the importable button allows you to view the Payment Terms dialog, wherein you can search and select the required Payment Terms. |
|
Customer |
Displays the Billing Customer for the Work Order. The Billing Customer can be changed by clicking on the importable button in the Customer field. |
|
Billing Contact |
Displays the Billing Contact of the Work Order. The Billing Contact can be changed by clicking on the importable button in the Contact field. |
|
Address |
Displays the Billing Address of the Billing Customer. |
|
PO# |
Allows you to enter the PO Number for the Work Order |
|
Pay At |
Displays the Pay At selected for the Work Order, clicking the drop down arrow in this field allows you to select the required Pay At option |
|
Billing Terms |
Displays the Billing Terms used for the Work Order, clicking on the importable button allows you to view the Billing Terms dialog, wherein you can search and select the required Billing Terms. |
|
Pay Type |
This field displays the Pay Type selected for the Work Order. The available options are Bill and Cash. |
Table 2.7: List and description for Fields on Payment tab
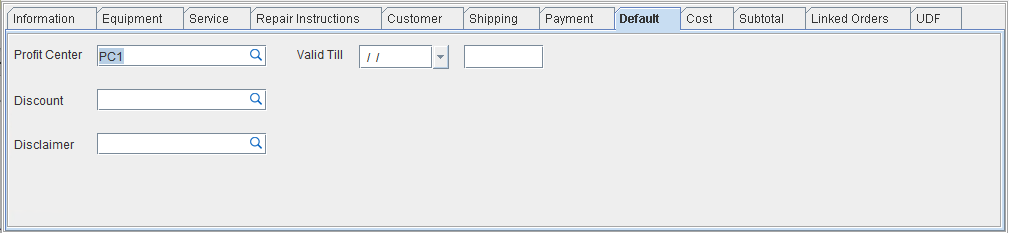
Default Tab
Field Name
|
Description
|
|
Profit Center |
This field displays the Profit Center tagged to the Work Order. Clicking on the importable button in the Profit Center field will display Group dialog, wherein you can search and select the required Profit Center ID. |
|
Disclaimer |
This field allows you to tag a Disclaimer to the Work Order. Clicking on the importable button in this field will display the Disclaimer dialog, wherein you can search and select the required Disclaimer. |
|
Discount |
This field allows you to tag a Discount Group to the Work Order. Clicking on the importable button in this field will display the Discount group dialog, wherein you can search and select the required Discount group. |
|
Valid Till |
This field allows you select the Date and Time across which the Work Order will be considered as Valid |
Table 2.8: List and description for fields on Defaults tab
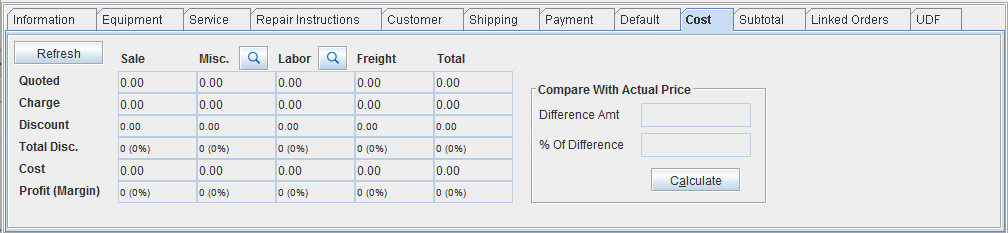
Cost Tab
Rows in the Cost tab
|
|
Field Name
|
Description
|
|
Charge |
Displays the Amount on Sale of item/parts, Misc, Labor, Freight and Total of Work Order before Discount. |
|
Discount |
Displays discount amount on the order (considering line level discount, order discount, and discount groups) |
|
Cost |
Displays the Cost of item/Sale, Misc, Labor, Freight as in the respective edit windows and the sum of all in the Total Cost Row. |
|
Gross Profit |
(Charge - Discount) - Cost = Gross Profit |
|
Margin |
Displays the Profit Margin % |
Table 2.9a: List and description for Row fields on Cost tab
Columns in the Cost tab
|
|
Field Name
|
Description
|
|
Sale |
Amount of Items/Parts with action sell which are added to the Work Order. |
|
Misc. |
Amount of Misc charges on the Work Order for which Is Freight checkbox is not selected in the Misc edit window at the time of adding the Misc. charge to the order. |
|
Labor |
Labor amount on the Work order |
|
Freight |
Amount of the Freight charges which is added to the Work Order, i.e. Misc. Charges for which Freight checkbox is selected in the Misc- Charges edit window at the time of adding it to the order. |
|
Total |
Total for each Row is displayed |
Table 2.9b: List and description for Column fields on Cost tab
Compare with Actual Price
|
|
Field Name
|
Description
|
Difference Amount
|
Displays the Difference Amount as compared to the actual price of the equipment.
|
% Difference
|
Displays the percentage of the amount compared to the actual price of the equipment.
|
Calculate
|
Button to trigger the calculation process.
|
Table 2.9c: List and description for other fields on Cost tab
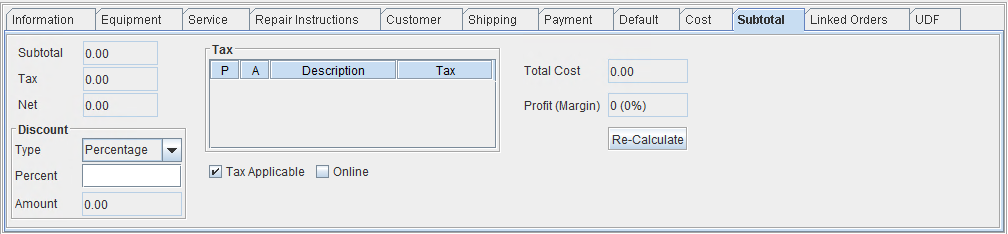
Subtotal Tab
Field Name
|
Description
|
|
Subtotal |
Displays the total of Labor/ Item/ Parts/ Misc.Charges on the Order after discount |
|
Tax |
Total tax levied on the Order, including Labor / Item / Parts/ Misc.Charges / Damage Waiver / Service Charge. |
|
Net |
Total Payable on the Order after Discount and Tax. |
|
Tax Applicable |
When this check box is selected, Tax will be applied on the Order. If this is not selected, then Tax will not be applied to the Order. |
|
Online |
|
|
Total Cost |
Total cost charged to the customer based on Charged cost, Tax and Discount applied. |
|
Profit Margin |
Total profit margin along with percentage. The value is calculated based on the equipment's purchase cost and charged cost. |
|
Discount Type |
This field allows you to select the Type of Discount, that has to be applied on the Order lines, available options are Percent and Fixed. |
|
Discount Percent |
This field will be enabled only if Type is selected as Percent, you can enter the Discount in terms of %. |
|
Discount Amount |
This field will be enabled only if Type is selected as Fixed, you can enter the Discount in terms of amount. |
|
Tax Description |
This field will display the Description of the Tax Schedule of the Tax Region that is tagged to the Work Order |
|
Tax |
This field will display the Tax in terms of percentage for the Tax Schedule of the Tax Region that is tagged to the Work Order |
Table 2.10: List and description for fields on Subtotal tab
Button Name
|
Description
|
|
Recalculate |
Click on this button to re-calculate the values of Total, Sub-Total Tax and Net Total, after editing the values. |
Table 2.1ob: List and description for buttons on Subtotal tab
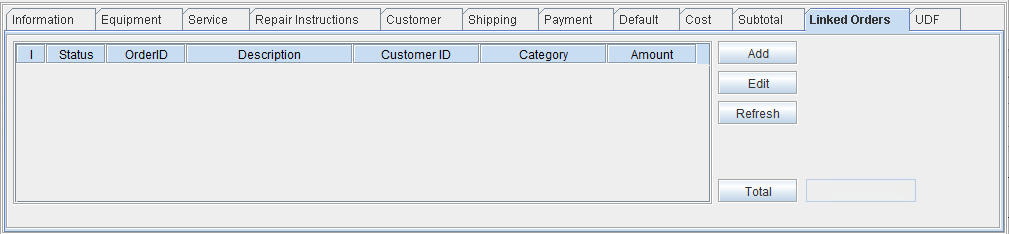
Linked Orders Tab
Field Name
|
Description
|
|
I |
Seqeunce number of the Linked Order. |
|
Status |
Status of the Order |
|
Order ID |
Order ID |
|
Description |
Description of the Order which is added to the list |
|
Customer ID |
ID of the customer to which the order is being billed. |
|
Category |
Category of the Order that is linked to the specific SWO. |
|
Amount |
Amount mentioned on this particular linked Order. |
|
Total |
Total of all the Linked Orders listed in the grid |
Table 2.11a: List and description for fields on Linked Orders tab
Button Name
|
Description
|
|
Add |
Add a new order for linking to the main SWO. |
|
Edit |
Edit the details of any previously added order. |
|
Refresh |
Refresh the list and their fields/values. |
|
Total |
Calculate/Re-calculate the total of the amounts of all linked order added to the list. |
Table 2.11b: List and description for buttons on Linked Orders tab
UDF Tab

The fields in this tab are based on the User Defined fields defined for Orders in Configuration Module > User Fields Setup. Know more?