The Form Setup feature allows you to predefine a format for printing. The form type can be defined individually for a site or for all sites.
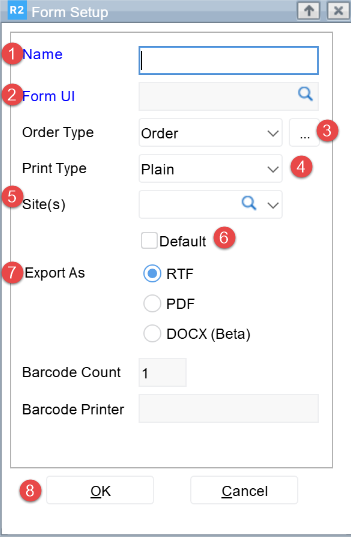
Form Setup Window
-
Name - Enter the Name for the form.
-
Form UI - Click the browse button next to Form UI, and then select the UI file path.
-
Order Type - Select the Order Type.
-
Print Type - Select the Print Type.
-
Site(s) - Click the browse button next to Site(s), and then select the applicable site.
-
Default - Select Default to show the form by default during printing.
-
Export As - Under Export As, select the output format (RTF, PDF, or DOCX (Beta)).
-
OK button
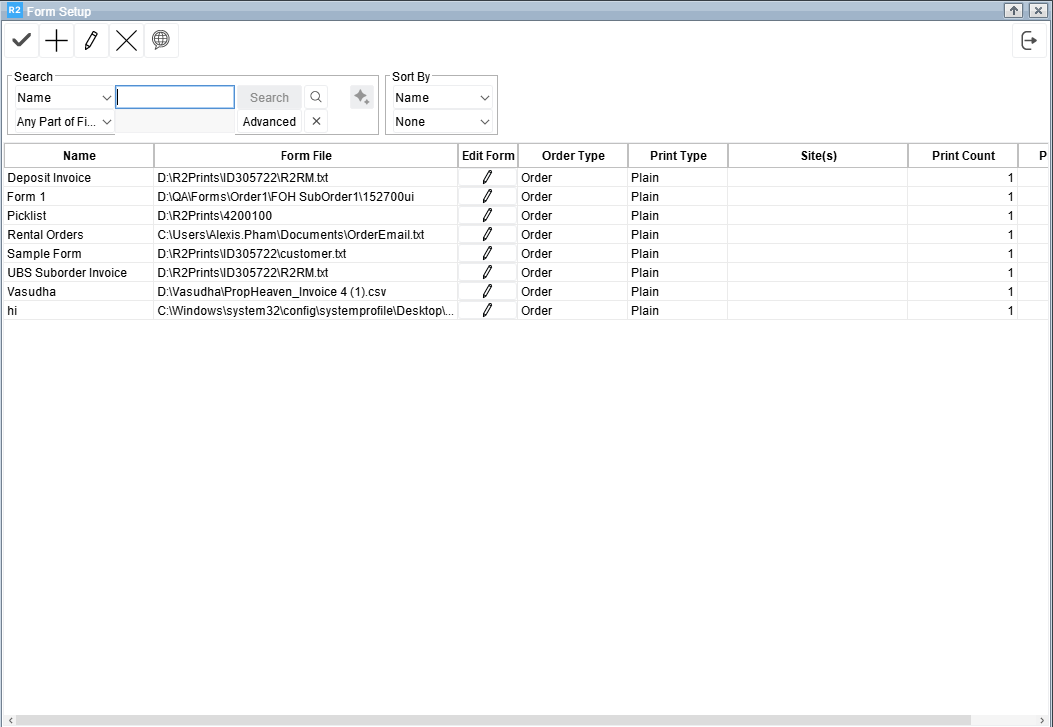
To add a new Form
-
Click on the Form Setup icon

-
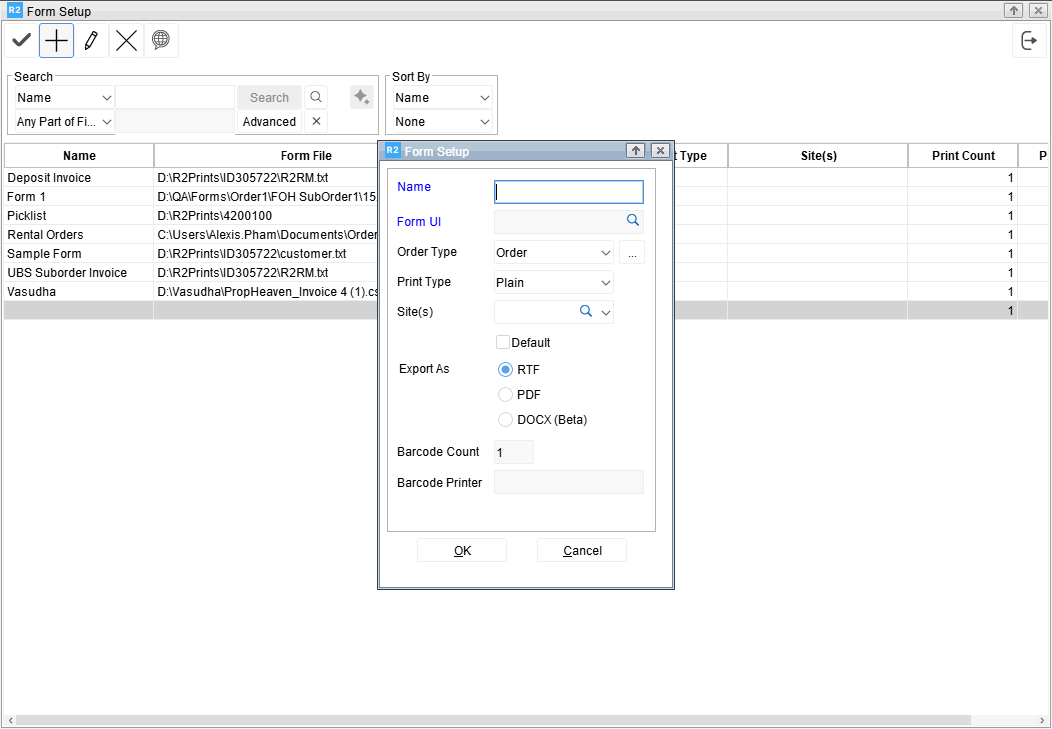
Click on Add button. Add Form Setup dialog will be displayed.
-
Enter the Name for the form.
-
Click on the importable button next to Form UI and then select the UI file path for form setup.
-
Select the Order Type.
-
Order Type can be Invoice, Order, or Deposit.
-
Select Invoice (Barcode Invoice) to print invoices.
-
Select Order to print orders.
-
Select Deposit to print deposit documents.
-
-
Barcode configures the form used to print barcodes.
-
-
Select the Print Type. The Print Type determines whether the output has to be generated in a Pre-printed form or on Plain Print.
-
Click on the importable button next to Site to select the site where Form Setup is applicable. If no site is selected, the form type defined will be available for all the sites.
-
Select Default to display this form by default in the Form Type Options dialog box when you print orders and invoices.
-
Under Export As, select the format for the printed output (RTF, PDF, or DOCX (Beta)).
-
Export options
-
RTF
-
Exports the form as a Rich Text Format (.rtf) file.
-
Use this option if you want a document that you can edit after export.
-
Opens in applications such as Microsoft Word.
-
-
PDF
-
Exports the form as a PDF (.pdf) file.
-
Use this option if you want a fixed layout that prints the same every time.
-
PDF is not intended for editing.
-
-
DOCX (Beta)
-
Generates a .docx file.
-
Opens reliably in modern Microsoft Word applications (for example, Microsoft 365).
-
Preserves formatting, including:
-
Fonts
-
Tables
-
Headers and footers
-
Images
-
-
If DOCX generation fails, R2 does not download an empty or corrupt file and displays a user-friendly error message. In most cases, formatting issues can be resolved by updating the Form UI Properties without requiring program changes.
-
-
-
-
Click OK.
To Edit Form Setup
-
Click on the Form Setup Icon on the Tool Bar. Form Setup dialog appears.
-
Click on the form definition which you wish to edit.
-
Click on Edit button. Edit forms dialog will be displayed.
-
Update the Form Setup.
-
Click OK.
To Print
Refer to Generating Form Setup based Print.