
Reference No: 29342
Details
The custom report generated using Rep_LaborTimesheetPayRollView is used to view the view the Payroll details entered from the R2 Labor. The details are explained in the sample workflow given below:
Prerequisites
-
Login to the R2 application.
-
Select the Maintenance module > Labor tab > click the New icon.
-
Create the Labor Positions [CAMERAOPERATOR] and [PRODUCTIONMANAGER].
-
Save and Exit the Maintenance module.
Sample Workflow
-
Select the Account module. The Account window is displayed.
-
Tag a Company [JVC].
-
Create an Order [ORD-1028].
-
Select the Labor tab. Click the Search Labor icon. The Search Labors window is displayed.
-
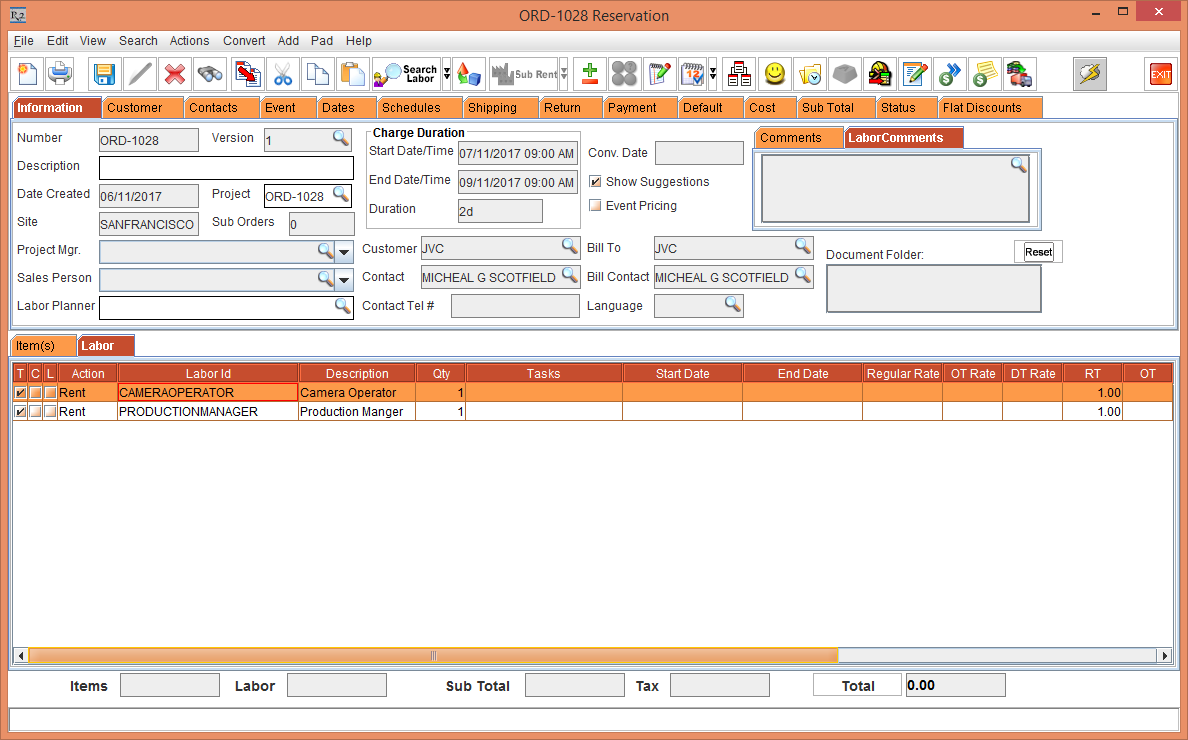
Add the Labor Positions [CAMERAOPERATOR] and [PRODUCTIONMANAGER] with 1 Qty each as shown in Figure 1.1.
-
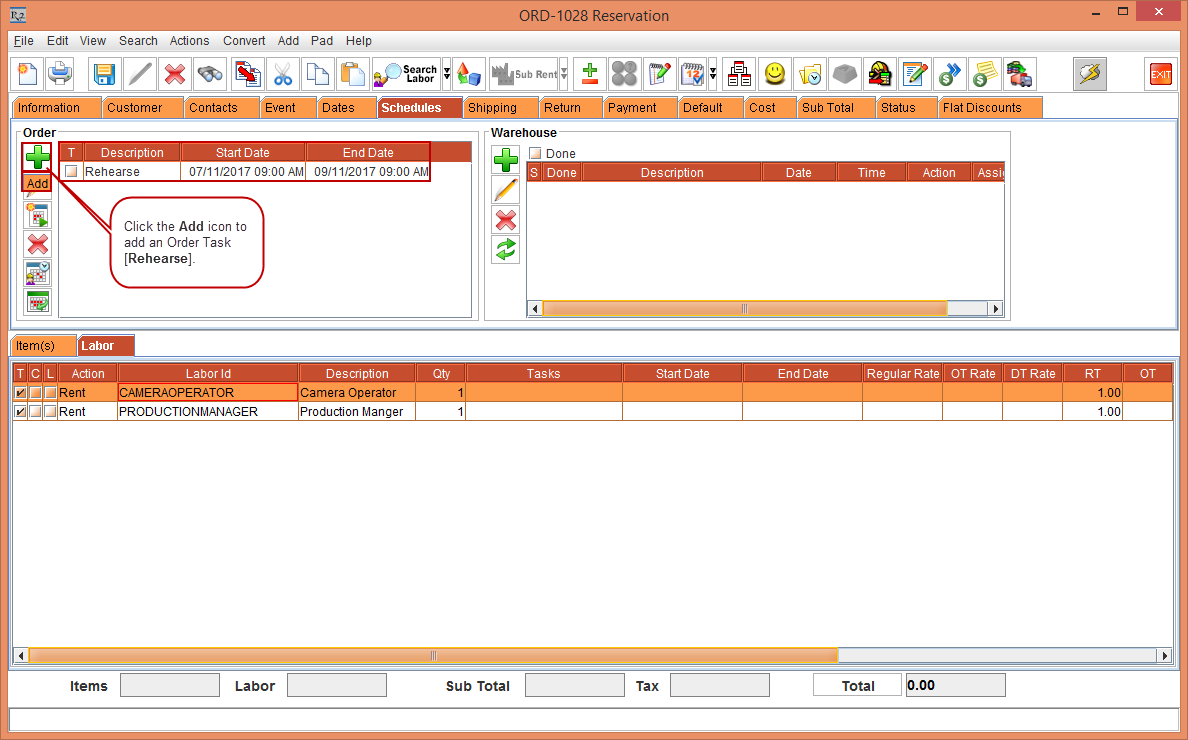
Select the Schedules tab > click the Add icon to add an Order Task, as shown in Figure 1.2.
-
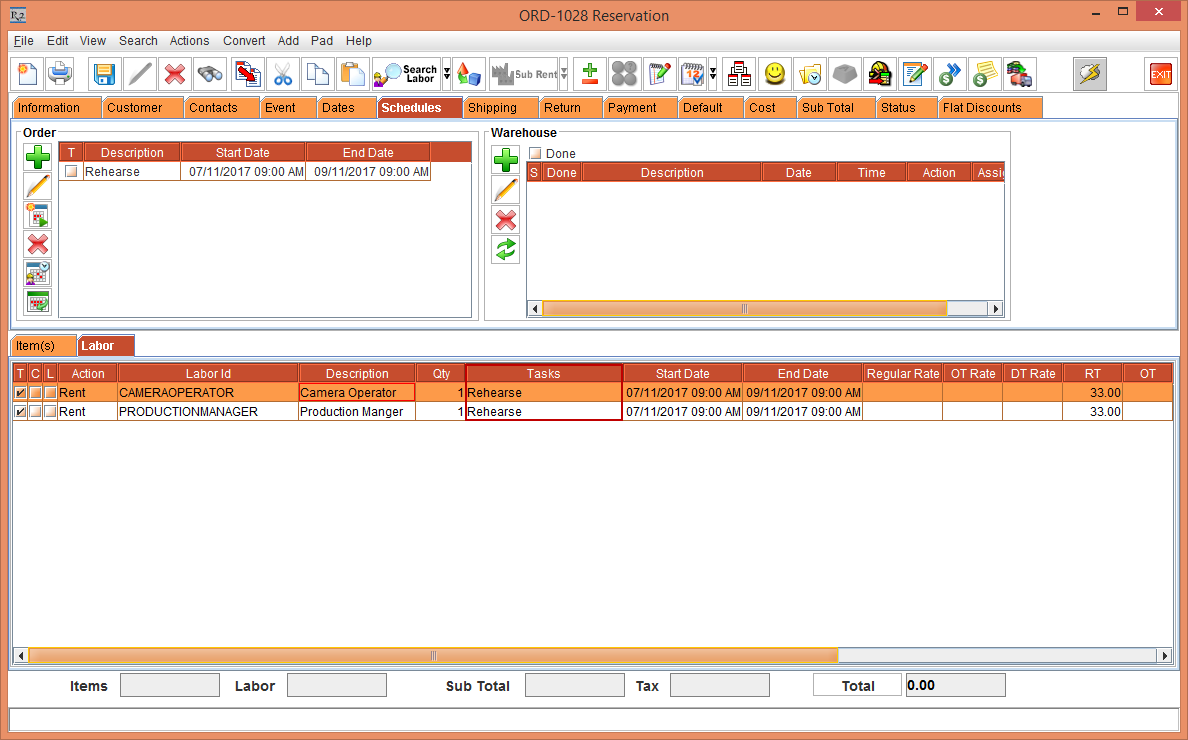
Select the Order Task [Rehearse] for each of the Labor Positions [CAMERAOPERATOR] and [PRODUCTIONMANAGER] , as shown in Figure 1.3.
-
Save and Exit the Order [ORD-1028].
-
Login to R2 Labor application.
-
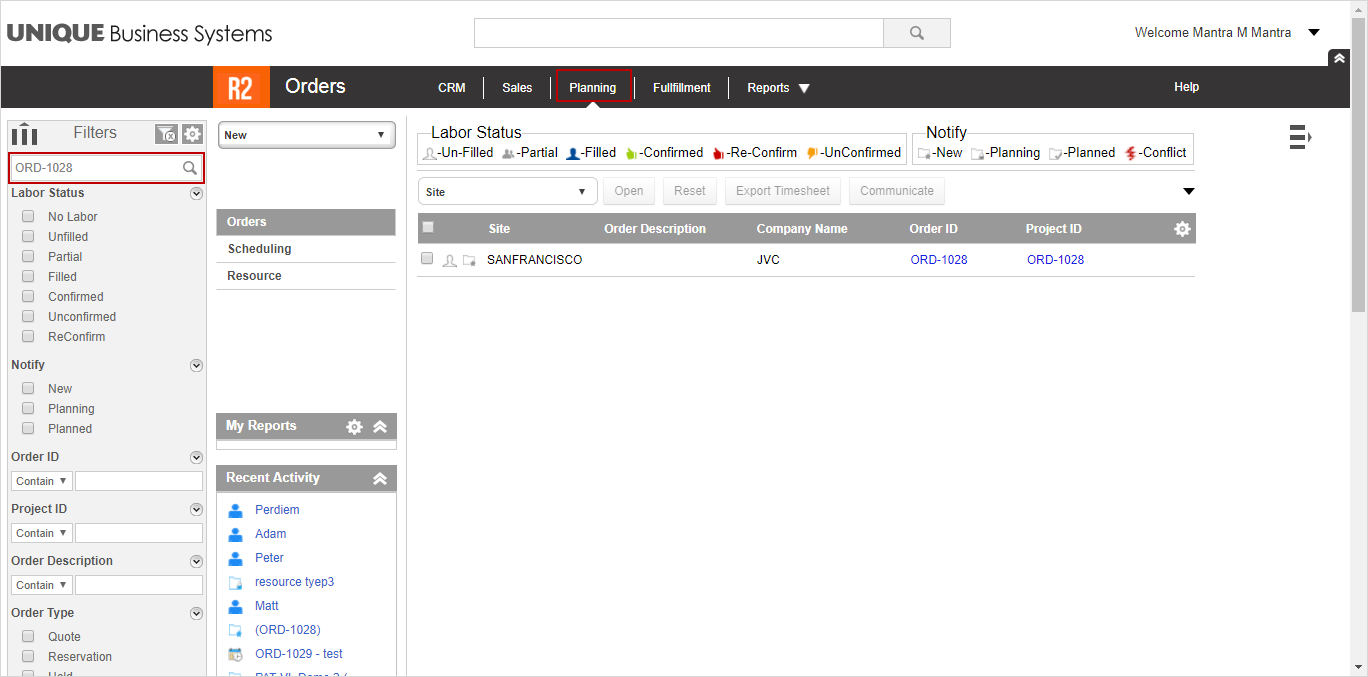
Select Planning > search the Order [ORD-1028], as shown in Figure 1.4.
-
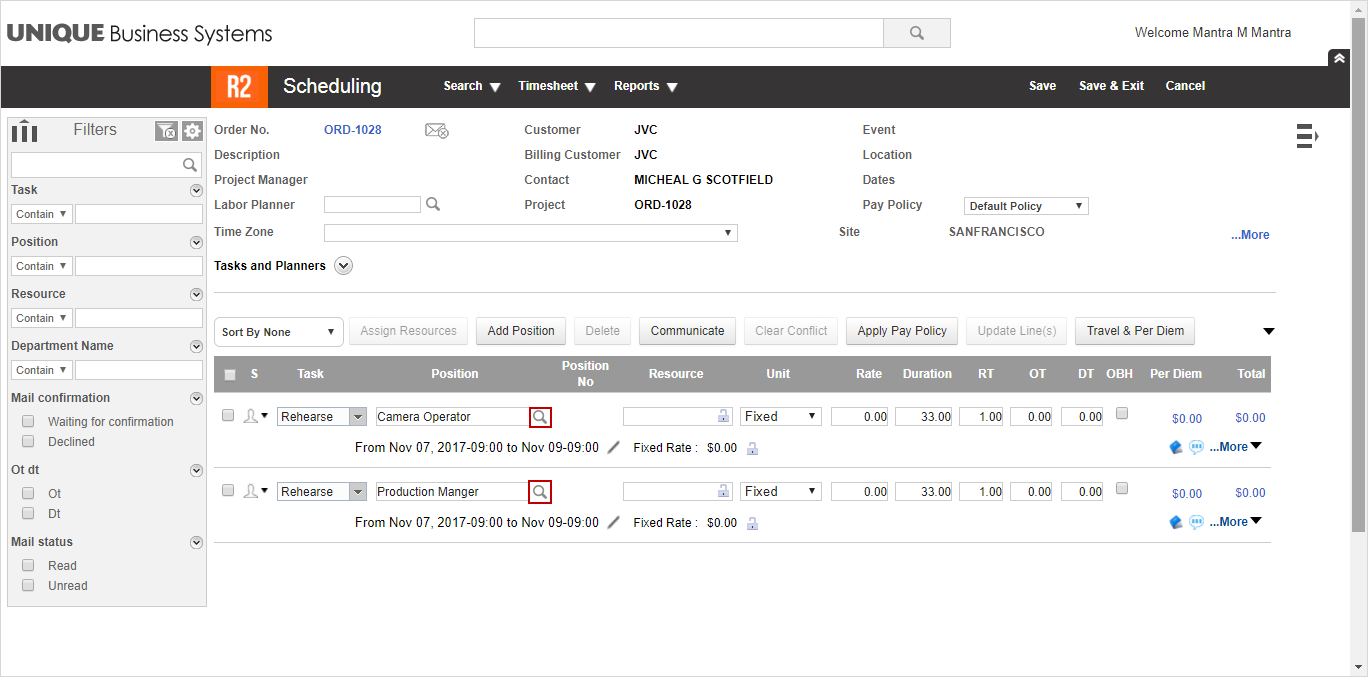
Click the Order [ORD-1028] link. The Order [ORD-1028] Scheduling window is displayed, as shown in Figure 1.5.
-
Click the Resource importable button shown in Figure 1.5.
-
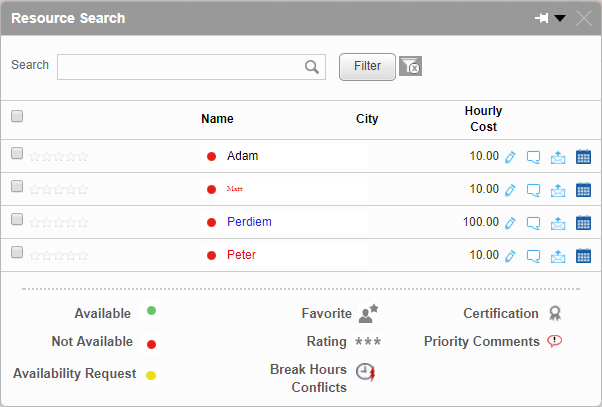
The Resource Search window is displayed as shown in Figure 1.6.
-
Select a Resource [Peter] which does not have any company tagged and the Resource type is a Freelancer.
-
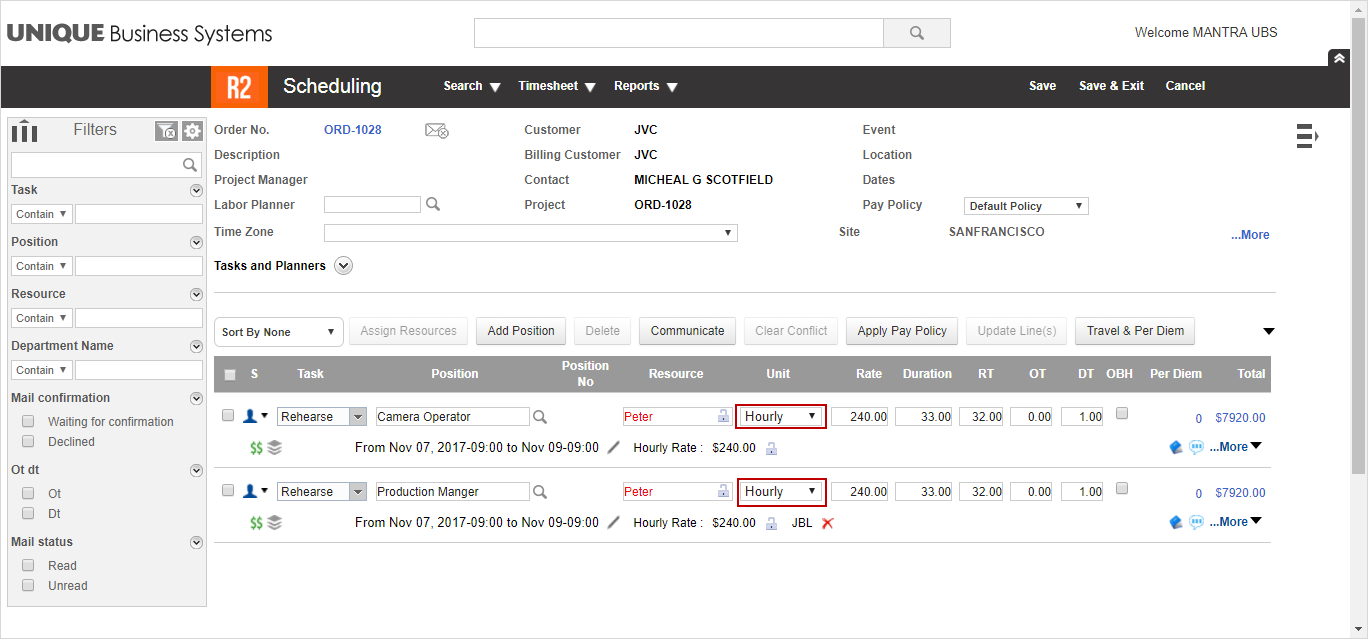
In the Labor line, select the Unit drop-down as Hourly, as shown in Figure 1.7.
-
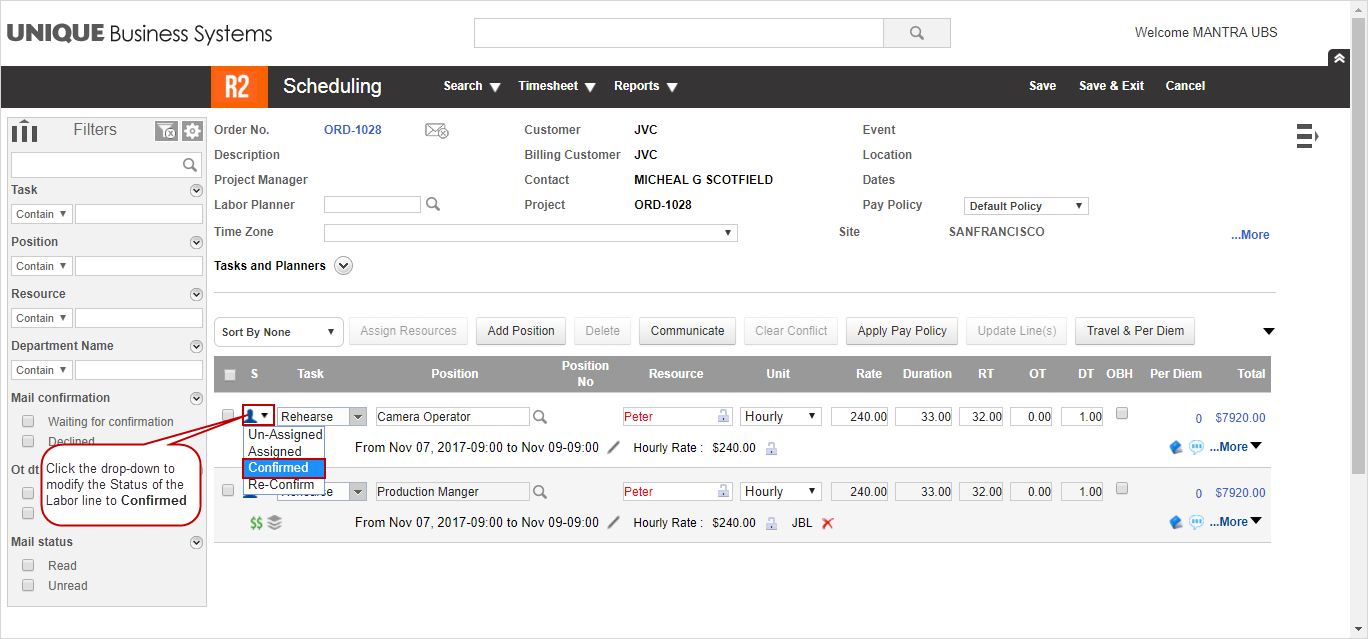
Change the Status of the Labor line to Confirmed, as shown in Figure 1.8.
-
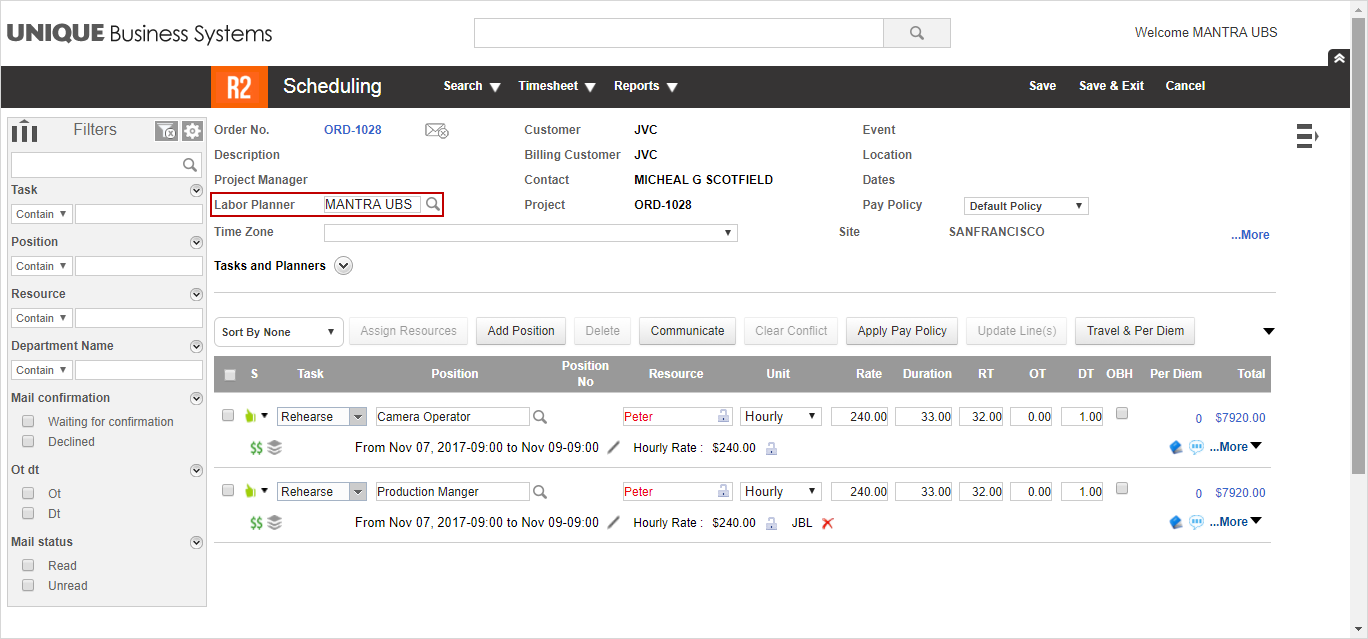
Select the Labor Planner importable button to add a Labor Planner [MANTRA UBS] for the order, as shown in Figure 1.9.
-
Save and Exit the Order.
-
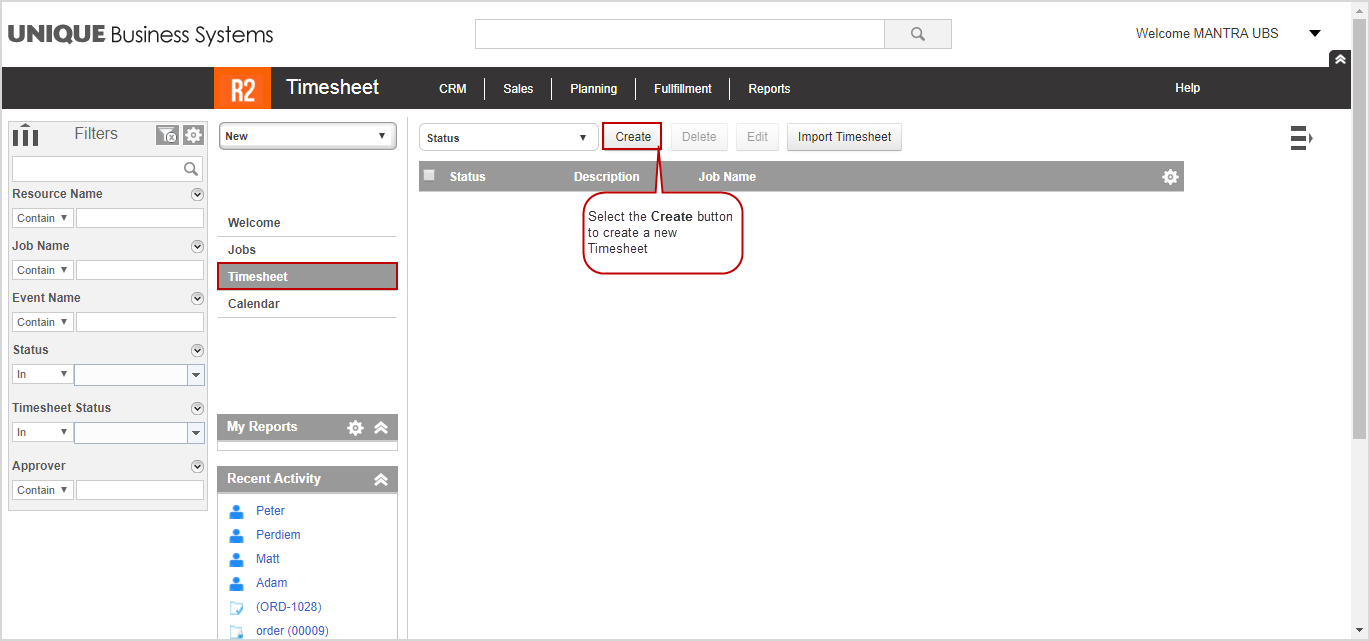
In the R2 Labor welcome page, select the Timesheet tab and select the Create button, as shown in Figure 1.10.
-
The Create Timesheet window is displayed.
-
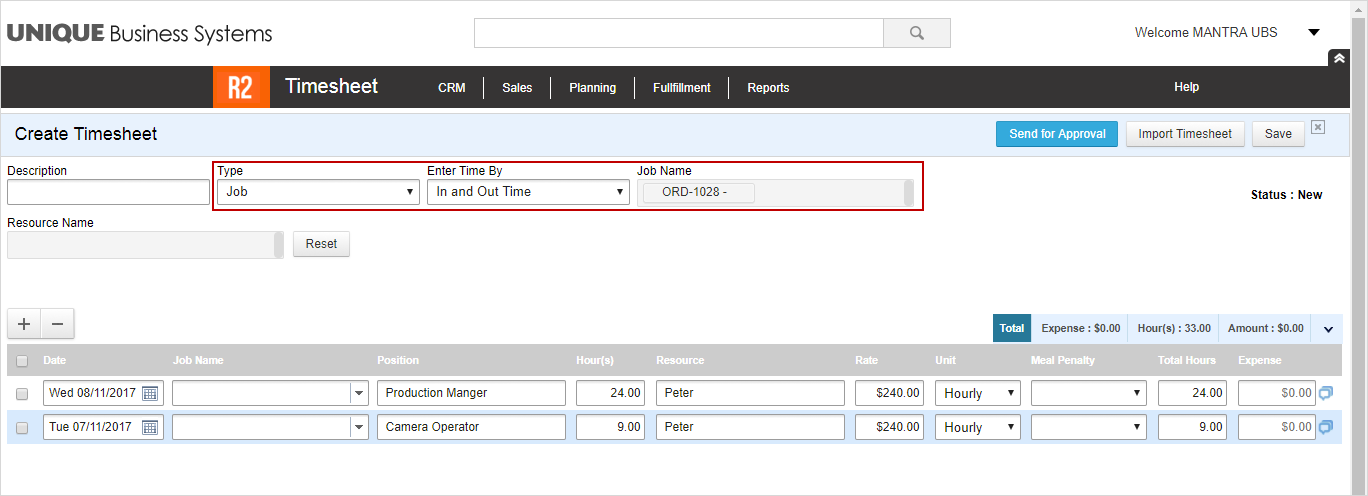
Select the Type [Job], Enter Time By [In and Out Time], and Job Name [ORD-1028], as shown in Figure 1.11.
-
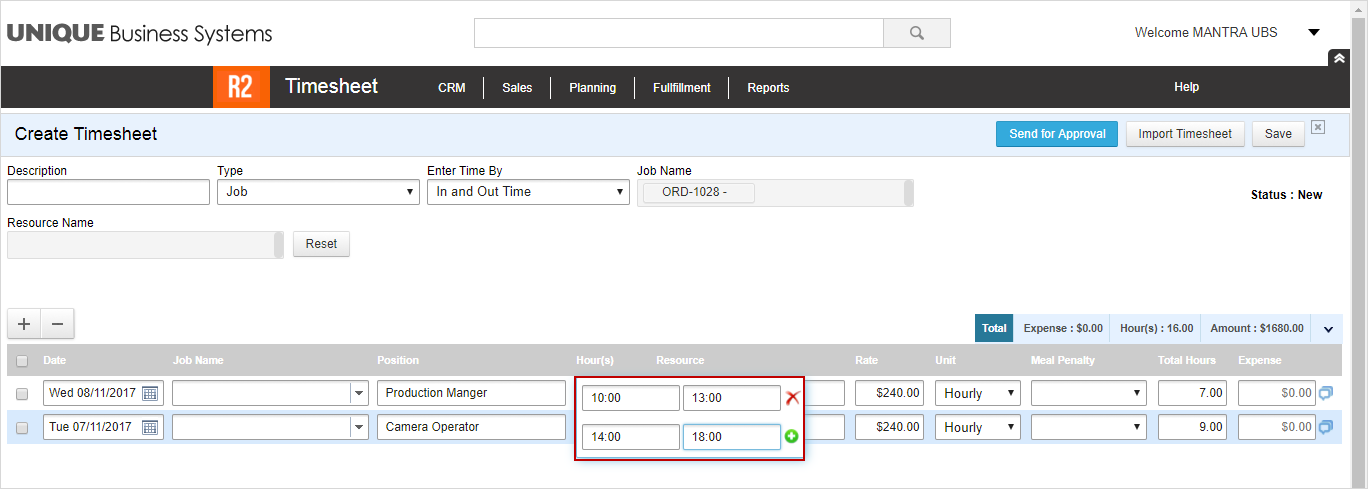
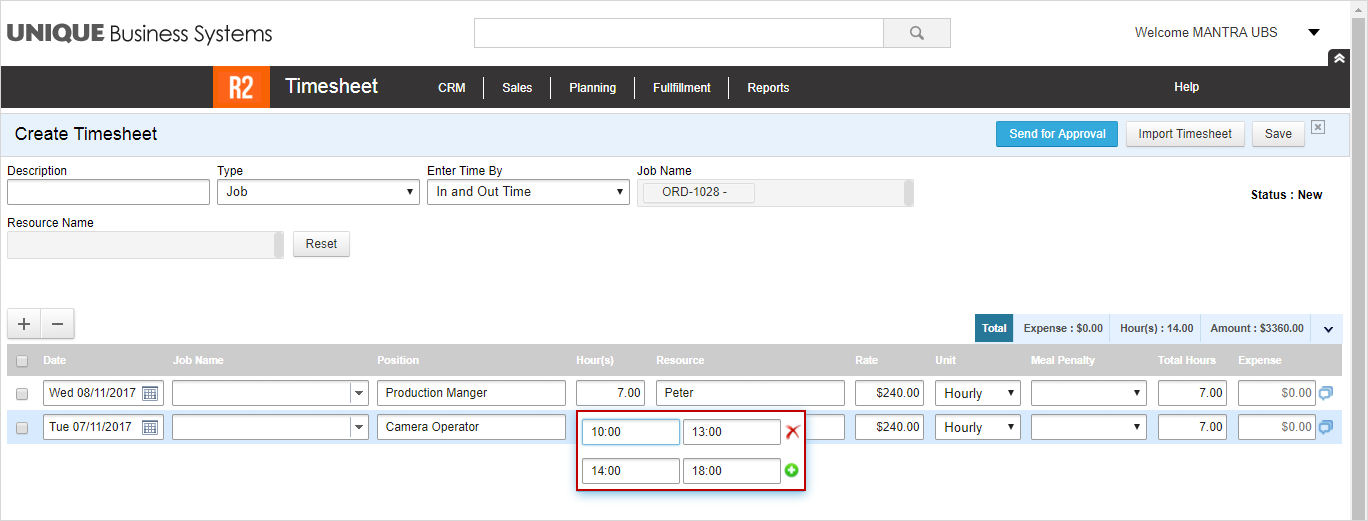
Enter the Hours for the Production Manager, as shown in Figure 1.12.
-
Enter the Hours for the Camera Operator, as shown in Figure 1.13.
-
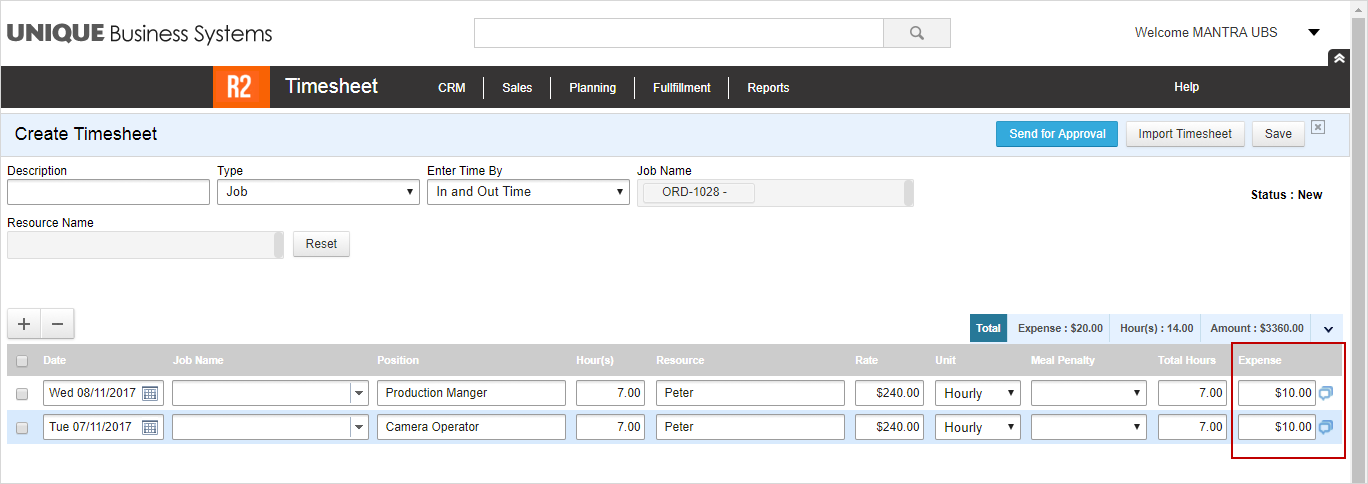
Enter the Expense [10$] for both the lines, as shown in Figure 1.14.
-
Select the Save button.
-
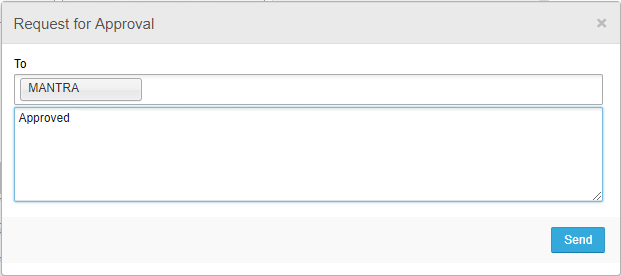
Select the Send for Approval button > the Request for Approval window is displayed > enter the Message [Approved] > click the Send button as shown in Figure 1.15.
-
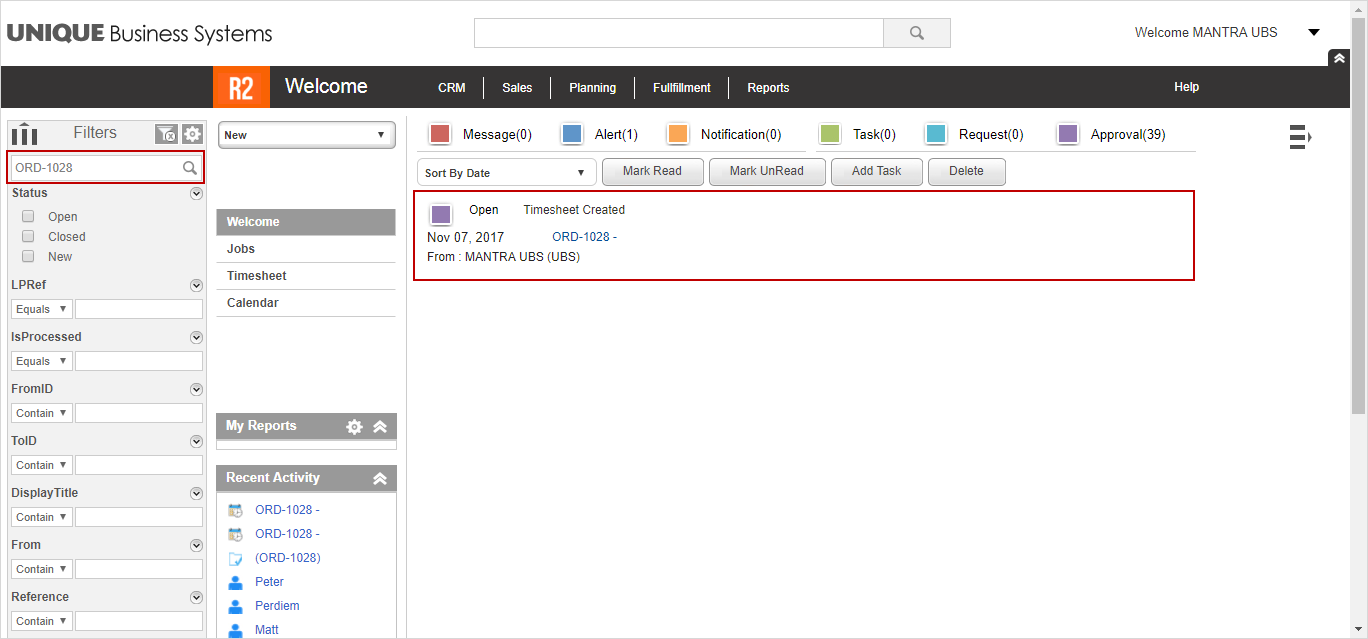
In the R2 Labor welcome page, search the Order [ORD-1028], as shown in Figure 1.16.
-
Select and open the Order [ORD-1028], as shown in Figure 1.16.
-
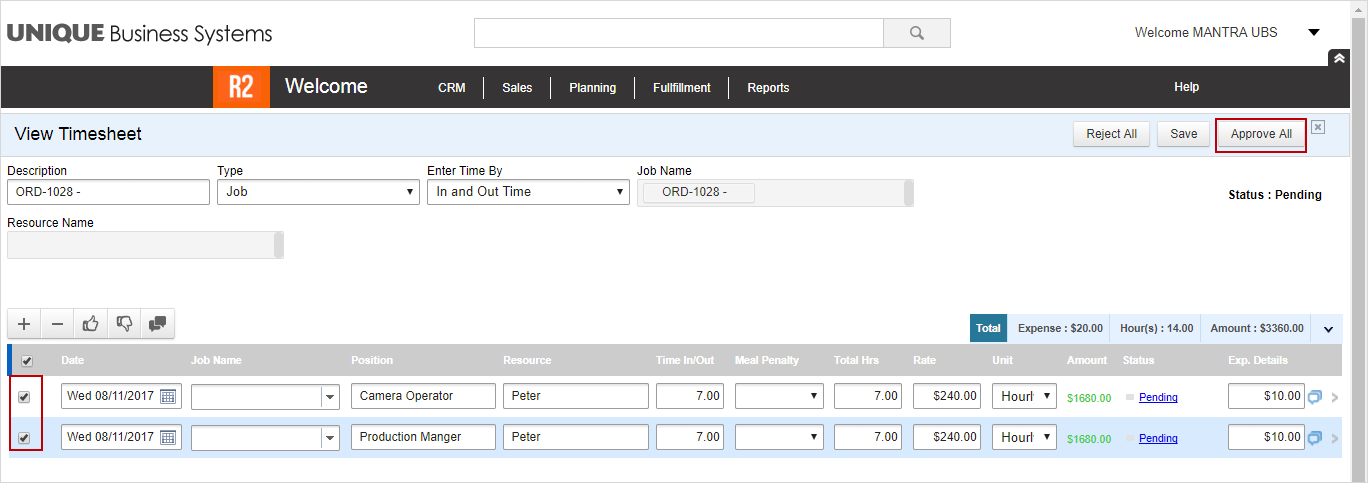
The View Timesheet window is displayed with the Labor Position lines in Pending Status.
-
Select both the Labor Position lines and select the Approve All button, as shown in Figure 1.17.
-
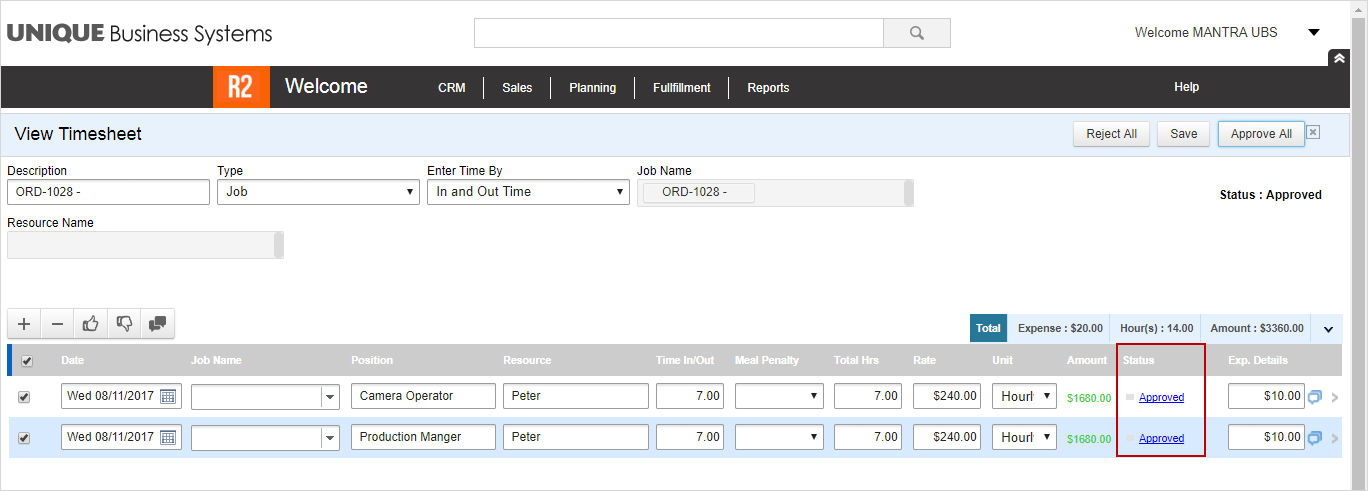
The Status of the Labor lines will be modified to Approved, as shown in Figure 1.18.
-
Save and Exit the Order [ORD-1028] in the R2 Labor application.
-
Select the Reports module and generate the Rep_LaborTimesheetPayRollView Report.
-
The Rep_LaborTimesheetPayRollView Report displays the Approved By [MANTRA UBS], Contract ID [ORD-1028], Labor Planner [MANTRA UBS], Order Description, Position [Production Manager], [Camera Operator], [AV Technical Operator], Rate [24143], Resource ID [CONT-070], Resource Name [Peter], and Schedule Date [11-08-2017].