Table of Contents
Warehouse Basics: How-to Fill, Ship, and Return Orders
Warehouse
The purpose of this guide is to describe the basic features of the Warehouse module. Also known as the fulfillment center, the Warehouse is where confirmed orders will appear to provide instructions to the warehouse team.
The basic warehouse workflow will include a few steps that will become the basis for every order you process. These steps include:
-
Order Prep
-
Shipping
-
Returning
-
Complete Tasks
To get started, click on the WAREHOUSE button from the Launch Pad:
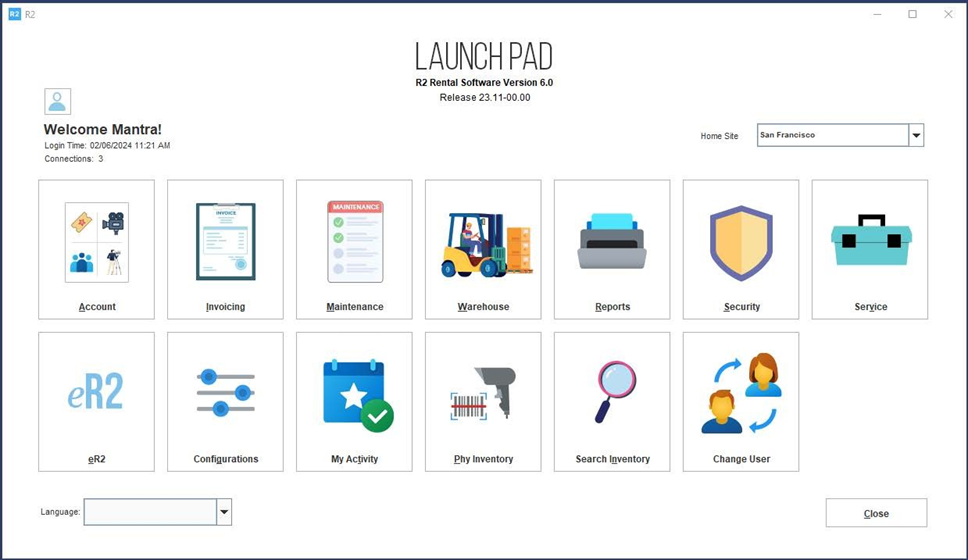
Only orders with a status of Reservation will appear in the warehouse and with four tasks, each with a given date of action: Prep, Ship, Pickup and Return.
1 Order Prep
Filling an order involves picking the gear from the warehouse and marking it as “filled” in the R2 reservation. This is called the order PREP task and appears as the action “Prep”
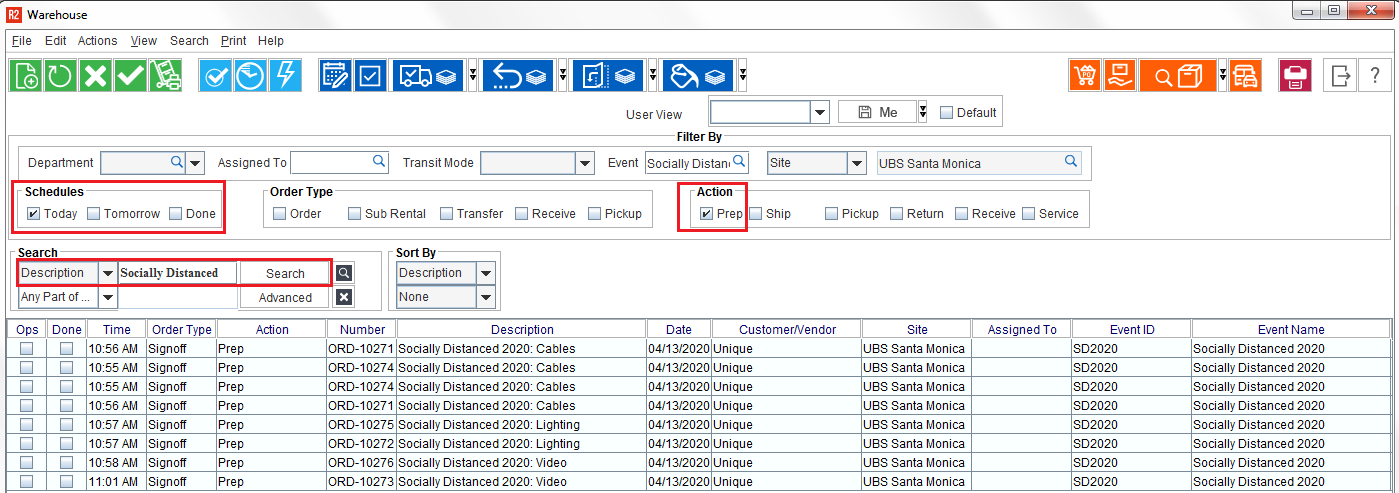
Search for prep tasks for a given order by:
-
Check the box for “Today”
-
Check the box for “Prep”
-
Search for the order in question. There may be more than one order fill task because they are designed to notify the warehouse when certain groups of inventory require shipping on different dates.
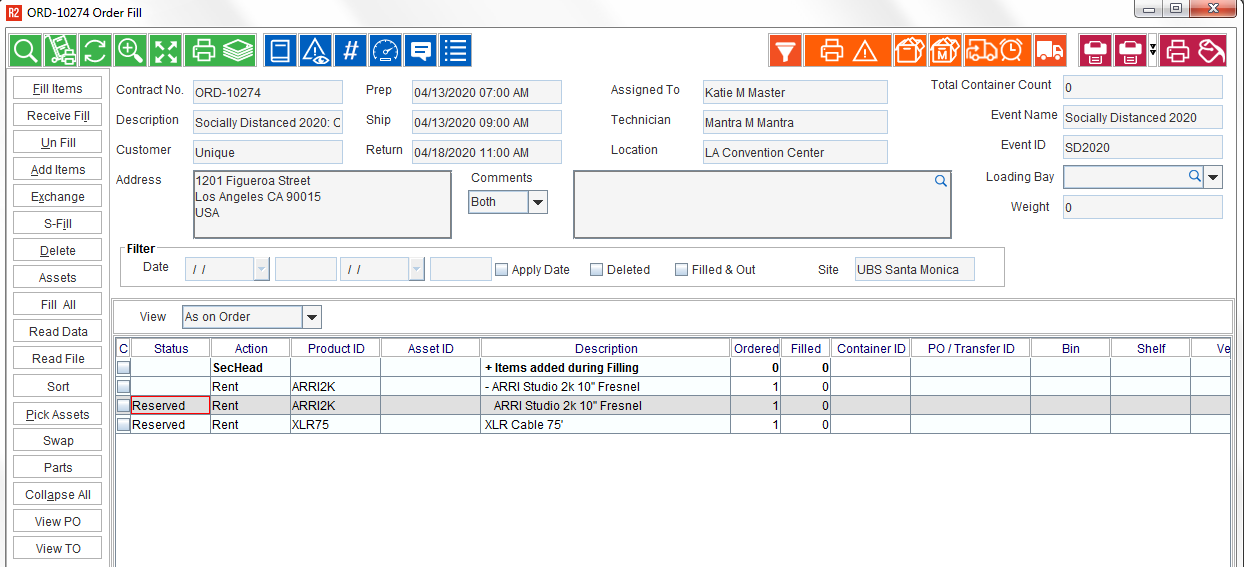
Double-click on a PREP task to begin filling the order.
-
Print the Pick List by clicking on the Pick List icon:
-
Click on the Expand All button (left side button stack) to view all items on the screen.
-
Scan or manually fill the order.
-
To Scan, click on the FILL ITEMS button (left side button stack):
-
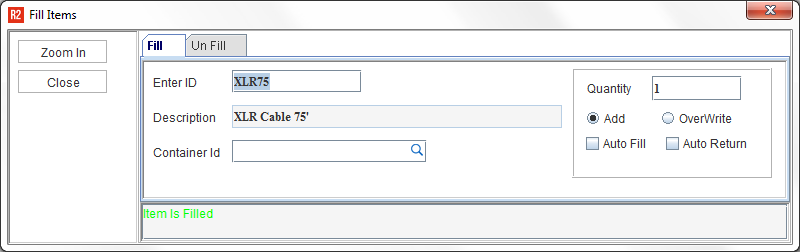
Scan barcodes into the Enter ID field. A successful scan will show the item’s description and a message indicating the “Item is Filled.” A failed scan will show an exception on the screen.
*Click on the Zoom In button to view a larger version of this scan window if you are standing far from the computer during scanning.
** Select a Container ID before scanning items. Items scanned will go into the selected container until it is changed and additional items are scanned.
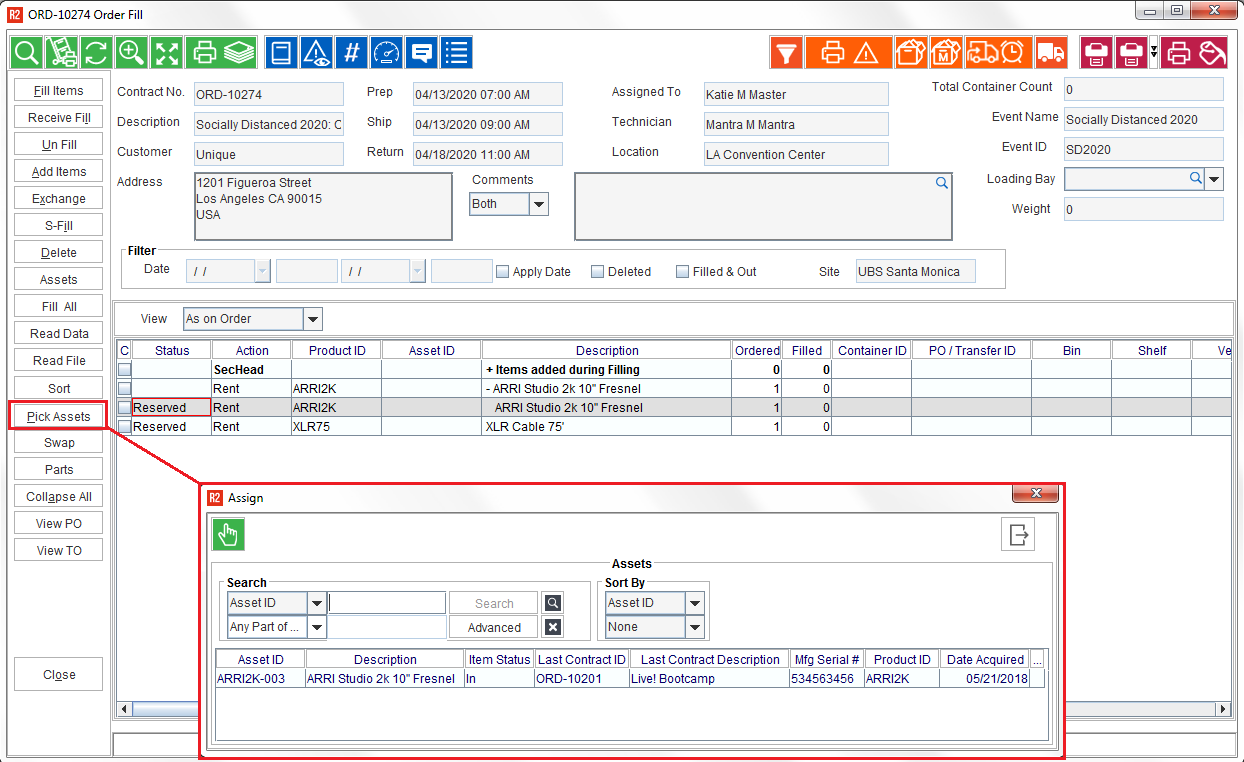
b. To manually fill the order, highlight the item needing filling, and click on the Pick Assets button. Double-click on the asset to fill it.
-
To fill non-serial items, enter the quantity into the Filled column:

-
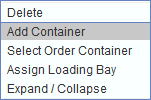
To change or add items into a shipping container, right-click on a non-serial item and select Add Container to add non-serial or non-barcoded items into a container:
-
Filled items will show a Status of Filled and will disappear when the screen is refreshed (or closed and opened again.)

-
Click on the Close button (left side button stack toward the bottom.)
-
Double-click on the Ship task next.
2 Shipping
Shipping an order changes the status of the order items to Out (rental items) or Sold (sell items). An order should be shipped in R2 once it is on the truck and driving away from the warehouse.
In the Warehouse, this is called the order SHIP task and appears as the action “Ship”. A ship task does not always fall on the same day as the prep task, so search for the Ship tasks for the day:
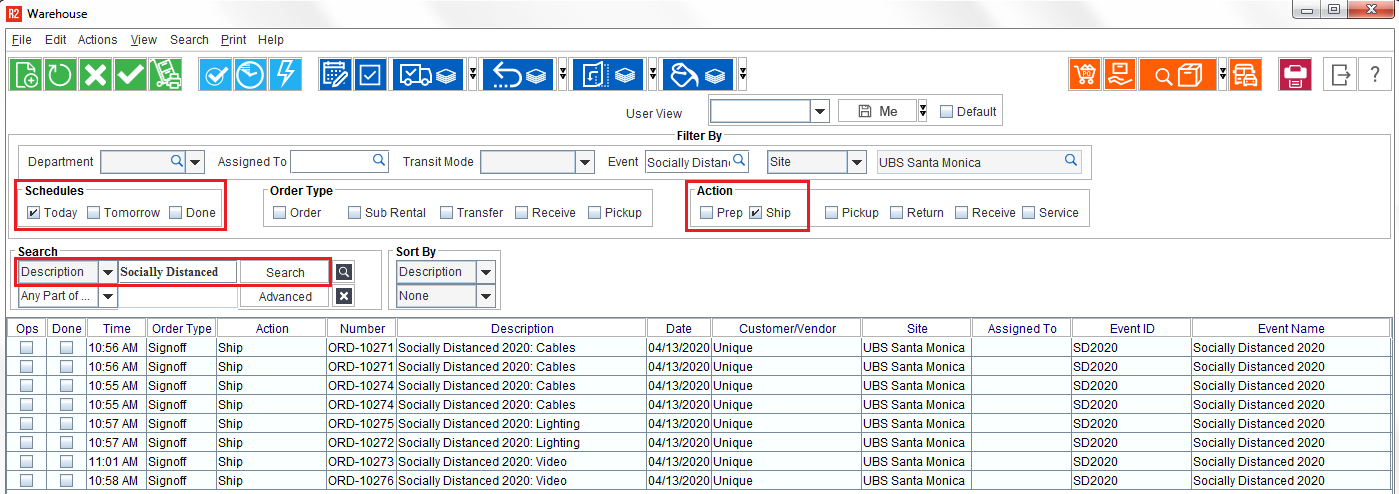
Search for ship tasks for a given order by:
-
Check the box for “Today”
-
Check the box for “Ship”
-
Search for the order in question.
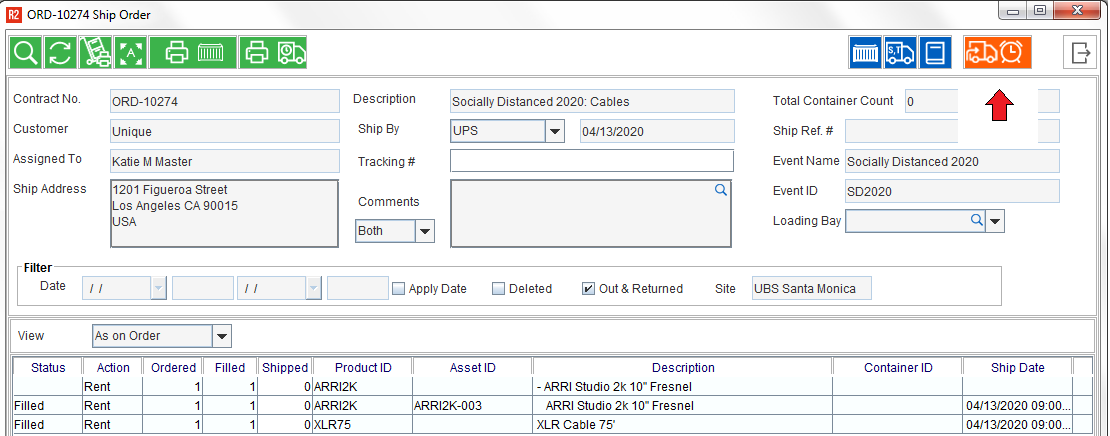
Double-click on a SHIP task to ship the items and print shipping documents.
-
To ship all items with a filled status, click on the “Ship Filled” icon;
or
-
Ship items by their containers one at a time by clicking on the “Dispatch Container” icon:
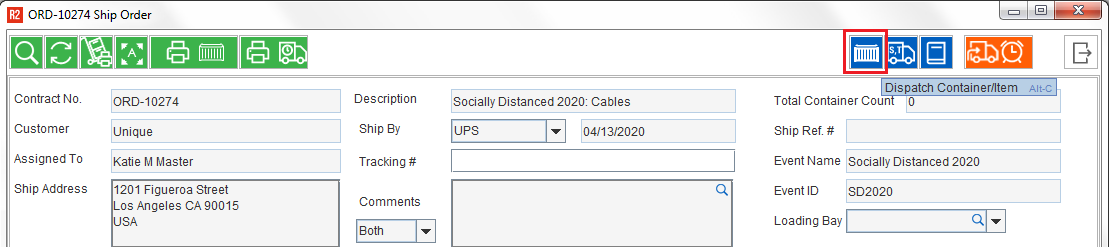
Best practice: the items should be marked as shipped only after they are on the truck. Dispatching one container at a time ensures all containers are loaded.
Print a Delivery/Pickup Receipt
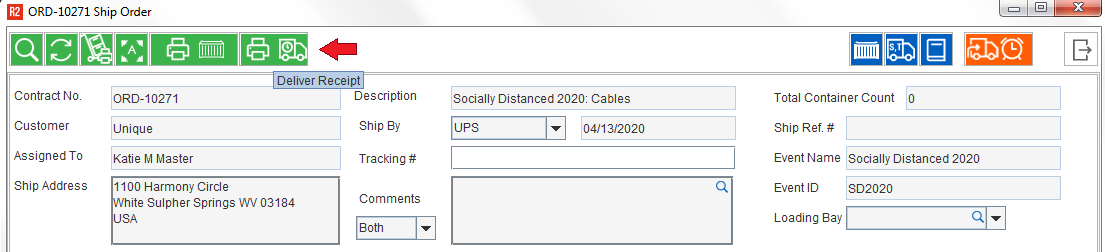
Whether the customer is picking-up the equipment, or you are delivering it to the venue, a report of the equipment that was shipped can be printed.
Click on the Delivery Receipt icon:
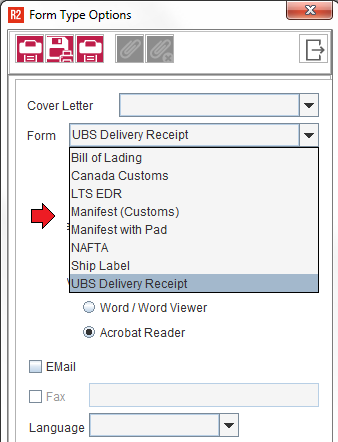
Click on the Form drop-down to select the type of delivery receipt (if you have several.)
Select whether the document should be in Microsoft Word or Adobe Acrobat format.
Check the box for Email if the delivery receipt needs to be sent to a remote party.
Click on the print 
A print option unique to delivery receipts will appear.
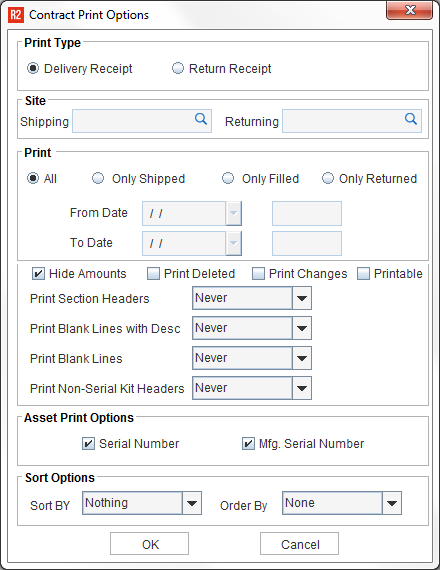
Select whether you want to print all items on the order, or just the items that have been Filled, Shipped or Returned:

Click on the OK button to print the Delivery Receipt:
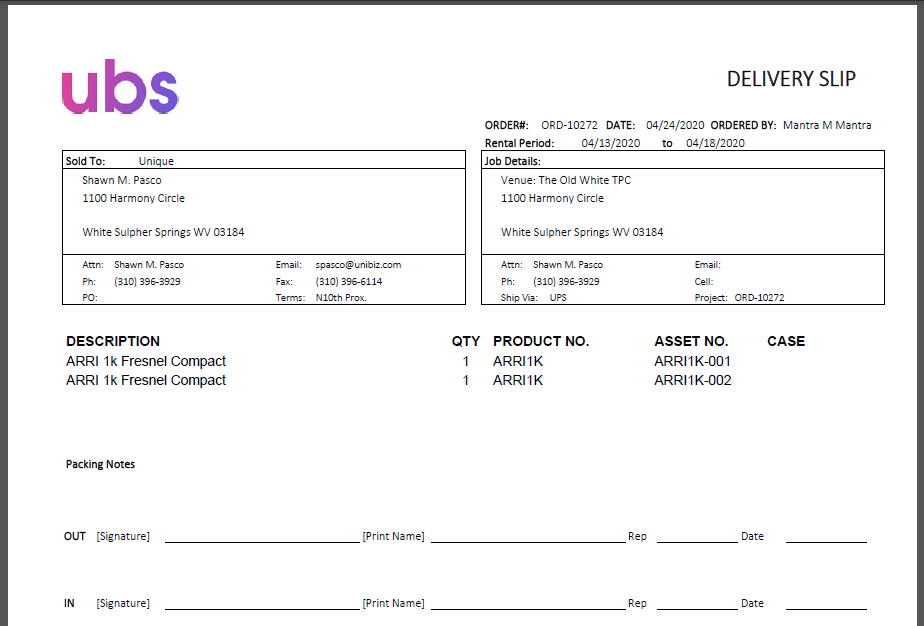
Sample Delivery Receipt
3 Returning
Returning items to an order changes the status of the items from Out to Returned. This is important because the items will become overdue if not returned on time, and could affect other orders awaiting that same inventory.
In the Warehouse, this is called the order RETURN task and appears as the action “Return”.
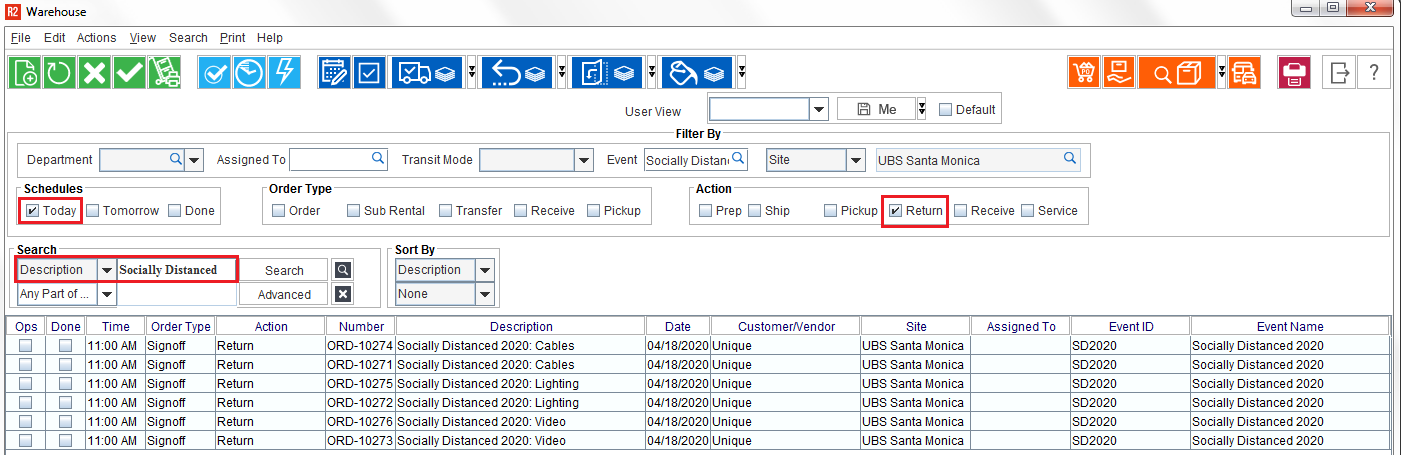
Search for ship tasks for a given order by:
-
Check the box for “Today”
-
Check the box for “Return”
-
Search for the order in question.
Double-click on a RETURN task to ship the items and print shipping documents.
-
To return by scanning, click on the Scan Items button and begin scanning. R2 will display the status of each scan:
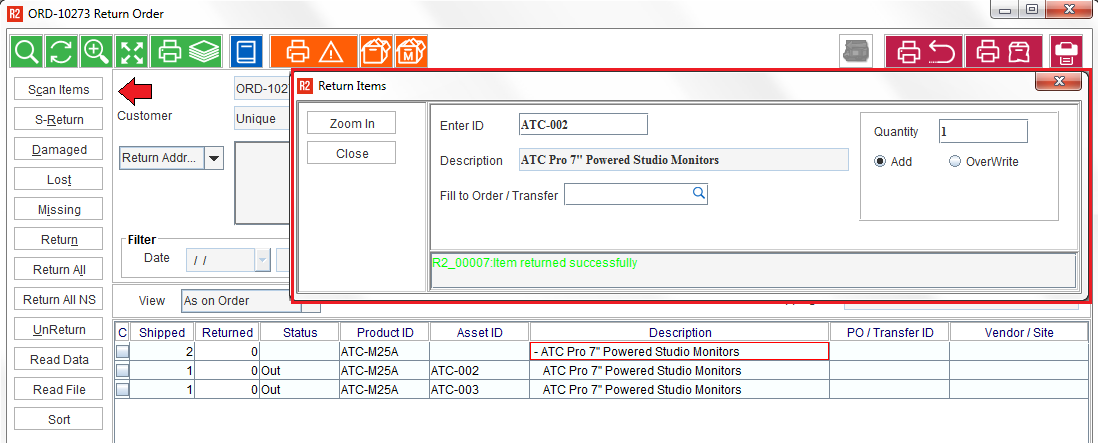
The line with the returned asset will have a status of Returned:

or
-
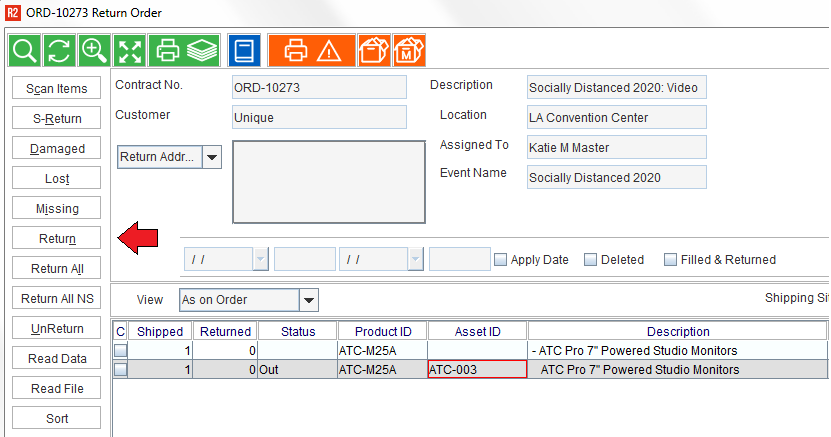
Return items manually if they are not barcoded. To return manually, begin by clicking on the Expand All button (bottom left of the screen.) Highlight the line to return and click on the Return button:
-
If you have returned an item in error, highlight the returned line and click the Un-Return button.
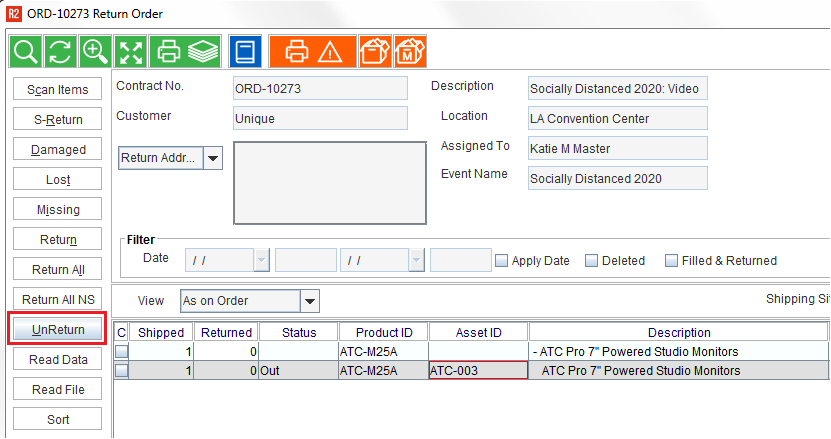
The Un-Return button will change the status of a Returned item back to Out.
Damaged / Lost / Missing
-
If an item is discovered to be Damaged (or is not returned from the customer) then do not Return the item. Instead, highlight the line in question, and click on one of the three functions: Damaged, Lost, or Missing:
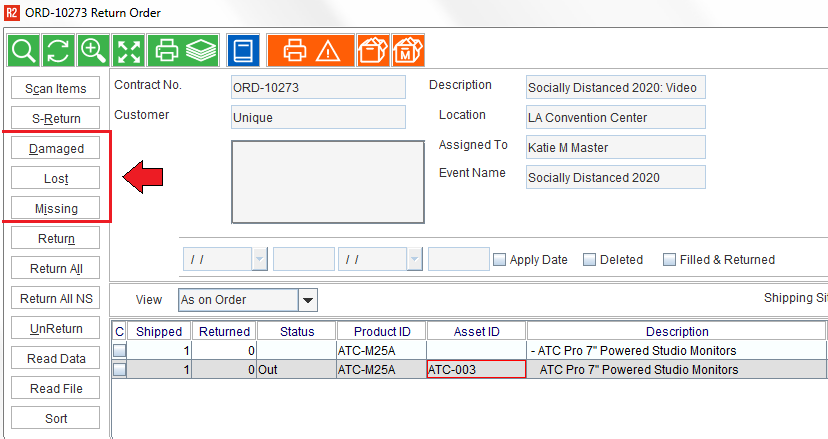
See here for what each term means and how it’s used:
|
Button |
What it does |
|---|---|
|
Damaged |
Mark the asset as Damaged if it is noticeably damaged at the time of return. This feature allows you to track the asset so it can be repaired, and (optionally) billed to the customer. |
|
Lost |
Mark the asset as lost if it is not returned by your customer. You can optionally bill your customer for lost articles. |
|
Missing |
Mark the asset as missing if it did not come back with your crew. There is a distinction between missing and lost statuses. Lost indicates that the customer had the equipment and did not return it. Missing indicates that you were in control of your gear and it did not come back or is missing. |
Comments are required at the time of marking an asset as Lost or Missing.
4 Complete Tasks
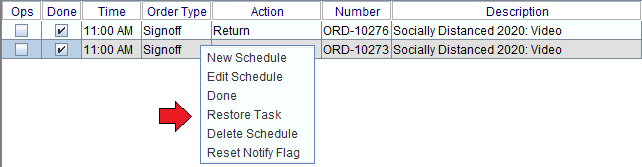
When a warehouse task has been completed, it should be marked as done. Marking a task as done removes it from the active task list view. To mark a task as done, right-click on the task and click on Done:
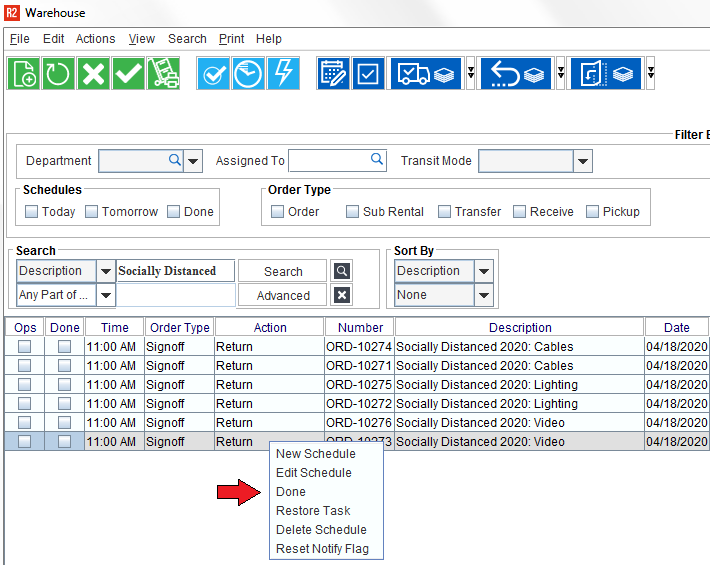
A task that has been marked as done is not deleted, but is removed from the active view. To recall tasks marked as done, check the Done box and perform your search:
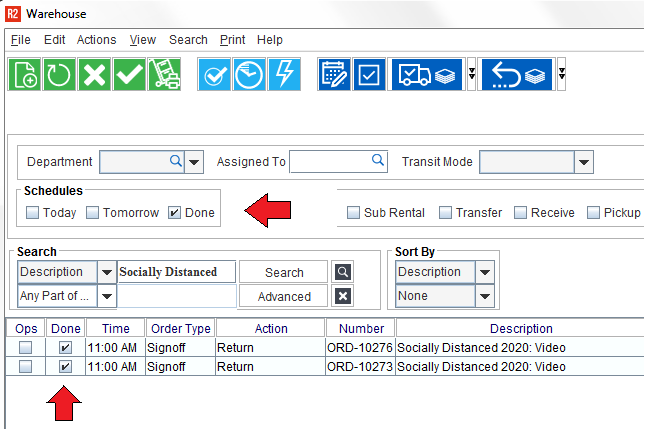
The Done checkbox on each task line will also reflect whether or not the task is complete.
To restore a task that was marked as done inadvertently, right-click on the task line and choose Restore: