Overview
Flowsheet feature helps you to keep track on various events or orders occurring in a specific period of time. It gives details about the number of events or orders for which arrangements are to be done. Flowsheet also gives details regarding the date on which the events will be ending and when the various equipments placed in that order need to be received.
Generating Flowsheet
-
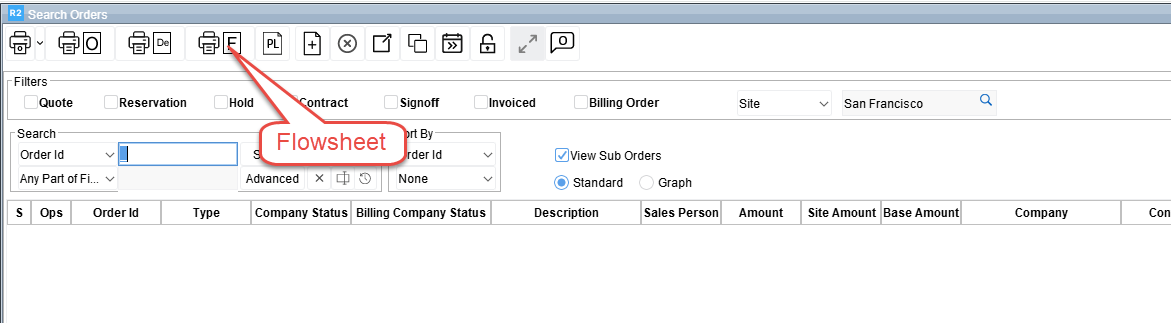
Flowsheet feature can be accessed from the Reports module > Sales menu > Flowsheet or Order Search Window. R2 will display Flowsheet Report Options dialog.

-
Select Site, From Date and To Date.
-
Click Run to display the Form Type options.
-
In the Form Type options dialog, select the Flowsheet form and Click on the Print icon.
Report Filter Options
The report can be filtered using the following options:
-
Event
-
Site and All Sites
-
Start Date and End Date,
-
Sort By
Table 1.0 Flowsheet Report Options
|
Report Options |
Description |
|---|---|
|
Site |
Click on the ellipses button to select the site for which flow-sheet has to be generated. |
|
All Sites |
Select this option to print Flow Sheets belonging to all the Sites. |
|
Start Date |
On selecting the start date. While printing, the order that have Load In or Prep date starting with the selected Start Date will be considered. If order has no Load In date, then Prep Date will be considered and vice-versa. |
|
End Date |
On selecting the end date. While printing, the order that have Strike or Return date that falls within the selected End Date will be considered. If order has no Strike date, then Return date will be considered and vice-versa. |
|
Sort By |
To select the way in which the orders will be sorted. Available options are Start Time (Load In or Prep Date) , Strike Time (Strike or Prep Date) and Alphabetically. |
|
Sort Order |
Defines the sort order for the Flow Sheet. Available options are None, Ascending and Descending. |
The report will be generated based on the 'And' condition between the filter options, i.e. Only the Orders which satisfy all the criteria set in the Report Filters will be considered for this report.
Flowsheet Formats
Flowsheet can be printed in either Plain format or Pre-Format. Select the required Print format from the Print Type field of Form Setup in Main dialog of Maintenance module.
You can pre-define the Flowsheet format using 977UI for Plain or 9777UI for Pre format. If the print formats are not defined for the Flowsheet, R2 will print the Flowsheet using default format (9777UI) and will not display the Form Type options dialog while generating the Report.
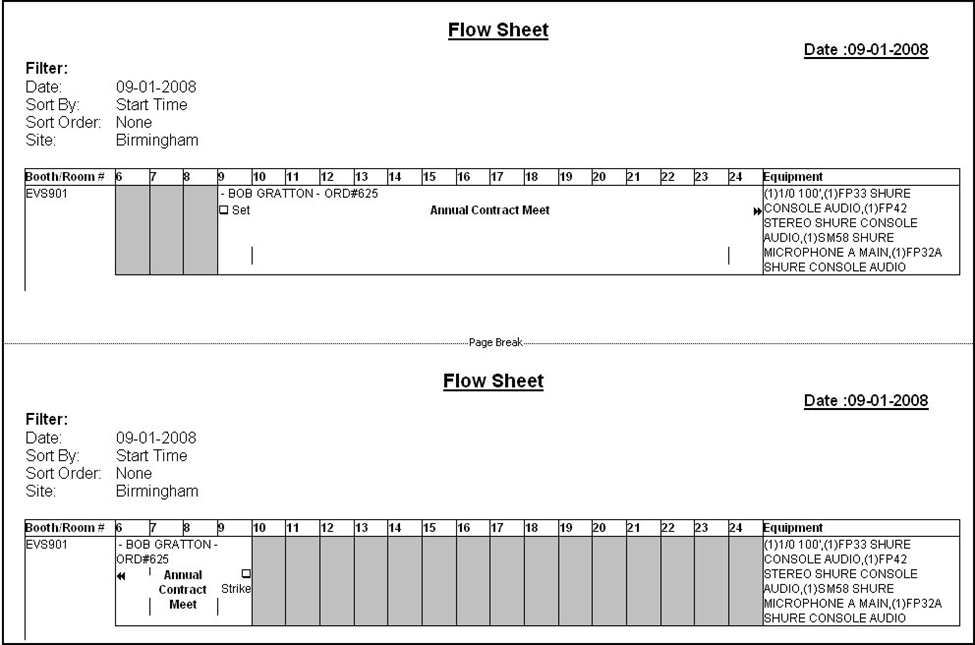
The Flowsheet report can be divided into two sections, header section and text section.
Header section information
Displays the fields like Date, Sort By, Order By and Site selected in the Flowsheet window.
Text section information
Time Bar: Indicates the number of working hours in a day. The details of the order like the Company Name, Location Name and so on will be displayed below the respective time column as per the start time. For example: If the start time of the order is 05:00 P.M., then order details will be displayed below the time column 17.
Text Column
Company Name, Location Name and Order ID separated by hyphens.
<<
Indicates that Load In or Prep Date of the order is previous.
>>
Indicates that Strike or Return Date of the order is later.
Set
Refers to created time of the order. The check box beside Set provides the user an option to mark so as to know that the order is set for an event.
Equipment
Lists the Equipment present in the order along with their respective quantities being displayed in brackets. This column has a total character limit of 4000. On exceeding the character limit, truncates characters falling further left.

Report Field Information
|
Report Field |
Description |
|---|---|
|
Load-In |
Displays Load In date defined in the order |
|
Room |
Displays Booth/Room defined in the order |
|
Order # - Order Description |
Displays Order Id and Description separated by Hyphen |
|
Customer - Contact |
Displays Customer and contact of the Order separated by Hyphen |
|
Prep |
Displays Order Prep Date |
|
Ship |
Displays Order Ship Date |
|
Show Start |
Displays Show Start date defined in the order |
|
Show End |
Displays Show End date defined in the order |
|
Pick Up |
Displays Order Pick up Date |
|
Return |
Displays Order Return Date |
|
Strike |
Strike filed will be displayed when any day of the date range selected for the flow-sheet matches the Strike date / Return date defined for the order. If strike date is not defined, R2 will consider Return date |
|
Set |
Refers to created time of the order. The check box beside Set provides the user an option to mark so as to know that the order is set for an event. Set field will be displayed when any day of the date range selected for the flow-sheet matches the order Load In date/ Order start date. |
|
Shipping Comments |
Displays the Shipping Comments if any entered in the Order |
|
Equipment and Labor |
Lists the Equipment and Labor present in the order along with their respective quantities being displayed in brackets. This column has a total character limit of 4000. On exceeding the character limit, truncates characters falling further left. |
Advanced Printing Flowsheet Options
Group by Date
Overview
You can generate Flowsheet print grouped by date using Custom Form setup using the 97777ui. The Flowsheet print generated using the 97777ui will look as shown in Figure 5.0.
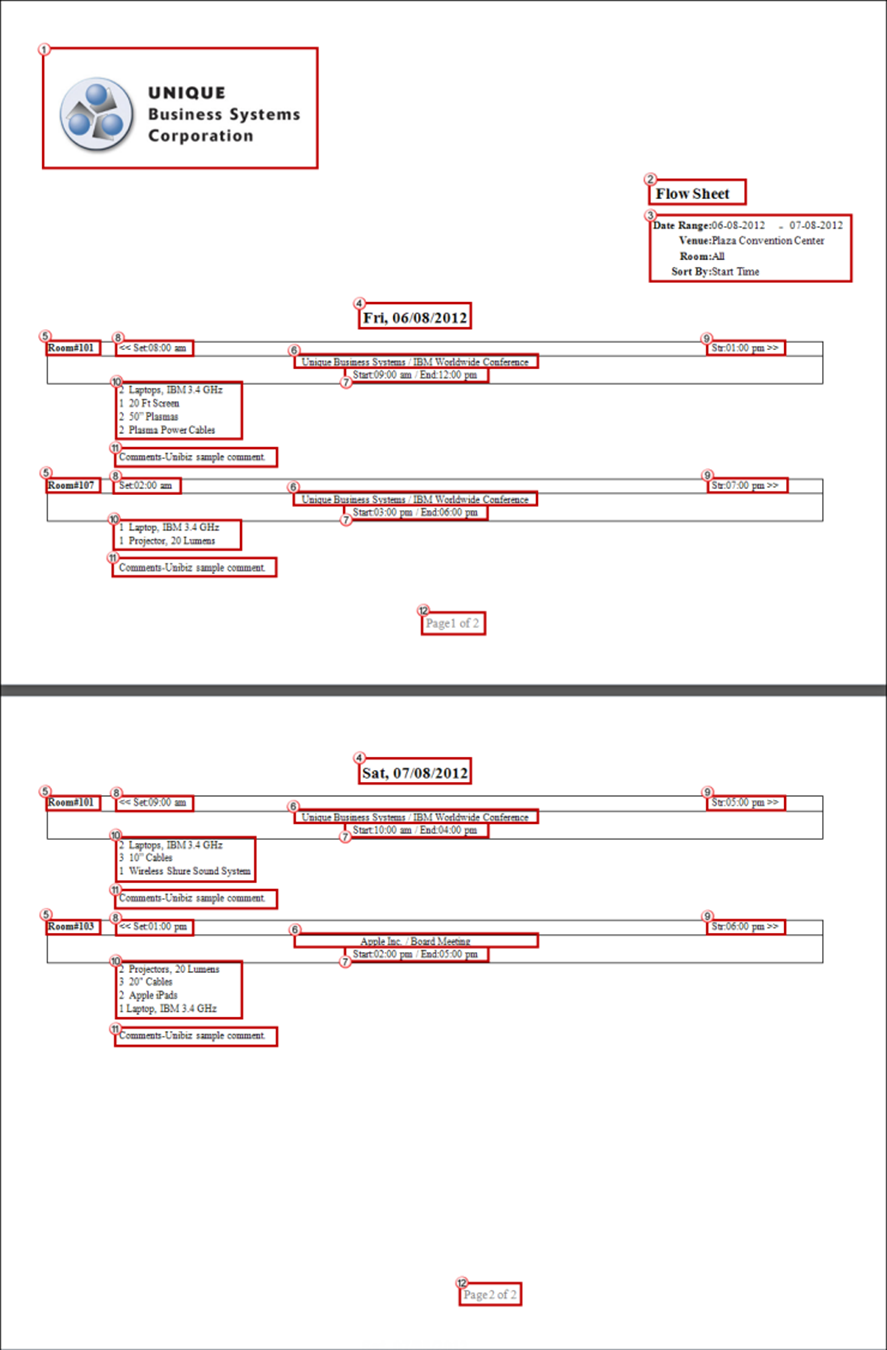
The details of each of the parts of the Flowsheet print grouped by date are as explained in Table 2.0.
Table 2.0 Parts of Flowsheet Print Ordered by Date
|
Number |
Name |
Description |
|---|---|---|
|
1 |
Logo |
The logo of the company. |
|
2 |
Print Name |
The name of the print taken. |
|
3 |
Flow Sheet Filter Information |
Generic information regarding the flow sheet filters like Date Range, Event Venue, Rooms and Sort By. |
|
4 |
Date |
The Flow Sheet print is grouped by Date. This denotes the date for which the grouping is done. Information grouped for each day will appear in a separate page. |
|
5 |
Room Number |
The room number where the event is taking place under which items required for the day in the specific room are listed. |
|
6 |
Event Name |
The name of the event happening in the Room number listed. |
|
7 |
Start and End Times |
The start and end timing of the Order. This is fetched from the Order Start and End Dates. |
|
8 |
Set Time |
The Prep Date as given in the Order. Displays as << if the order has started prior to the Date in field 4. |
|
9 |
Strike Time |
The Strike Date as given in the Order. Displays as >> if the order is ending later to the Date in field 4. |
|
10 |
Items |
The Items which are present in the Order and are required on the specific day of field no 4 on the specific room in field number 5. |
|
11 |
Comments |
Any comments provided on the order listed under the specific room. |
|
12 |
Page Number |
The page number of the page in the print taken. |
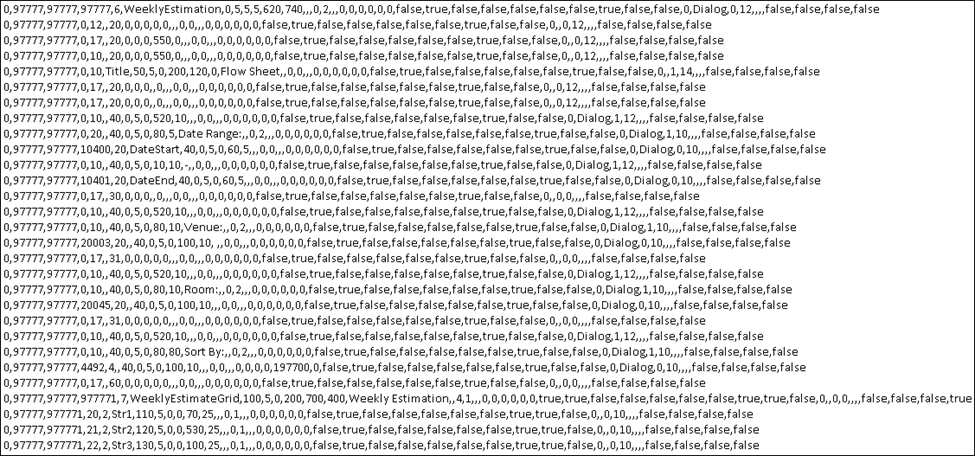
The sample 97777ui that can be used for creating the Custom Form setup for generating Flowsheet print grouped by date is as shown in Figure 5.1. This can be found in the screens folder.
Include Blank Lines and Kits with Child Items
Overview
Check boxes named Include blank lines and Print Kit in Expanded are available in the Flowsheet dialog box, as shown in Figure 6.0.
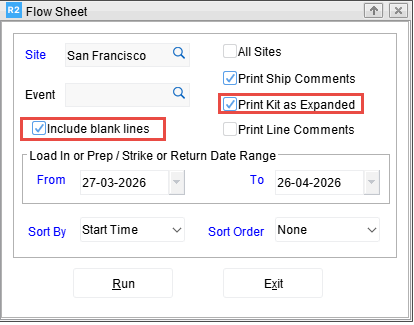
When the check boxes are selected while printing Event Order Flowsheet using 977UI, 9777UI or 97777UI, the print gets generated as follows:
-
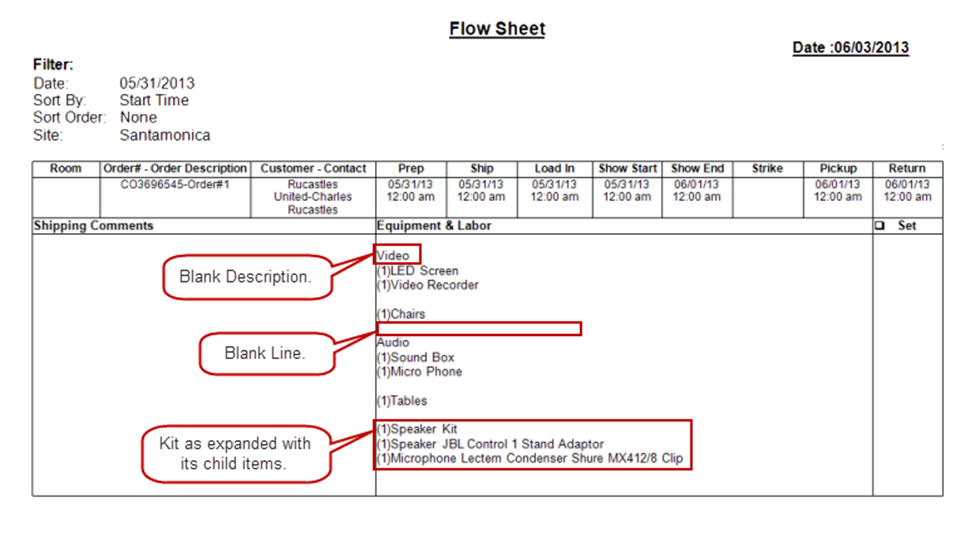
Include blank lines check box selected - The blank lines/blank lines with description - present in the Order will be printed.
-
Print Kit in Expanded check box selected - Any Kit added to the Order will get printed in the expanded mode displaying its Child Items irrespective of its status expand status in the Order, as shown in Figure 6.1.
Include Item and Labor Line Comments
Overview
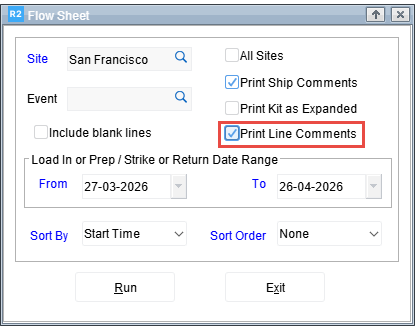
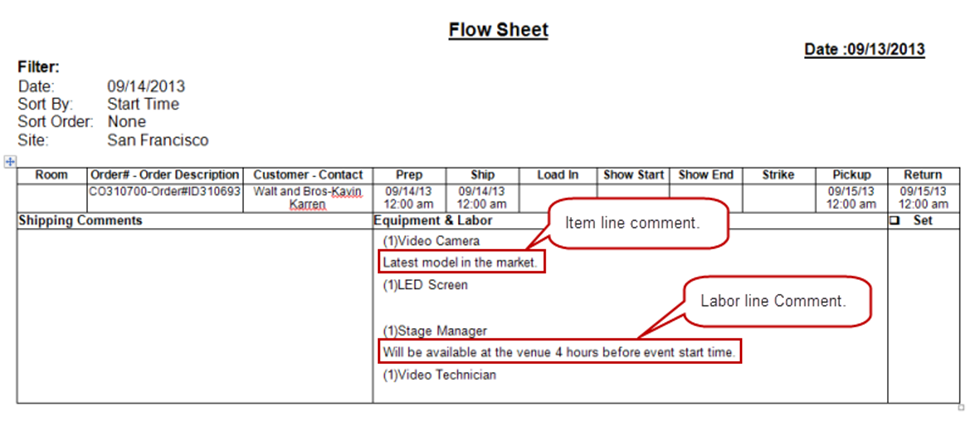
A check box named "Print Line Comments" is available in the Flowsheet dialog box, as shown in Figure 7.0. When printing a Flowsheet using 977UI, 9777UI and 97777U, if the check box is selected, the Item and Labor line comments of the Order are printed, as shown in Figure 7.1.
Include Item Descriptions in new lines while generating Flowsheets
Overview
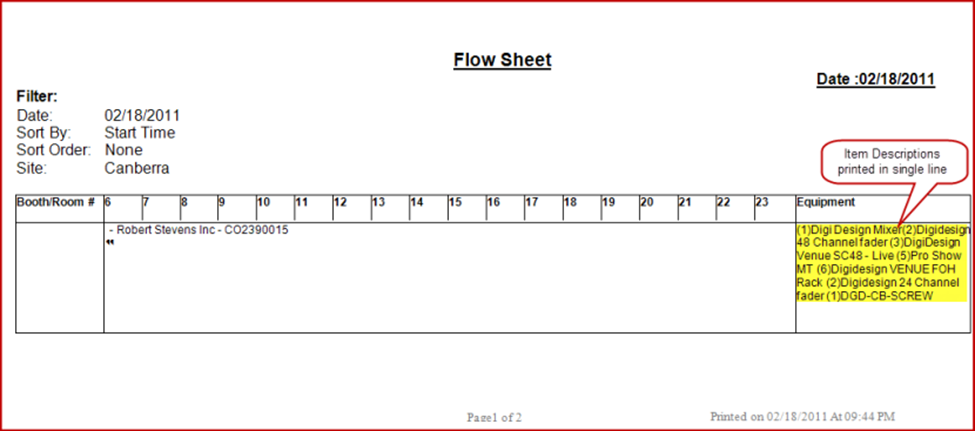
In versions prior to 05.02.12-00, while generating Flowsheet using 977UI or 9777UI, component type 2 can be used for CID 45 (977UI) and CID 24 (9777UI) to print the item descriptions in a single line as illustrated below:
With effect from version 05.02.12-00, you have the option to print item descriptions either in a single line or in a new line as explained below:
-
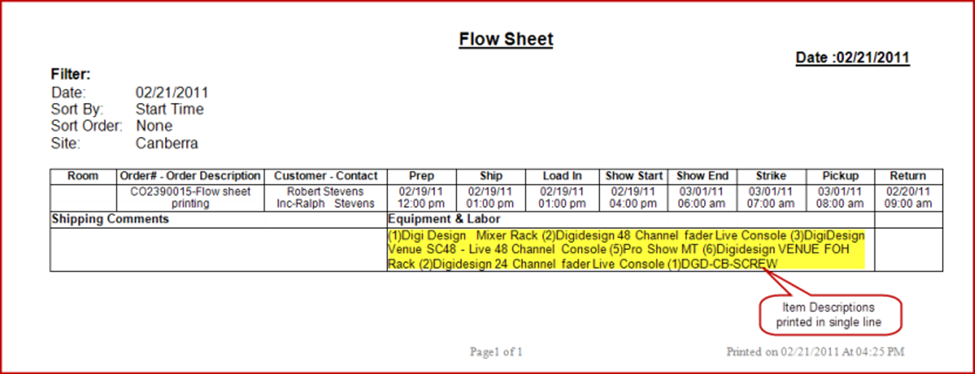
While generating Flowsheet using 977UI or 9777UI, with Component Type as 2 for CID 45 (977UI) and CID 24 (9777UI), system will print the item descriptions in single line in the print generated. Refer Figure 8.0 and Figure 8.1.
-
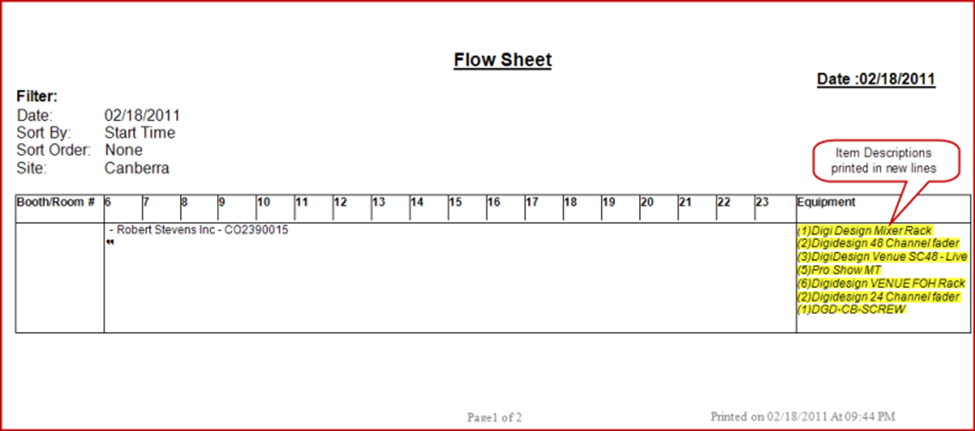
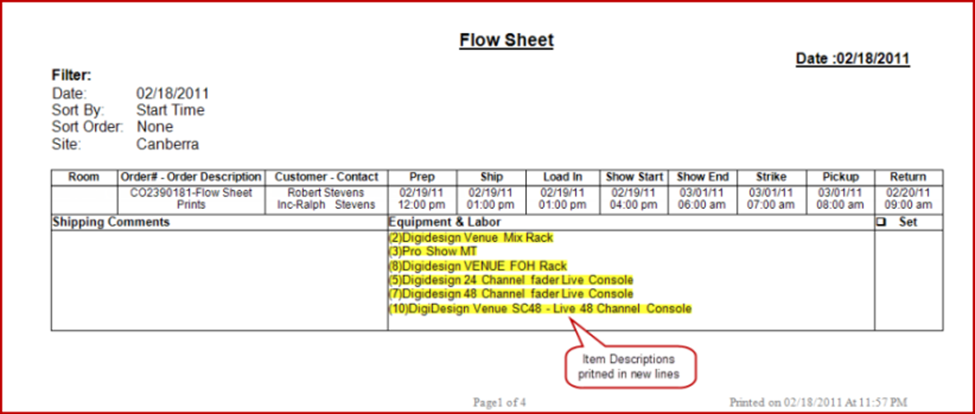
While generating Flowsheet using 977UI or 9777UI, with the Component Type as 64 for CID 45 (977UI) and CID 24 (9777UI), system will print the item descriptions in new lines in the print generated. Refer Figure 8.2 and Figure 8.3.
Flowsheet prints are generated in DOCX format. To learn more about DOCX, click here.