When a warehouse task (e.g., Prep, Ship, etc.) is assigned to an employee, you can define a rule to send a notification with the task and relevant order details, ensuring the employee is promptly informed. Any updates or changes to the task will also trigger notifications to keep the employee updated.
This feature supports all order types available in the schedule task screen such as Contract, Subrental, Transfer Order, Purchase Order, and Pickup.
Steps to schedule a warehouse task notification in BRE
-
Login to Labor > Navigate to Main menu > Navigate to BRE > Click Rules.
-
Click Create.
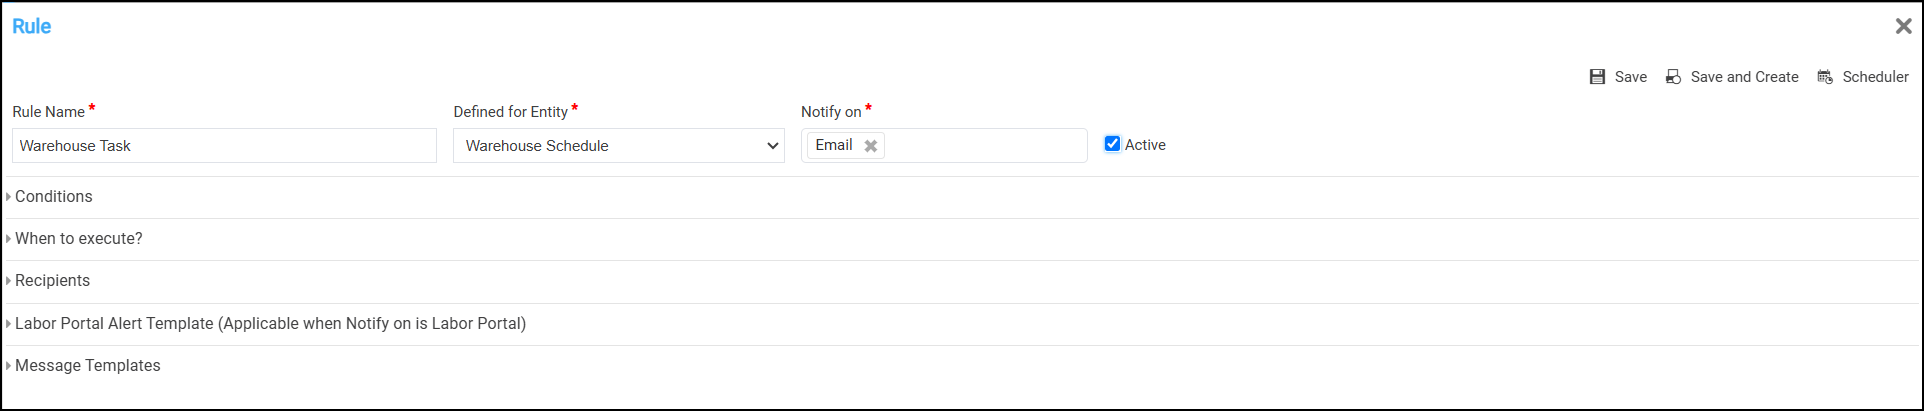
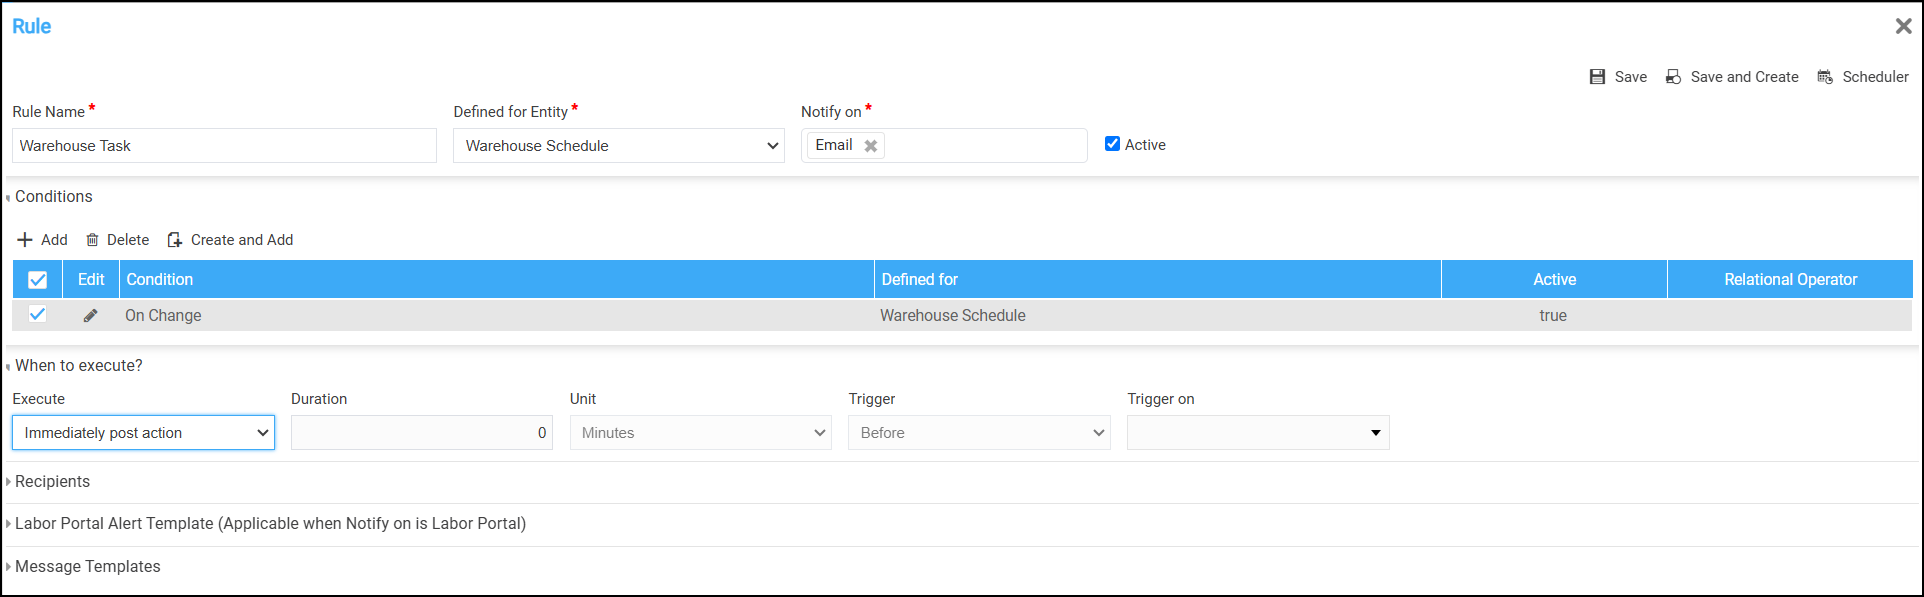
In the Rule screen, you will define the rule by setting the conditions that must be met when a warehouse task is assigned and you can specify the recipients and compose the body of the email template.
-
Enter the basic details of rule:
-
Rule Name: Provide a unique name to the rule.
-
Defined for Entity: Select the Warehouse Schedule entity from the dropdown. Once the entity is selected, system pulls the related sub entities and these help you to define the condition.
-
Active: Select the checkbox to keep the rule active.
-
Notify on: Choose Email to receive notification through Email or Labor portal if you want to receive notification through Labor Portal.
-
-
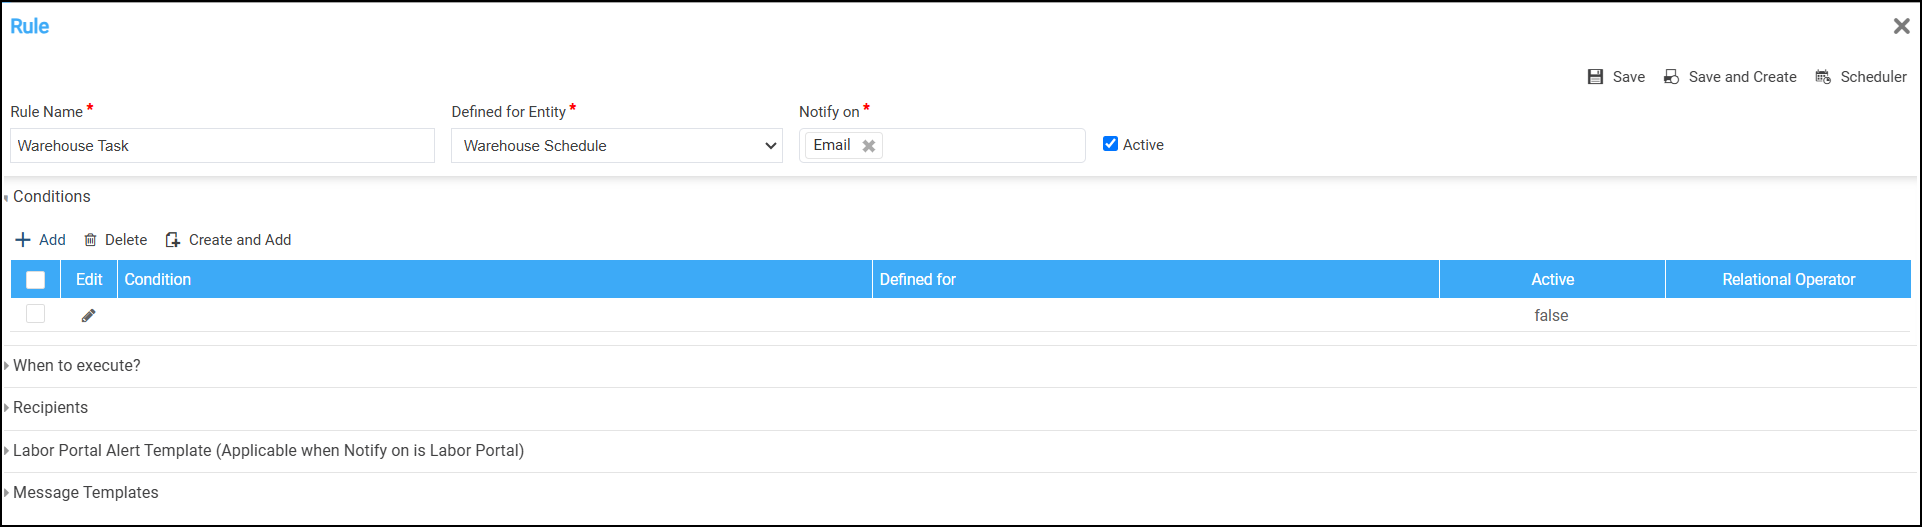
Expand Conditions to set conditions for above rule.
-
Click Add.
Conditions screen will be displayed
Here is the example
|
Field name |
Example |
Description |
|---|---|---|
|
When? |
On change |
“On Change” of field “Assigned to” in R2 |
|
Field |
Assigned to |
This means in R2 if there is any change in field/attribute in Warehouse task like changing description, site, load in date, comments etc., the condition should trigger an Email. |
|
Consider |
Current value |
Select either previous value or current value, which means it selects the value before changing or value after changing. |
|
Criteria |
Select any option |
Check for pattern in if you select any string type, checks dates previous or past months/years, Numeric values given if field is selected as amount, rate etc. |
|
Compare with |
Select any option |
If you select field value as Assigned to then it criteria gives options such as comments, recipients, site name etc. If you select date fields like load in date, schedule date it gives options such as current date, current date+15 etc. |
|
Relational operator |
AND , OR |
Select relational operator as OR to execute any of change occurs in the warehouse task, select relational operator as AND to execute all of the conditions since any changes occurred in warehouse task. |
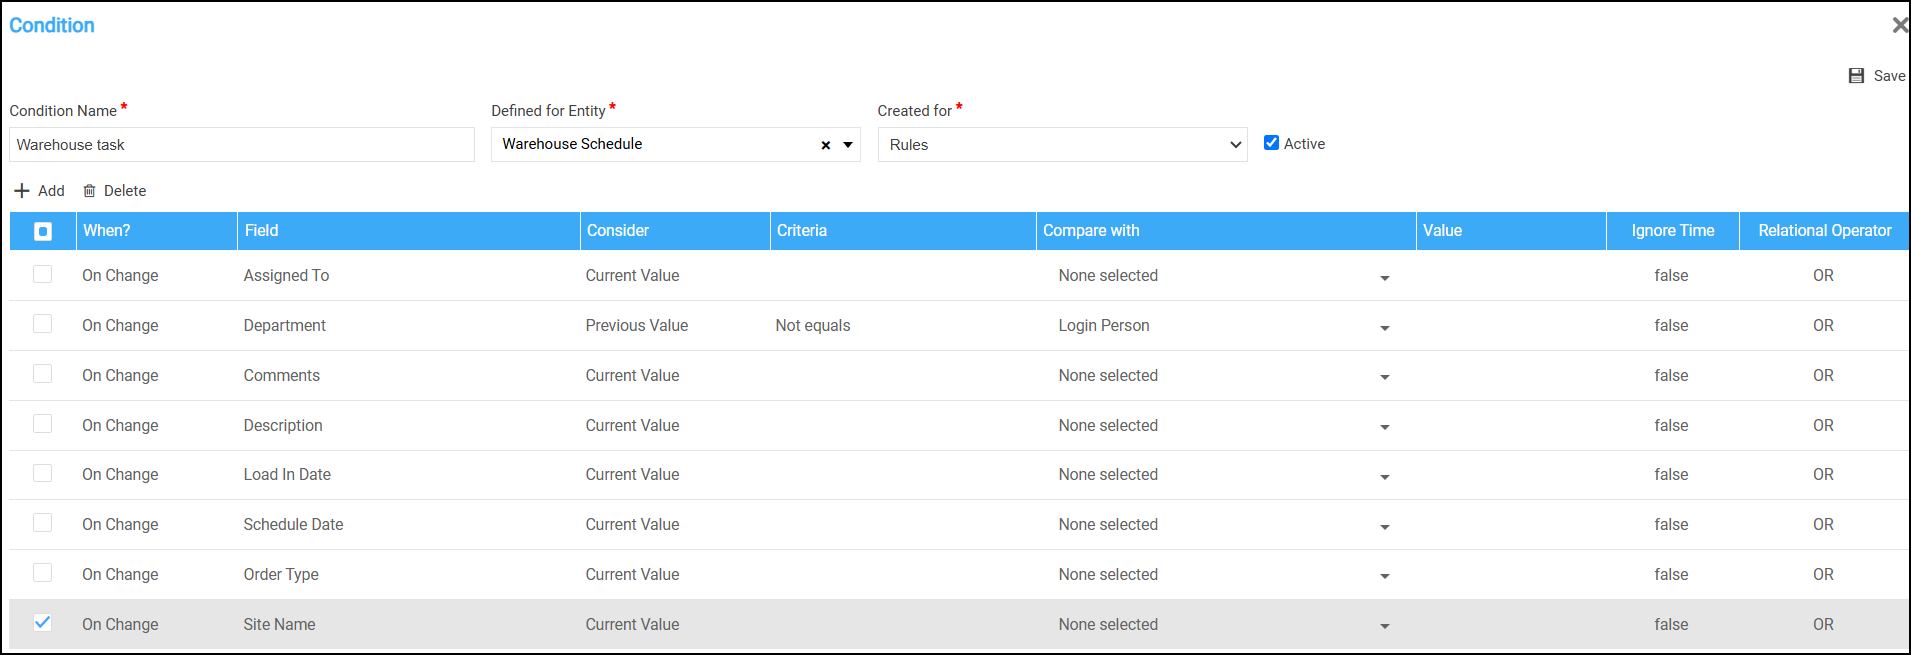
Example If you set the following options:
-
On Change: The rule triggers when a change occurs.
-
Assigned to: The field "Assigned to" is changed.
-
Current Value: The rule evaluates the value after the change has been made.
-
Select Any Option: You can compare the current value with any set criteria like Equals, Greater Than, or Less Than.
-
AND, OR: You can choose to trigger the rule if all conditions (AND) or any condition (OR) are met.
This means, if any change happens to the Assigned to field, the rule will activate and send an email notification.
-
When to Execute?: Expand this section, select Immediately Post Action to execute the rule as soon as creating or updating any warehouse task.
-
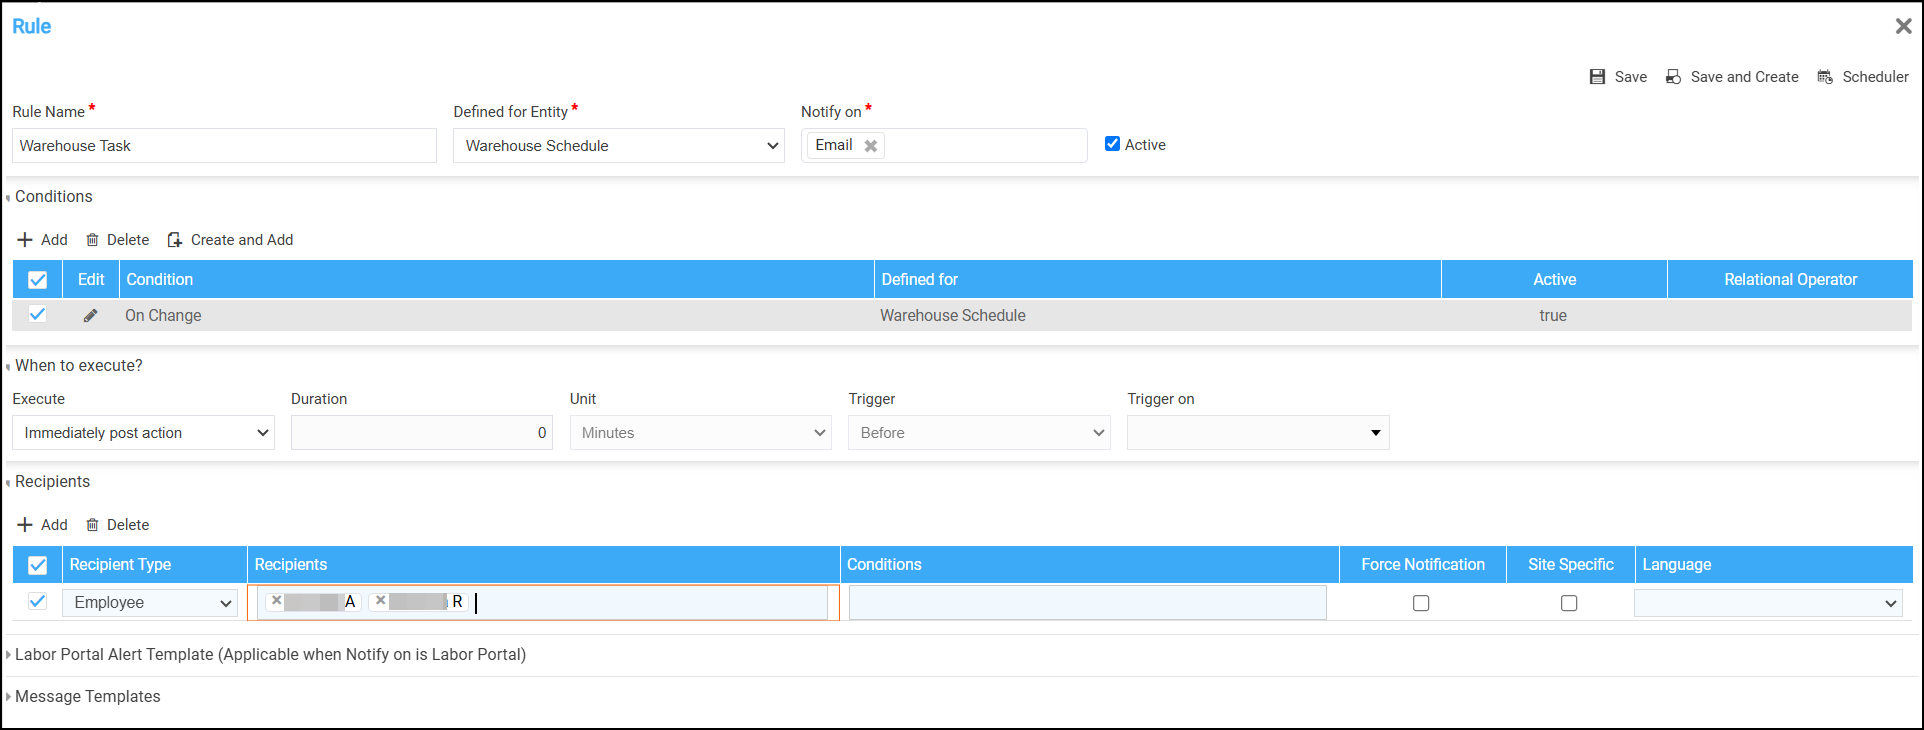
Recipients: Now, you can add Recipients to whom you want to send Notification to.
-
To send a notification you can select Employee, Department, Position, Contact, Others.
-
Example: Select Data Source Fields of R2 to choose relevant fields such as "Assigned To” etc.
-
-
If you want to receive notification through Labor Portal, then add Field tokens and template for alert.
-
Whenever you select Field tokens from the list, it gets added to template field
-
You can edit and modify according to required sequence with heading or more text.
-

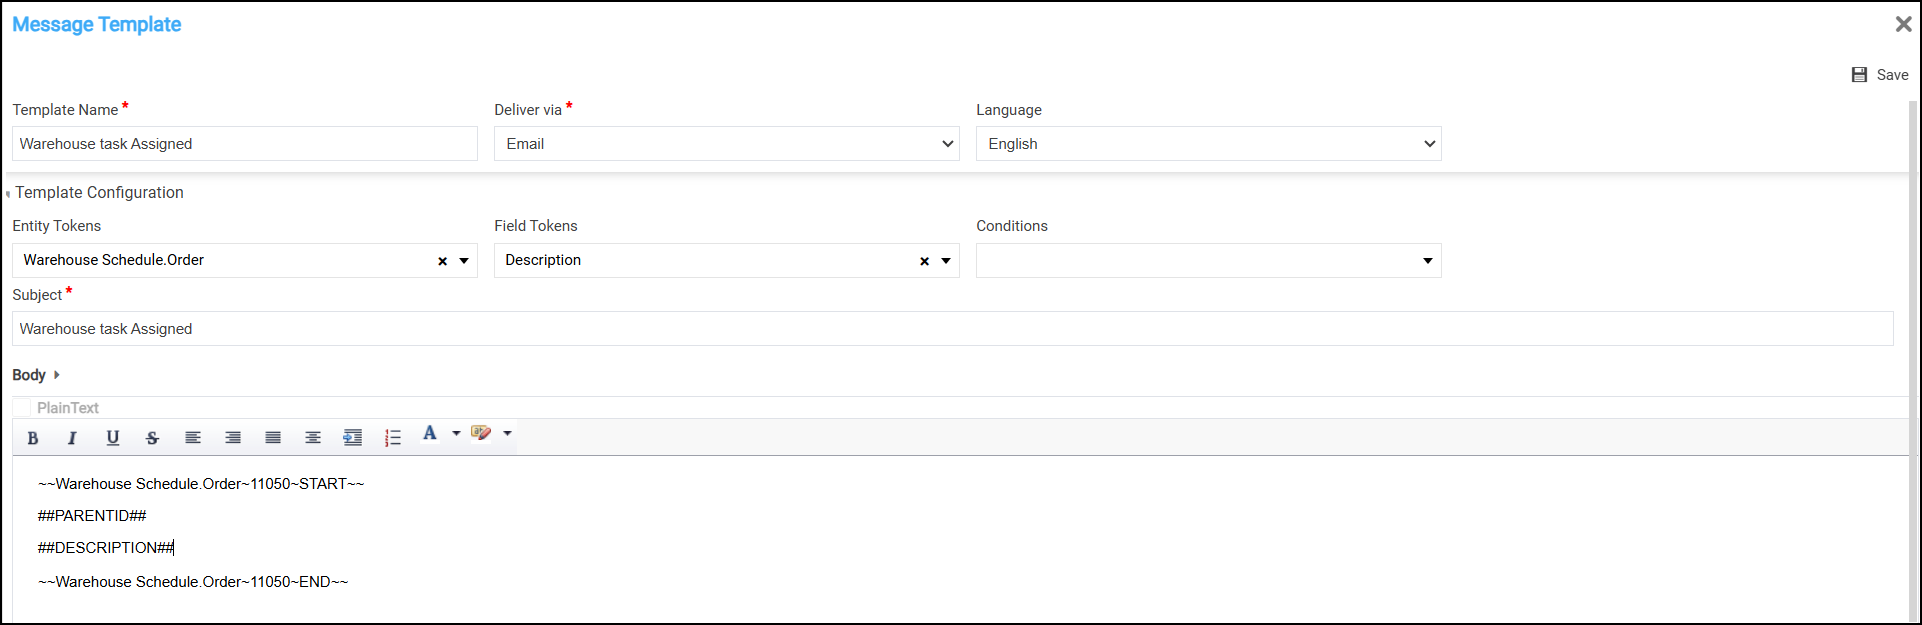
You can set Message template to send a Email notification.
-
Click Add to create a message template.
-
Enter the following fields:
-
Template name: To set a name for the Message title.
-
Deliver via: To set delivery mode such as: Email/Labor Portal.
-
Language: To set language for email content.
-
Template Configuration: This section is used to extract values from the order fields and retrieve information directly from R2 to include in the message such as
-
Entity tokens: This extracts values from selected entity such as : Order, Project manager, Sales Person, Event.
-
Field tokens: This extracts the particular values of selected entity such as: Order ID, Project manager first name, Sales person first name, Event name etc.
-
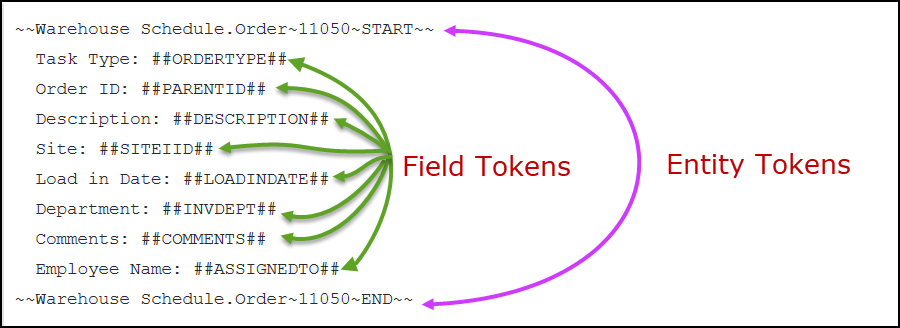
Here is the list of fields supported by Warehouse task entities.
-
-
Subject: This gives the message subject brief description.
-
-
Body: This section populates with the Entity tokens and Field token selected also here you can add your own text followed by Field tokens and text related to content, such as:
-
-
Click Save to save the message template.
-
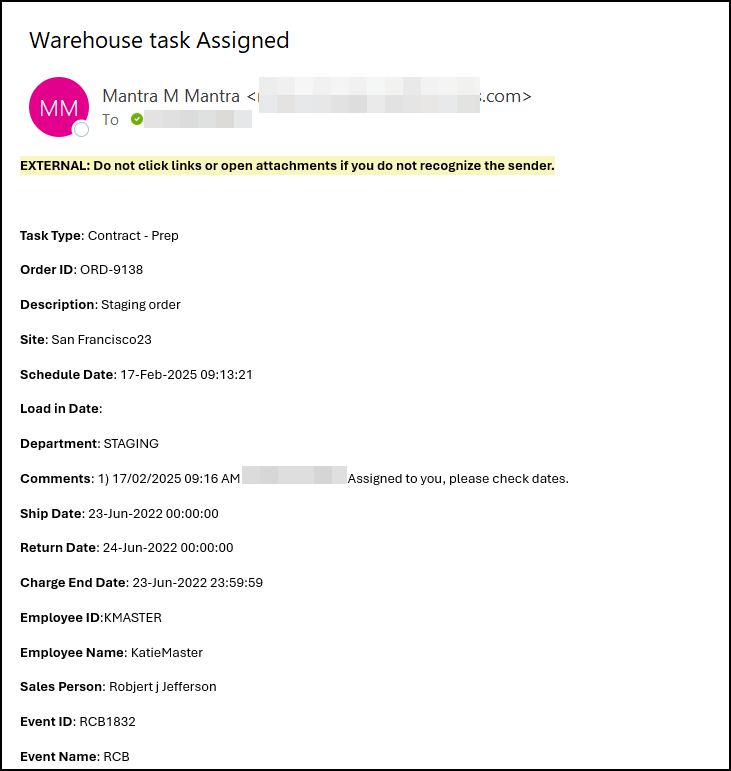
Whenever the field “Assigned to” gets changed the following Email triggers to the selected recipients.