The Scheduler allows you to predefine specific times or intervals for executing a rule. If the conditions are met, an email / notification will be triggered according to the defined rule.
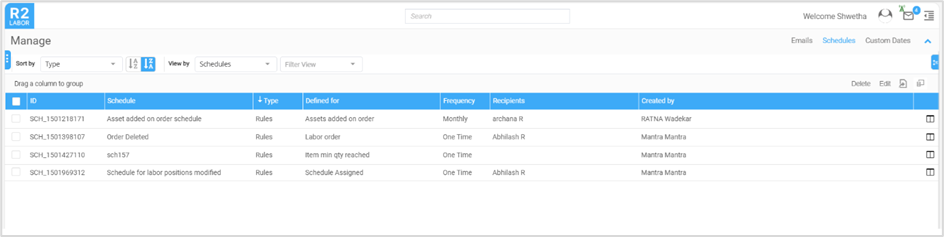
You can find and modify all the schedules created under BRE> Manage> Schedules as shown in the below screen.
-
Create: Schedules can be created for a specific rule. Click here to know more..
-
Edit: To modify existing schedule, select the Schedule from list and click Edit.
-
Delete: To delete existing schedule, select the schedule from list and click Delete.
How to create the Schedule?
-
Go to Rules and create a new rule or edit the existing one.
-
Click the Scheduler button at the top right corner of the screen.
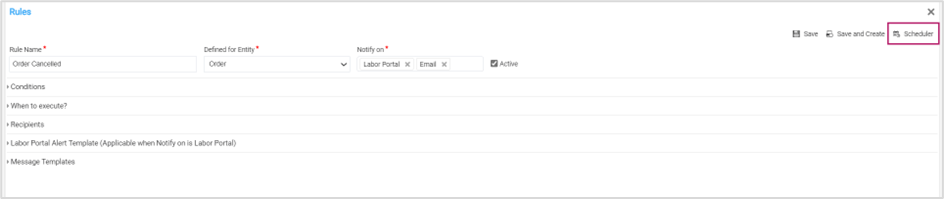
Figure 1.1: Scheduler in rules -
In the Schedule dialog box
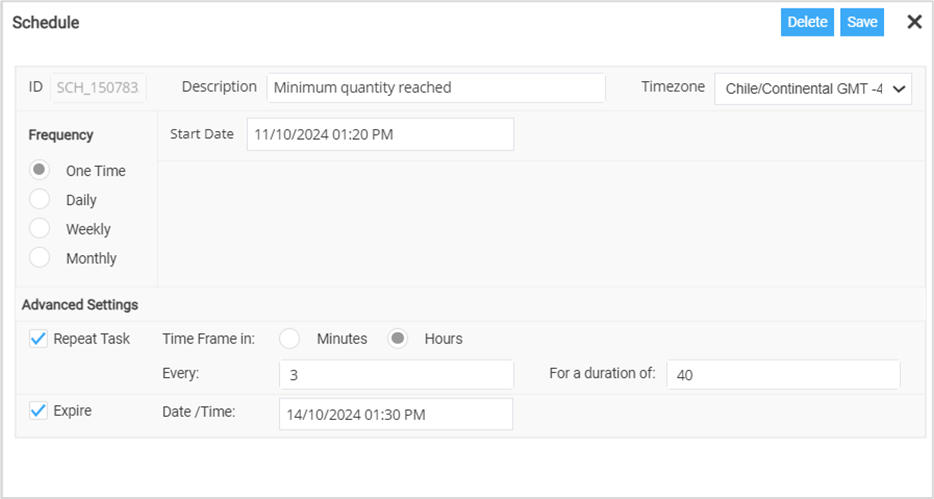
Figure 1.2: Schedule dialog box
-
ID: This is system generated and cannot be modified as it is disabled.
-
Description: Provide the description for the schedule.
-
Time zone: Set the time zone so that the rule can be executed based on the specified time zone.
-
Frequency: This is to set the interval period to execute the rule. Available periods are One time, Daily, Weekly, and Monthly. You can choose one of them as required.
-
Start Date: Use the calendar icon to set the date to start the rule execution.
-
Advanced Settings: This setting helps you repeat the rule execution at regular hourly or minute intervals.
-
Repeat Task: This checkbox enables to repeat the rule execution at specified intervals.
-
Time Frame in:
-
Select ‘Minutes’ to execute the rule at minute-based intervals.
-
Select ‘Hour’ to execute the rule at hour-based intervals.
-
-
-
Every: Enter the number of minutes or hours for the interval at which the rule should be executed.
-
Expire: Check this box to stop the rule execution after a specified date and time.