You can maintain all the call log details against the opportunity here. Here are the steps to do the same.
-
Click Call button.
-
'Log a Call' window displays as shown below.
-
Input the required details.
-
To log a call, you need to capture the following details.
-
Contact Name: By default, you will see the contact name tagged against this opportunity. However, you can change the contact if required using the dropdown.
-
Call Type: Select the type of the call from the dropdown.
-
Inbound: Select when you receive a call from your customer.
-
Outbound: Select when you call the customer.
-
-
Call Result: Select the conclusion of the call from dropdown.
-
Completed: When the customer attended your call and discussed.
-
No Answer: When the customer not received your call.
-
Left Message: When the customer left a message and dropped the call.
-
Not Reachable: When the call has not reached the customer.
-
Need Follow up: When the you need to follow up with the customer on few things.
-
-
Call Purpose: Select the purpose of the call from dropdown.
-
Follow up: When you follow up with the customer on the opportunity.
-
Marketing: When you commerce about the opportunity.
-
Request info: When you follow up with the customer on the opportunity.
-
Sales Prospecting: This is very similar to cold calling where you approach a customer enquiring about your product for services.
-
Support: This is very similar to regular after/during sales support where you approach the customer for extending any technical, functional, and billing related assistance.
-
-
Date/Time: Select the date and time of the call you had with customer using the calendar icon.
-
Details: Input the call details in the textbox.
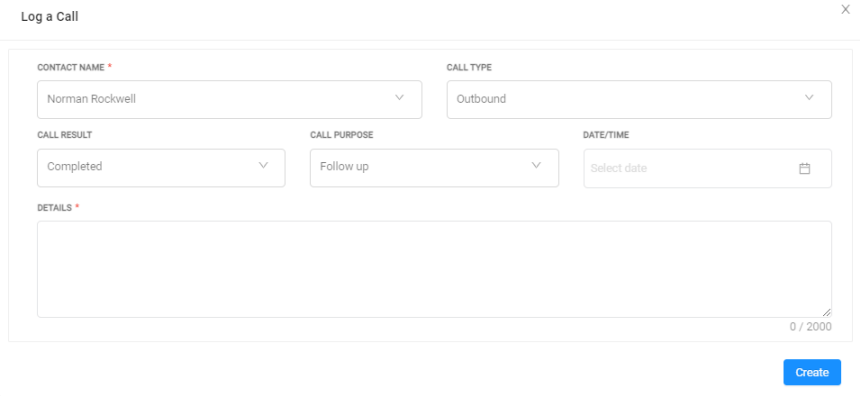
Figure 1.0: Log a Call window
-
-
-
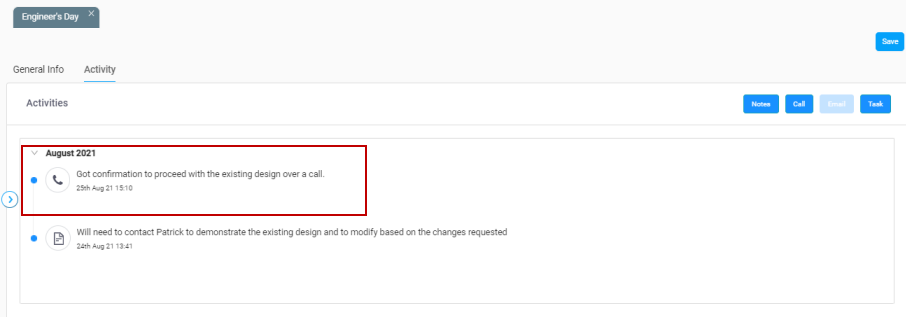
After providing the details, click Create button. The created note displays in the timeline view.
-
Click the Call icon to see who captured the notes.
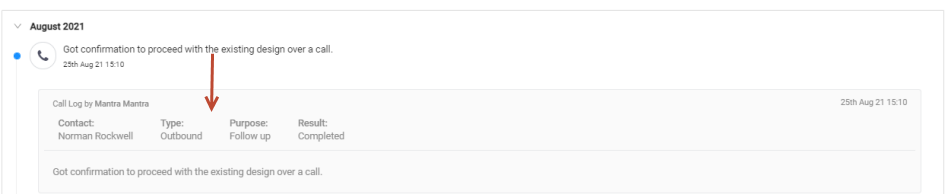
Figure 1.2: Call details