(06.24.02-00) Integration with Employment Hero Application
Content was last updated in 06.24.02-00
This is a custom enhancement developed for a specific business requirement.
This feature helps you to create Timesheets in R2 Labor by importing the work time-log of In-House resources from Employment Hero application against the Jobs (Bookings) those resources have worked upon, so that the time log and actual cost is reflected in R2 Labor accordingly.
Prerequisites
Install the following components in the client’s machine.
Python
Oracle SqlPlus Client
Oracle Sql* Loader
Create the following data in R2Labor application.
An Order with at least one Labor position added.
Assign Resource to the Labor position. The assignment status must Always be ‘Confirmed’.
The Assignment should have a defined Start and End Date.
EWT Records must have been defined for the mentioned Start and End Date.
A Calendar event is defined with matching Start and End Date and EWT records.
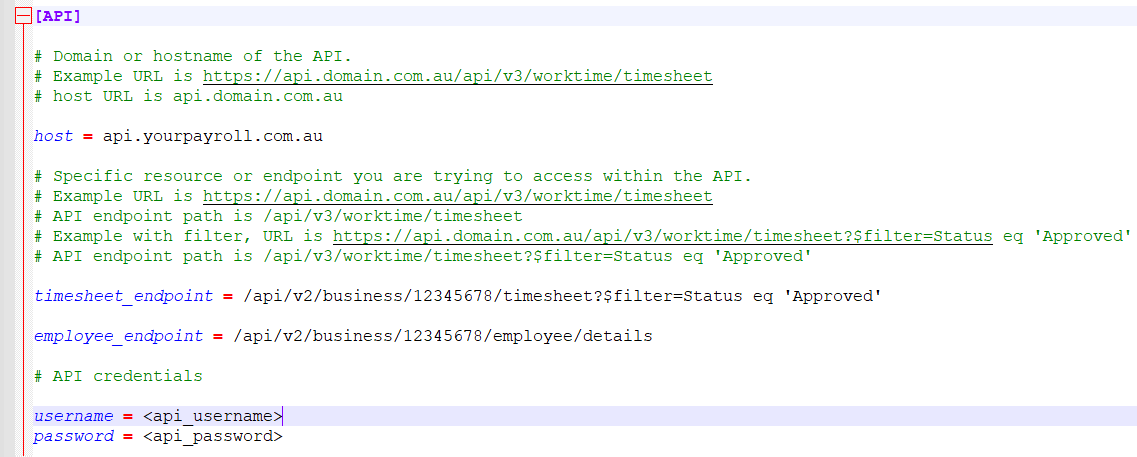
Setting up the .ini file
This configuration file is referred by the Python script for Employment Hero integration to create Timesheets.
The file name is EmploymentHeroAPIConfig.ini. and is available at the folder location ../CustomScripts/EmploymentHeroIntegrationForTimesheet/.
Open the file and fill-in all the required details…
Field Name | Description |
|---|---|
[API]Host | Domain or hostname of the API. |
[API}timesheet_endpoint | Specific resource or endpoint you are trying to access within the API for the timesheet. |
[API}employee_endpoint | Specific resource or endpoint you are trying to access within the API for the employee details. |
[API]Username | API credentials |
[API]Password | API credentials |
[Database]schema_username | Username for Oracle schema being used. |
[Database]schema_password | Password for the above Username |
[Database]service_name | Configured Service Name for the Schema being used. |
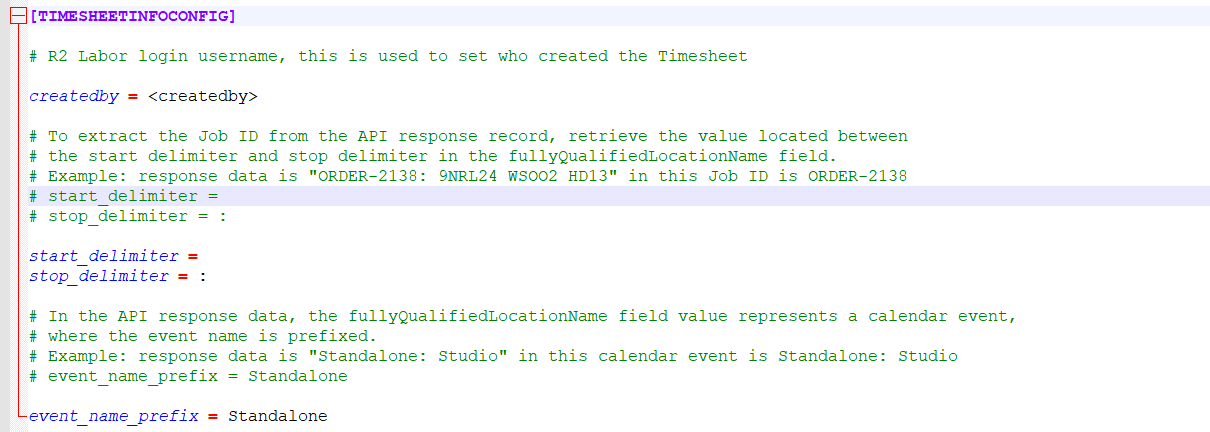
[TimesheetInfoConfig]createdby | R2Labor user who created the Timesheet |
[TimesheetInfoConfig]start_delimiter | Start and Stop Delimiter are used to extract the following values from the Start_Delimiter field can be blank.
|
[TimesheetInfoConfig]stop_delimiter | |
[TimesheetInfoConfig]event_name_prefix |
The ‘event_name_prefix’ is picked from the above setting and matched the with ‘Description’ text of all the ‘Calendar Events’ definitions in R2Labor, to ascertain if the extract record is indeed a ‘Calendar Event’ or not.
See below, screenshot of a sample INI file
How sync happens?
EH to R2 Labor Timesheet integration will be successful only:
If an EWT record with matching JobID and Date is found in R2 Labor and
If Calendar event "Standalone" definition exists.
A Calendar event with matching date is found in R2 Labor.
The script provided can be run to import the Timesheet details from Employment Hero and create Timesheet in R2 Labor.
This Batch Program will fetch the Timesheet details from Employment Hero whose status is 'Approved'.
Validating a Successful/Unsuccessful extraction
If extraction is Successful
A Successful Event is when “all the records are mapped properly.”
It will create the relevant Timesheets in R2 Labor.
It will place the following files in the '/Log/Success' folder.
A JSON extract with all the records processed/fetched in the response.
The extracted JSON will have the following naming convention.
<Order Description>_<DateStamp In YYYYMMDD format>_<TimeStamp In 24HHMMSS Format>.JSON
If extraction is Unsuccessful
A Failed Event is when “there is at least one record in the response that could not be mapped to R2 Labor Bookings or Paid Calendar Events.”
System fails to create a Timesheet for these lines.
It will place the following files in the '/Log/Failure' folder.
A JSON extract with all the records processed/fetched in the response.
A CSV format log file bearing the 'Creation timestamp' and in the file name.
The log will also have details of all the records due to which error occurred.
Some examples for the reasons why an extraction would fail:
Multiple records are found with the Resource ID, Order ID and Event Date API response.
Resource ID is not found in R2 Labor.
No Booking/EWT is found for the mention date in R2 Labor.
The extracted JSON will have the following naming convention.
<Order Description>_<DateStamp In YYYYMMDD format>_<TimeStamp In 24HHMMSS Format>.JSON
The extracted Log, in either case will have the following naming convention.
Failure_Details_<DateStamp In YYYYMMDD format>_<TimeStamp In 24HHMMSS Format>
Scenario #1: Creating Timesheet(s) for Booking Lines.
Step 1: Order Created within R2.
In R2, do the following steps:
Create an Order.
Add the desired labor positions and their respective desired count.
Save the Order.
Note down the Order ID.
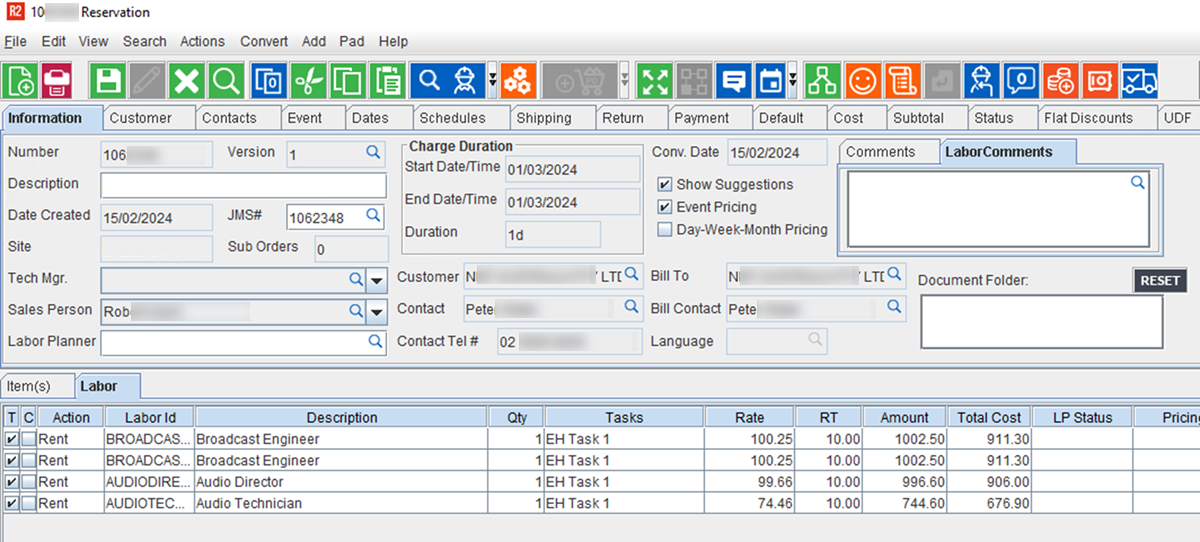
Order within R2 displaying Labor Lines
Step 2: Labor lines within R2Labor.
Open R2Labor, and continue with the following steps:
Search and Open the same Order ID.
In Planning Order, assign a ‘Resource’ for each of the added labor position(s).
If there are multiple count for a specific labor position, repeat the above step.
Save the Order.
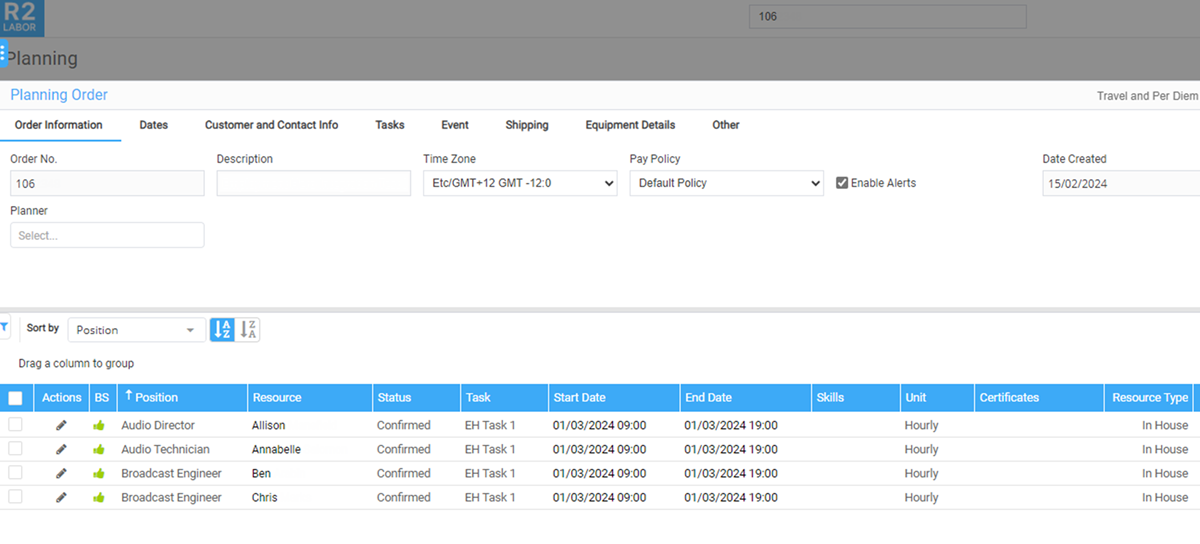
Labor Lines with Resources in Planning Order
Step 3: Run the Script mentioned above to extract data from EH Application.
Run the batch file to get the extract from EH Application.
If the extract is not generated, look for the Log file in the Failure folder as explained above.
Step 4: Labor lines with Timesheet (after extraction from EH) in R2Labor.
Open R2Labor, and continue with the following steps:
Search and Open the same Order ID.
In Timesheet, the required data would have been populated from the extract.
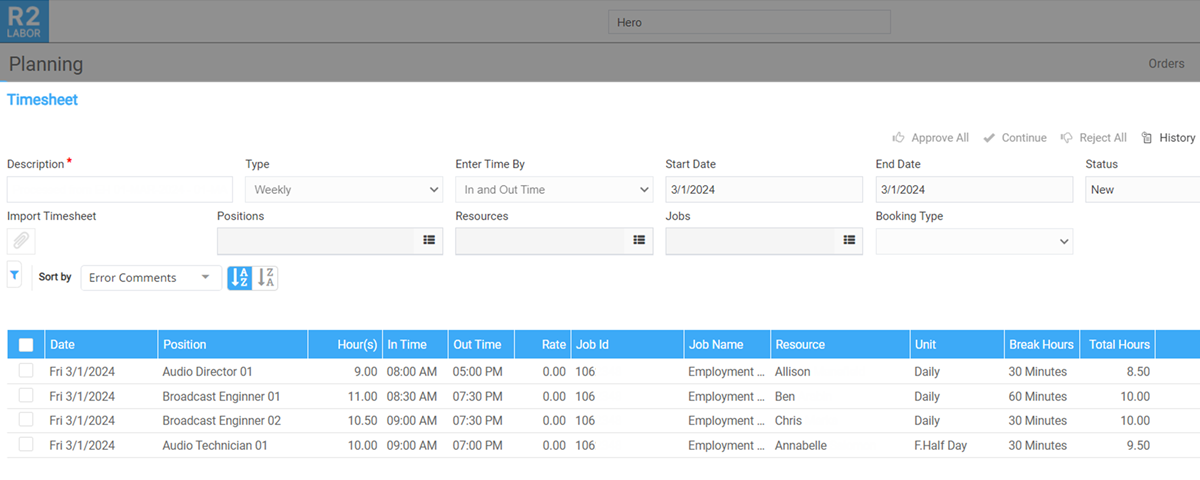
Labor Lines with Timesheet
Scenario #2: Creating Timesheet(s) for Calendar Events
Step 1: Create ‘Calendar Events’
As a 'Prerequisite for this scenario, the Standalone events should exist in both R2Labor and Employment Hero. Within R2Labor, this has two parts - Defining a Calendar Event and Creating a Calendar Event for a specific crew on a certain date.
Before extraction is initiated, it is important to ensure that: All the ‘Calendar Events’ needed from Employment Hero are in ‘Approved’ state, since the scripts will look for only those events.
Step 2: Identifying if the extracted data from Employment Hero is a ‘Calendar Event’
The program does the following checks to successfully add the calendar events to a timesheet:
For every record received from Employment Hero API, the program checks if the
fullyQualifiedLocationNamefield starts with the prefix defined in event_name_prefix.If it does, the program checks if it matches any calendar events in the definitions configured in Web Labor Settings.
If there is a match, the program tries to find this calendar event for the given dates and crew in R2Labor.
If the match is successful, the script proceeds for timesheet generation.
If the match is not found, the script considers this as an error, and logs it accordingly.
Step 3: Generating Timesheet in R2Labor.
If all of the above conditions from previous step are satisfied, a timesheet record is added for processing.
Else, the script considers this as an error, and logs it accordingly.
For both of the above scenarios, the timesheet created through this process, adheres to the following Naming convention.
Processed From EH will be Prefix for the timesheet description.
Earliest Start Date and Latest End Date is also shown in the Description.
Type of Timesheet is ‘Weekly’.
Time is Entered as “In and Out Time”.

