The Travel Itinerary screen enables to enter details related to a new travel plan. It includes fields for capturing basic itinerary information, along with dedicated tabs for managing associated jobs, flight, and hotel details.

Header section
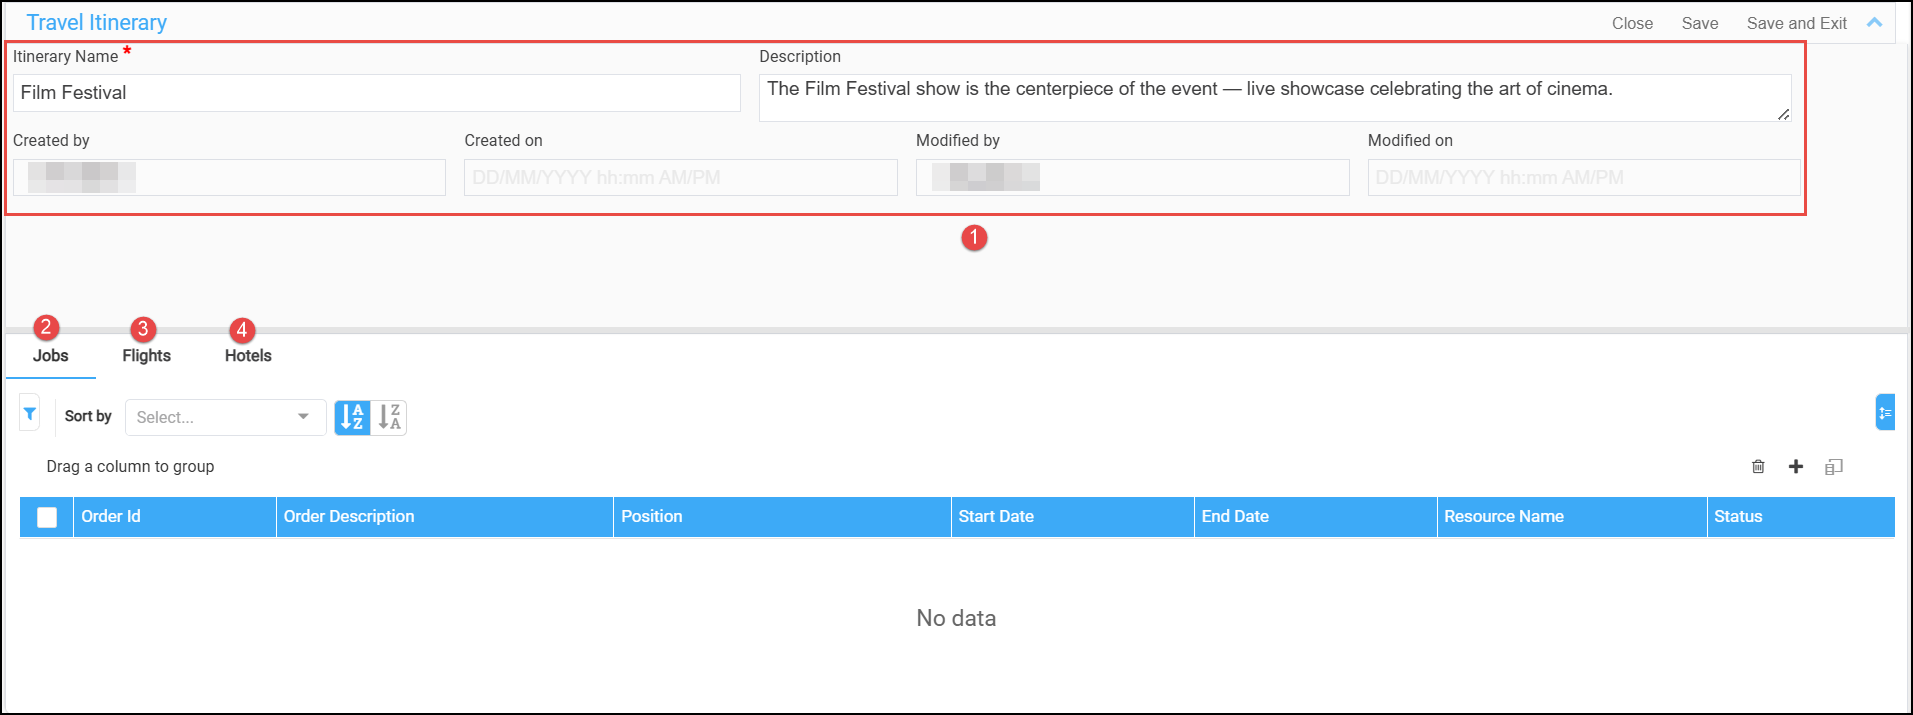
This section allows users to input basic information about the itinerary.
-
Itinerary Name: Provide a unique name to the itinerary. The asterisk (*) indicates that this is a required field to save the itinerary.
-
Description: Optional text field to add details or context about the itinerary.
-
Created by: A read-only field that displays the name of the user who created the itinerary after it has been saved.
-
Created on: A read-only field showing the date and time the itinerary was initially created.
-
Modified by: A read-only field indicating the user who last updated the itinerary.
-
Modified on: A read-only field displaying the date and time of the most recent modification.
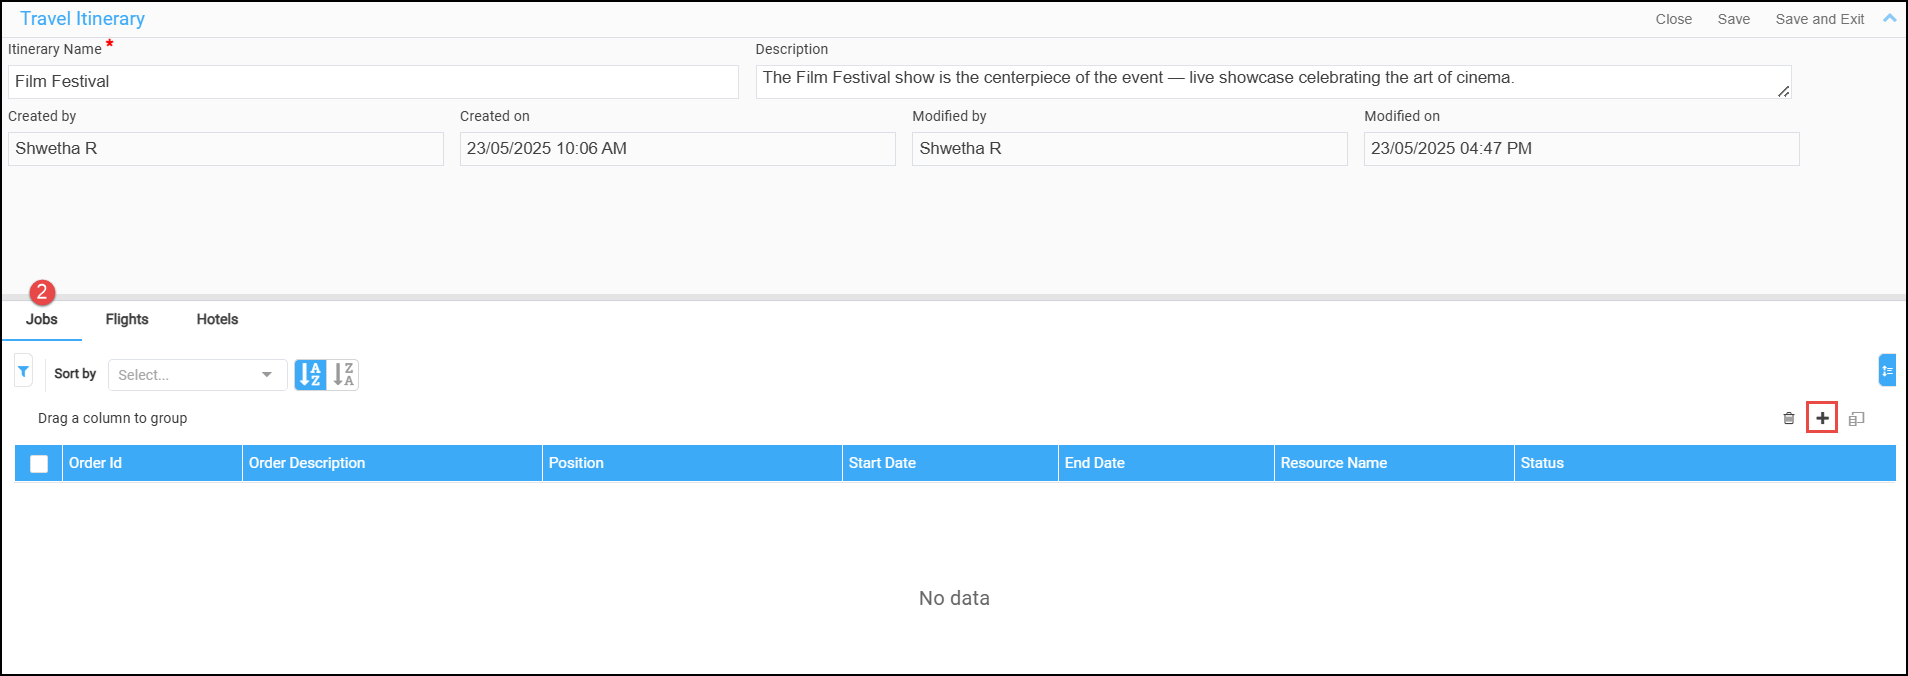
Once the basic details are entered, next is to select the jobs to create itinerary for the resources assigned on the jobs.

Jobs
-
Click the "+" icon to search jobs.
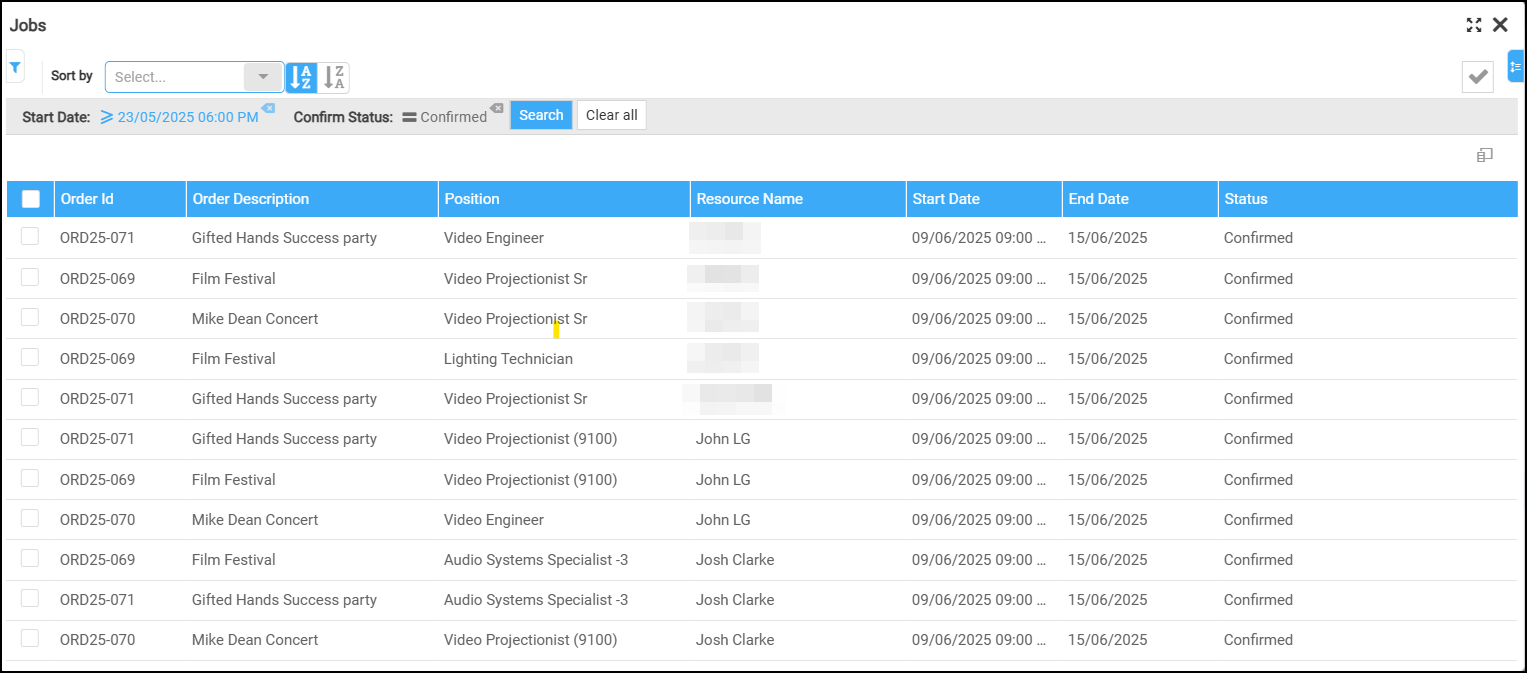
A popup window appears to select jobs. By default,
-
Jobs scheduled to start one hour from the current system date and time are displayed.
-
Only jobs with a 'Confirmed' status are shown. Use the filter option to view jobs with other statuses.
-
All job entries are displayed in read-only mode.
-
Select the desired jobs and click Apply (✓) icon at the top right corner. The pop-up will close, and the selected jobs will be added to your itinerary.
-
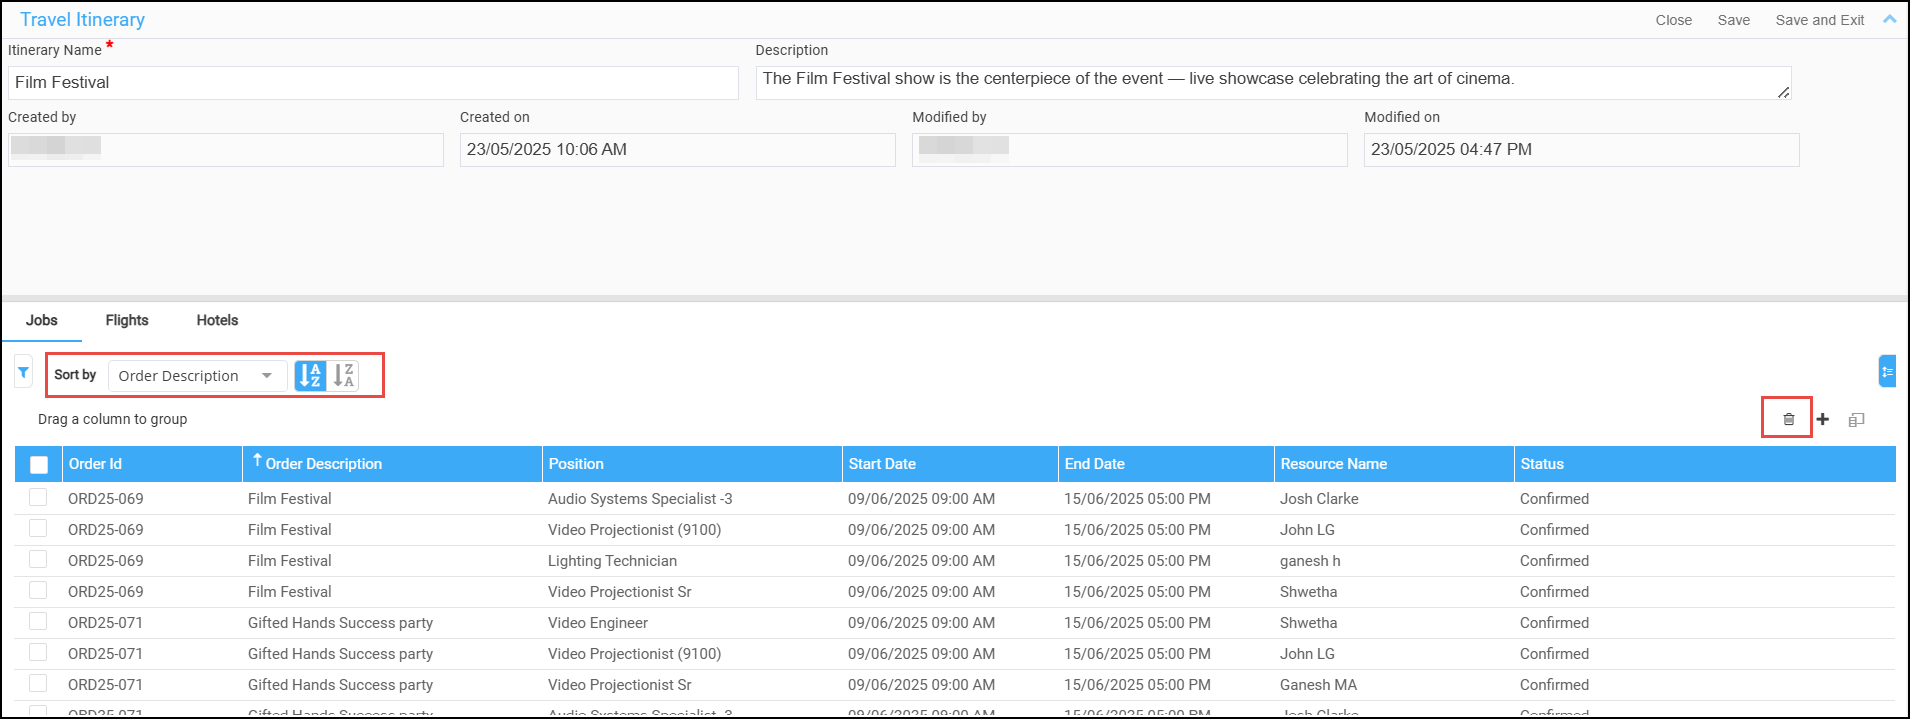
Use ‘Sort By’ option to arrange results according to your preferred criteria.
-
Use 'Filter' option to search or filter jobs.
-
Use ‘Delete’ option to remove the job from itinerary.
-

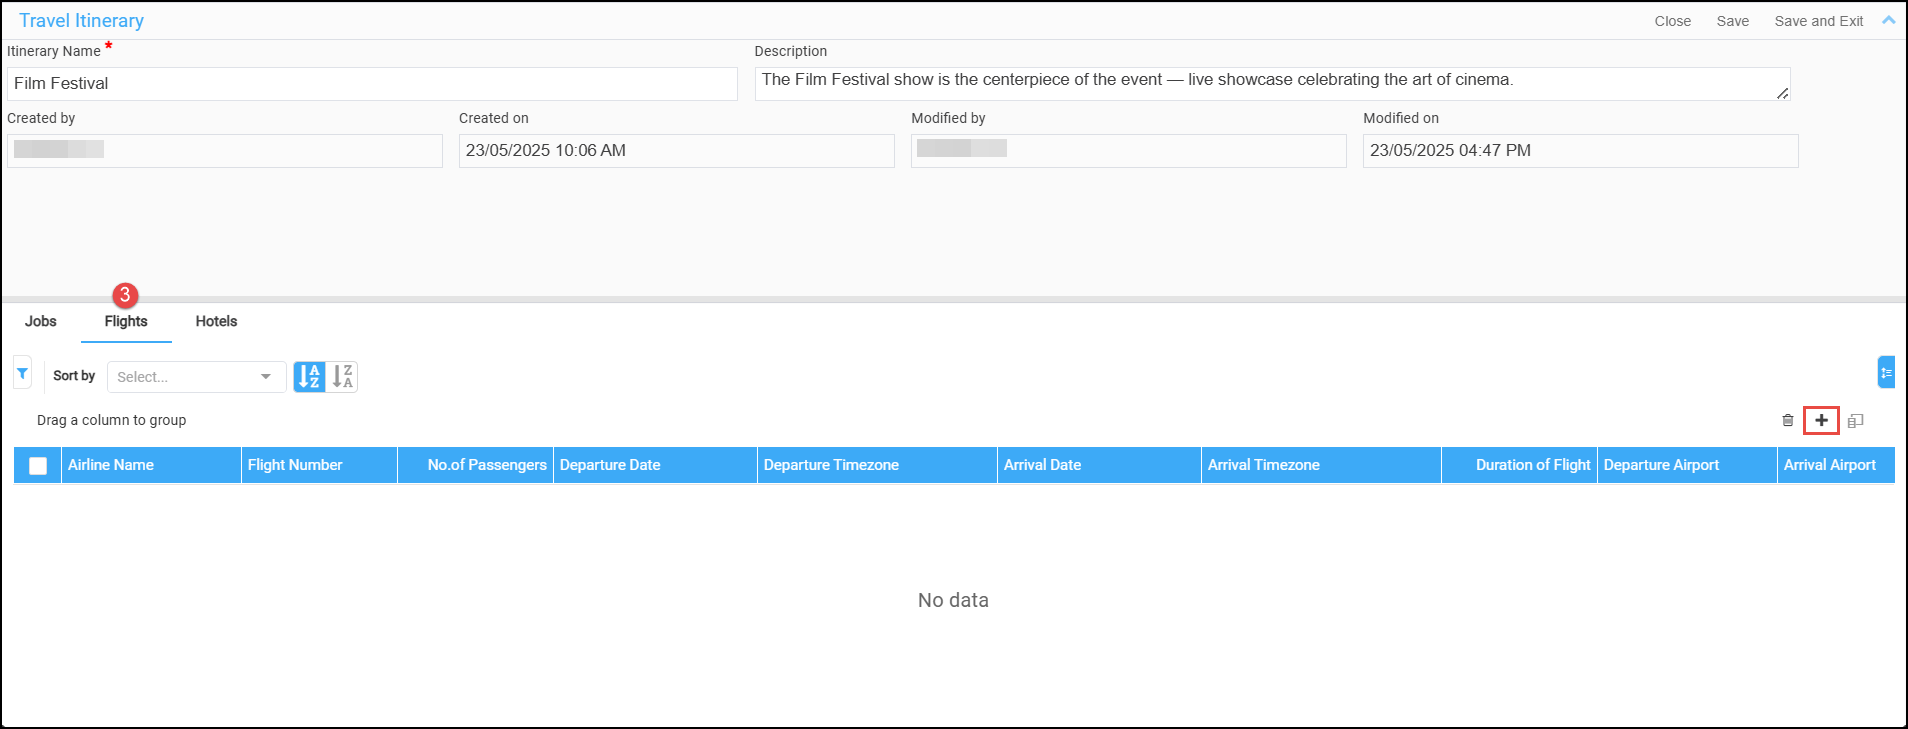
Flights
As the name says, "Flights" tab is to input flight details. Without adding Jobs to the itinerary, you cannot input flight details.
-
Click "+" icon to add flight details to the itinerary.
-
Input the flight details.
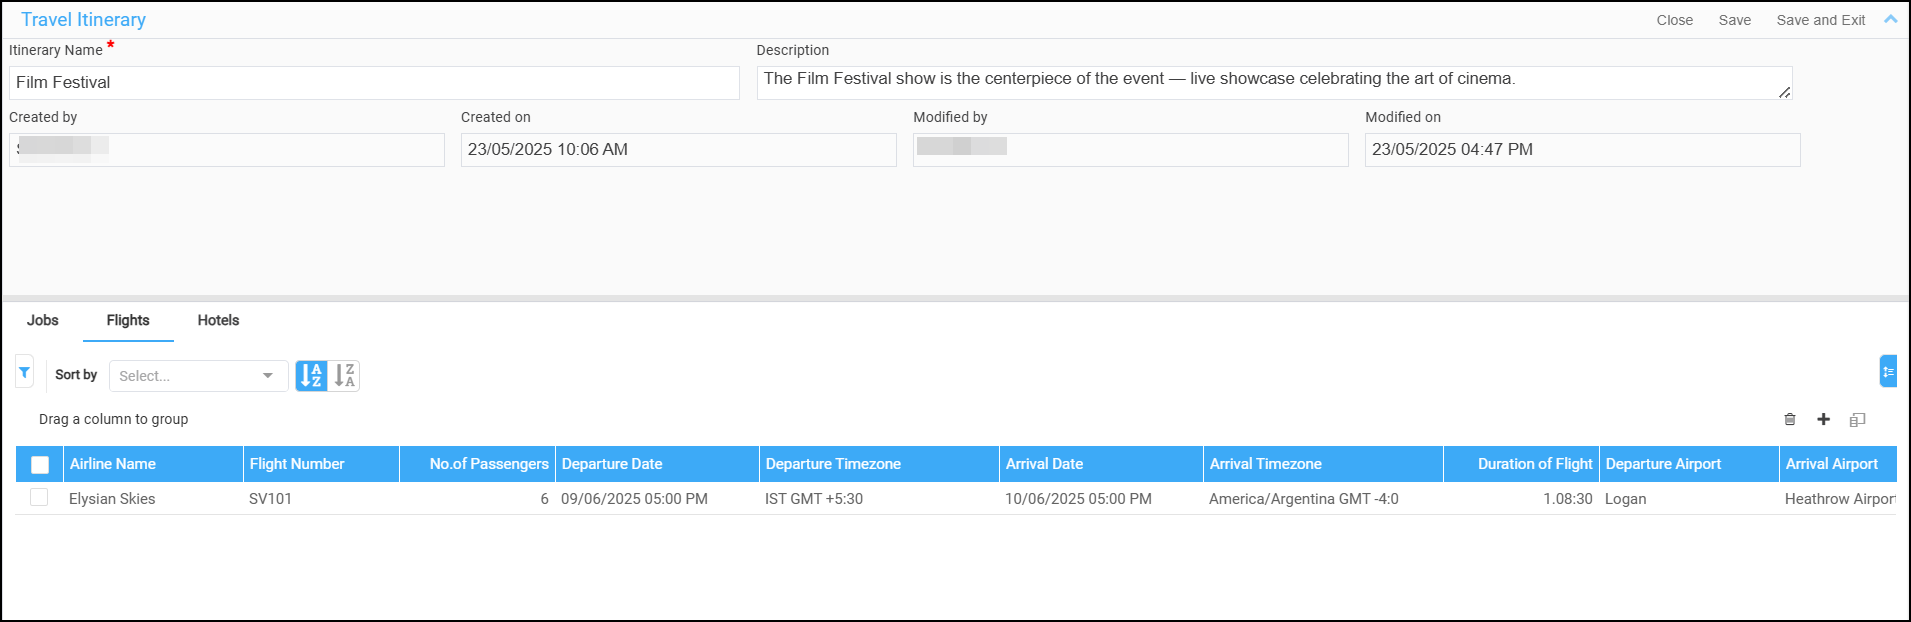
Figure 1.5: Flight info -
Airline Name: The name of the airline.
-
Flight Number: The flight’s unique identifier.
-
No. of Passengers: This field automatically populates the passenger count based on the resources assigned to the selected job dates. For example, if four job dates are selected in jobs tab, then the passenger count displays as Four with an edit icon.
-
Clicking the edit icon opens the Flight Passenger Details dialog.
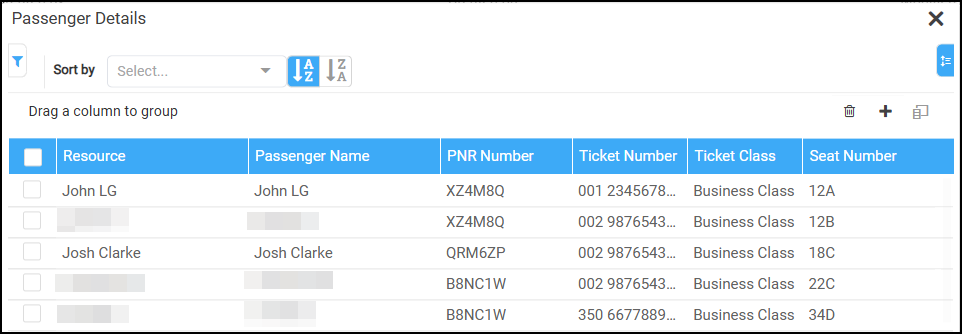
Figure 1.6: Passenger Details -
You will see the resources who are assigned on the selected job dates in jobs tab.
-
Enter the Passenger Name, PNR number, Ticket Number, Ticket Class, and Seat Number for each resource.
-
Use the Remove option to exclude resources from the list. When changes are made, the No. of Passengers value updates automatically.
-
Use the Add option to include additional resources (limited to those assigned to the selected job dates).
-
-
Sort and Filter options are provided to organize or narrow down the passenger list.
-
-
Departure Date: The date of departure
-
Departure Time zone: The time zone of the departure location (e.g., "IST GMT +5:30").
-
Arrival Date: The date of arrival (e.g., "03/21/2025" for the first flight, "03/24/2025" for the second).
-
Arrival Timezone: The timezone of the arrival location (e.g., "IST GMT +5:30").
-
Duration of Flight: The length of the flight (e.g., "00:02:00" or 2 hours for the first flight, "00:03:30" or 3 hours and 30 minutes for the second).
-
Departure Airport: The airport of departure
-
Arrival Airport: The airport of arrival
-
Booking Reference: A reference number for the booking
-
Baggage Allowance: The allowed baggage weight (e.g., "20 kg").
-
Loyalty Program Info: Information about loyalty programs (e.g., "NA" for not applicable).
-
Additional Information: Extra notes or instructions
-
Hotels
This tab is dedicated to input the Hotel details. Without adding Jobs to the itinerary, you cannot input Hotel details.

-
Click on “+” icon to add Hotel details to Itinerary.
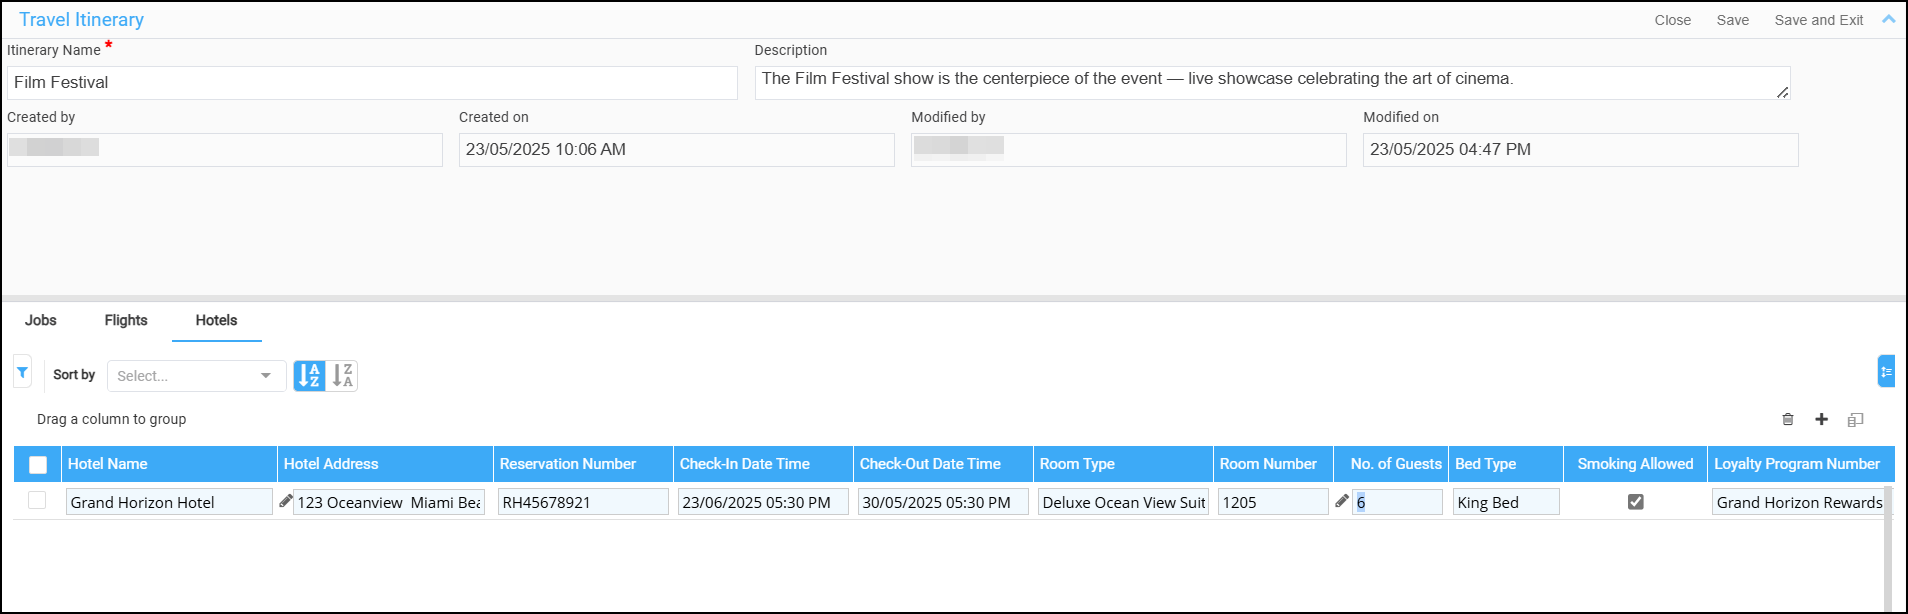
Figure 1.8: Hotel Info -
Enter the following details:
-
Hotel Name: The name of the hotel where the reservation is made.
-
Hotel Address: The full address of the hotel, including street, city, and postal code.
-
Reservation Number: A unique identifier or reference number for the hotel booking.
-
Check-In Date Time: The scheduled date and time for check-in at the hotel.
-
Check-Out Date Time: The scheduled date and time for check-out from the hotel.
-
Room Type: The category of room booked (e.g., "Single", "Double", "Suite").
-
Room Number: The specific room number assigned (if available at the time of entry).
-
No. of Guests: This field automatically populates the Guest count based on the resources assigned to the selected job dates. For example, if four job dates are selected in jobs tab, then the guest count displays as Four with an edit icon.
-
Clicking the edit icon opens the Hotel Guests dialog.
<img>-
You will see the resources who are assigned on the selected job dates in jobs tab.
-
Enter the Guest Name, Guest Phone, and Guest Email for each resource.
-
Use the Remove option to exclude resources from the list. When changes are made, the No. of Guests value updates automatically.
-
Use the Add option to include additional resources (limited to those assigned to the selected job dates).
-
-
Sort and Filter options are provided to organize or narrow down the Guest list.
-
-
-
Bed Type: The type of bed provided in the room (e.g., "King", "Queen", "Twin").
-
Smoking Allowed: Indicates whether smoking is permitted in the room.
-
Loyalty Program Number: The guest’s membership number for the hotel’s loyalty program (if applicable).
-
Hotel Phone: The contact phone number for the hotel.
-
Hotel Email: The email address for hotel communication or support.
-
Cancellation Policy: The terms and conditions for canceling the booking.
-
Check-In/Out Policy: Guidelines or rules provided by the hotel for check-in and check-out.
-
Additional Information: Any extra notes, instructions, or special requests related to the stay.
-
Once the itinerary is saved, you can
-
View or edit the itinerary in Planning Order associated with each corresponding booking line.
-
A visual indicator will appear on the booking line to show that an itinerary has been planned.