
-
Login to Needs Service for R2 app
-
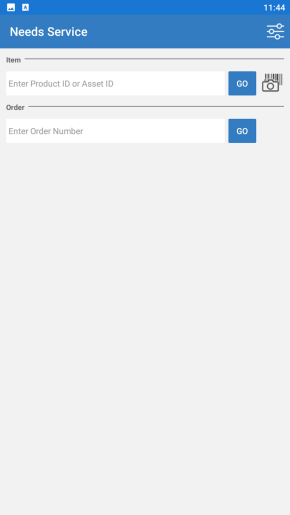
The Needs Service home screen appears as shown in Figure 1.0.
-
To proceed from here, you can either:
-
Enter an Item's SKU ID in the textbox or use the device's camera to scan a barcode.
-
Enter the Order ID in the textbox.
-
-
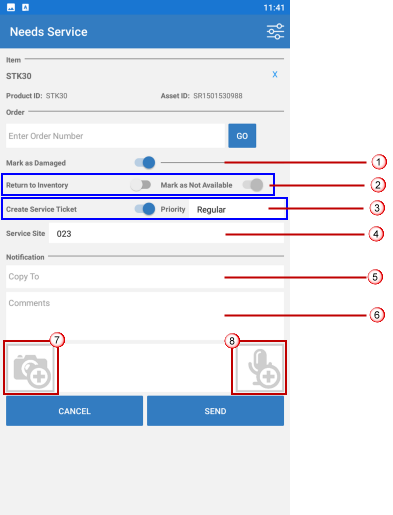
Once you have used the SKU ID or Order ID to search, the following screen displays the details.
-
In this screen you can do the following steps:
-
Use the slider to mark an item as damaged.
-
-
Only when you mark the item as Damaged, the system allows you to do the settings.
-
Only when you mark the item as 'Return to inventory'', it is automatically marked as 'Not available'.
-
Only when you decide to 'Create A Service Ticket', the system allows you to define the 'Service Priority', and choose the 'Site' at which service will be done.
-
Use the slider to mark the item as Return to inventory.
-
Further mark item as not available.
-
-
Use the slider to, mark if you need to Create a service ticket.
-
Set Priority for service ticket (Regular or High). See Screenshot.
-
Click to expand...
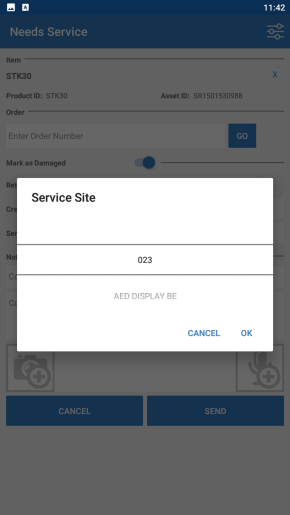
at which the service is too be done.
-
Add people from your team to communication related to Service request.
-
Add elaborate comments related to the service request communication
-
Tap the button to add an Image/Video to accompany your Service Request.
-
Tap the capture button on your device's camera feature, to click the required photo.
-
-
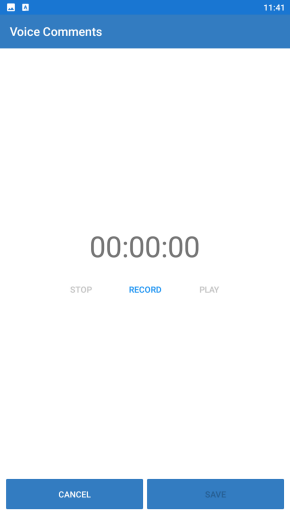
Tap the button to add an Audio Clip to accompany your Service Request.
-
Once the recording is ready, tap the Save button.
-
Figure 3.0 Adding Audio-visual Comments, Feedback, and Instructions
|
Tap on Add Product Image/Video or Instructions |
Tap on Add Voice Instructions/Comments |
|
|