To access the Transportation Module, open the R2 Launch Pad and click on WAREHOUSE. Begin by clicking on the Transportation icon.

Upon opening the Transportation Module, the following window will appear:

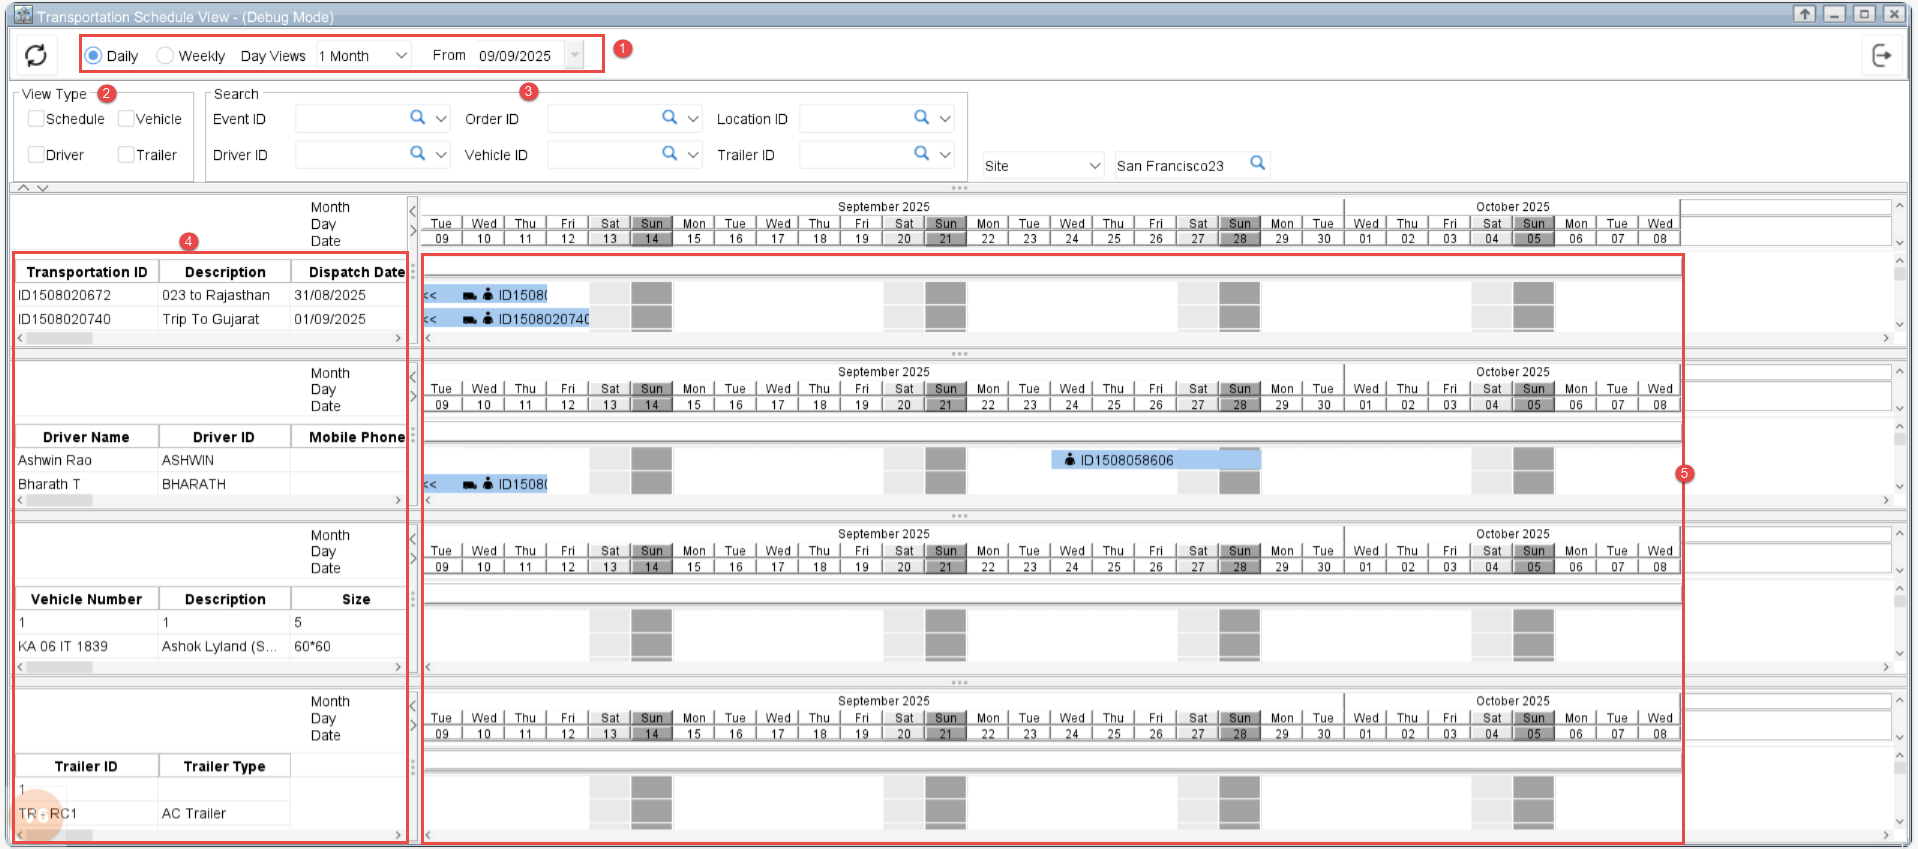
To view a full (giant) view of the logistics schedule and driver/trailer/vehicle availability, click ![]()
-
View Modes: You can switch between Daily, Weekly, and Monthly views to see schedules at different levels of detail.
-
Custom Date Range: To focus on a specific timeframe, select Custom from the Views dropdown and define the From and To dates.
-
View Type Selection: By default, the calendar displays all types (Schedule, Driver, Trailer, Vehicle). You can filter by a specific type (e.g., only Schedule, Driver, Trailer, or Vehicle) and click Refresh to update the view.
-
Search: Easily filter or search schedules using various criteria such as Event ID, Driver ID, and more.
-
Left panel: Displays details based on the selected view type. For example, if you select all view types (Schedule, Driver, Trailer, Vehicle), the panel will show the corresponding data for each type in the calendar view.
-
Calendar View
-
Date Range: The calendar updates based on the selected view (Daily, Weekly, Monthly, or Custom).
-
Visual Indicators: The calendar uses icons and highlights to indicate logistics assignments. Click on an assignment to view its details. For example:
-
A truck icon indicates a vehicle assignment.
-
A driver icon indicates a driver assignment.
-
-
Overlap Alerts: If a driver, trailer, or vehicle is double-booked, the calendar shows a separate overlapping line to make conflicts visible.
-
How to create new logistic
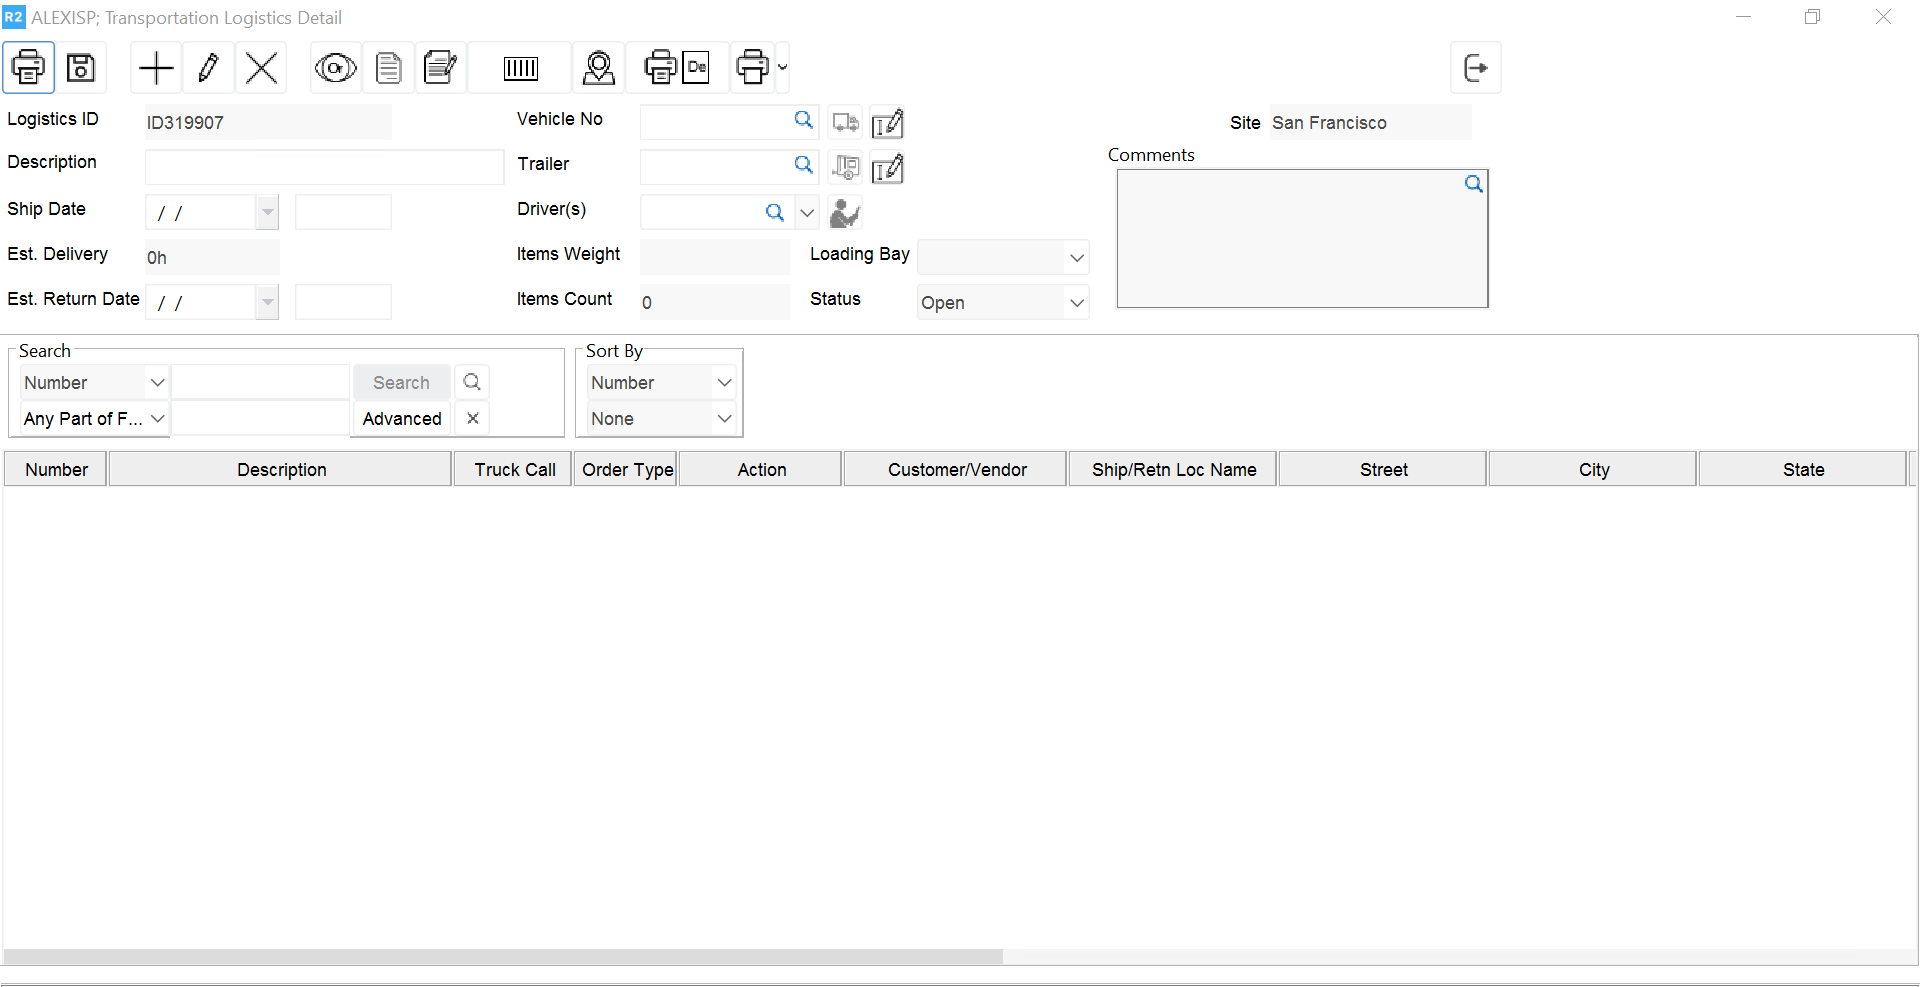
Click on the New icon ![]()
-
Description: Provide the description of the transportation task.
-
Ship Date: Enter the dispatch date and time.
-
Est. Return Date: Enter the date you estimate the order will be returned.
-
Comments: Enter shipping comments that can be printed optionally.
-
Vehicle No.: Select the vehicle number. Click

-
Trailer No.: Select the trailer number. Click

-
Driver Name: Select the driver’s name. Click

-
Truck Number: Select the truck assigned for dispatch
-
Order: Assign the order or orders that are assigned to this specific truck.
Note: it is possible to generate transportation details that will include more than a single order.
Vehicle Availability
The Vehicle Availability view shows a calendar of vehicle schedules, allowing you to check availability before making assignments. You can easily identify which vehicles are free and which are already allocated to logistics, and then assign the available ones as needed.
This view works the same way as the Vehicle/Driver Availability calendar. The only difference is that, by default, it displays Vehicle data. If required, you can switch to other view types later.

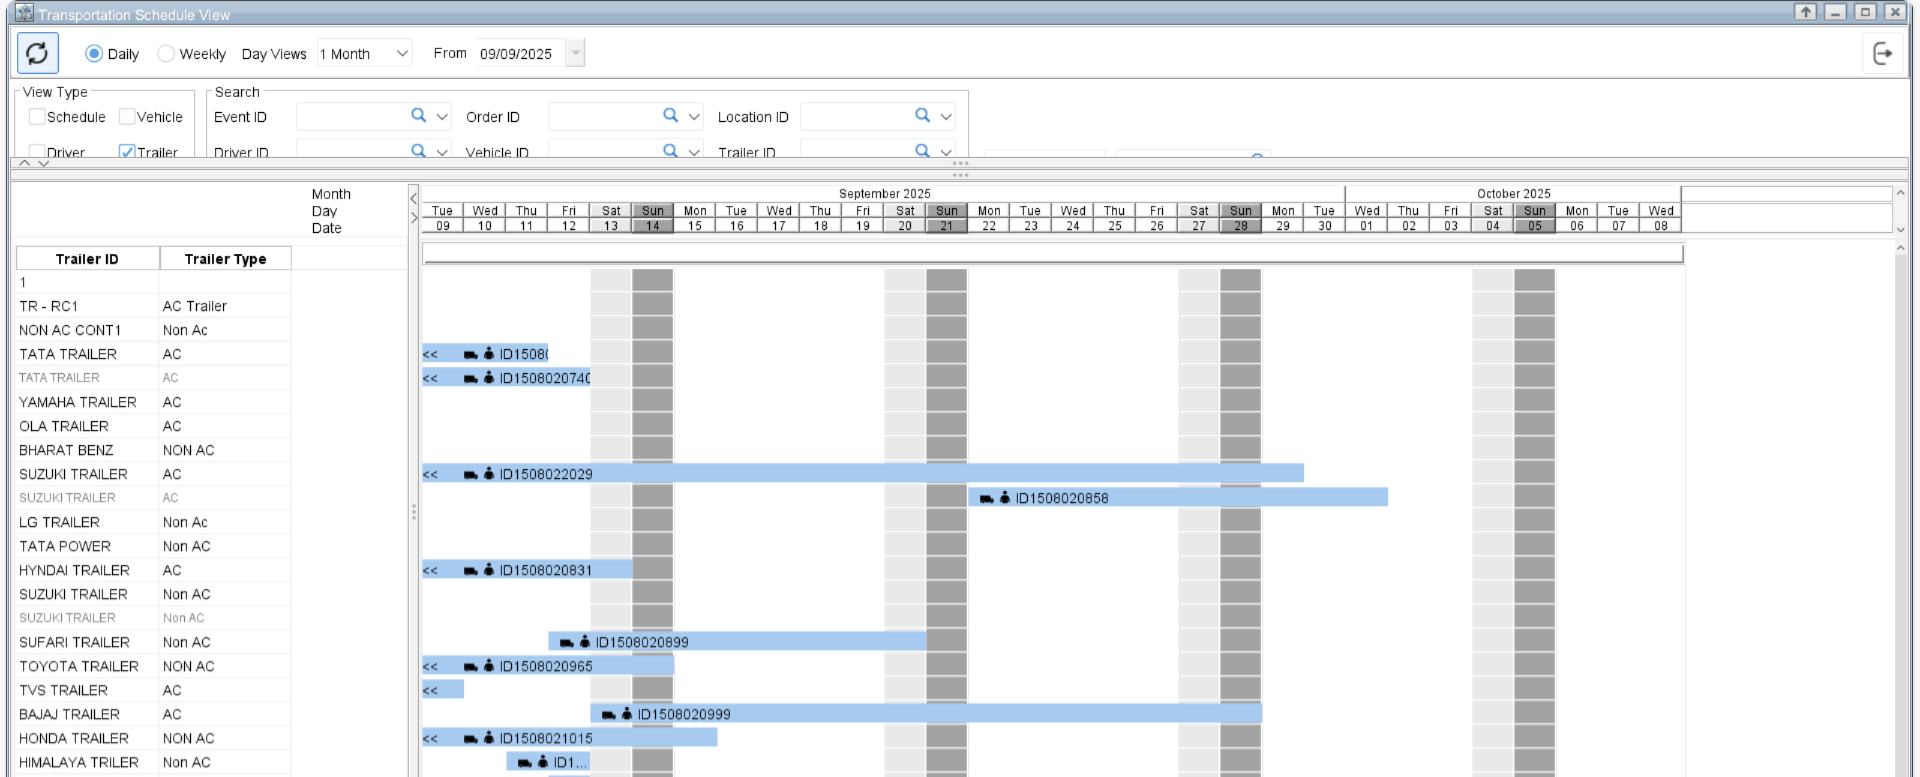
Trailer Availability
The Trailer Availability view displays a calendar of trailer schedules, helping you check availability before making assignments. You can quickly see which trailers are free and which are already allocated to logistics, and then assign the available ones as needed.
This view functions the same as the Vehicle/Driver Availability calendar. The only difference is that, by default, it shows Trailer data. If required, you can switch to other view types later.
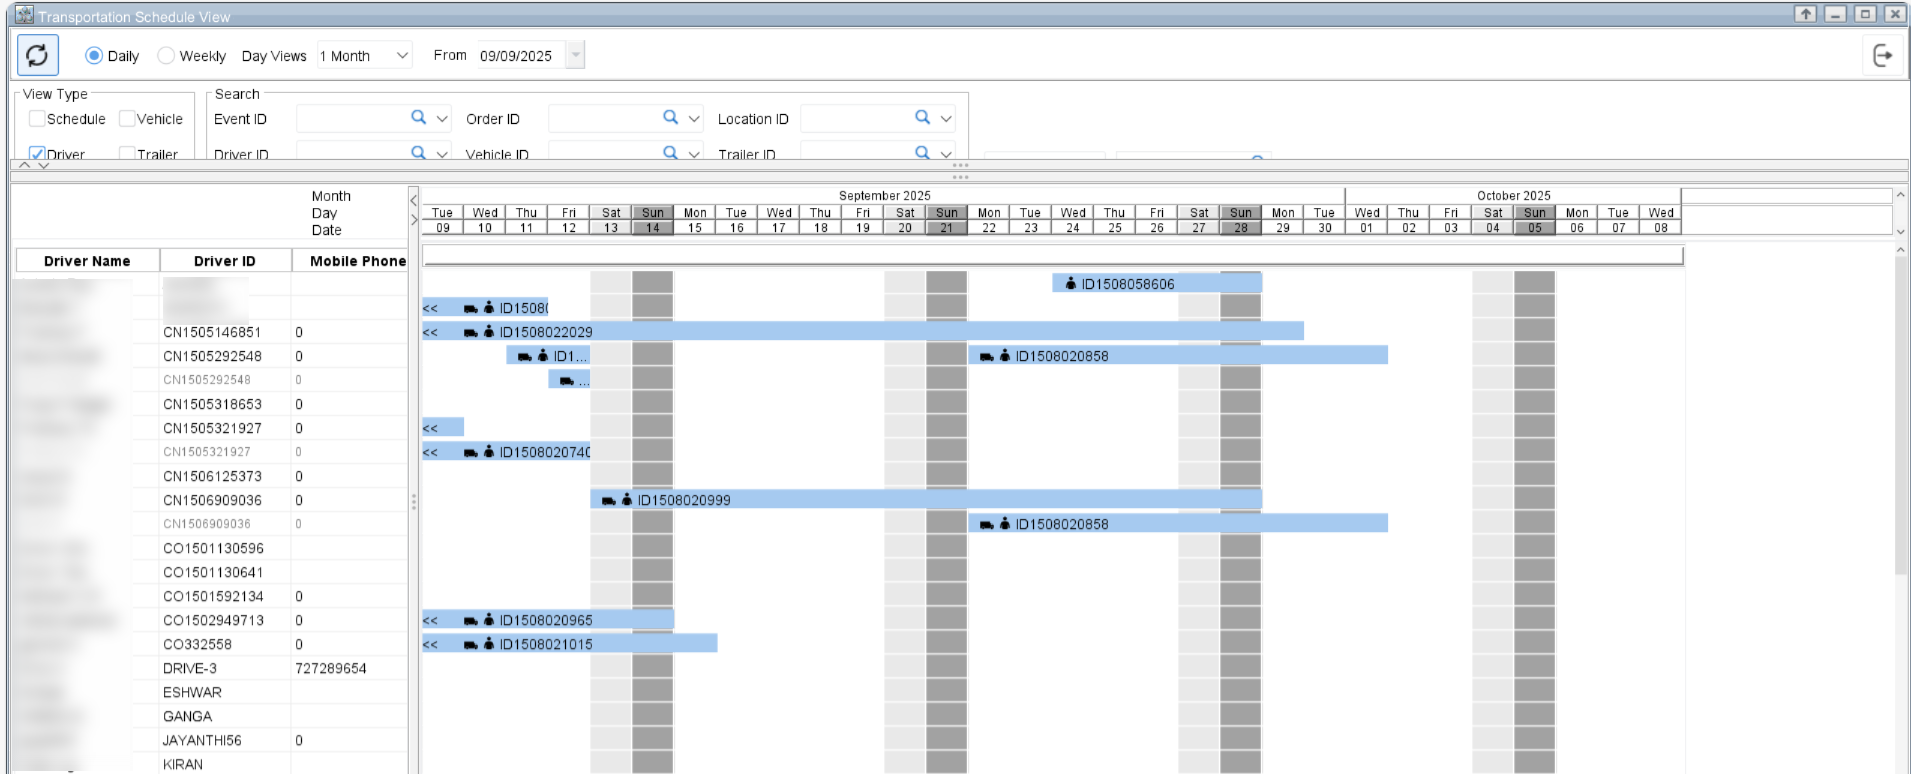
Driver Availability
The Driver Availability view shows a calendar of driver schedules, allowing you to check availability before making assignments. You can easily see which drivers free and which drivers are already allocated to logistics, and then assign the available ones as needed.
This view works the same way as the Vehicle/Driver Availability calendar. The only difference is that, by default, it displays Driver data. If required, you can switch to other view types later.