
What are Schedules?
Schedules in R2 reports are time-based triggers that automate to send notifications at set intervals. They help ensure that data processing and reporting occur consistently without manual intervention.
The Schedule page contains a list of project names and allows you to configure Interval based schedules
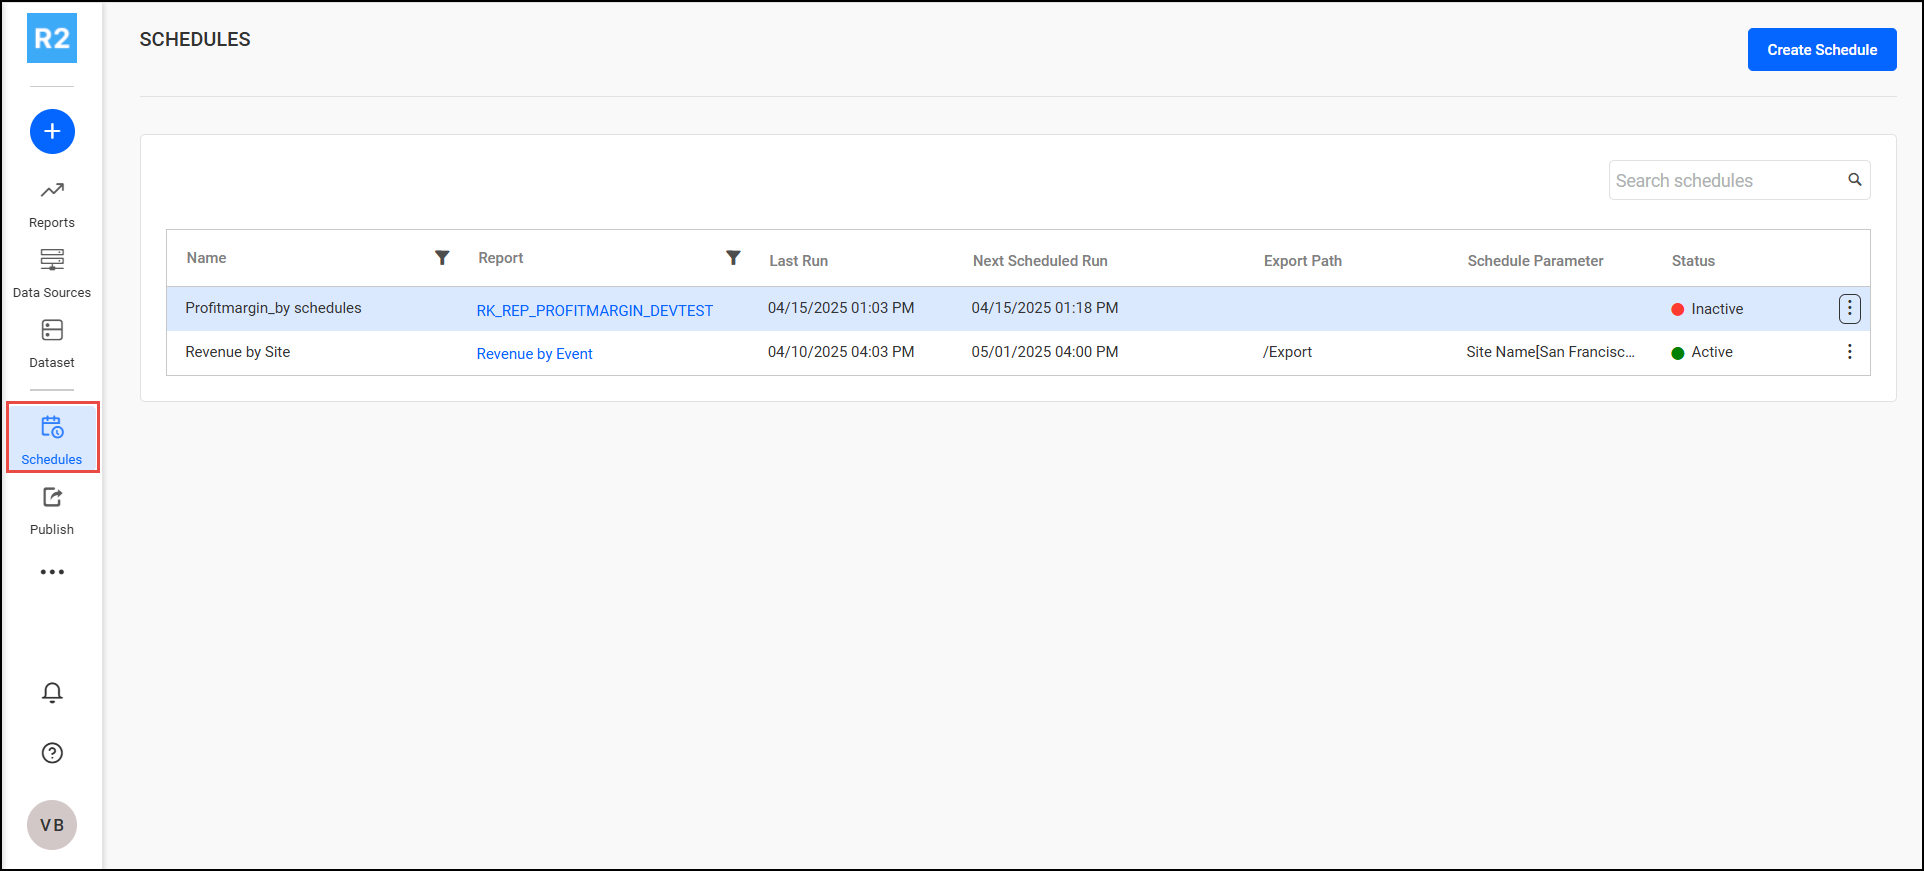
To create Schedules
-
Click Create Schedule
-
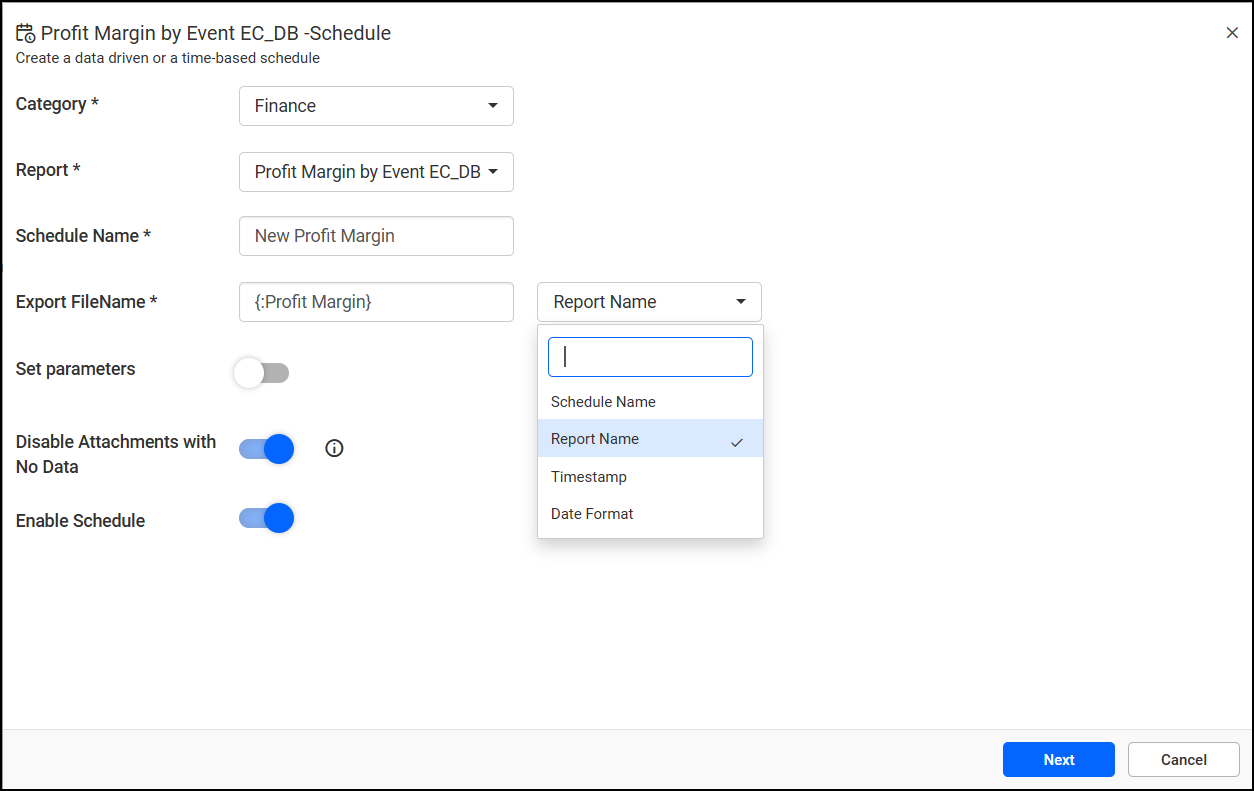
Select the desired Category and Report from the dropdowns.
-
Enter the Schedule Name you wish to assign.
-
Export Filename: Define the export file name using the desired format from the dropdown. Supported formats include:
-
Schedule Name
-
Report Name
-
Timestamp
-
Custom Date Format
(e.g.,SalesReport_{Timestamp}.pdf)
-
-
Set Parameters: Set Parameters depends upon the report parameters setting, if you have set report parameters as mandatory in parameters section, then your report accepts input parameters, you can configure them here.
-
Disable Attachments with No Data: Enable this checkbox if you do not want to send reports when there’s no data.
-
Enable Schedule: Toggle this to activate or deactivate the schedule.
-
Click
Next. You will reach the Time and Date Schedule screen.
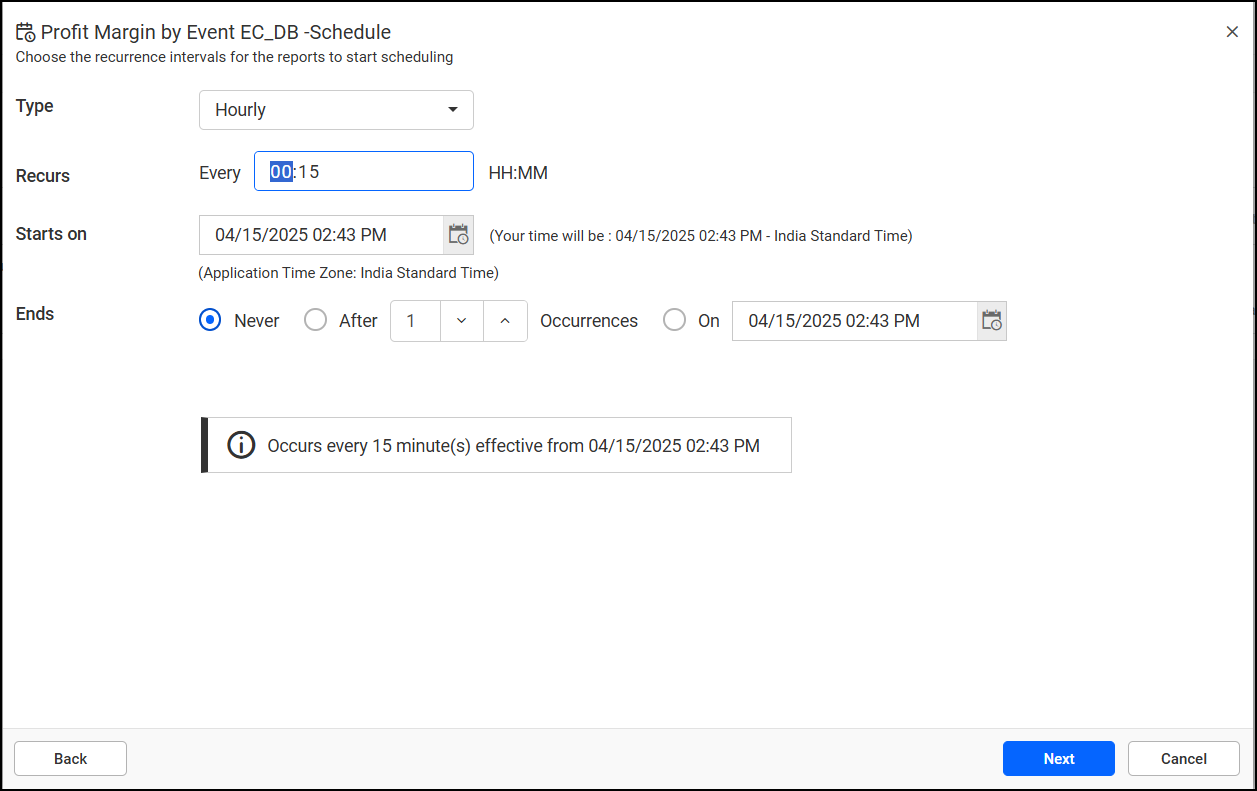
Set the following fields:
-
Type: Choose whether the schedule is based on Daily, Weekly, Monthly, or a Custom interval.
-
Recurs: Specify how often the schedule should repeat (e.g., every 2 days, every week on Monday).
-
Starts On: Set the date and time when the schedule should begin.
-
Ends:
-
Never – The schedule runs indefinitely.
-
After – The schedule ends after a specific number of occurrences.
-
On Date – The schedule ends on a specified date.
-
-
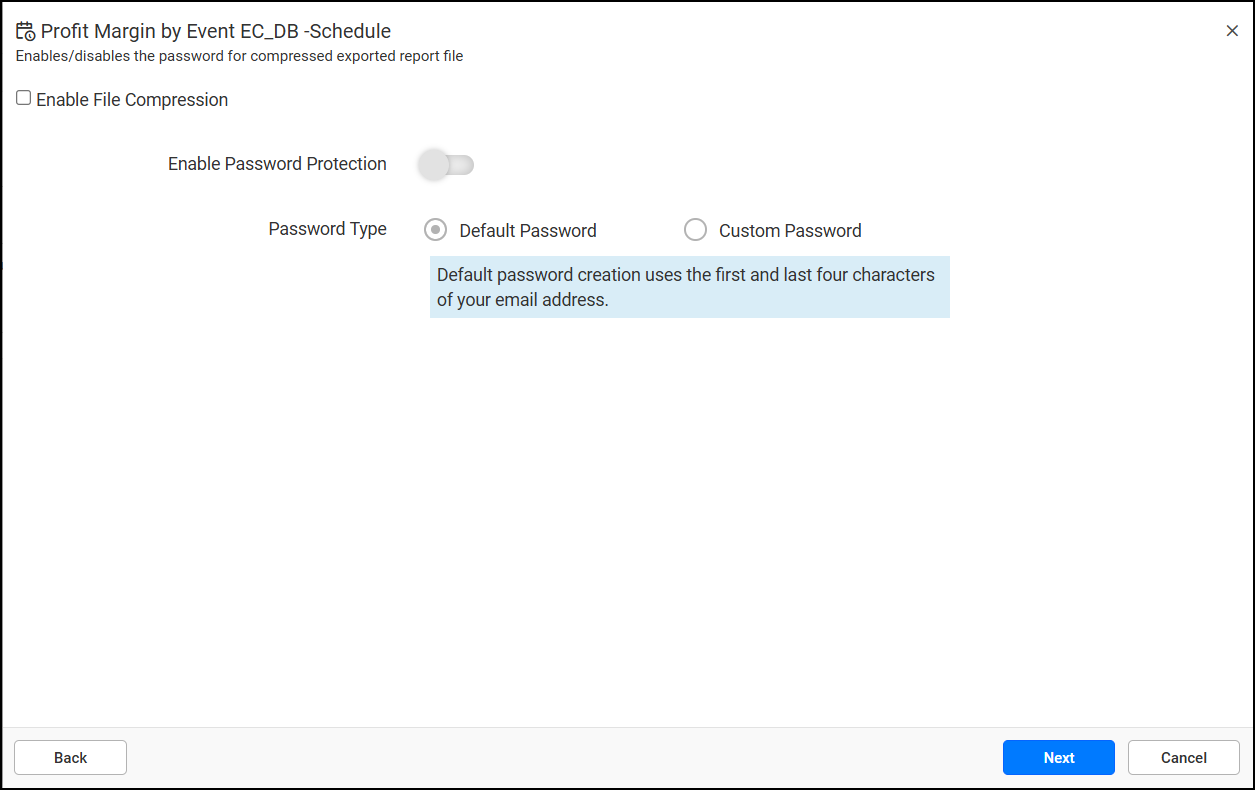
Click Next. You will reach the File Compression and Password Protection screen.
-
Select the following options:
-
Enable File Compression: Check this to compress the report files before sending (e.g., ZIP format).
-
Enable Password Protection: Secure the exported files with a password.
-
Password Type:
-
Default Password – Uses a pre-configured default password.
-
Customize Password – Allows you to define a custom password.
-
-
-
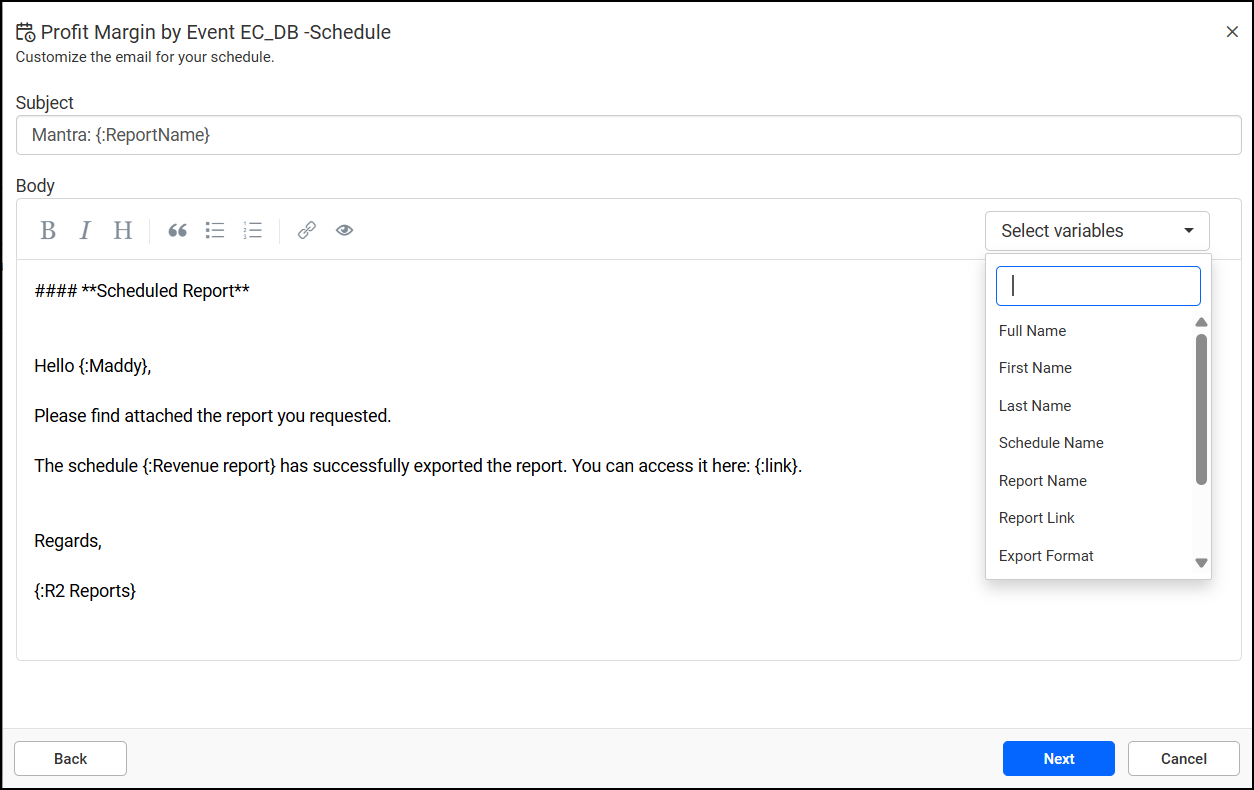
Click Next. You will reach the Email Notification Format screen.
-
You can select variables as required to set the body (Message) to append with body message such as
Hello {First name} {Last name},
Report name: {Report name}
-
Click Next.
-
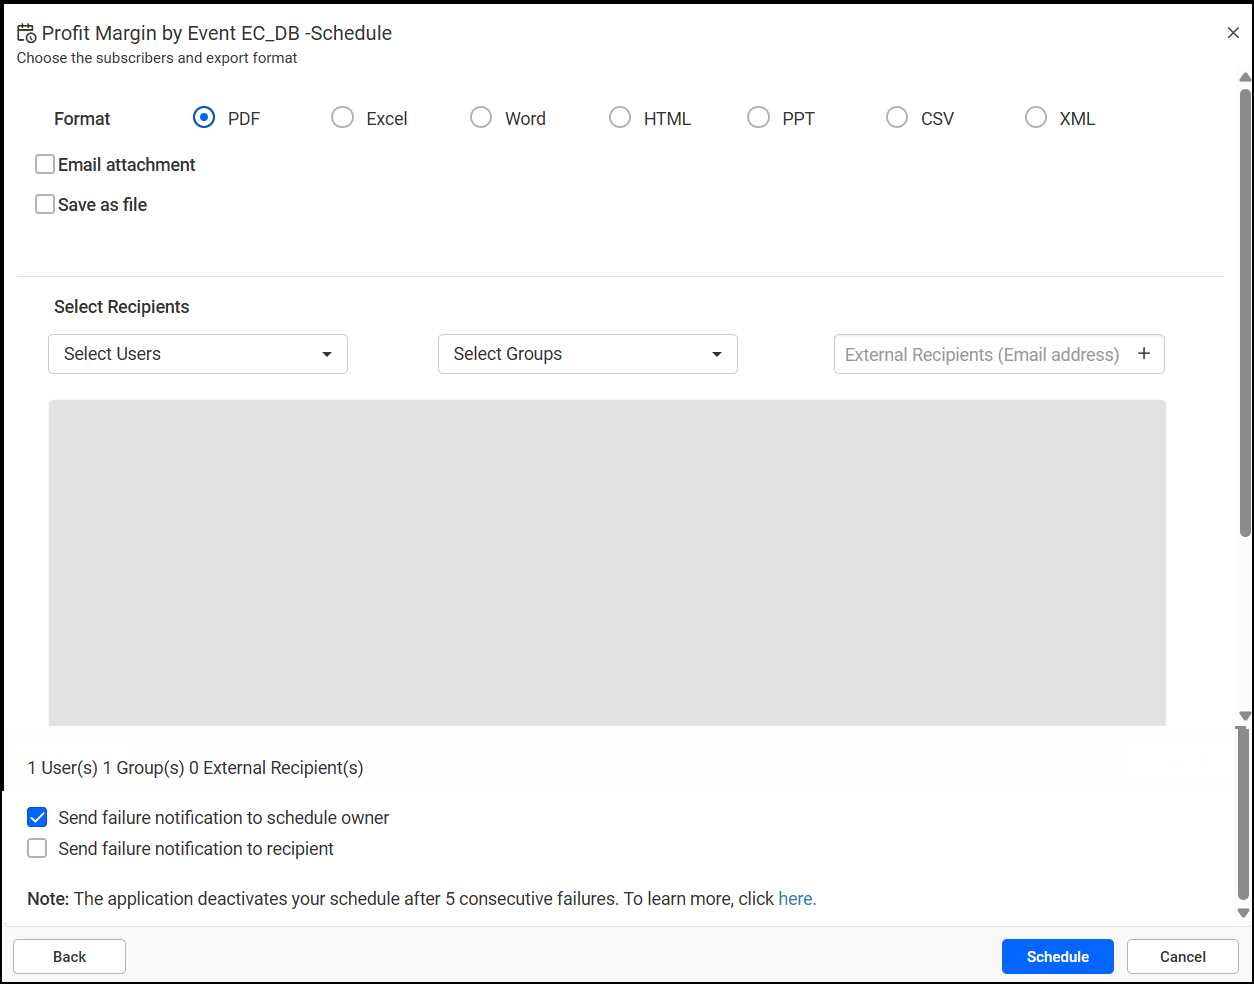
Now set the format you wish to send the report
-
Select Format: Choose the file format (e.g., PDF, Excel, CSV) for the report output.
-
Select Recipients: Choose internal users, user groups, or enter external email addresses.
-
Failure Notification: Enable the checkbox if you want to send failure alerts to recipients or the schedule owner.
-
Click Schedule.