When you click the Quick Service icon from the Service module, the Quick Service dialog box is displayed in which you scan the Asset ID, the Service Schedules section displays all the satisfied schedules for the Asset without generating any Work Order, as shown in Figure 1.0.

Sample workflow
Prerequisites
Perform the following the steps:
-
Select the Maintenance module.
-
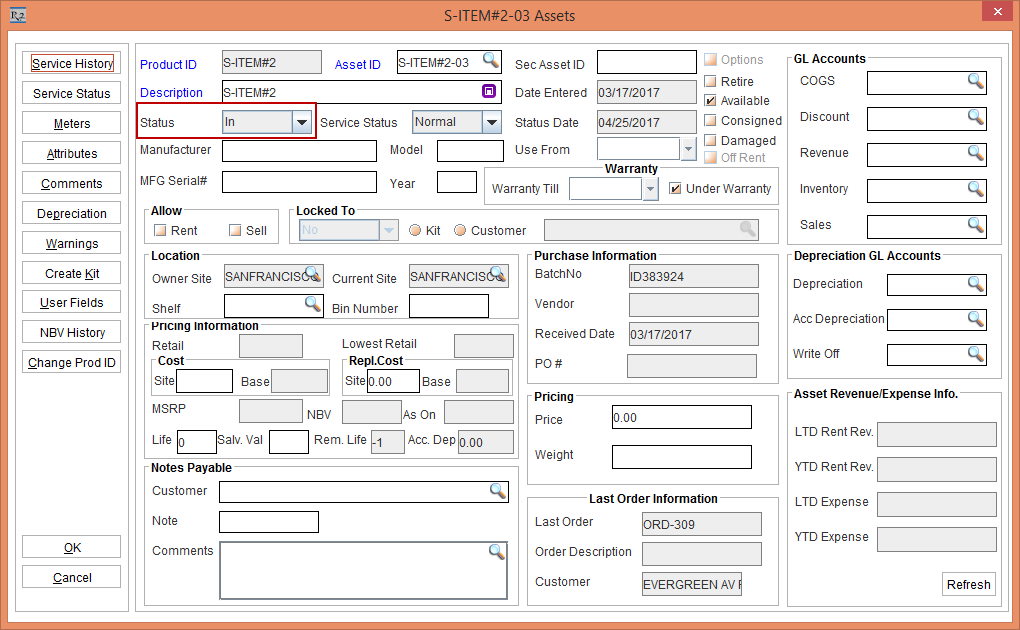
Create a Serial Item [S-ITEM#2] comprising of an Asset [S-ITEM#2-03].
-
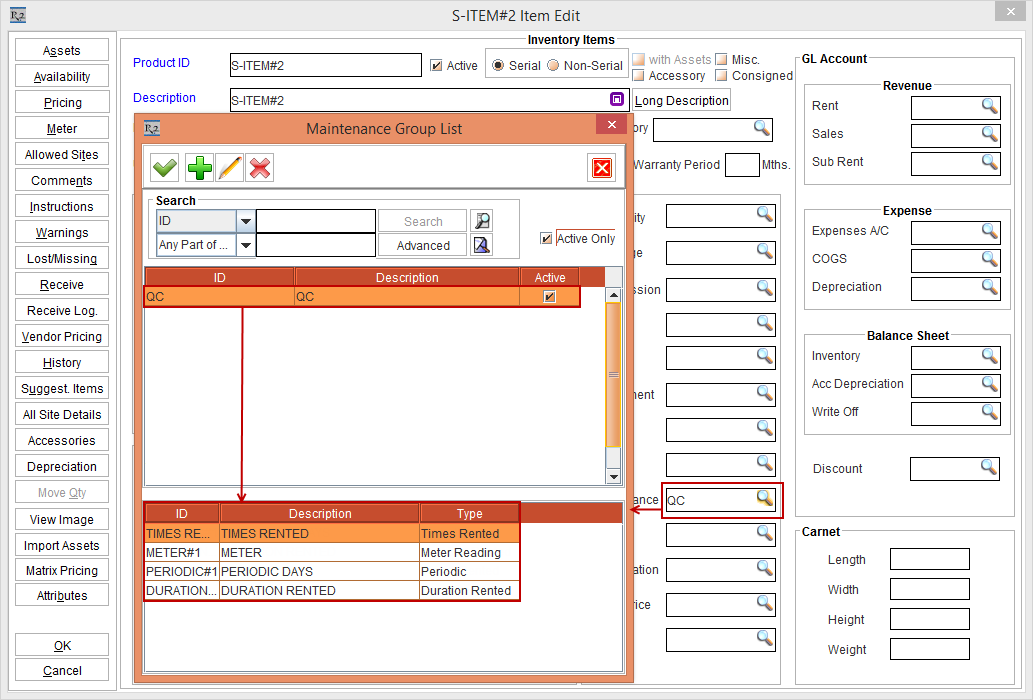
Select the Maintenance importable button field and tag the QC schedule as shown in Figure 2.0.
-
The Schedules [PERIODIC] [DURATION] [TIMES RENTED], and [METER] are created by entering the following values in the fields of the Schedule Edit window, as shown in Figure 2.1.
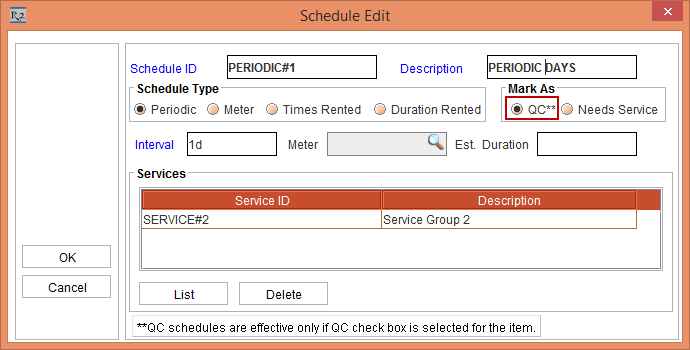
Note: Select the QC radio button from the Mark As section for each of the Schedules [PERIODIC] [DURATION] [TIMES RENTED], and [METER].
Scenario:
-
Select the Account module.
-
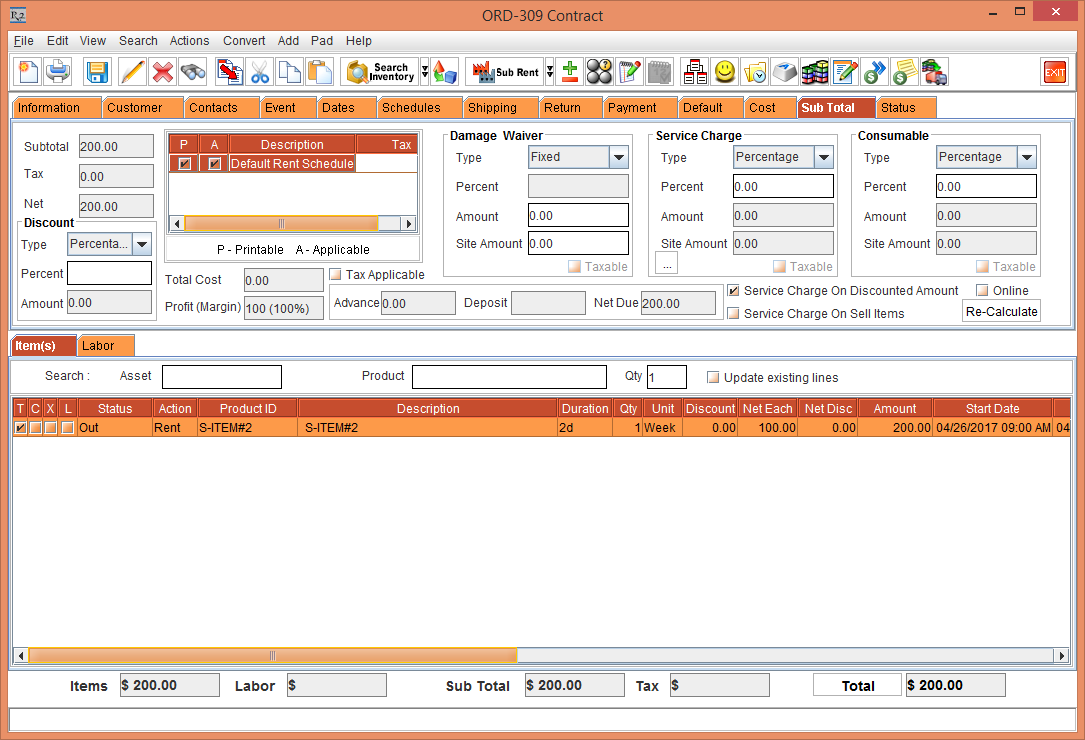
Create a Rental Reservation Order [ORDER-309] with duration as 2 days.
-
Add the Serial Item [S-ITEM#2] with Qty as 1 to the Order.
-
Fill and Ship the Serial Item [S-ITEM#2] with the Asset [S-ITEM#1-03]. The Status of the Item is Out as shown in Figure 3.0.
-
Select View > Return Order. The Return Order for the Order [ORDER-309] is displayed.
-
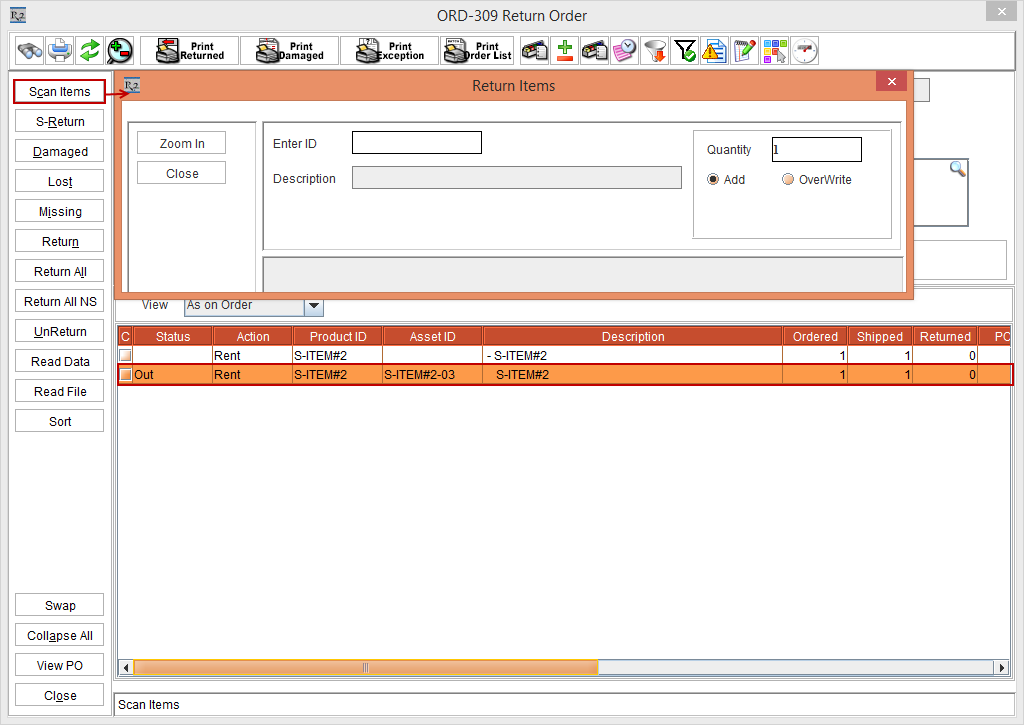
Select the Serial Item [S-ITEM#2] with the Asset [S-ITEM#2-03] and click the Scan Items button. The Return Items dialog box is displayed, as shown in Figure 3.1.
-
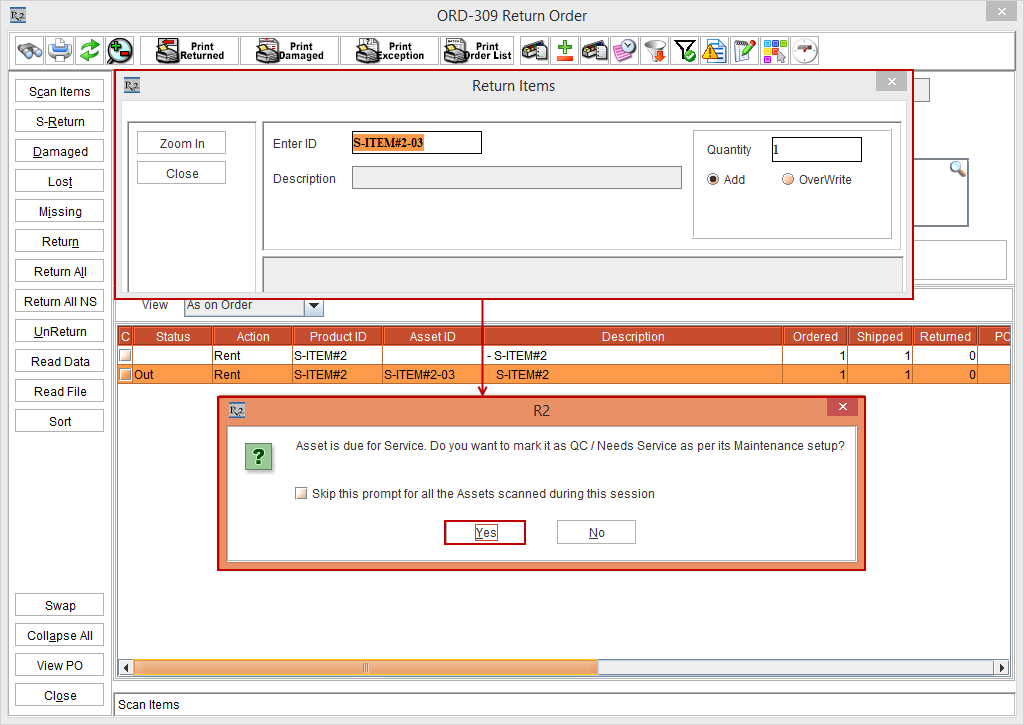
Type the Asset [S-ITEM#2-03] and press Enter key. The system displays a prompt with the message, as shown in Figure 3.2.
-
Click Yes. The Asset [S-ITEM#2-03] Status is modified to QC.

-
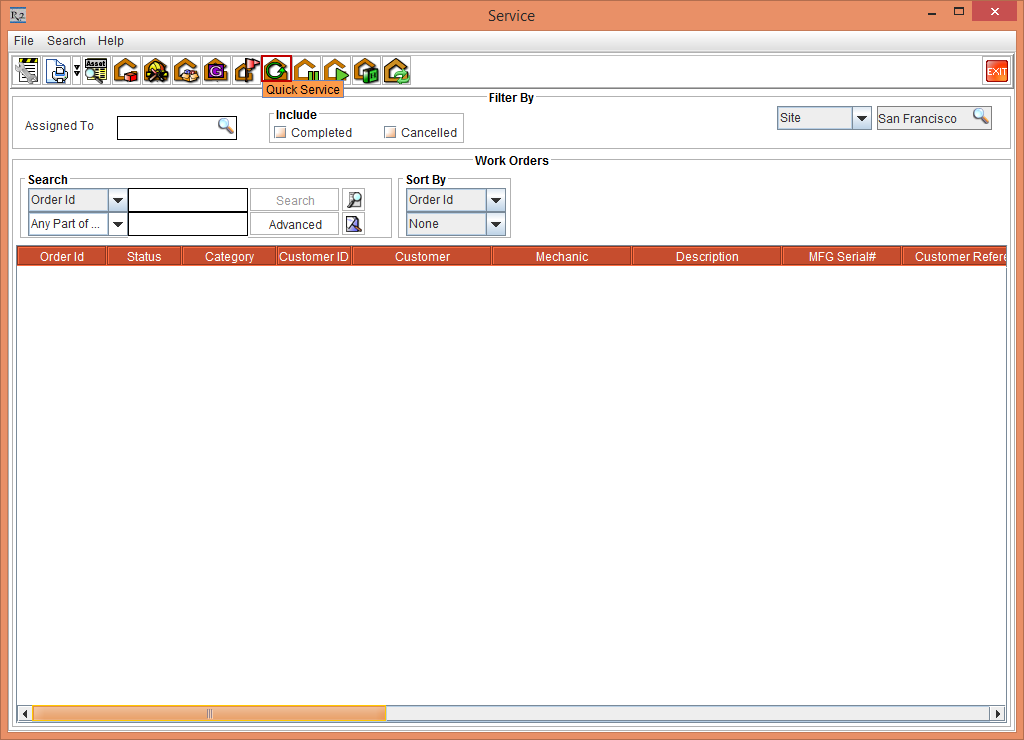
Select the Service module. The Service window is displayed.
-
Click the Quick Service icon, as shown in Figure 3.4.
-
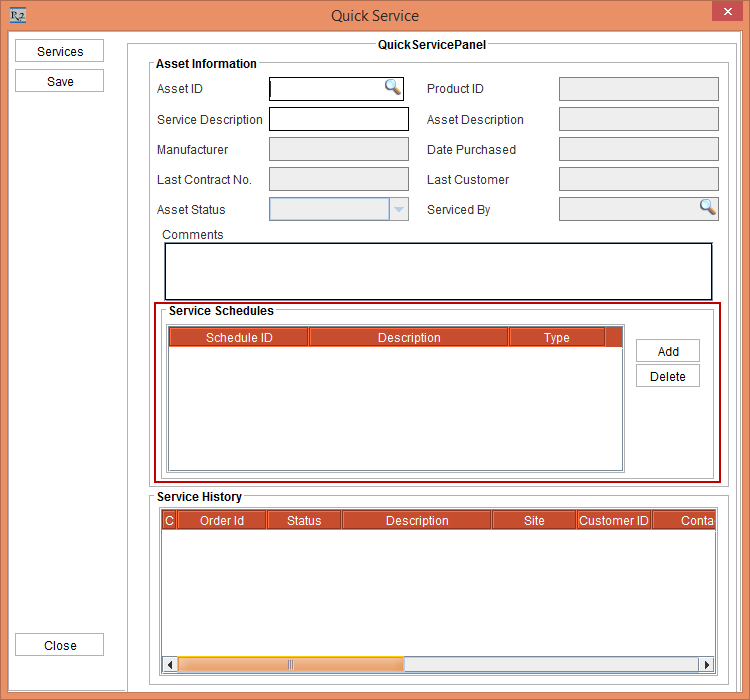
The Quick Service window is displayed as shown in Figure 3.5.
-
Scan the Asset [S-ITEM#2-03]. The Service Schedules section displays a list of satisfied schedules for the Asset [S-ITEM#2-03].
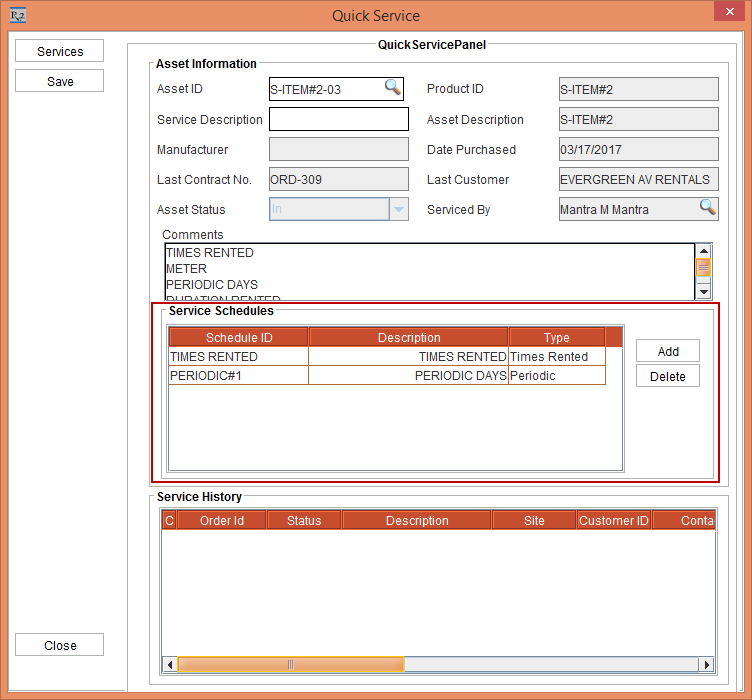
Figure 3.6 The Service Schedules section displays a list of satisfied schedules for the Asset [S-ITEM#2-03]
-
Click the Save button and the Close button. The Asset [S-ITEM#2-03] Status is modified to In.