
-
In the navigation bar, click the Activity Manager icon.
-
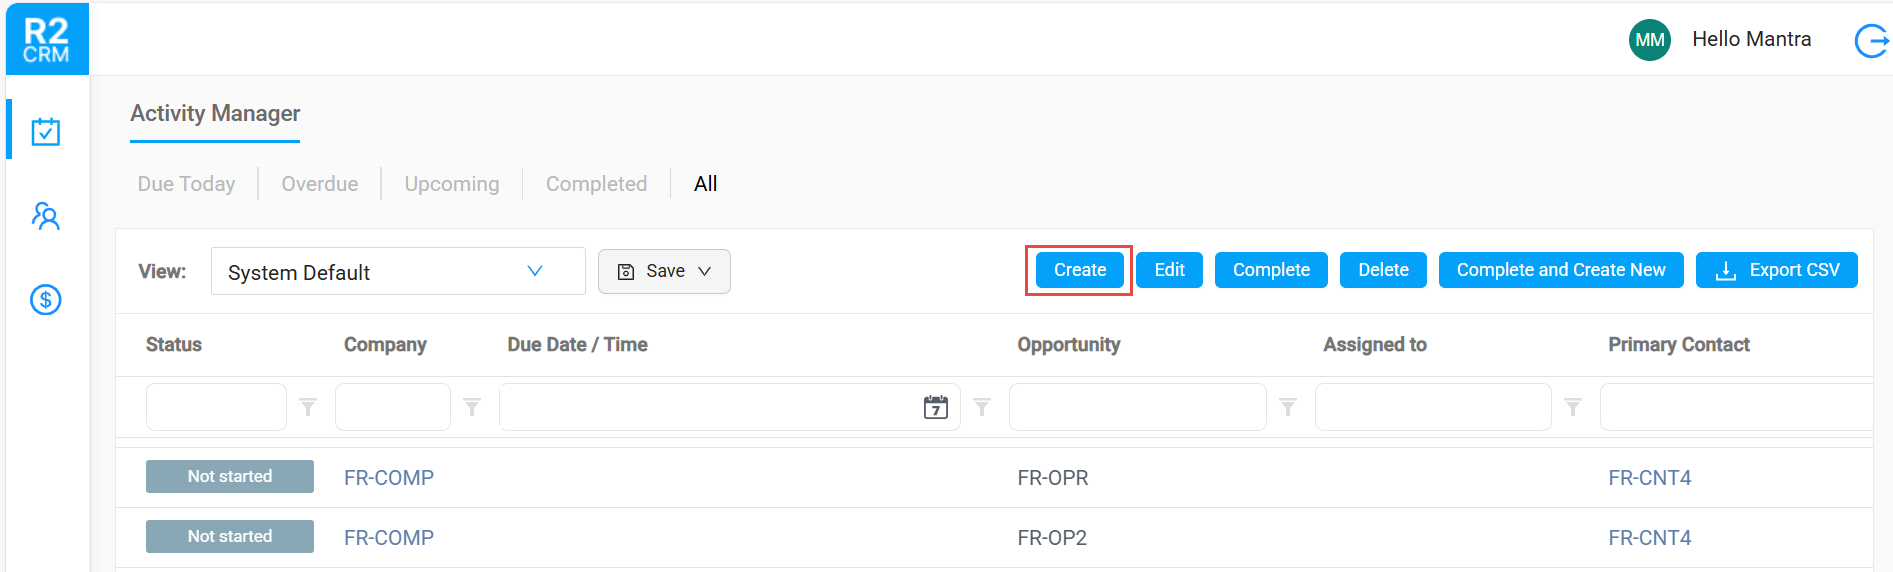
In the 'Activity Manager' window, click the Create button.
-
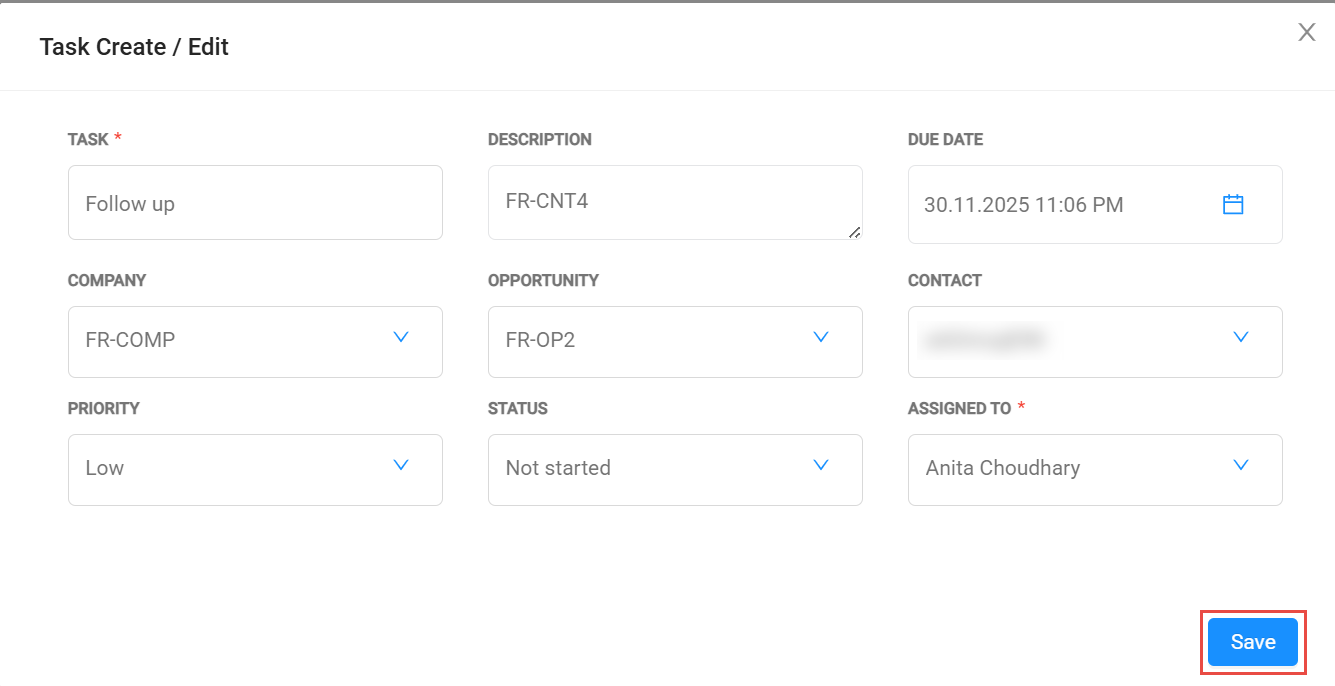
The 'Task Create / Edit' dialog box displays.
-
Fill the values for the following fields.
-
Task: You have two options to fill the value for this field. Either select the pre-configured value from dropdown or enter the task name and tab out.
-
Description: Provide a short description of the task.
-
Due Date: Provide deadline of the task. select the time frame and date as shown here.
-
Company: Select the company from the dropdown for which the task is being created.
-
Opportunity: Select the opportunity from the dropdown for which the task is being created.
-
Contact: Once you select the company, the primary contact auto-populates of the selected company. However, you can also select any other contact which is being added against the selected company.
-
Priority: It refers to ranking of the task. select the appropriate one from the dropdown.
-
Low: When the task is least important and has minimal impact/dependency on any other task.
-
Normal: When the task is reasonably important and may have impact/dependency on any other task.
-
High: When the task is highly important and has significant impact/dependency on any other task.
-
-
Status: It refers to the standing level of the task. Select the status of the task from the dropdown.
-
Not Started: When the task has not been started yet.
-
In Progress: When the task is in progress.
-
Completed: When the task is done.
-
Waiting on someone else: When the task is awaiting on some inputs/actions.
-
Deferred: When the task has been postponed/ put on hold.
-
-
Assigned To: By default, you will see the assignee who has logged in to the CRM. However, you can change the assignee if required.
-
-
After filling the details, click the Save button.
-
-
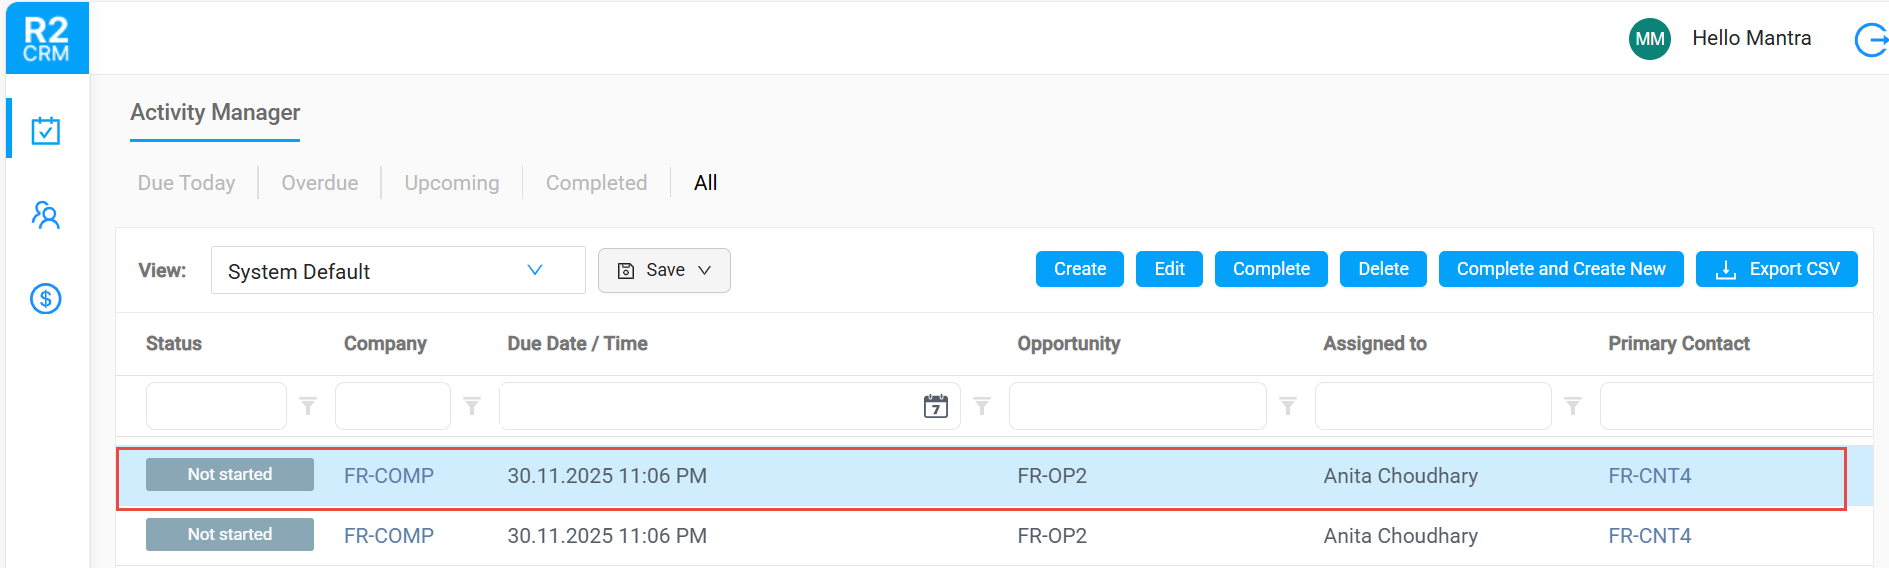
The created task displays in the search window as shown below.
Yeah… you successfully created a task!!!
Edit an existing Task
-
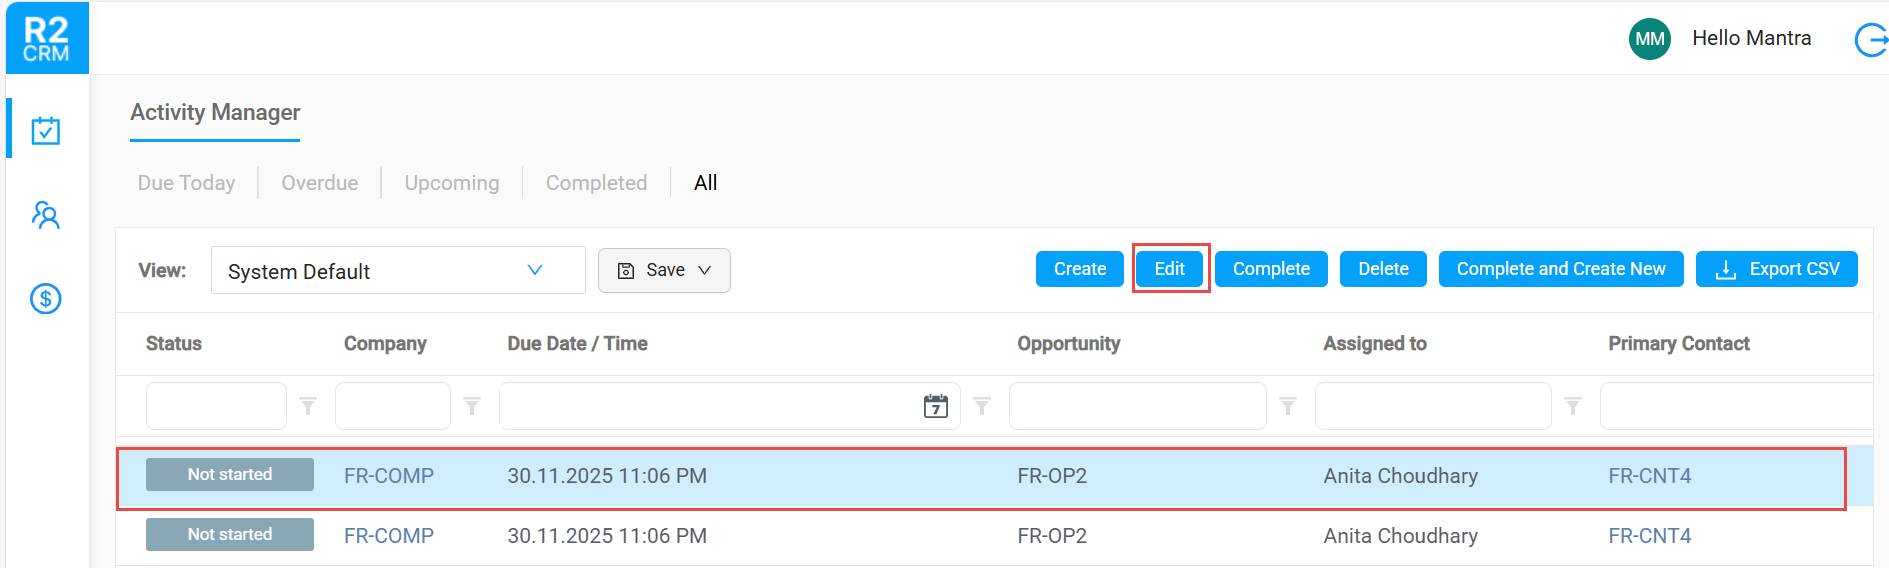
Select the task and click Edit button.
-
'Task Create /Edit' form displays.
-
All the fields are available for editing.
-
Modify the required fields and click Ok.
All the latest changes will be saved and ready for your view.
You cannot edit the task which is already marked as 'Completed'.