Calendar
As a crew, you can manage and track your jobs, requests, and custom events via a calendar interface. With its color-coded interface and easy navigation, the Calendar help you stay on top of your schedule.
Here’s what you can do with the Calendar
View Requests
View Jobs (current and upcoming)
Manage your availability
Manage calendar events
Overview
Navigate to main dashboard and tap Calendar icon in navigation bar.

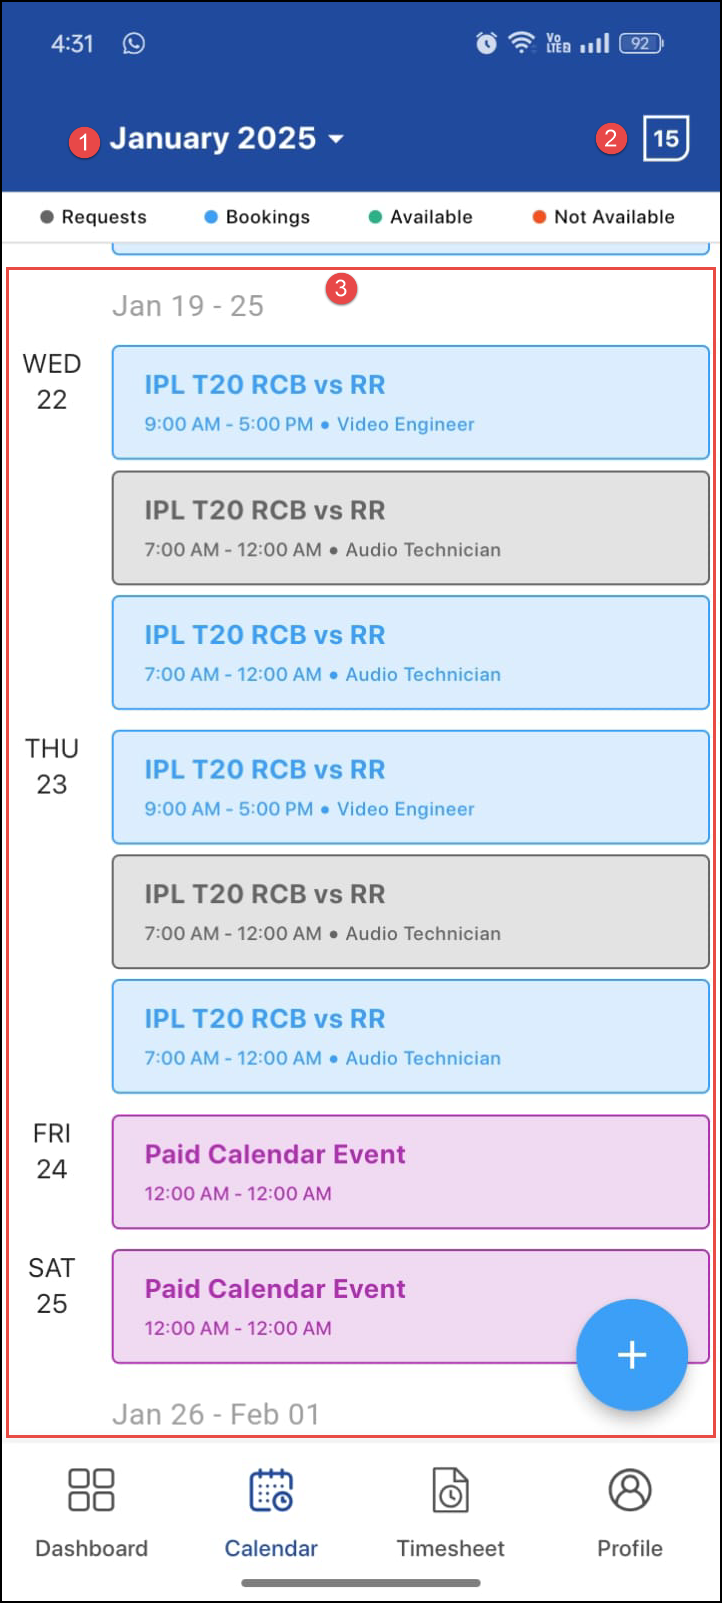
Figure 1.0: Calendar
Browse months: Use the down arrow at the top of the calendar to see past, current or future months requests/jobs.
Current Date: Displays the current date on top right corner.
Schedules: All your requests, jobs, availability, and custom events display in the respective dates. You can tap on it to view details. Each event has color codes for quick reference.
Requests (Gray): Indicates requests that are awaiting your response. Just tap to view job details and respond with your availability/confirmation. After responding, the request will be automatically removed from the calendar.
Jobs (Blue): Displays accepted jobs (ongoing and future). Just tap to view job details, ongoing jobs will give you the option to Clock In/ Out.
Availability: This helps you as well as the planner to see your availability when planning.
Available (Green): Mark periods when you can work.
Not Available (Red): Block out times you're unavailable.
Custom events (Purple): Events created will appear in purple. These can include personal events you set up, or events created for you by the Planner or Project Manager.
You cannot edit or delete the events created by the Planner/ Project Manager.
Any modifications made to your calendar will be synchronized in the R2 Labor system and vice versa.
Creating your Availability/Custom Event
To create a custom event or to mark your availability, click
 on the calendar.
A pop-up window will appear.
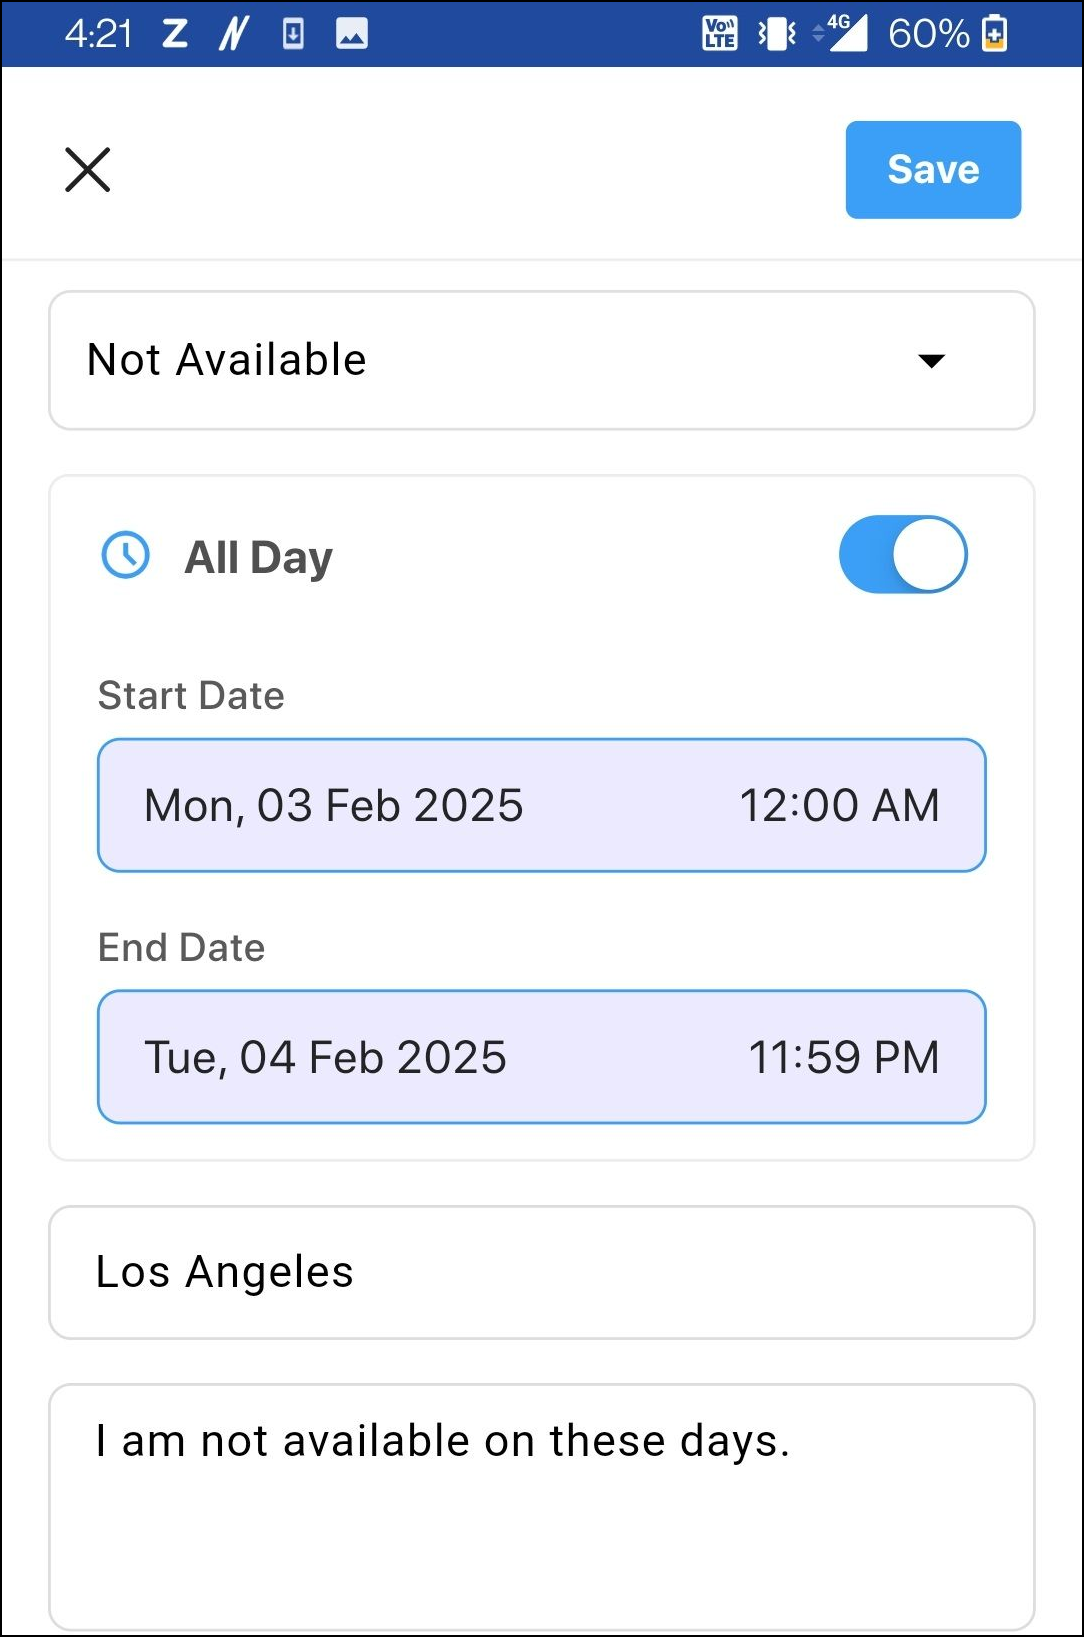
Event Description: Click the down arrow to select the availability status i.e. Available and Not Available from the dropdown list. You can also type your own description to create custom event and then select from dropdown.
All Day: Choose if the event is all day.
Start and End Date: Choose the start & end date.
Location: Enter the location.
Details: Provide the details of the event.
Save: Click Save so that the created availability/event displays in calendar.

Figure 1.1: Create Event
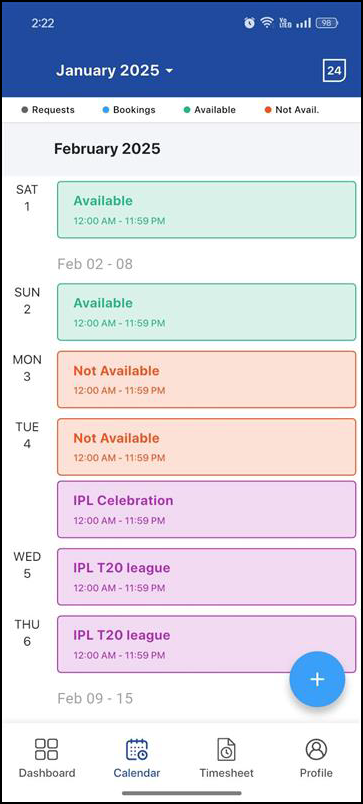
‘Not Available’ event is displayed in calendar as shown below:

Figure 1.3: Created events
Any changes made to your calendar (such as adding, editing, or deleting custom events) will be reflected in the R2 Labor system for Planner and vice versa.
