
Reference No: R2-8698
Version No: 06.00.04-00
Prior to Version 06.00.04-00
Earlier, in the Company Edit window, when the Company Type drop-down as Intra-Company was selected the system was creating multiple Intra Companies for the same Site. The Company Edit window did not comprise of any Intra-Company Type drop-down options, as shown in Figure 1.0.
Figure 1.0 Edit Company window with no Intra-Company Type options

With Effect from Version 06.00.04-00
Now, in the Edit Company window, when the Company Type drop-down as Intra-Company is selected, the following Intra-Company Type options are provided enabling you to select and create multiple Intra Companies for the same Site.
-
All
-
E-Pool
-
Service
-
Sales
Figure 1.1 Edit Company window with Intra-Company Type options
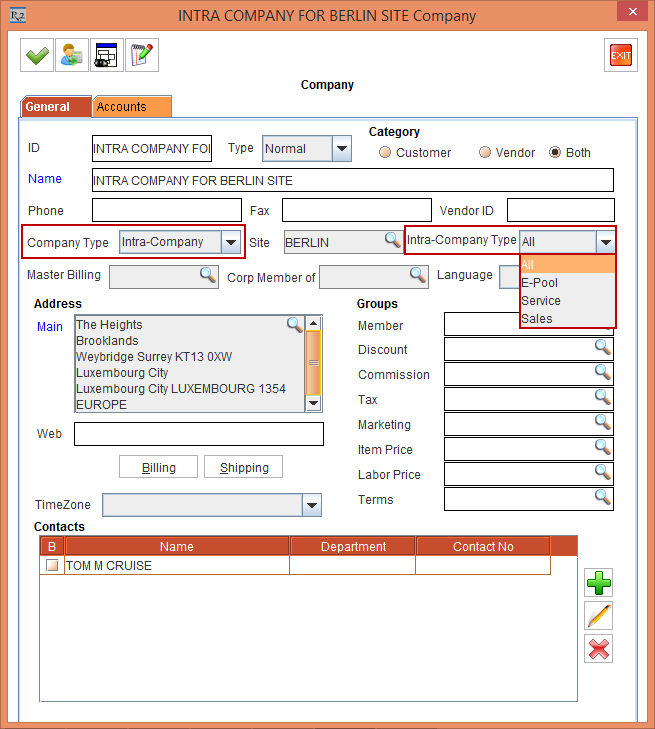
The Intra-Company Type field is enabled only for Company Type drop-down as Intra-Company. The Intra-Company Type field is disabled with the default All option selected for the other Company Type drop-down options except for Intra-Company, as shown in Figure 1.2.
Figure 1.2 Intra-Company Type field Disabled for other Company Type drop-down options
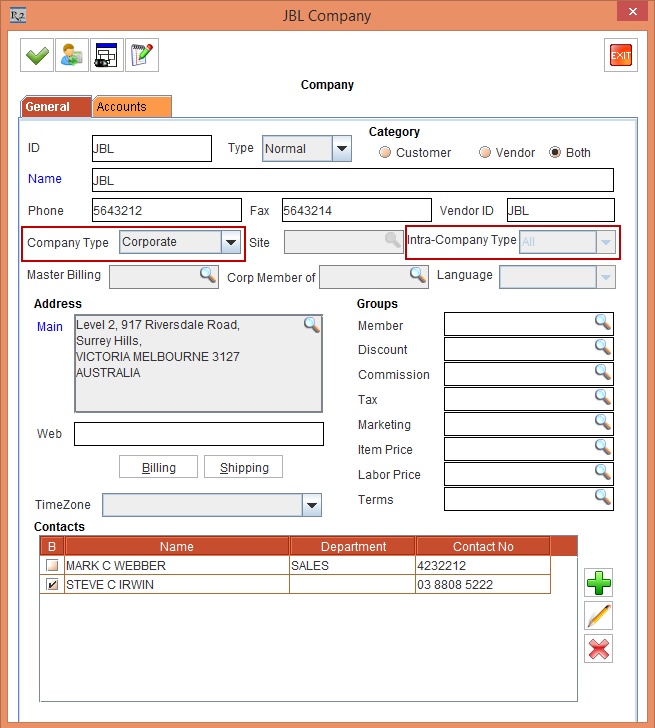
The details are explained in the sample workflow given below:
Scenario 1 - Company Type as Corporate
Prerequisites
Perform the following the steps:
-
Select the Site [SAN FRANCISCO].
-
Select the Maintenance module > Customer tab > Company tab.
-
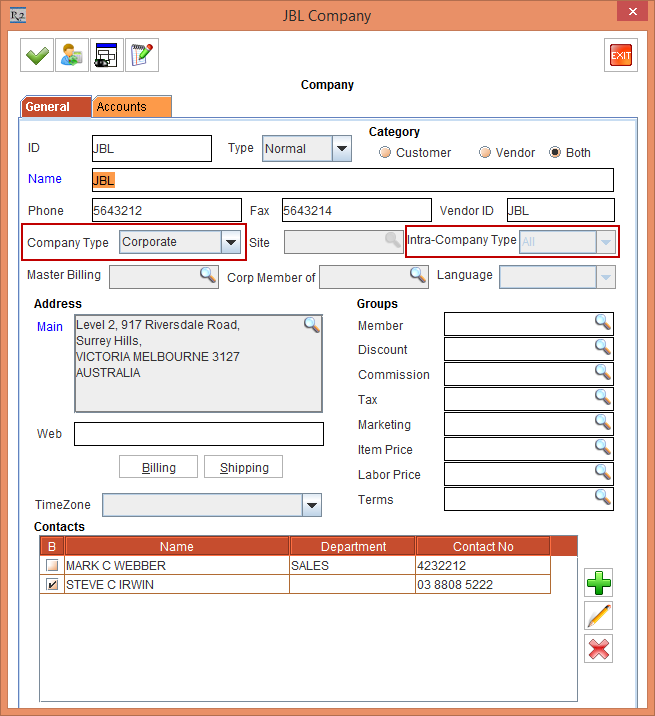
Create a Company [JBL] with the Company Type drop-down as Corporate.
-
The Intra-Company Type field is disabled with the default All option selected, as shown in Figure 2.0.
Figure 2.0 Company [JBL] with the Company Type drop-down as Corporate
-
Click OK in the JBL Company Edit window.
-
Select the Items tab and create a Serial Item [JBLH] and receive some Assets.
-
Exit the Maintenance module.
Sample Workflow
-
Select the Service module, click the WorkOrder icon and create a Service Work Order.
-
Select the Equipment tab and click the Asset ID / Product ID importable button. The Serial Assets / Non Serial Items window is displayed.
-
Search and tag the Asset [JBLH#01]. The Service Type dialog box is displayed.
-
Select the Service Type [Corrective] and click OK.
-
Save the Service Work Order [SWO-18].
-
Select the Information tab. The Customer field displays as [Service customer], as the Site [SAN FRANCISCO] does not comprise of any Company with the Intra-Company Type as All/Service, as shown in Figure 2.1.
Figure 2.1 Service Work Order [SWO-18] with the Customer field as Service customer

-
Exit the Service Work Order [SWO-18] window.
Scenario 2 - Company Type as Intra-Company and Intra-Company Type as All
Prerequisites
Perform the following the steps:
-
Select the Site [SAN FRANCISCO].
-
Select the Maintenance module > Customer tab > Company tab.
-
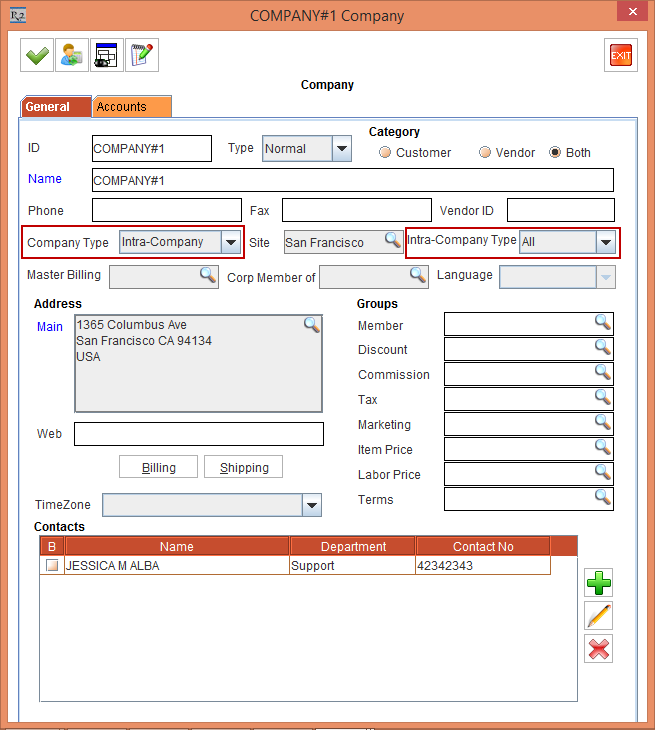
Create a Company [COMPANY#1] with the Company Type drop-down as Intra Company.
-
Select the Intra-Company Type drop-down as All, as shown in Figure 3.0.
Figure 3.0 Company [COMPANY#1] with the Company Type drop-down as Intra Company and Intra-Company Type drop-down as All
-
Click OK in the COMPANY#1 Company Edit window.
-
Select the Items tab and create a Serial Item [JBL SMART] and receive some Assets.
-
Exit the Maintenance module.
Sample Workflow
-
Select the Service module, click the WorkOrder icon and create a Service Work Order.
-
Select the Equipment tab and click the Asset ID / Product ID importable button. The Serial Assets / Non Serial Items window is displayed.
-
Search and tag the Asset [JBL SMART#01]. The Service Type dialog box is displayed.
-
Select the Service Type [Corrective] and click OK.
-
Save the Service Work Order [SWO-19].
-
Select the Information tab. The Customer field displays as [COMPANY#1], as shown in Figure 3.1.
Figure 3.1 Service Work Order [SWO-19] with the Customer field as [COMPANY#1]

-
Exit the Service Work Order [SWO-19] window.
Scenario 3 - Company Type as Intra-Company and Intra-Company Type as Service
Prerequisites
Perform the following the steps:
-
Select the Site [SAN FRANCISCO].
-
Select the Maintenance module > Customer tab > Company tab.
-
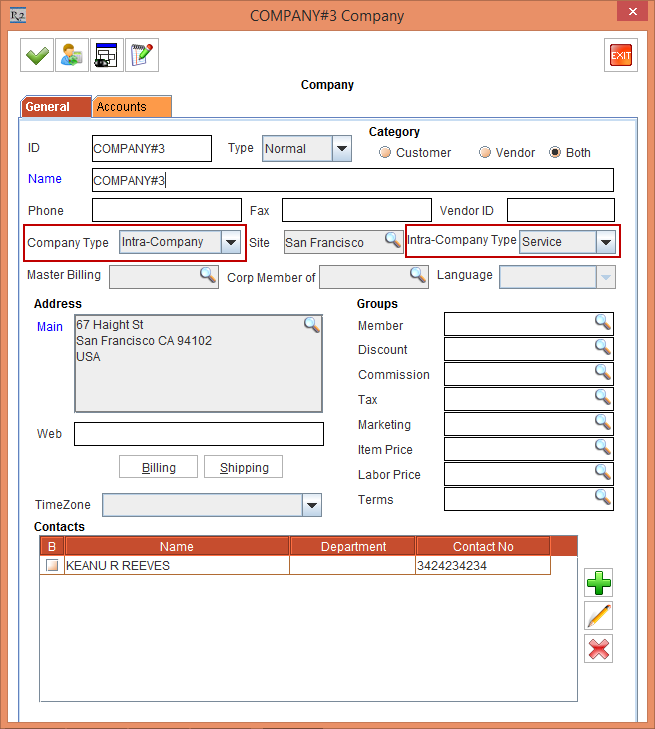
Create a Company [COMPANY#3] with the Company Type drop-down as Intra Company.
-
Select the Intra-Company Type drop-down as Service, as shown in Figure 4.0.
Figure 4.0 Company [COMPANY#3] with the Company Type drop-down as Intra Company and Intra-Company Type drop-down as Service
-
Click OK in the COMPANY#3 Company Edit window.
-
Select the Items tab and create a Serial Item [JBL SMART] and receive some Assets.
-
Exit the Maintenance module.
Sample Workflow
-
Select the Service module, click the WorkOrder icon and create a Service Work Order.
-
Select the Equipment tab and click the Asset ID / Product ID importable button. The Serial Assets / Non Serial Items window is displayed.
-
Search and tag the Asset [JBL SMART#02]. The Service Type dialog box is displayed.
-
Select the Service Type [Corrective] and click OK.
-
Save the Service Work Order [SWO-20].
-
Select the Information tab. The Customer field displays as [COMPANY#3], as shown in Figure 4.1.
Figure 4.1 Service Work Order [SWO-20] with the Customer field as [COMPANY#3]

-
Exit the Service Work Order [SWO-20] window.
-
When an Internal Asset is tagged to the Service Work Order, the Customer field defaults to the Intra-Company with the Intra-Company Type as Service from the Work Order Site.
-
When the Intra-Company with the Intra-Company Type as Service is not available in the Work Order Site then the Customer field will default to the Intra-Company Type as All from the Work Order Site.
-
When the Intra-Company with the Intra-Company Type as All is not available in the Work Order Site then the Customer field will default to the Service Customer.
Scenario 4 - Operation Order with the Company Type as Corporate
Prerequisites
Perform the following the steps:
-
Select the Site [SAN FRANCISCO].
-
Select the Maintenance module > Customer tab > Company tab.
-
Create a Company [JBL] with the Company Type drop-down as Corporate.
-
The Intra-Company Type drop-down is selected as All by default, as shown in Figure 5.0.
Figure 5.0 Company [JBL] with the Company Type drop-down as Corporate
-
Click OK in the JBL Company Edit window.
-
Exit the Maintenance module.
Sample Workflow
-
Select the Account module and tag the Company [JBL].
-
Select the File menu > New sub menu > Operation Order option. The Reservation (Operation Order) window is displayed.
-
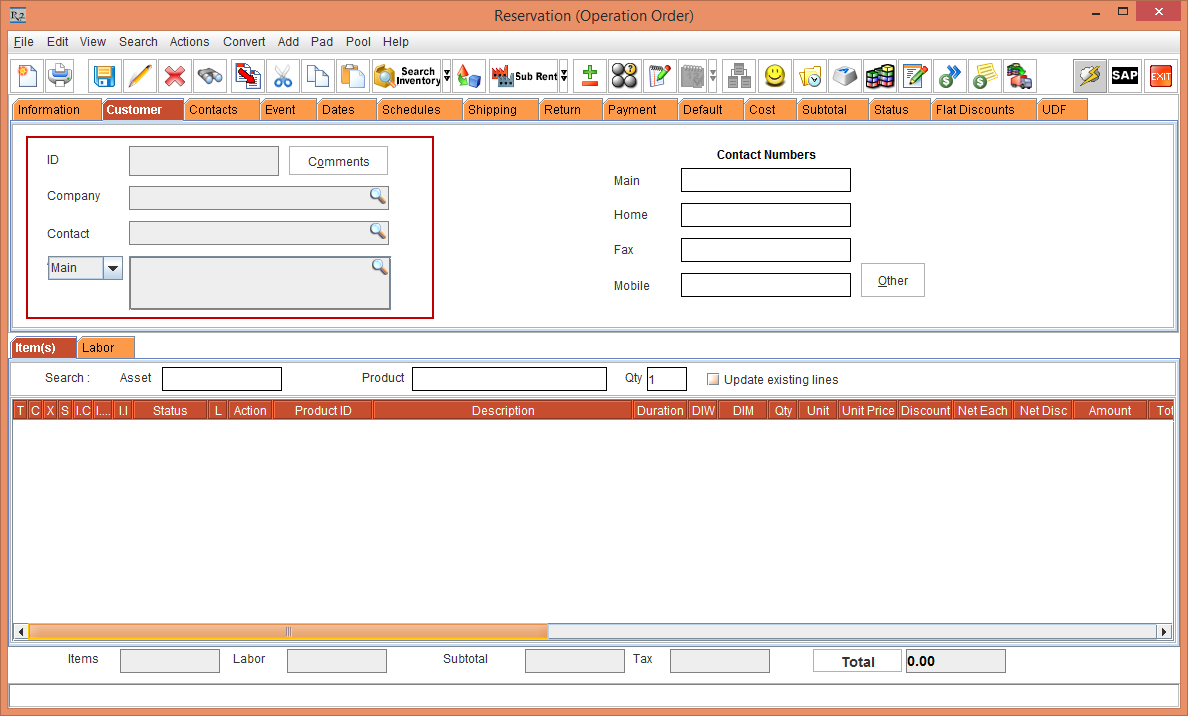
Select the Customer tab and verify the Customer. The Customer is not defaulted to the Customer [JBL], shown in Figure 5.1.
The Customer is not defaulted to the Customer [JBL], as the tagged Company Type is Corporate in the Company Edit [JBL] window.
Figure 5.1 Account module > File menu > New sub menu > Operation Order option > Reservation (Operation Order) window
-
Exit the Reservation (Operation Order) window.
Scenario 5 - Operation Order with the Company Type as Intra-Company and Intra-Company Type as All
Prerequisites
Perform the following the steps:
-
Select the Site [SAN FRANCISCO].
-
Select the Maintenance module > Customer tab > Company tab.
-
Create a Company [COMPANY#1] with the Company Type drop-down as Intra Company.
-
Select the Intra-Company Type drop-down as All, as shown in Figure 6.0.
Figure 6.0 Company [COMPANY#1] with the Company Type drop-down as Intra Company and Intra-Company Type drop-down as All
-
Click OK in the COMPANY#1 Company Edit window.
-
Exit the Maintenance module.
Sample Workflow
-
Select the Account module and tag the Company [COMPANY#1].
-
Select the File menu > New sub menu > Operation Order option. The Reservation (Operation Order) window is displayed.
-
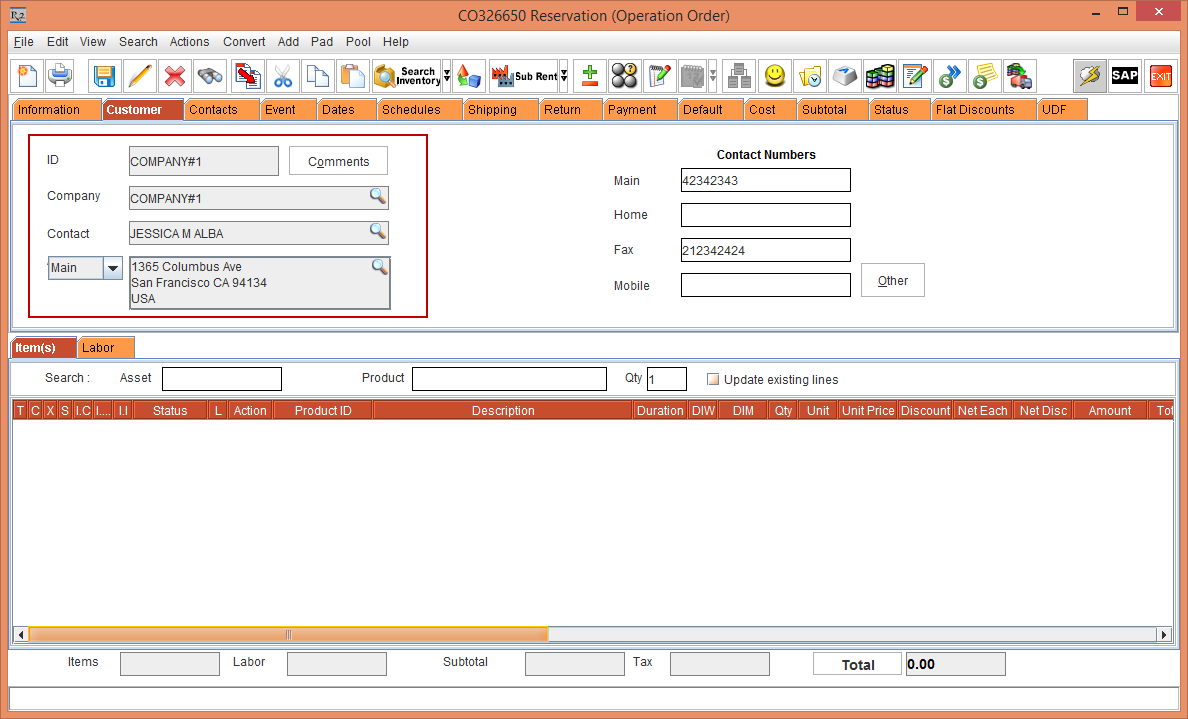
Select the Customer tab and verify the Customer. The Customer is defaulted to the Customer [COMPANY#1], shown in Figure 6.1.
The Customer is defaulted to the Customer [COMPANY#1], as the tagged Company Type is Intra-Company with the Intra-Company Type [All] in the Company Edit [COMPANY#1] window.
Figure 6.1 Account module > File menu > New sub menu > Operation Order option > CO326650 Reservation (Operation Order) window
-
Exit the CO326650 Reservation (Operation Order) window.
Scenario 6 - Operation Order with the Company Type as Intra-Company and Intra-Company Type as E-Pool
Prerequisites
Perform the following the steps:
-
Select the Site [SAN FRANCISCO].
-
Select the Maintenance module > Customer tab > Company tab.
-
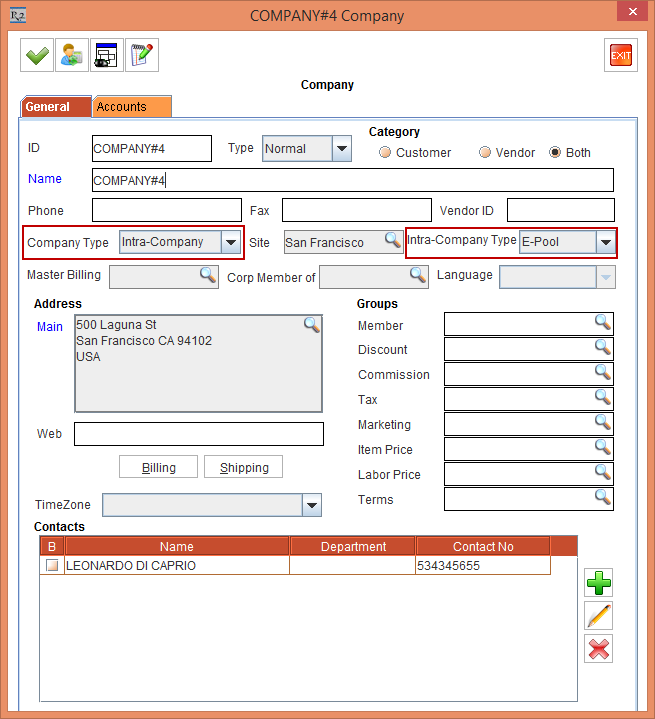
Create a Company [COMPANY#4] with the Company Type drop-down as Intra Company.
-
Select the Intra-Company Type drop-down as E-Pool, as shown in Figure 7.0.
Figure 7.0 Company [COMPANY#4] with the Company Type drop-down as Intra Company and Intra-Company Type drop-down as E-Pool
-
Click OK in the COMPANY#4 Company Edit window.
-
Exit the Maintenance module.
Sample Workflow
-
Select the Account module and tag the Company [COMPANY#4].
-
Select the File menu > New sub menu > Operation Order option. The Reservation (Operation Order) window is displayed.
-
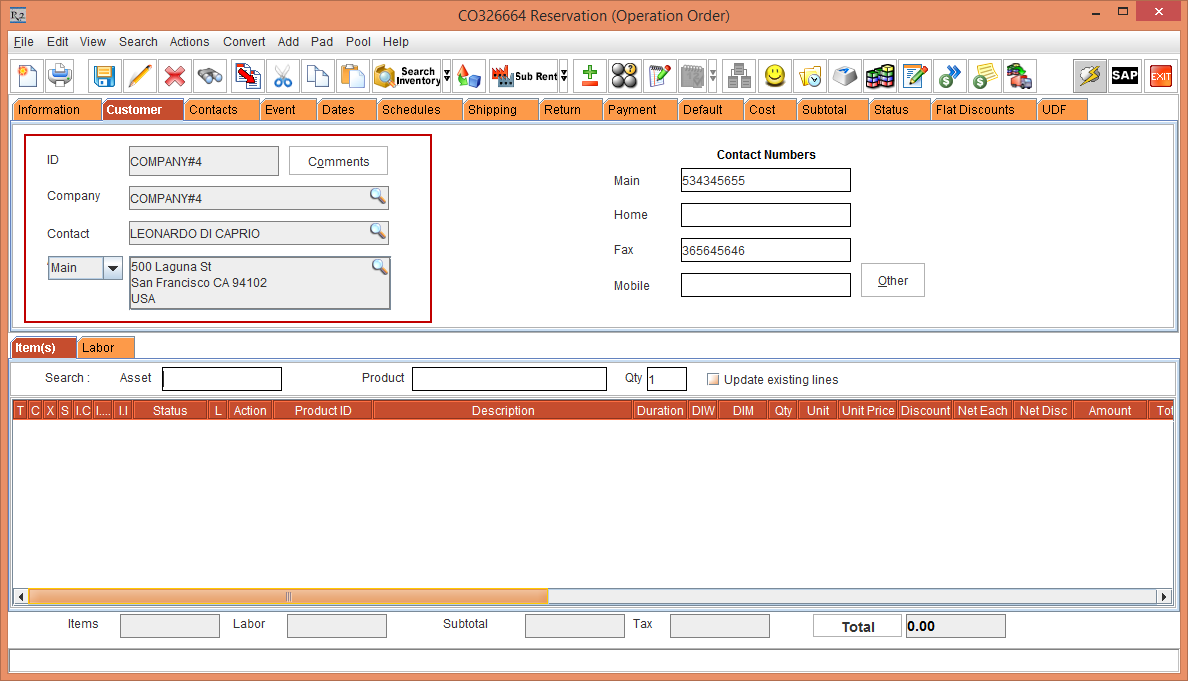
Select the Customer tab and verify the Customer. The Customer is defaulted to the Customer [COMPANY#4], shown in Figure 7.1.
The Customer is defaulted to the Customer [COMPANY#4], as the tagged Company Type is Intra-Company with the Intra-Company Type [E-Pool] in the Company Edit [COMPANY#4] window.
Figure 7.1 Account module > File menu > New sub menu > Operation Order option > CO326664 Reservation (Operation Order) window
-
Exit the CO326664 Reservation (Operation Order) window.
Scenario 7 - Operation Order with Search Company / Contact window displaying the Companies with Intra-Company Type drop-down as All or E-Pool
Prerequisites
Perform the following the steps:
-
Select the Site [SAN FRANCISCO].
-
Select the Maintenance module > Customer tab > Company tab.
-
Create a Company [COMPANY#4] with the Company Type drop-down as Intra Company.
-
Select the Intra-Company Type drop-down as E-Pool, as shown in Figure 7.0.
Figure 7.0 Company [COMPANY#4] with the Company Type drop-down as Intra Company and Intra-Company Type drop-down as E-Pool
-
Click OK in the COMPANY#4 Company Edit window.
-
Exit the Maintenance module.
Sample Workflow
-
Select the Account module and tag the Company [COMPANY#4].
-
Select the File menu > New sub menu > Operation Order option. The Reservation (Operation Order) window is displayed.
-
Select the Customer tab and verify the Customer. The Customer is defaulted to the Customer [COMPANY#4], shown in Figure 7.1.
The Customer is defaulted to the Customer [COMPANY#4], as the tagged Company Type is Intra-Company with the Intra-Company Type [E-Pool] in the Company Edit [COMPANY#4] window.
Figure 7.1 Account module > File menu > New sub menu > Operation Order option > CO326664 Reservation (Operation Order) window
-
Select the Company importable button. The Search Company / Contact window is displayed, displaying only the list of Companies with the Company Type drop-down as Intra-Company and Intra-Company Type drop-down as All or E-Pool, as shown in Figure 7.2.
Figure 7.2 Search Company / Contact window displaying the Companies with the Intra-Company Type drop-down as All or E-Pool

-
Exit the CO326664 Reservation (Operation Order) window.
Scenario 8 - Equipment Usage View with the Company Type as Intra-Company and Intra-Company Type as All
Prerequisites
-
Select the Site [SAN FRANCISCO].
-
Select the Maintenance module > Customer tab > Company tab.
-
Create a Company [COMPANY#1] with the Company Type drop-down as Intra Company.
-
Select the Intra-Company Type drop-down as All, as shown in Figure 8.0.
Figure 8.0 Company [COMPANY#1] with the Company Type drop-down as Intra Company and Intra-Company Type drop-down as All
-
Click OK in the COMPANY#1 Company Edit window.
-
Select the Items tab and create a Serial Item [JBL SMART] and receive some Assets.
-
Exit the Maintenance module.
Sample Workflow
-
Select the Search Inventory module and tag the Item [JBL SMART] and click the Equipment Usage View icon. The Equipment Usage View window for the Item [JBL SMART] is displayed.
-
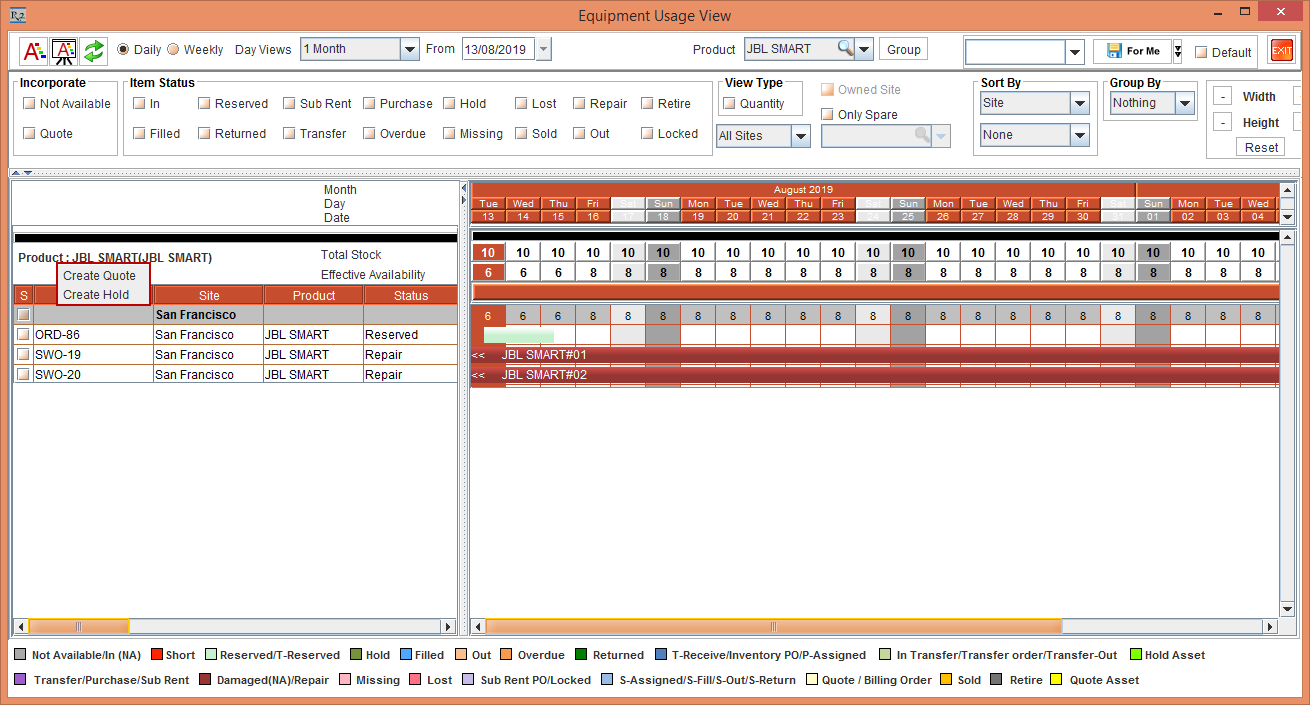
Perform a right-click on the Left Hand Side of the Equipment Usage View window. The Create Quote and Create Hold options are displayed, as shown in Figure 8.1.
Figure 8.1 Account module > File menu > New sub menu > Operation Order option > CO326664 Reservation (Operation Order) window
-
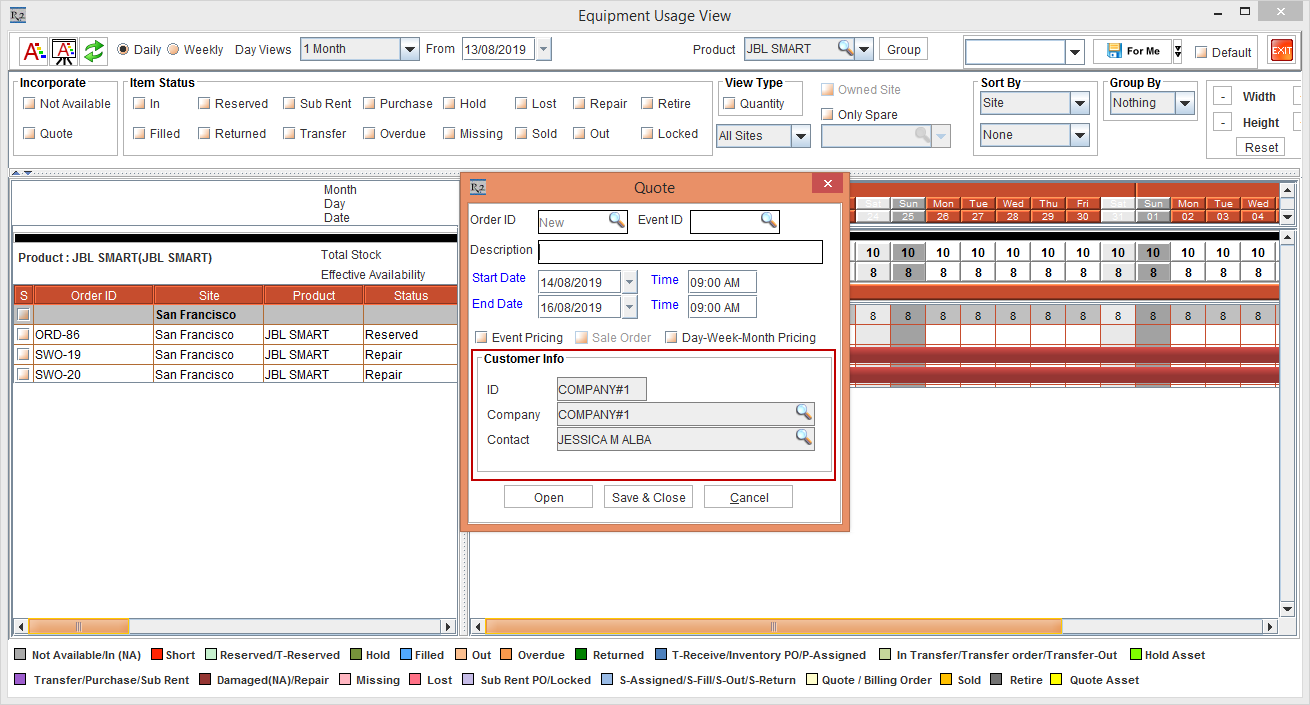
Select the Create Quote option. The Quote dialog box is displayed with the Customer Info section displaying the Customer [COMPANY#1] details, as shown in Figure 8.2.
The Customer [COMPANY#1] details are displayed in the Customer Info section of the Quote dialog box, as the Customer [COMPANY#1] is tagged with the Company Type [Intra-Company] and the Intra-Company Type [All].
Figure 8.2 Create Quote > Quote dialog box > Customer Info section displaying the Customer [COMPANY#1] with the Intra-Company Type as All
-
Cancel the Quote dialog box.
Similarly, the Customer [COMPANY#1] details are displayed in the Customer Info section of the Create Hold dialog box, as the Customer [COMPANY#1] is tagged with the Company Type [Intra-Company] and the Intra-Company Type [All].
-
Exit the Equipment Usage View window.