
Reference No: 29185
Details
Support for the Export Cost from the Approved Time sheet for Freelancers without Company.
The details are explained in the sample workflow given below:
Sample Workflow
Prerequisites:
-
Login to R2 Labor.
-
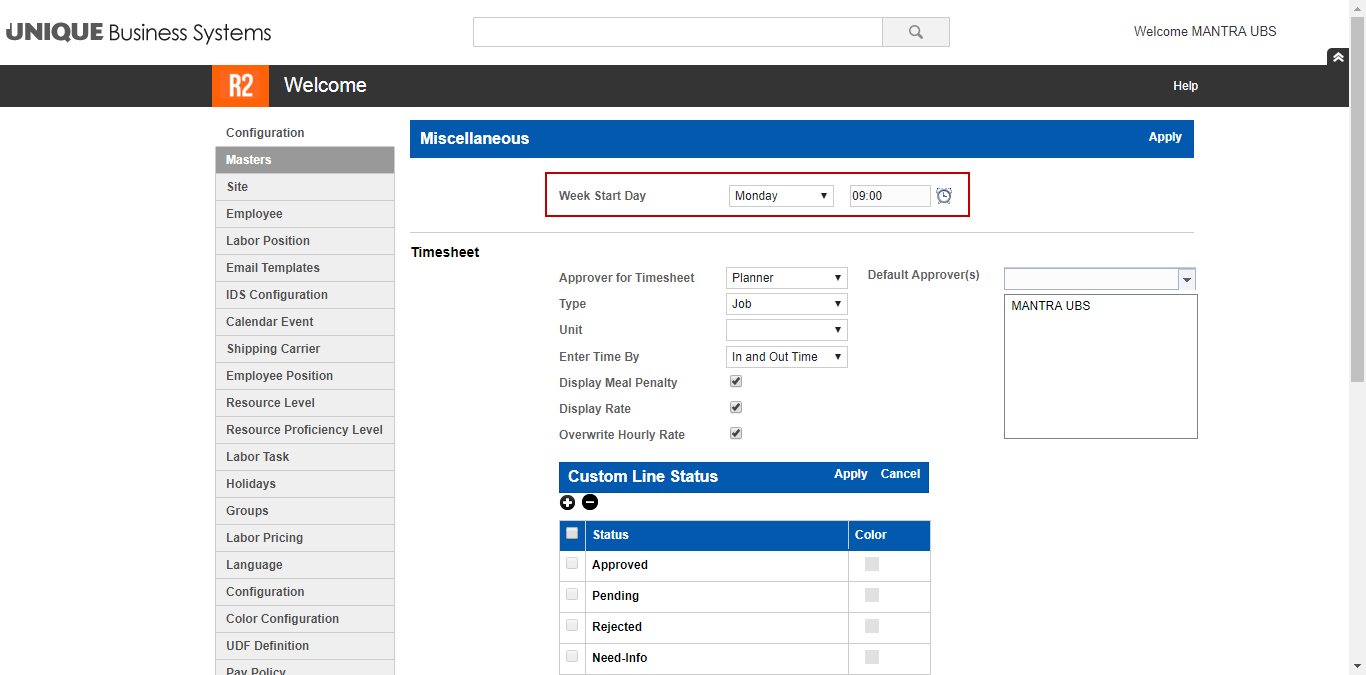
Select the Setting Option > Miscellaneous > change the Week Start Day to Monday , as shown in Figure 1.0
-
Click the Apply button and exit the R2 Labor.
Scenario:
-
Select the Accounts module.
-
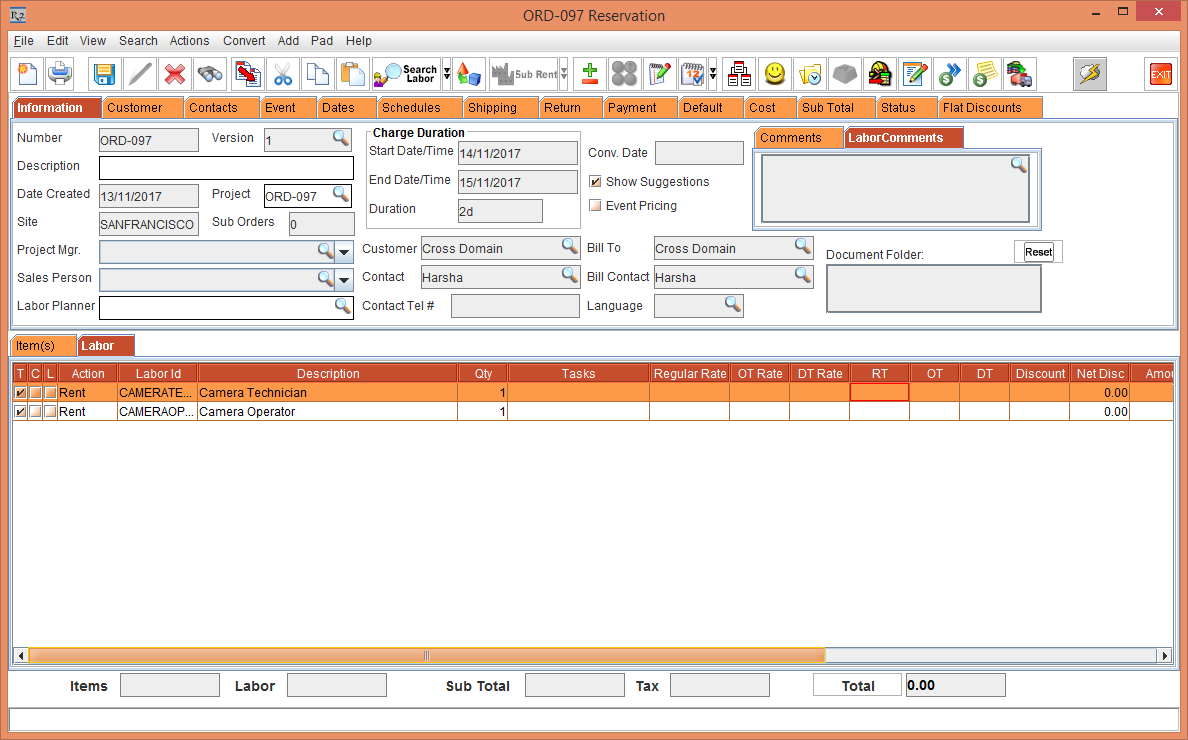
Create an Order [ORD-097].
-
Add the Labor [CAMERAOPERATOR] and [CAMERATECHNICIAN] with 1 Qty each, as shown in Figure 1.1
-
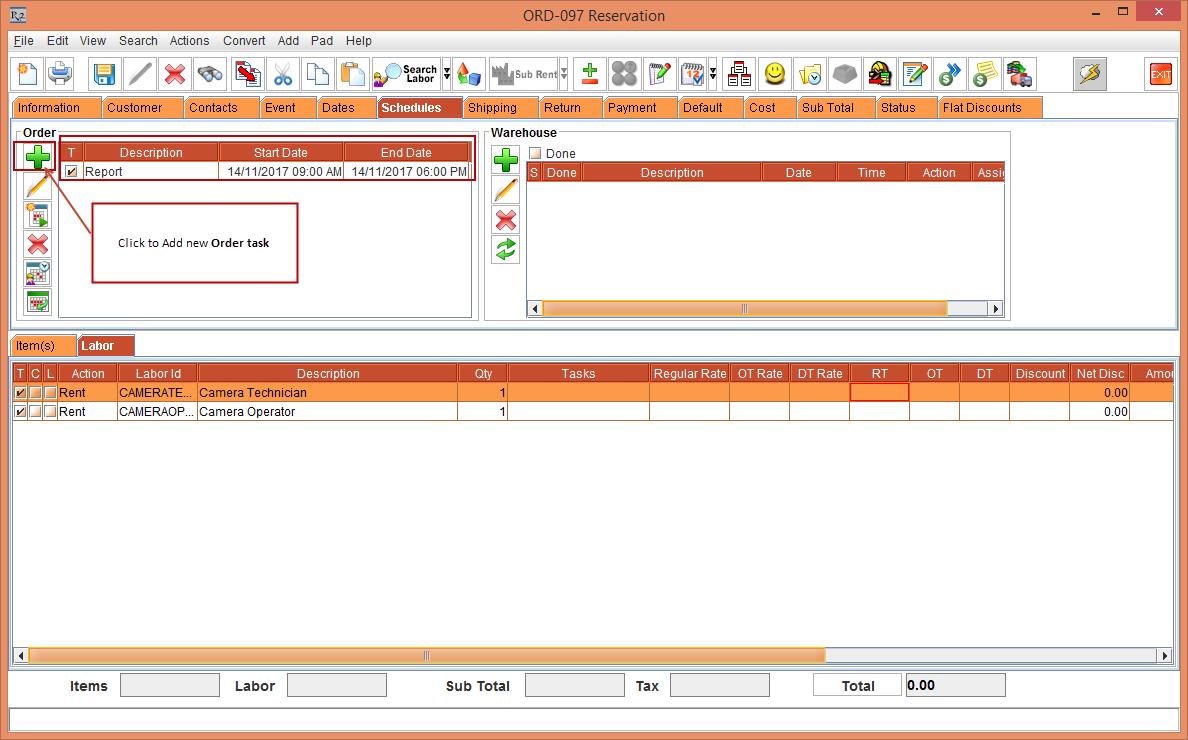
Select the Schedules tab > add the Order Task, as shown in Figure 1.2.
-
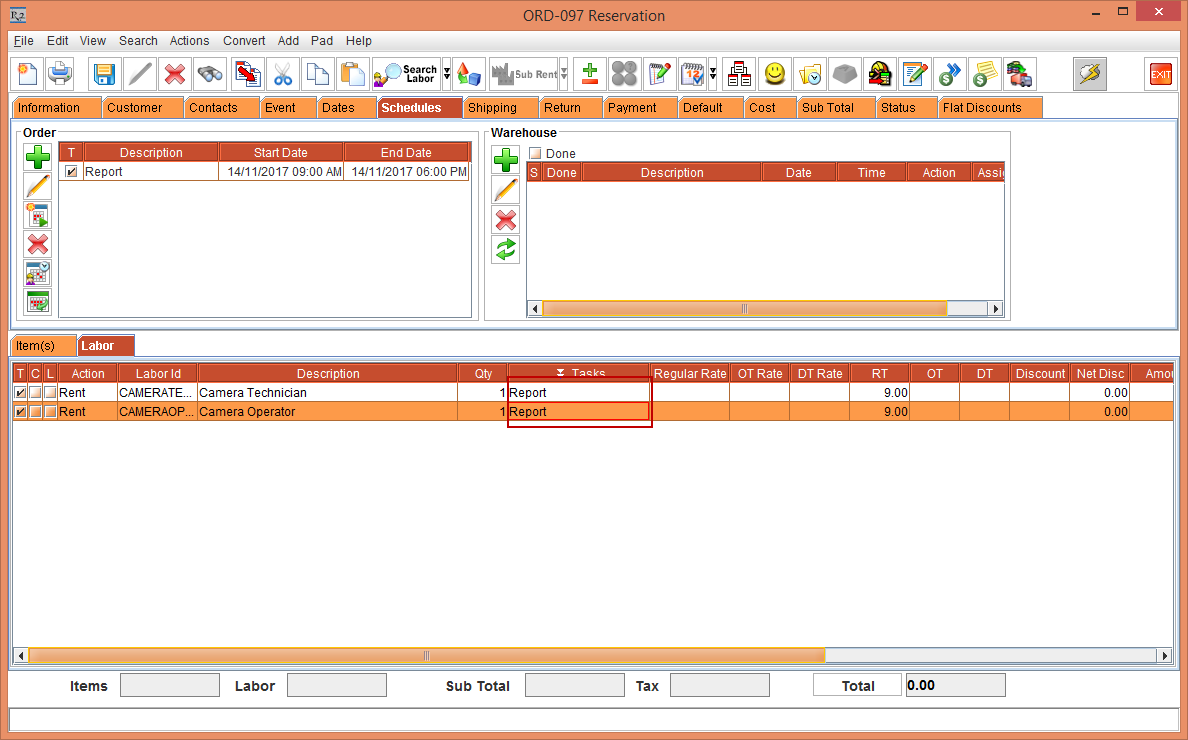
Select the Tasks, which are created in the Labor line, as shown in Figure 1.3.
-
Save and close the Order.
-
Login to R2 Labor application.
-
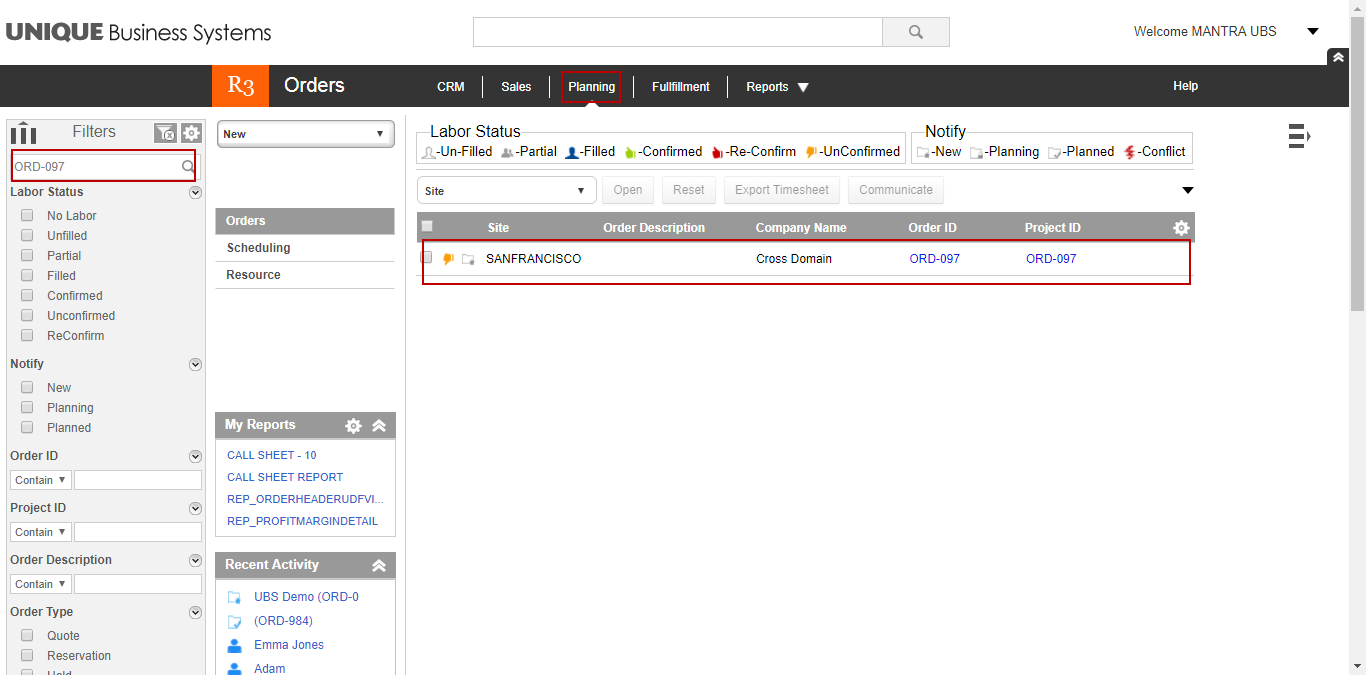
Select the Planning > search the Order [ORD-097] as shown in Figure 1.4.
-
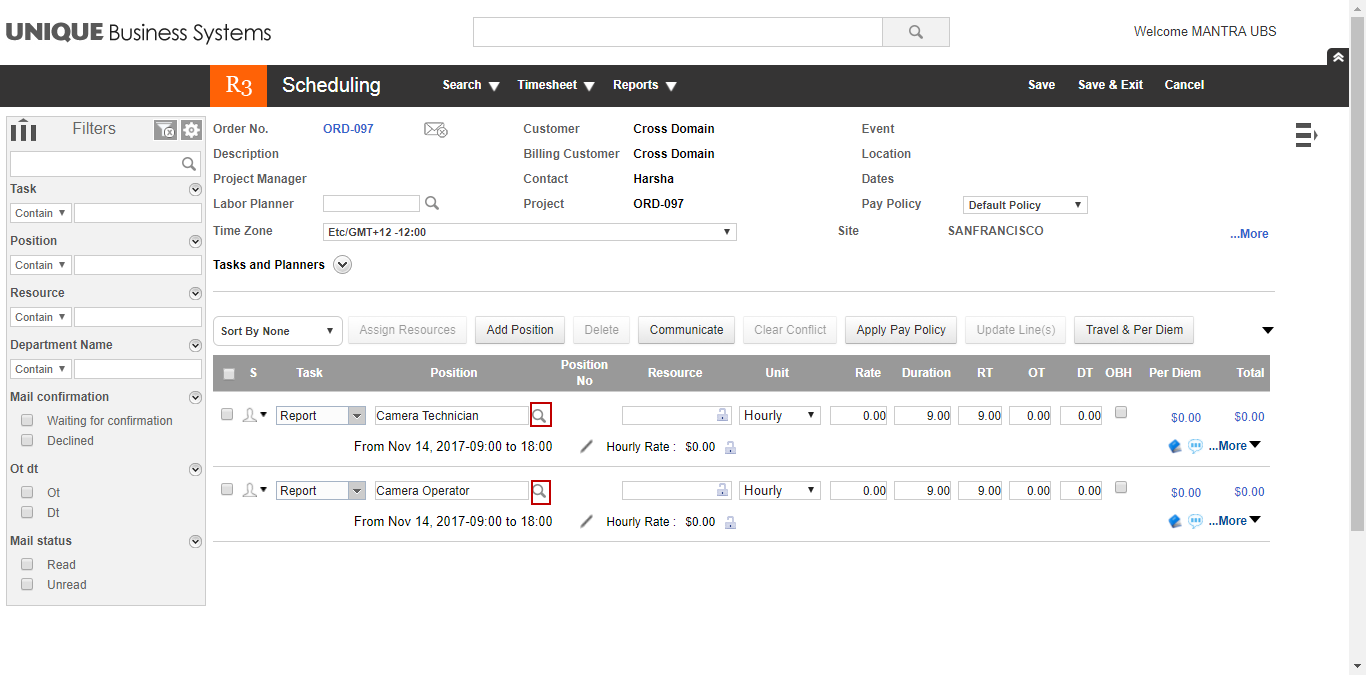
Click the Order ID [ORD-097] the Scheduling window appears , as shown in Figure 1.5.
-
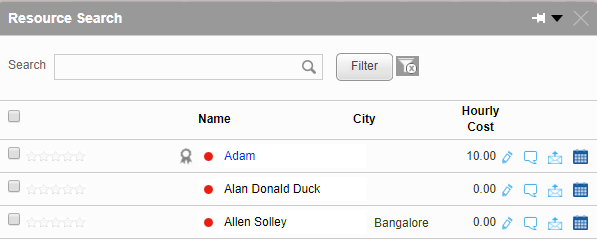
Click the Resource importable button shown in Figure 1.5, the Resource Search window is displayed, as shown in Figure 1.6.
-
Select the Resource that is which is not having any company tagged and Resource type is freelancers.
-
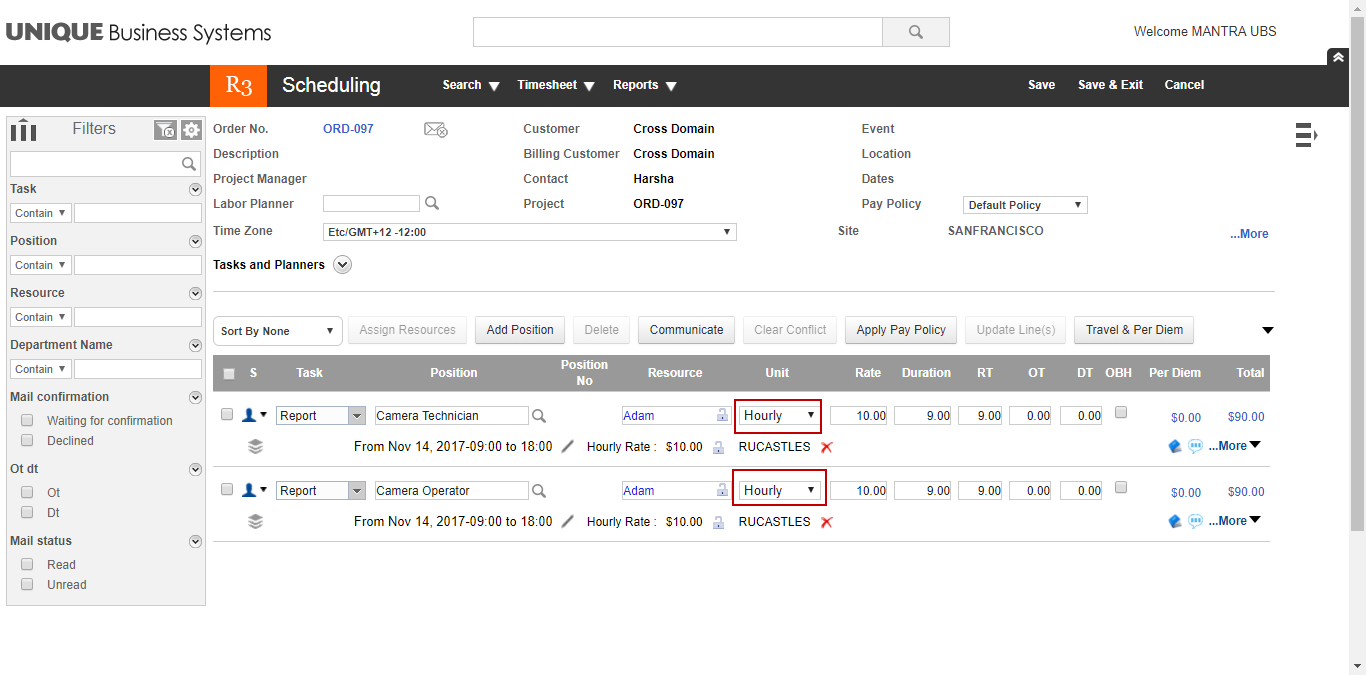
In the Labor line, select the Unit as Hourly, as shown in Figure 1.7.
-
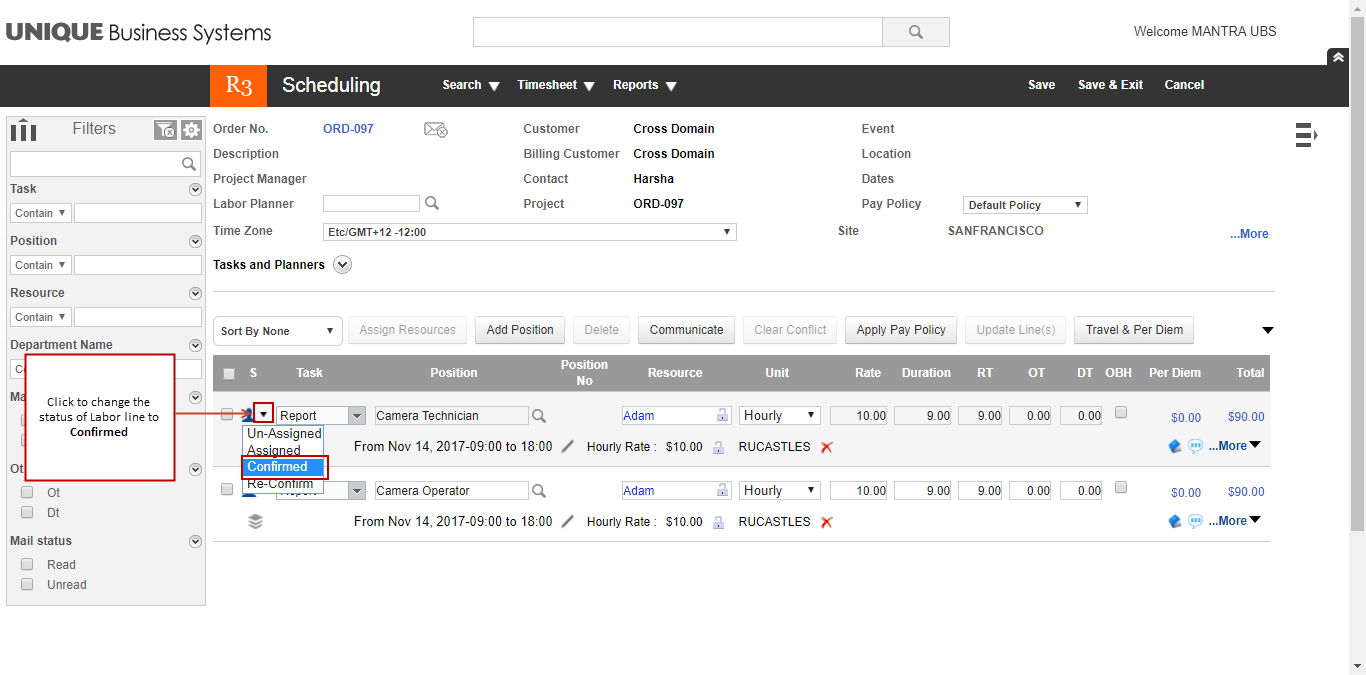
Change the Status of the Labor line to Confirmed, as shown in Figure 1.8.
-
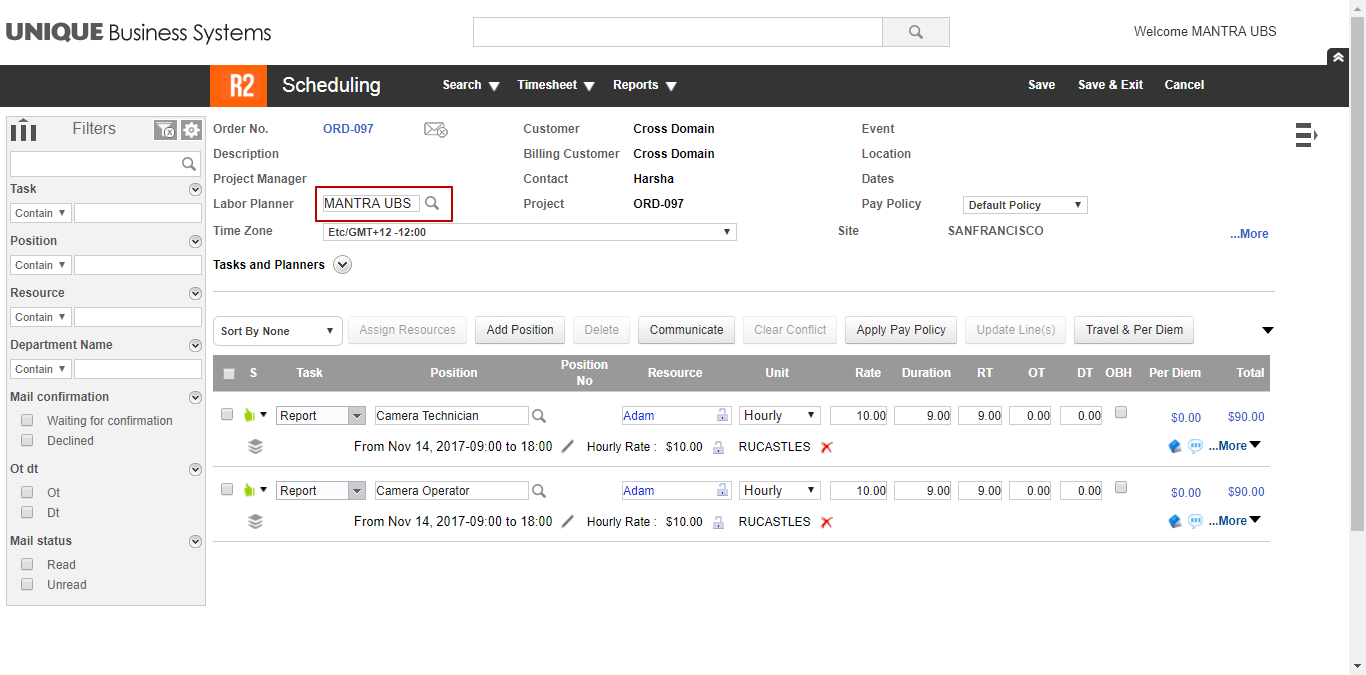
Click the Labor Planner importable button to add a Planner for the order, as shown in Figure 1.9.
-
Save and exit the Order.
-
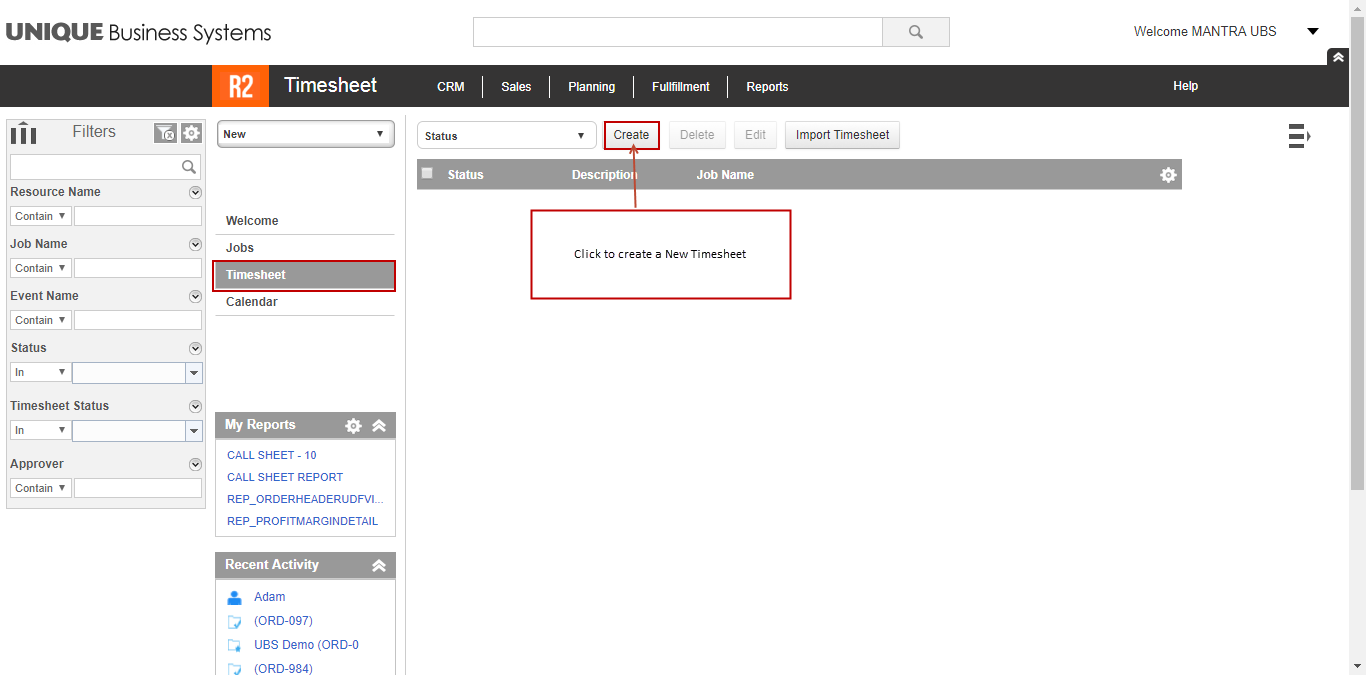
In the R2 Labor welcome page, select the Timesheet tab and click the Create button, as shown in Figure 1.10.
-
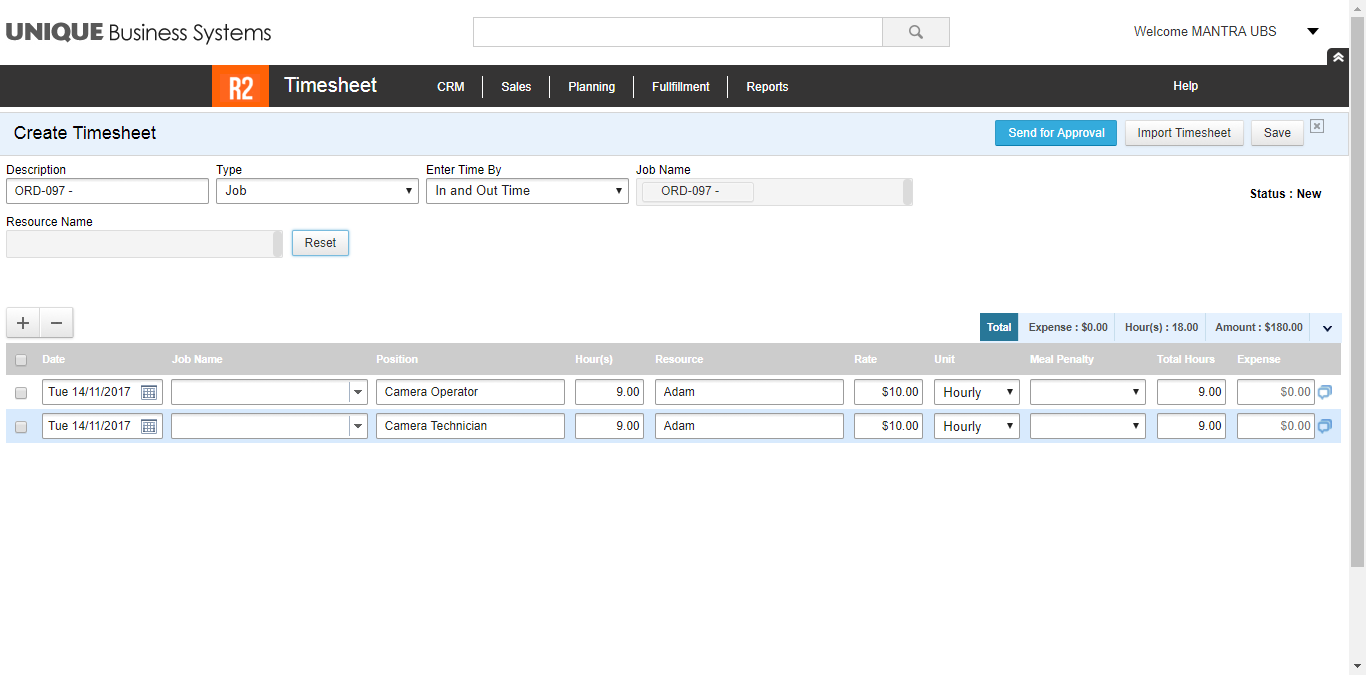
The Create Timesheet window is displayed, Select the Type as Job, and enter the Time By as In and Out Time, and Job Name as Order Id [ORD-097], as shown in Figure 1.11.
-
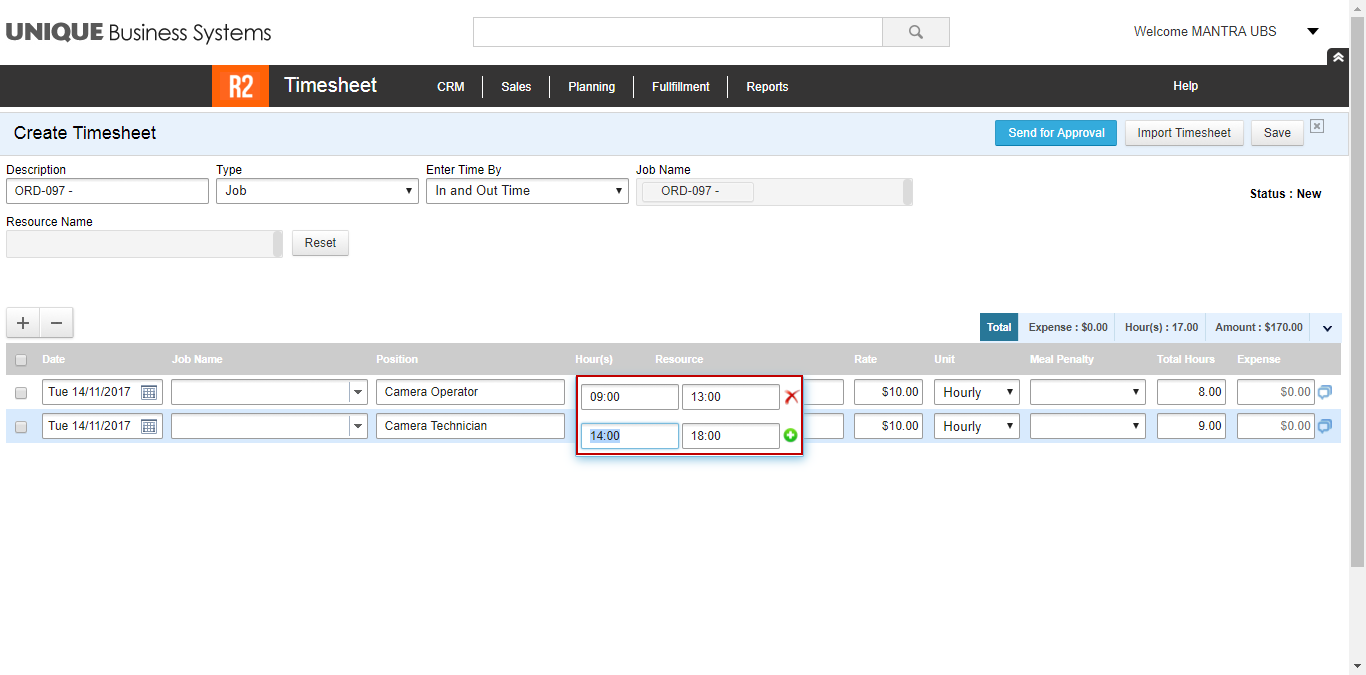
Enter the Hours for Camera Operator 01, as shown in Figure 1.12.
-
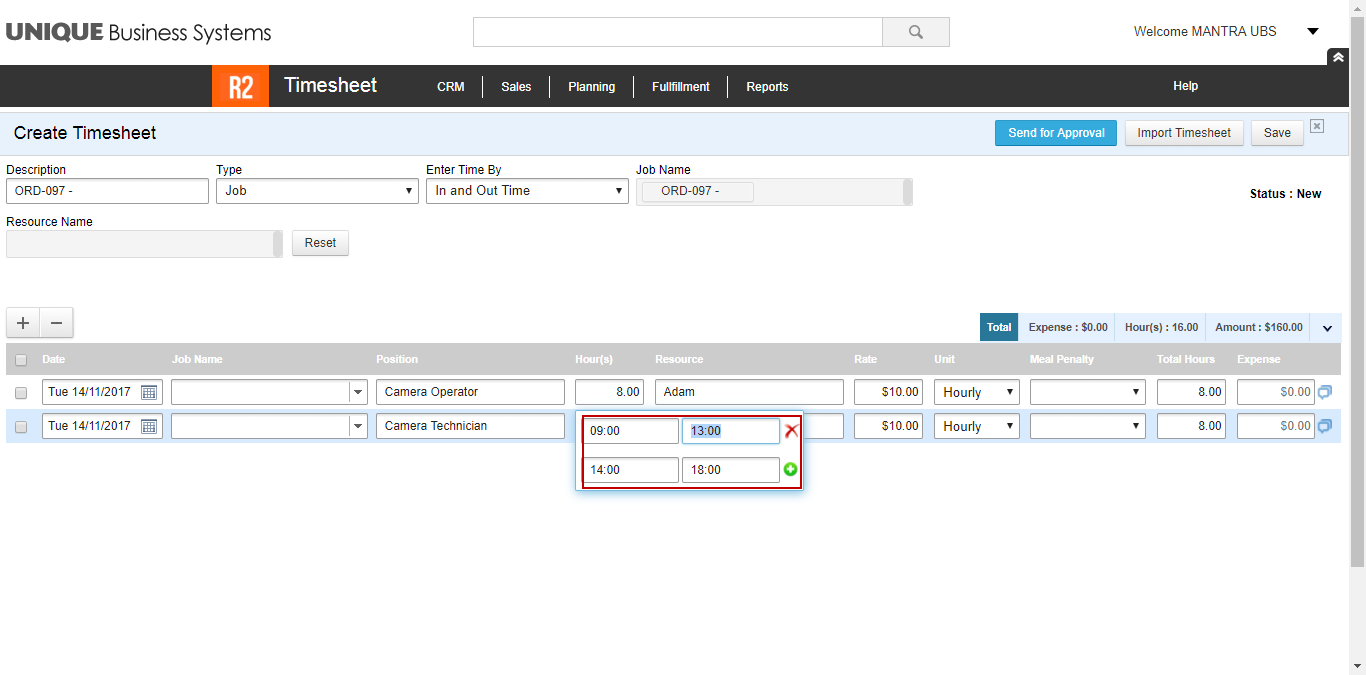
Enter the Hours for Camera Technician 01, as shown in Figure 1.13.
-
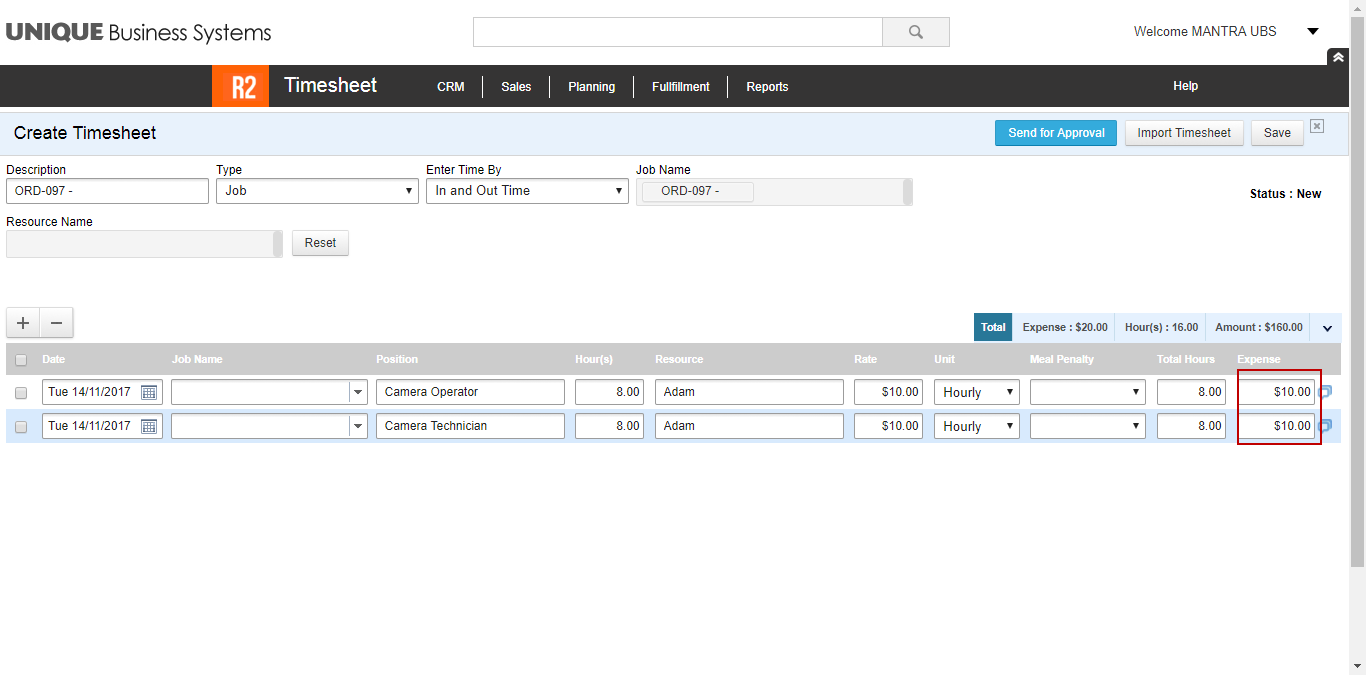
Enter the Expense as 10$ for both the lines, as shown in Figure 1.14.
-
Click the Save button.
-
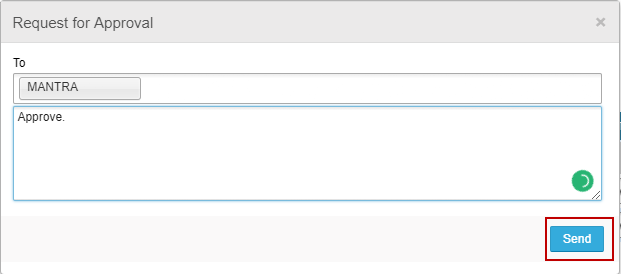
Click the Send for Approval button > the Request for Approval window appears > enter the Message > click the Send button, as shown in Figure 1.15.
-
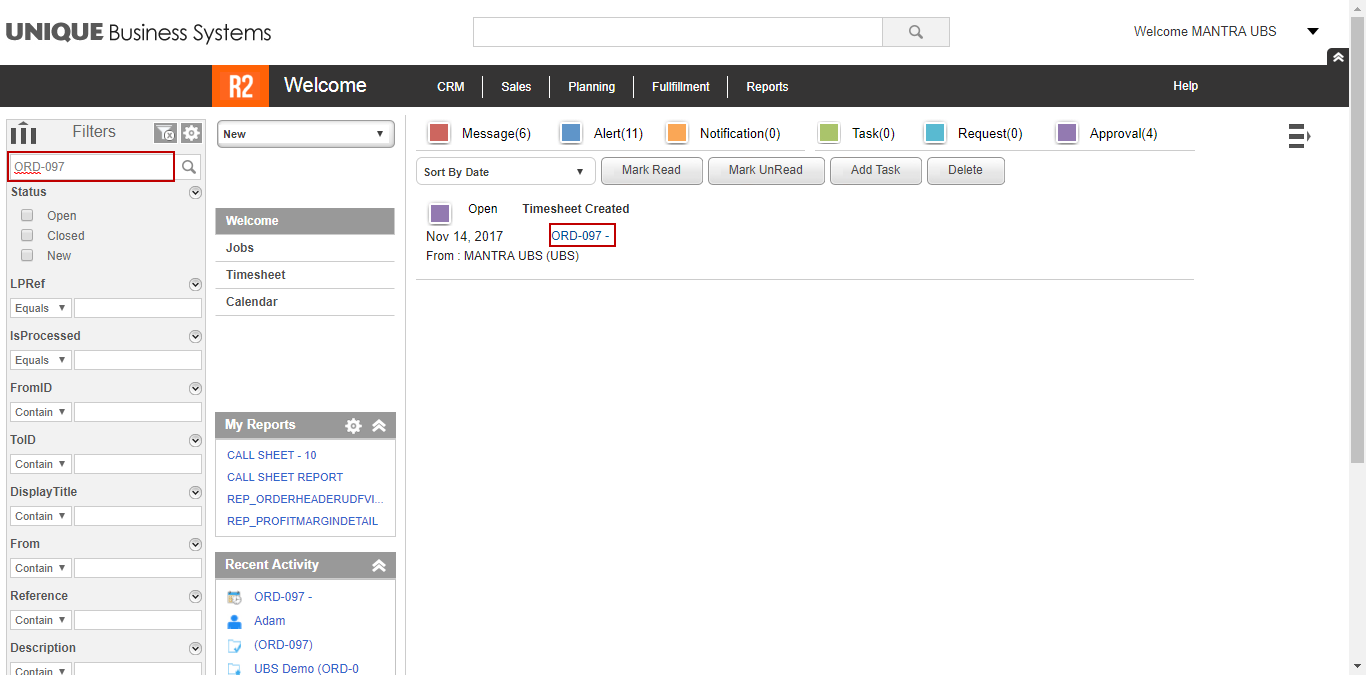
In the R2 Labor welcome page, search the Order [ORD-097] as shown in Figure 1.16.
-
Click the Order [ORD-097] under Description, as shown in Figure 1.16.
-
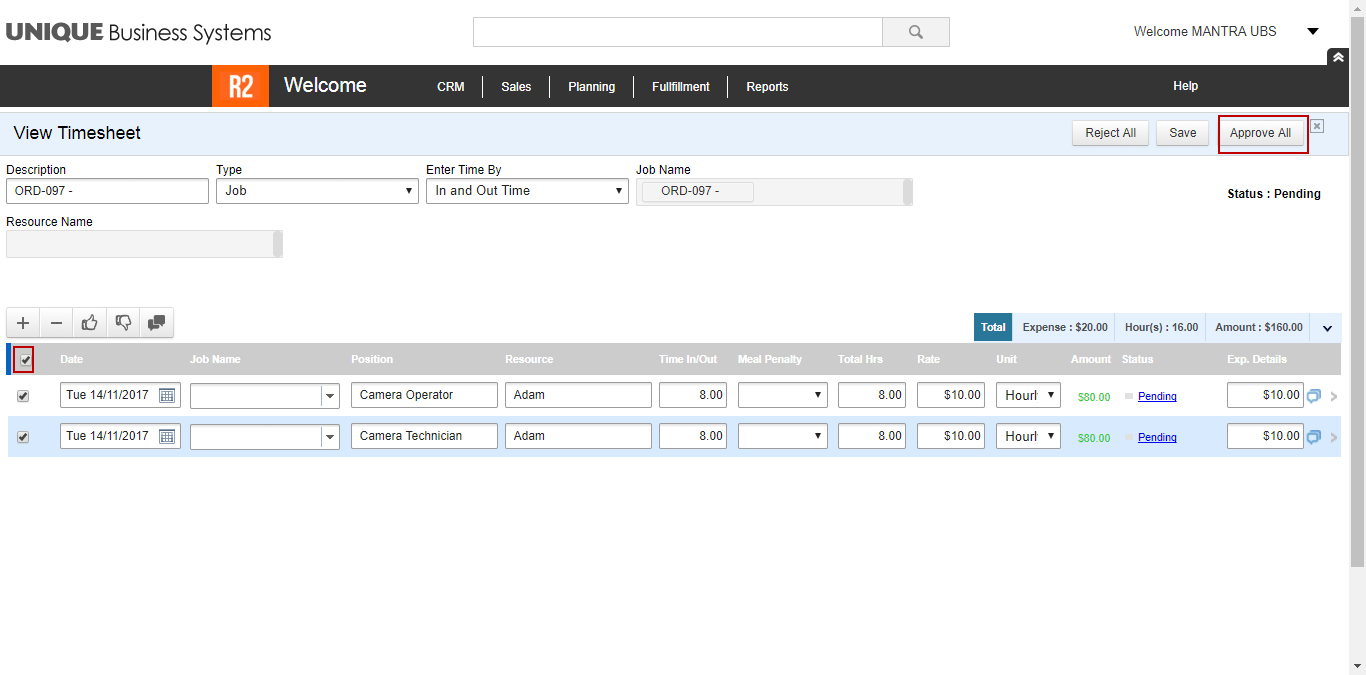
The View Timesheet window appears > select both the lines and click the Approve All button, as shown in Figure 1.17.
-
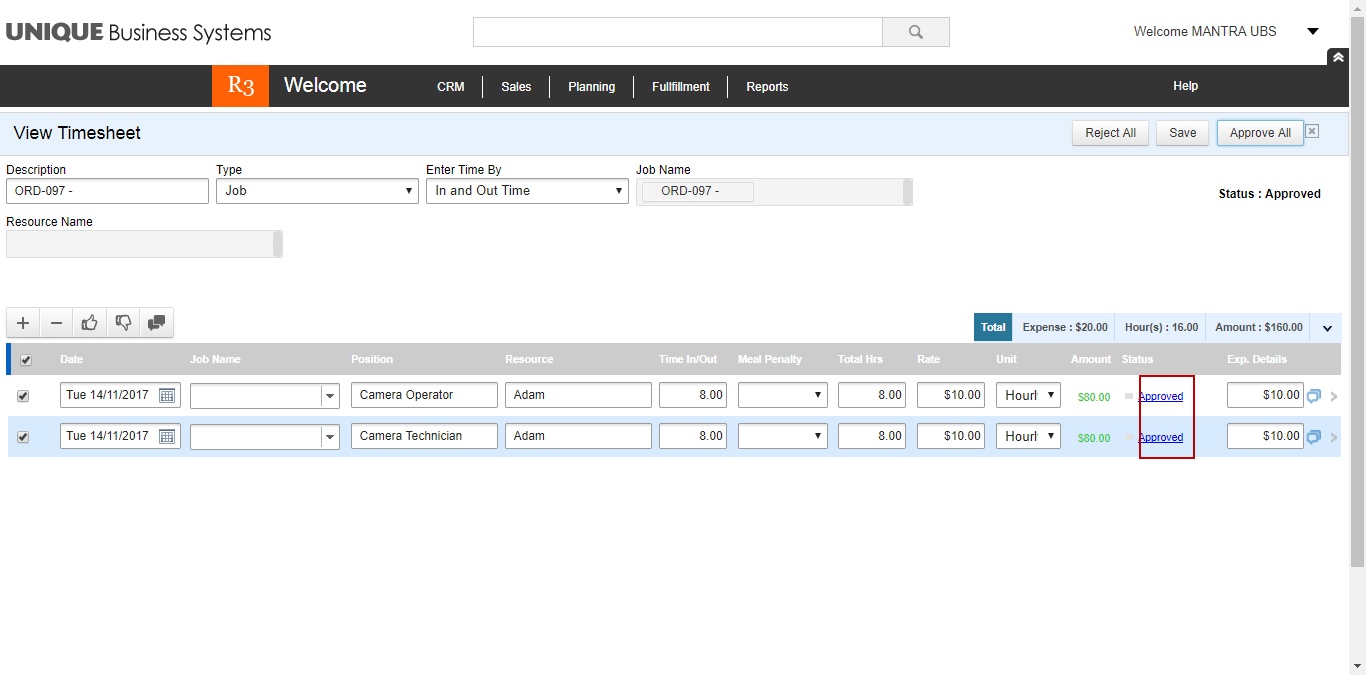
The Status of the Labor line will change to Approved as shown in Figure 1.18.
-
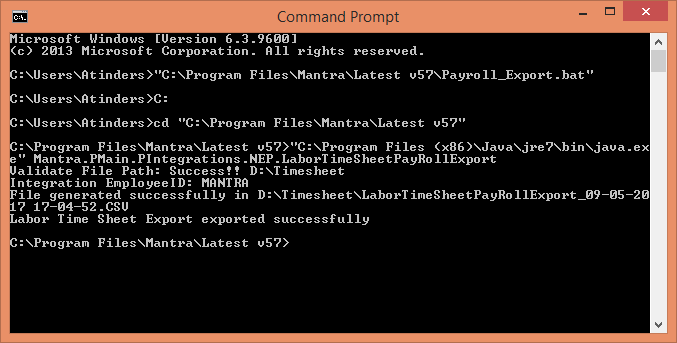
Run the Payroll_Export.bat file in the Command Prompt as shown in the Figure 1.19.
-
The output will display all the timesheets which are in Approved status and falling between last Monday to previous days, as shown in Figure 1.20.
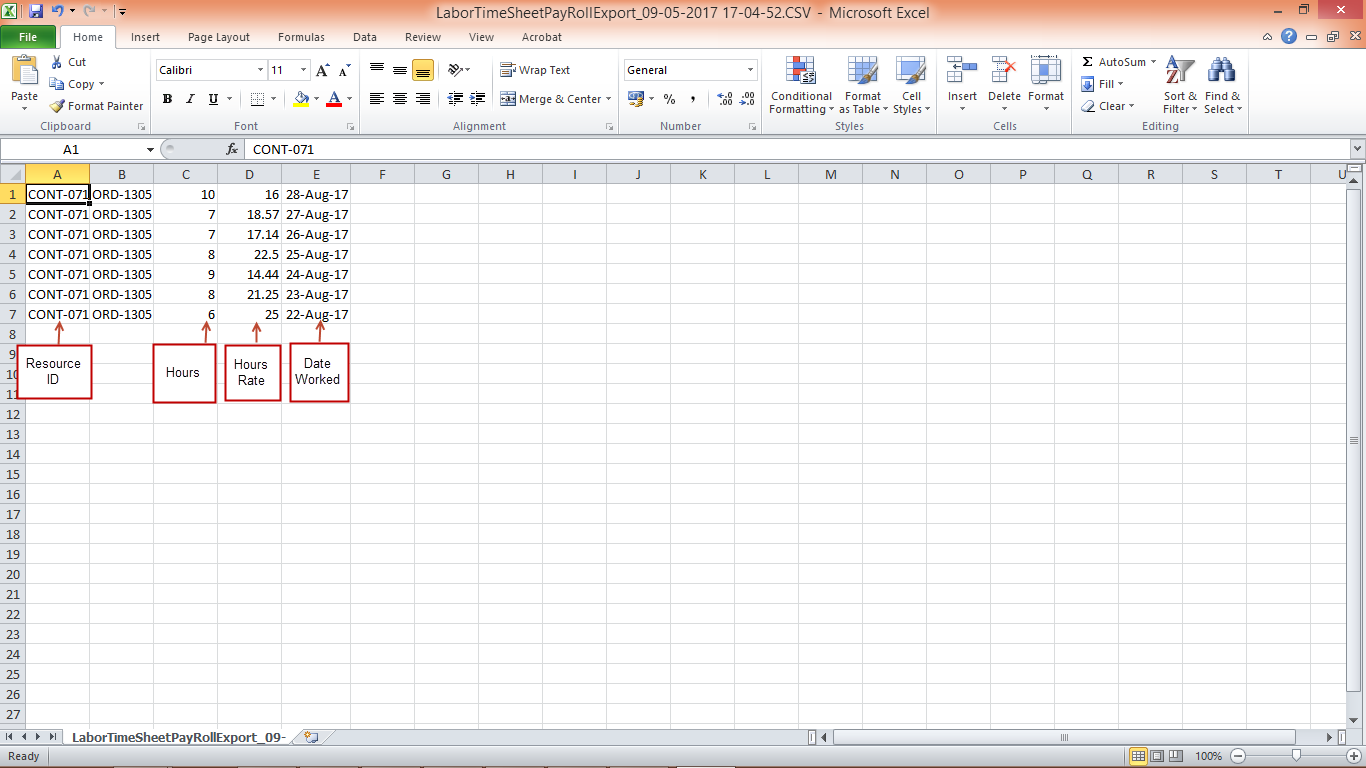
Once the Timesheet is generated the status of the Timesheet in R2 Labor will change to Paid and Closed and that same Timesheet will not come within that date if we again generate the Timesheet.