Table of Contents
Existing Events and Locations
Events are activities like conventions, conferences and exhibitions in which multiple customers may participate. R2 allows you to store Event information such as dates, times, booth numbers and locations.
To select or change the Event associated with an order
-
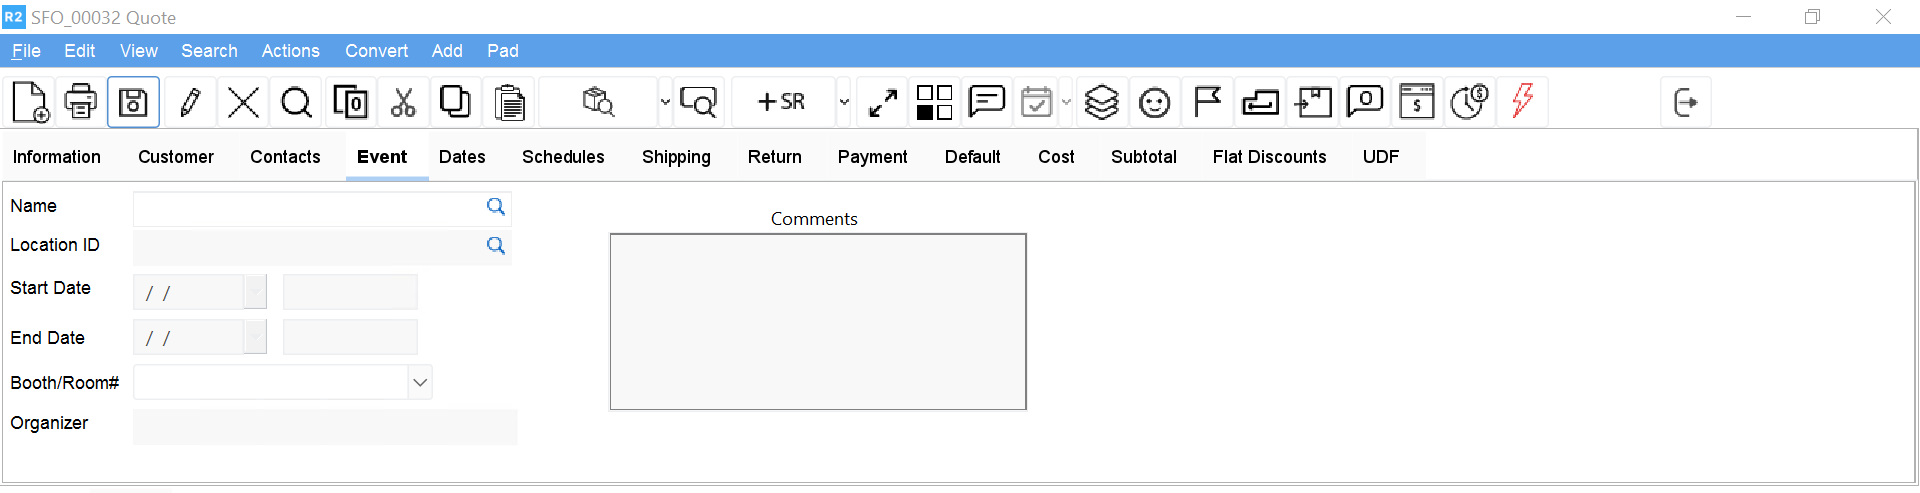
From an order window, select the Event tab.
The Event tab shows the event Name, Location, Start Date, End Date, Booth No. (number), Organizer and any Comments about the event.
-
Click on the more button next to the Name field.
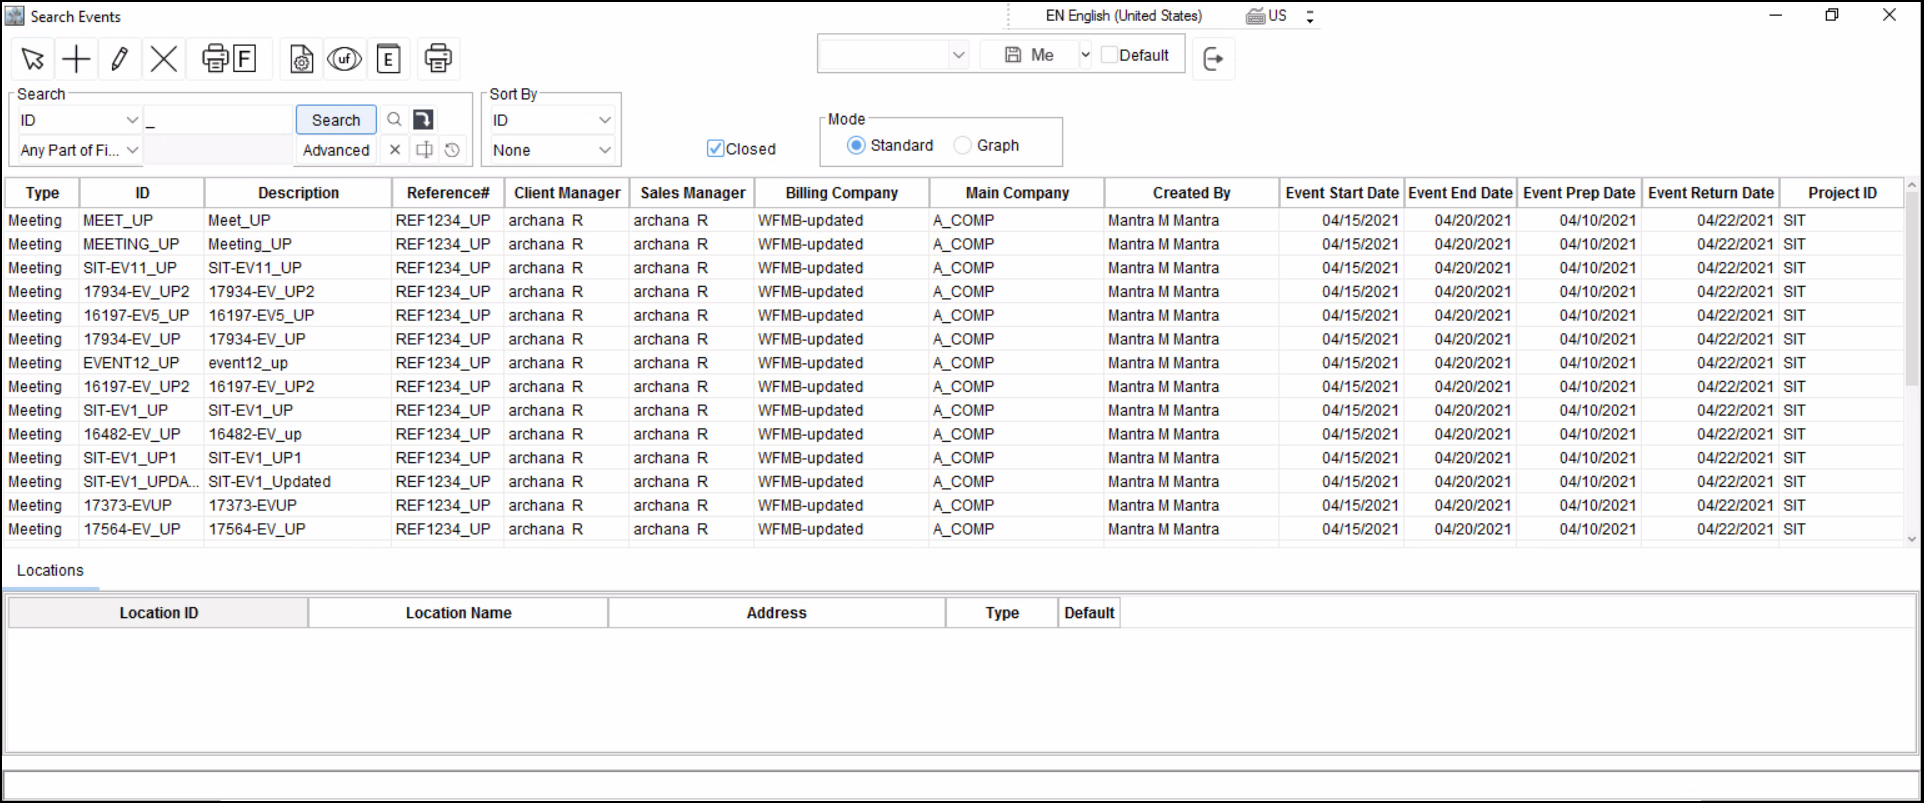
This opens the Events search dialog from which you can select an event or add a new event.

-
Click on the Search button
A list of all Events in your R2 database appears.
-
Click on the Event you wish to associate with the order.
This highlights the Event record. Any Locations available for the high- lighted Event will appear in the Event Locations area in the lower portion of the dialog.
If multiple Event Locations are available for the selected Event, highlight the correct Location before clicking on the Tag but- ton. The Location information selected here will be inserted in the Shipping tab.
-
Click on the Tag button
This tags the Event (and Location) for addition to the order.
-
Click on Ok
This closes the Events search dialog and returns you to the order window where the event information is now displayed.
To select or change an Event Location
Choosing an Event Location is similar to selecting an Event. However, within the Events tab, you will click on the more button next to the Location field, not the Event field. Then, once in the Events search dialog, tag an Event Location at the foot of the dialog.
You will only be able to change the Location from the Event tab if more than one has been assigned to the selected Event. To use a shipping location not currently in the database, either add a new Location to the Event, or select or add the Location from within the Ship- ping tab.
Adding Events
Follow the directions below to add an Event or Event Location while adding or revising an order. Events and Event Locations can also be added through the Maintenance module.
To create an Event record, only the Event Name, Start Date and End Date are required.
To add a new Event
From an order window, click on the Event tab.
The Event tab shows the event Name, Location, Start Date, End Date, Booth No. (number), Organizer and any Comments about the event.
Click on the more button next to the Name or Location field.
This opens the Events search dialog from which you can add an event or event location.
Click on the Add button in the top row. This opens the Event dialog box.
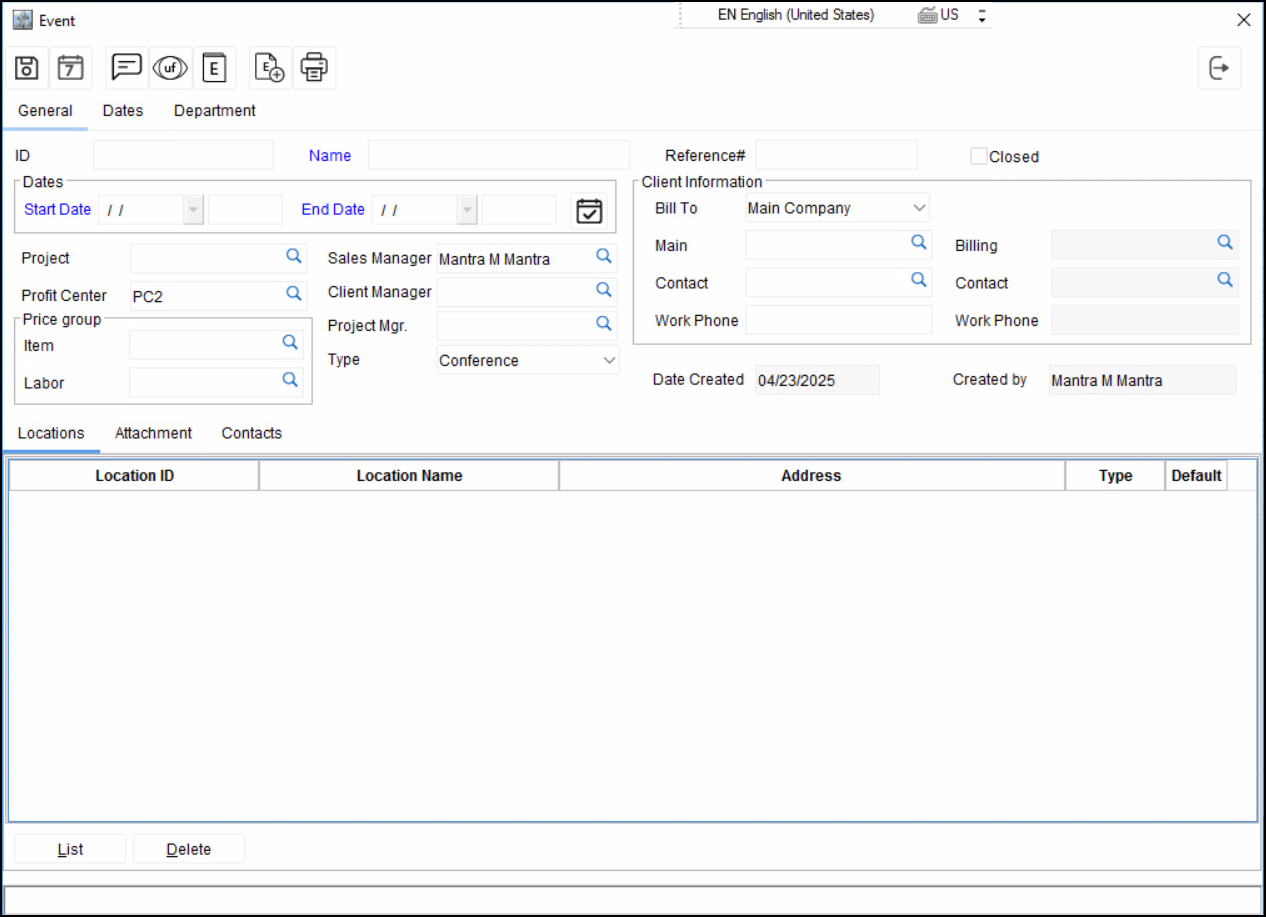
Enter Event details.
You must enter an Event Name, Start Date and End Date to create a new event record.
Click on Ok
The Event dialog closes and the new Event appears in the event list- ing.
Dates
The Dates tab in the Order window is used to input key order dates. Date significance will vary according to how you do business. For example, some rental houses use only Prep, Ship and Return dates.
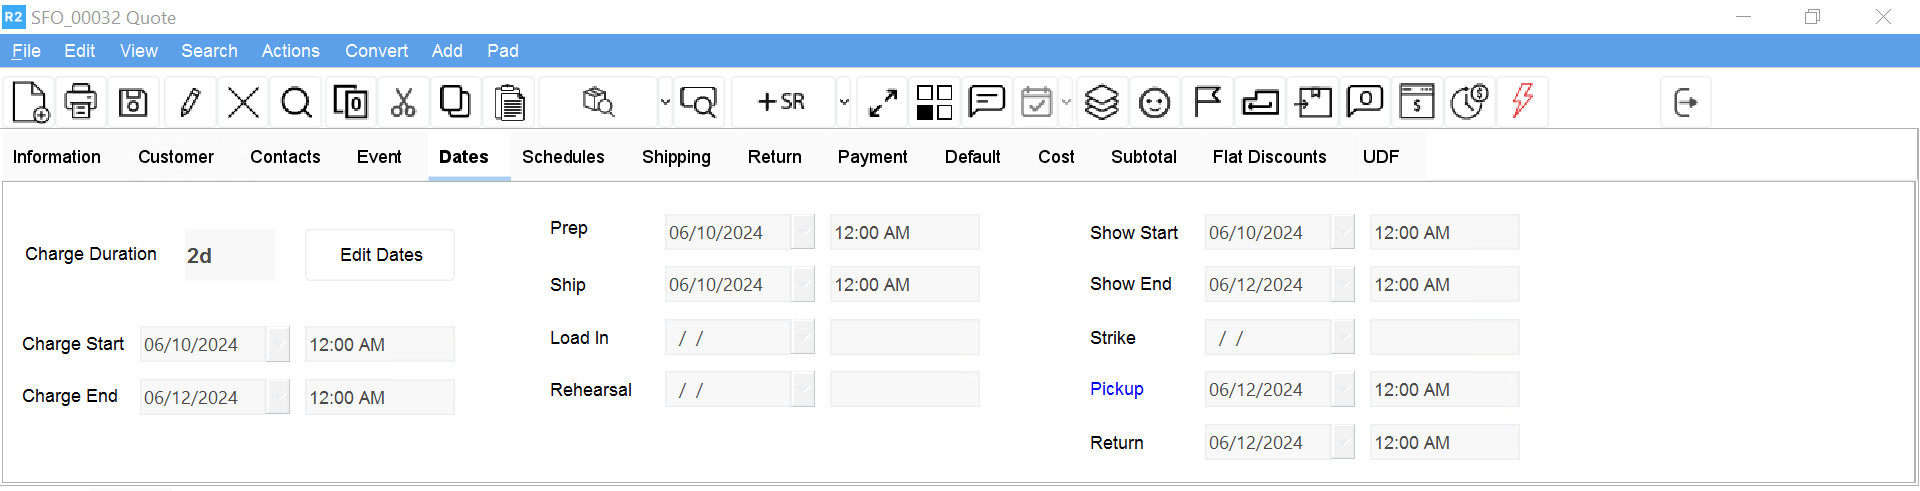
To most accurately track availability, enter correct dates before converting an order into a Reservation.
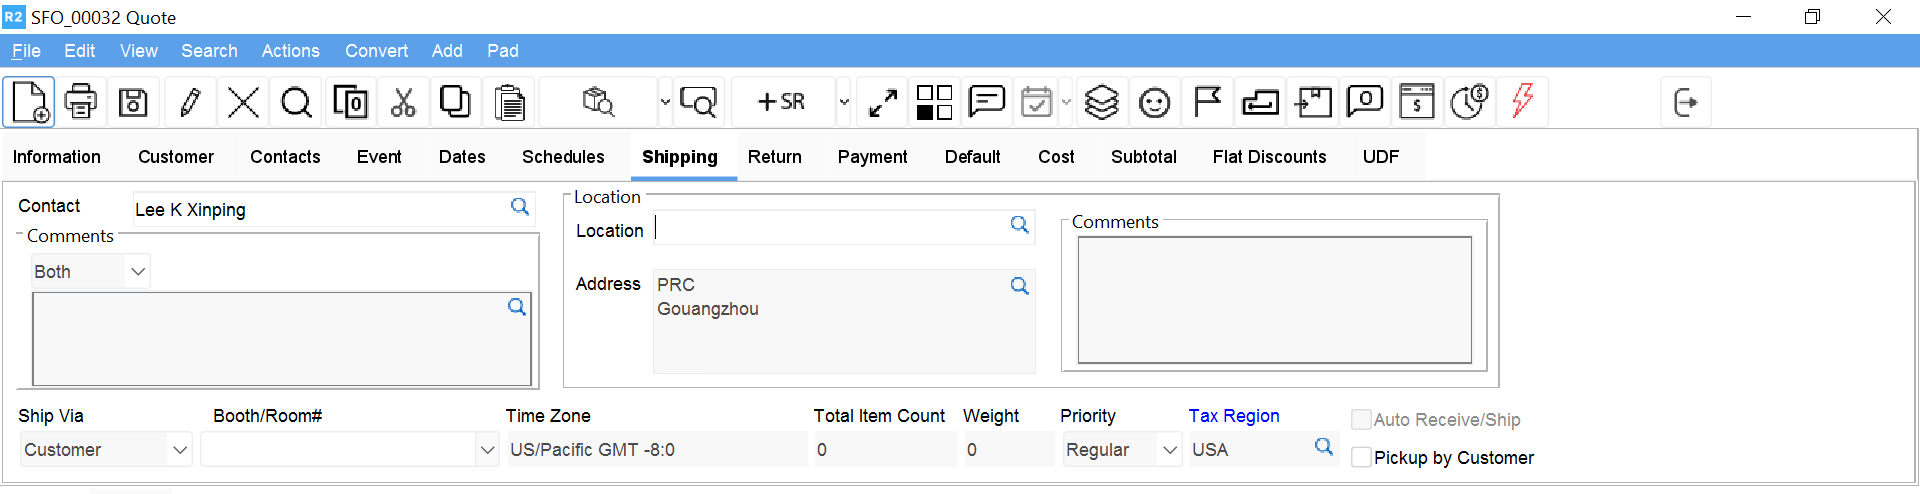
Shipping
The Shipping tab is used to record the delivery destination for items on an order. The Location and Address may be automatically filled in with either the Customer's default shipping address or the Location selected from the Event tab. If neither a default Shipping address nor Event Location is selected for the Order, you will need to enter Shipping information before the order can be processed.
Entering Shipping Information
If your order does not correspond to an Event record, and the current customer has no default address, you may enter shipping information by either selecting a Location from your Location database, or by simply entering the delivery Address.
To select a Shipping Location
-
From an order window, select the Shipping tab.
-
Click on the more button next to the Location field.
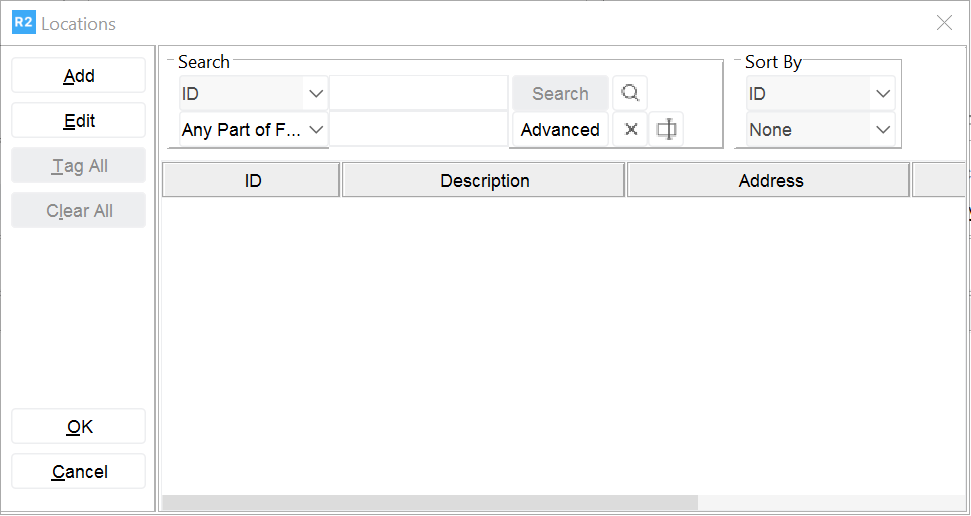
-
Enter Search criteria and click on Search and a Location list will appear if pre entered in R2.
-
Double-click on the location record you wish to select
This inserts the selected Location information in the Shipping Tab.
To add a new Location
-
From an order window, select the Shipping tab.
-
Click on the more button next to the Location field.
The Locations dialog appears.

-
Click on Add
The Location details dialog appears.
-
Enter Location Information.
-
Click Ok
To enter a Shipping Address
-
From an order window, select the Shipping tab.
-
Click on the more button next to the Address field.
The Address dialog appears.
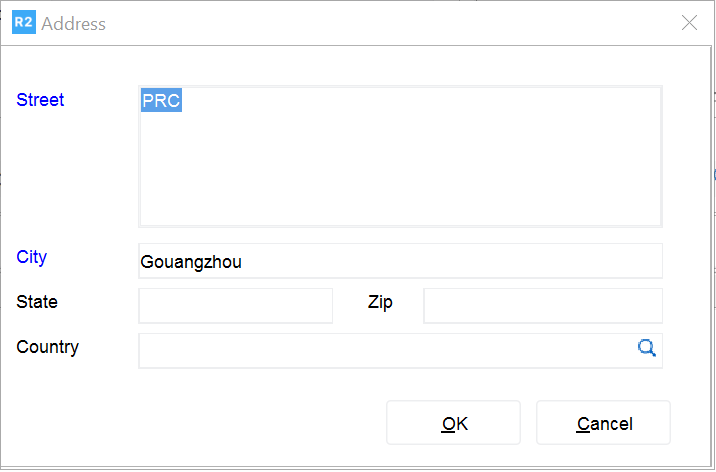
-
Type in all necessary Address information.
-
Click Ok