Reference No: R2-5446
Version No: 06.00.03-00
Details
Support has been provided to display the Show Start Date and Show End Date columns in the REP_PODETAILVIEW Report.
The details are explained in the sample workflow given below:
Prerequisites
-
Select the Maintenance module > Items tab.
-
Create an Item [ELECTRIC PLANER] with some Qty.
-
Save and Exit the Maintenance module.
Sample Workflow
-
Select the Account module.
-
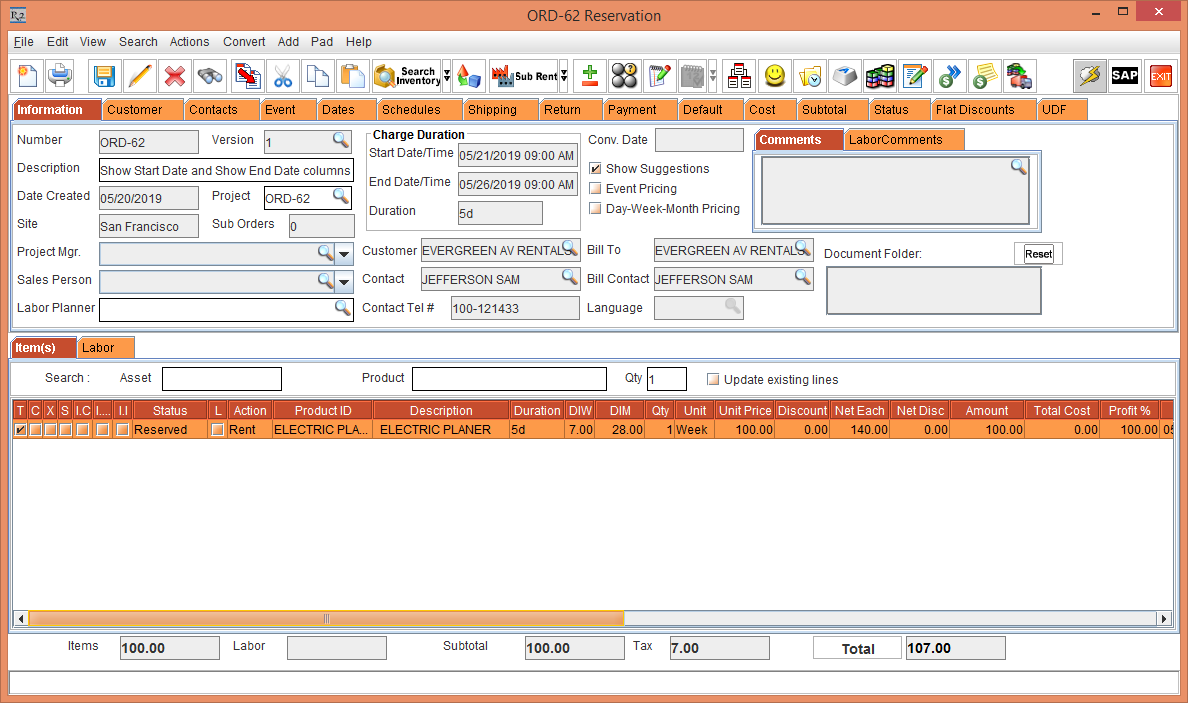
Tag a Company [EVERGREEN AV RENTALS] and create a Rental Reservation Order [ORD-62] with the Start Date [21-May-2019] and End Date [26-May-2019].
-
Search and add the Item [ELECTRIC PLANER] with 1 Qty and the Unit Price [100.00], as shown in the Figure 2.0.
-
Select the Dates tab > Edit Dates button. The Order Dates window is displayed. Enter the Show Start [21-May-2019] and Show End [26-May-2019].
-
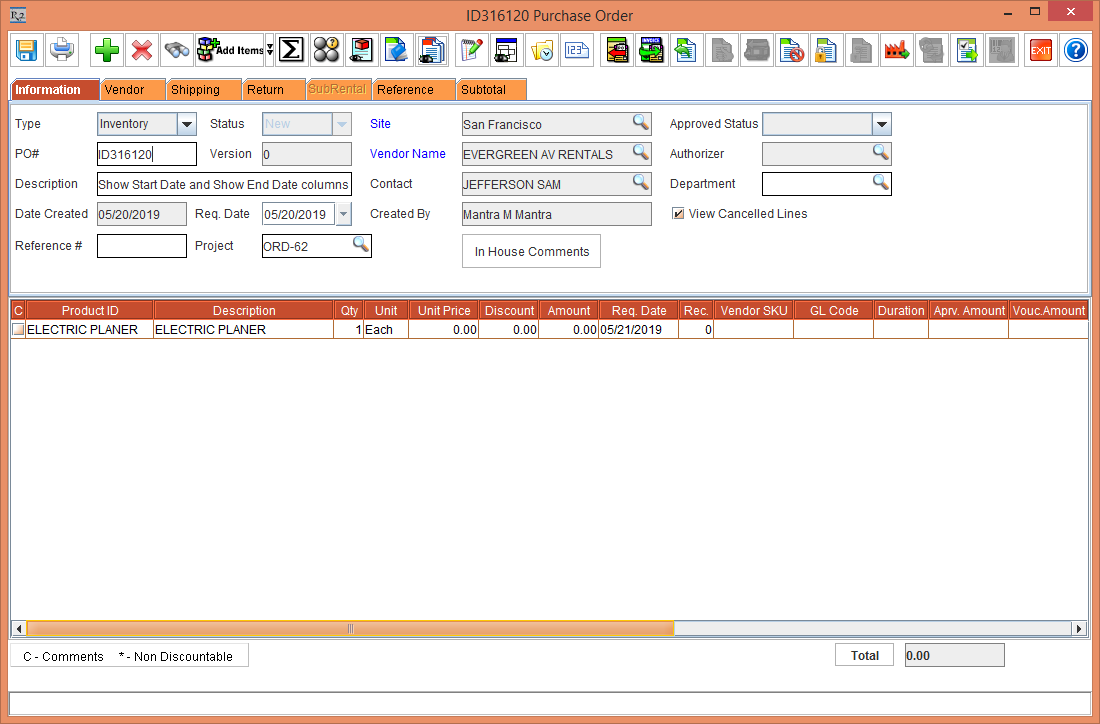
Select the Serial Item [ELECTRIC PLANER] > right-click > Assign option. The Assign window is displayed.
-
Click the Purchase radio button > click OK. The Assign Vendor dialog box is displayed.
-
Click the User Assign radio button. The Purchase Order window is displayed.
-
Click Create New Purchase Order radio button > Supplier window > select the Supplier [EVERGREEN RENTALS]. The Purchase Order [ID316120] is created, as shown in the Figure 2.1.
-
Save and Exit the Purchase Order [ID316120].
-
Select the Configuration module > Configure Reports button. The Report Assistant Configuration window is displayed.
-
Configure a Report Definition [REP_PODETAILVIEW] by choosing the Fields to be displayed in the report.
-
Save and Exit the Configuration module.
-
Relaunch the R2 application.
-
Select the Reports module > Report Generator window > File menu > Report Wizard option. The Report Assistant window is displayed.
-
Create a Function based report [REP_PODETAILVIEW] with the Filter [PO ID].
-
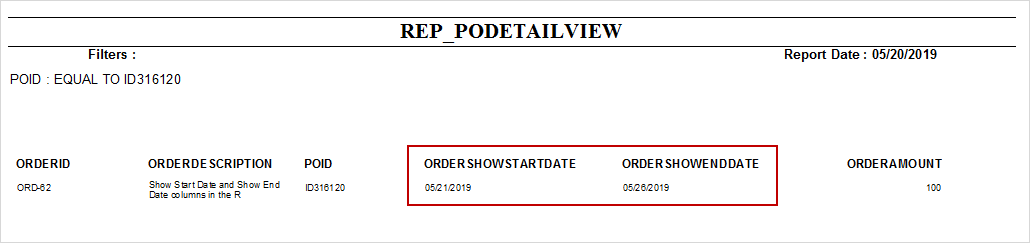
Generate the [REP_PODETAILVIEW] by entering the Purchase Order ID [ID316120].
-
The report gets generated displaying the ORDERSHOWSTARTDATE [21-May-2019] and ORDERSHOWENDDATE [26-May-2019], as shown in Figure 2.2.
-
Exit the Report [REP_PODETAILVIEW] and exit the Report Generator window.