
Reference No:R2-42
Details
The support for AR invoice Batch (Receivables) Export is provided without exporting the file. A new check box Mark As Posted in the Invoicing module > Invoicing window > Actions menu > Post Batch option > Post Batch window has been introduced which modifies the Status of the Invoice Batch to Posted without creating a file export.
The details are explained in the sample workflow given below:
Sample Workflow
Prerequisites
-
Select the Maintenance module > Items tab.
-
Create a Serial Item [AIR TANK] and receive some Qty of the Item.
-
Save and Exit the Maintenance window.
Scenario I
-
Select the Account module. Tag a Company [EVERGREEN AV RENTALS].
-
Create a Rental Reservation Order [ORD-23] for two days duration.
-
In the Information tab, select the Sales Person importable button > the Employee window is displayed > tag the Sales Person [KAITE M MASTER], as shown in the Figures 1.0.
-
Add the Serial Items [AIR TANK] with the Unit Price [300.00], as shown in Figure 1.0.

-
Select the Return tab.
-
Select the Location importable button. The Locations window is displayed.
-
Search and tag the Location [EVERGREEN].
-
Select the UDF tab and enter the UDF3 [SUMMER SHOWS].
-
Click the Done icon to Invoice the Rental Reservation Orders [ORD-23]. The Invoice [INV-16] is generated, as shown in Figures 1.1.

-
Exit the Account module.
-
Select the Invoicing module.
-
Create an Accounts Receivables batch by selecting the Receivables tab.
-
Click the New icon > the Invoice Batch window is displayed.
-
Enter the Batch Name [ACCOUNTS RECEIVABLES BATCH].
-
Click the Add Invoices icon. The Invoice List window is displayed, listing the Invoice [INV-16].
-
Double-click and tag the Invoice [INV-16].
-
Click OK. The Invoice [INV-16] is tagged and the Batch ID [ID307255] is created, as shown in Figure 1.2.

-
Exit the ID307255 Invoice Batch window.
-
In the Invoicing window, select the Actions menu > Post Batch option. The Post Batch window is displayed.
-
Do not select the Create Export File check box and Create Files in Folder check box. Select the Invoice Format drop-down as Great Plains and the Mark As Posted check box, as shown in Figure 1.3.

-
Click OK.
-
The Batch ID [ID307255] gets posted with the Status displaying as Posted, as shown in Figure 1.4.

-
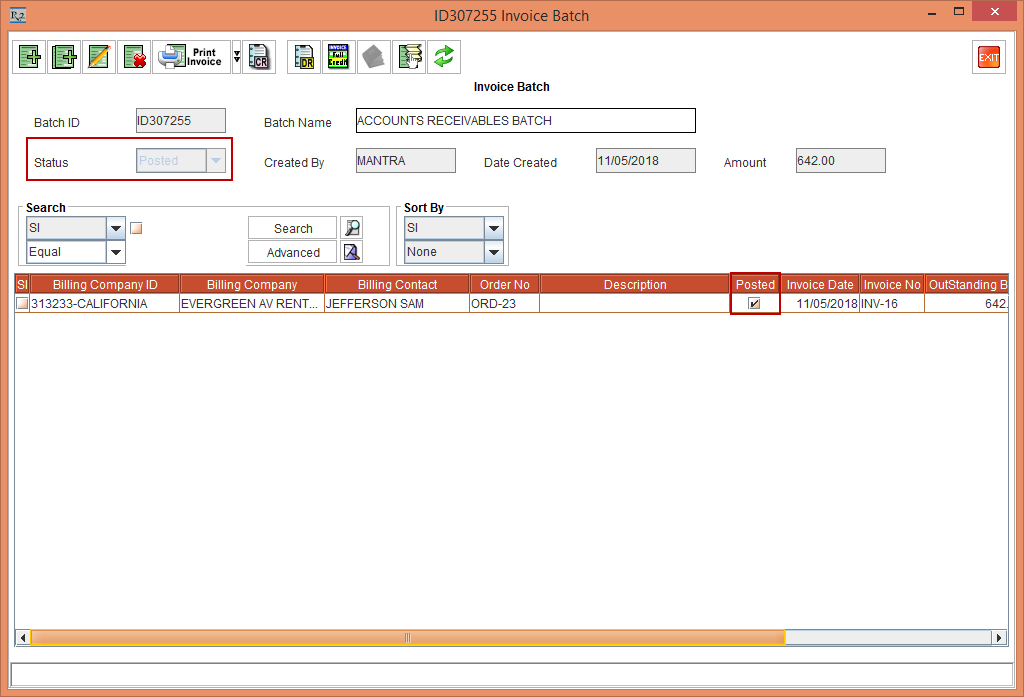
Open the ID307255 Invoice Batch. The Status of the Accounts Receivables batch [ID307255] displays as Posted, as shown in Figure 1.5.
-
Exit the ID307255 Invoice Batch window.
-
Verify if the Export files have been generated in the Prints folder [D:\Prints]. It will only Post the Batch and not generate any export files.
Scenario II
-
Select the Account module. Tag a Company [EVERGREEN AV RENTALS].
-
Create a Rental Reservation Order [ORD-24] for two days duration.
-
In the Information tab, select the Sales Person importable button > the Employee window is displayed > tag the Sales Person [ROBERT J JEFFERSON], as shown in the Figures 2.0.
-
Add the Serial Items [AIR TANK] with the Unit Price [300.00], as shown in Figure 2.0.

-
Select the Return tab.
-
Select the Location importable button. The Locations window is displayed.
-
Search and tag the Location [EVERGREEN].
-
Select the UDF tab and enter the UDF3 [SUMMER SHOWS].
-
Click the Done icon to Invoice the Rental Reservation Orders [ORD-24]. The Invoice [INV-17] is generated, as shown in Figures 2.1.

-
Exit the Account module.
-
Select the Invoicing module.
-
Create an Accounts Receivables batch by selecting the Receivables tab.
-
Click the New icon > the Invoice Batch window is displayed.
-
Enter the Batch Name [ACCOUNTS RECEIVABLES BATCH].
-
Click the Add Invoices icon. The Invoice List window is displayed, listing the Invoice [INV-17].
-
Double-click and tag the Invoice [INV-17].
-
Click OK. The Invoice [INV-17] is tagged and the Batch ID [ID307329] is created, as shown in Figure 2.2.

-
Exit the ID307329 Invoice Batch window.
-
In the Invoicing window, select the Actions menu > Post Batch option. The Post Batch window is displayed.
-
Select the Create Export File check box and Create Files in Folder check box. Select the Invoice Format drop-down as Great Plains and the Mark As Posted check box, as shown in Figure 2.3.

-
Click OK.
-
The Batch ID [ID307329] gets posted with the Status displaying as Posted, as shown in Figure 2.4.

-
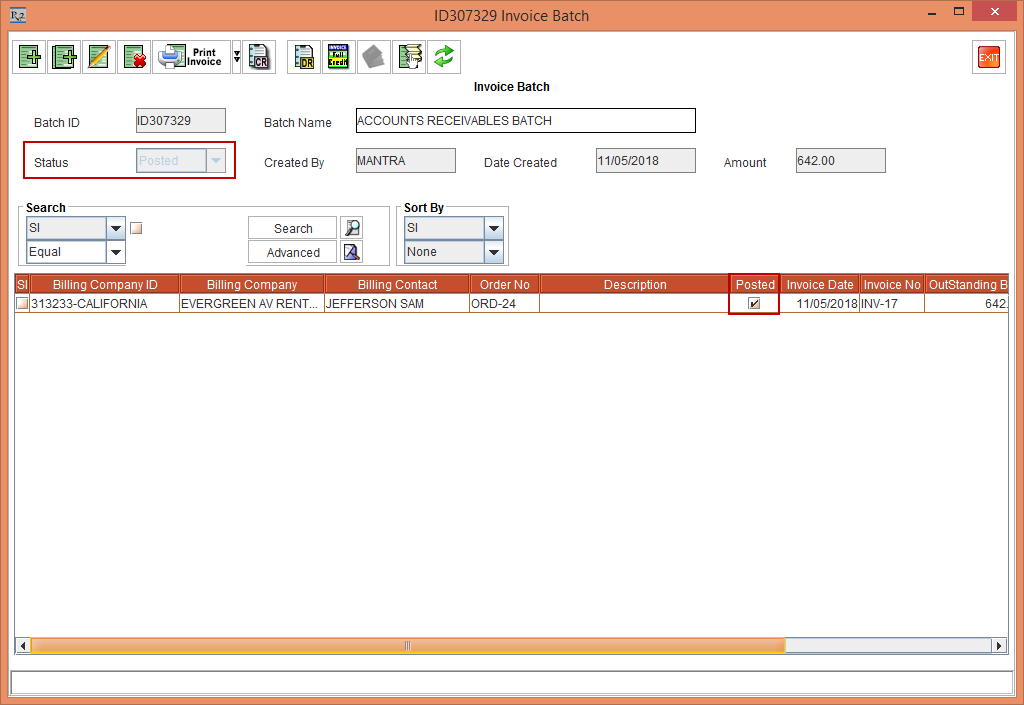
Open the ID307329 Invoice Batch. The Status of the Accounts Receivables batch [ID307329] displays as Posted, as shown in Figure 2.5.
-
Exit the ID307329 Invoice Batch window.
-
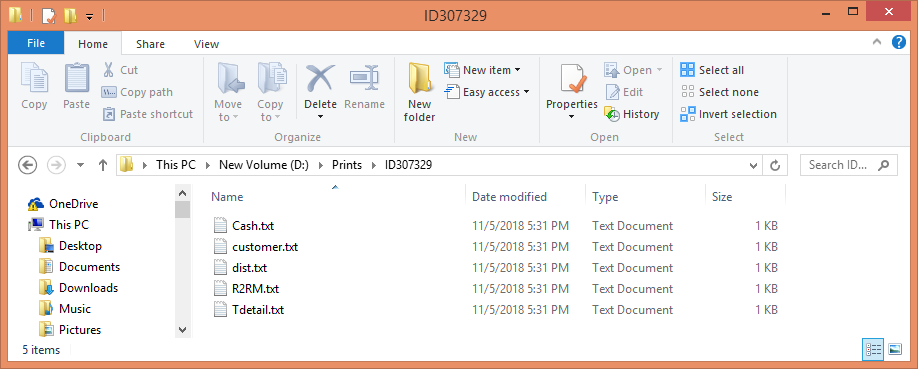
Open the Prints folder [D:\Prints\ID307329].
-
Four TXT files [Cash.txt], [customer.txt], [dist.txt], [R2RM.txt], and [Tdetail.txt] are generated, as shown in the Figure 2.6.
-
For Offline Integration formats, the Mark as Posted check box will be,
-
Selected and disabled, when the Export flag is selected
-
Unselected and enabled, when the Export flag is unselected.
-
For Online Integration formats, the Mark as Posted check box will be,
-
Disabled irrespective of the Export flag
-
Selected only if the Export flag is selected.
-
If the Batch is already posted
-
On Posted Batch, the Mark as Posted flag should be unselected and be disabled irrespective of the Create Export File check box.
-
Alignment modifications have been performed in the Post Batch window.
-
Moved the Invoice Format choice to the top and Moved the Mark As Posted check box to the right side
-
The above behavior is valid along with the values from the Maintenance module > Defaults settings