
Reference No: R2-3575
Version No: 06.00.04-00
Details
Support has been provided for Multi Currency and the following other features in the POS or Sale Invoice.
-
Category
-
SubCategory
-
Sub Total
-
Currency symbol in the Total
The details are explained in the sample workflow given below:
Prerequisites
-
Enable Multi Currency from the back end.
-
Relaunch the R2 application in the Site [GERMANY].
-
Select the Maintenance module > Employee tab > Site tab.
-
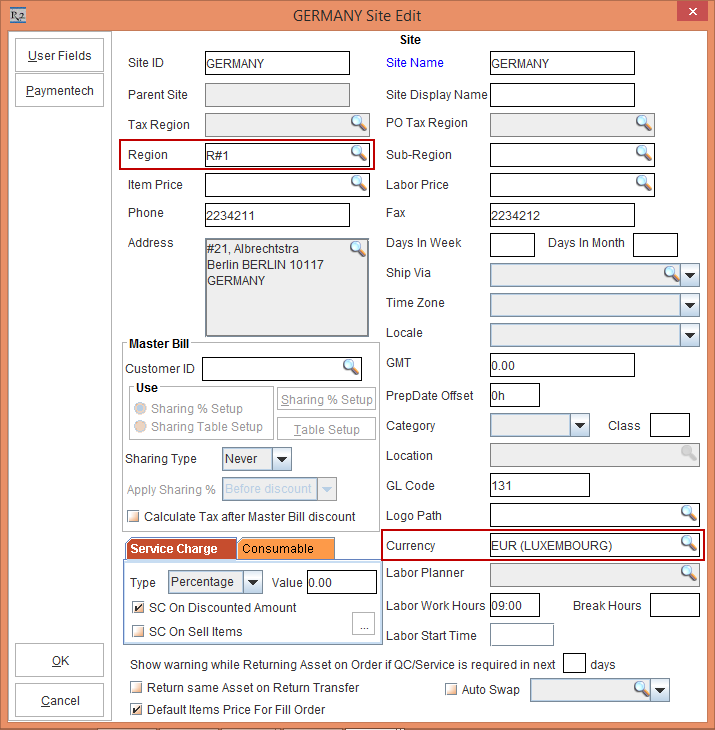
Edit the Site [GERMANY].
-
Click the Region importable button and tag the Region [R#1].
-
Click the Currency importable button. The Currency Code List is displayed.
-
Tag the Currency [EUR (LUXEMBOURG)], as shown in Figure 1.0.
-
Click OK.
-
Select the Maintenance module > Items tab > Items tab.
-
Create a Serial Item [NIKON D3400] and receive 2 Qty.
-
Select the Department importable button and tag the Department [LENS].
-
Click the Pricing button. The Pricing List window is displayed.
-
Click Add. The Pricing window is displayed.
-
Define a Pricing, as shown in Figure 1.1.

-
Click OK.
-
Save and Exit the Maintenance module.
Sample Workflow
-
Login to the R2 application in the Site [GERMANY].
-
Select the Account module. The Account window is displayed.
-
Tag a Company [NIKON INC.].
-
Click the POS icon. The Sale Invoice window is displayed.
-
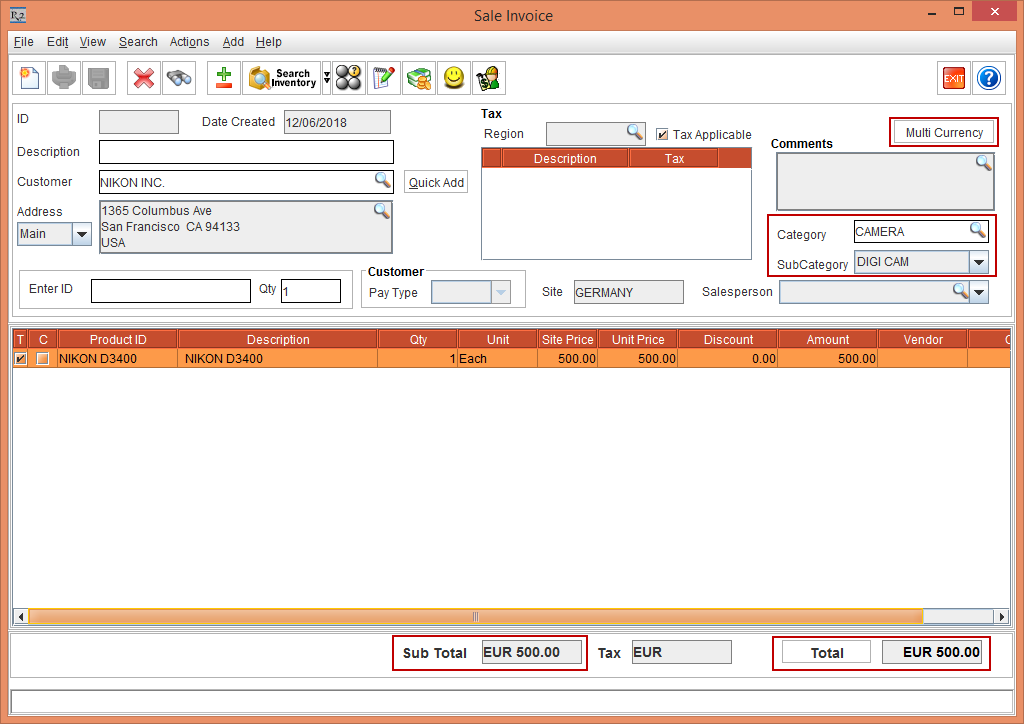
Tag the Category [CAMERA] and select the SubCategory [DIGI CAM], as shown in Figure 2.0.
-
Search and add the Serial Item [NIKON D3400] with 1 Qty. The Item line with the predefined Unit Price [500.00] is displayed, as shown in Figure 2.0.
-
The Sub Total field displays the Amount with the tagged Currency [EUR 500.00], as shown in Figure 2.0.
-
The Total field also displays the tagged Currency with the Amount [EUR 500.00], as shown in Figure 2.0.
-
Click the Multi Currency button, as shown in Figure 2.0.
-
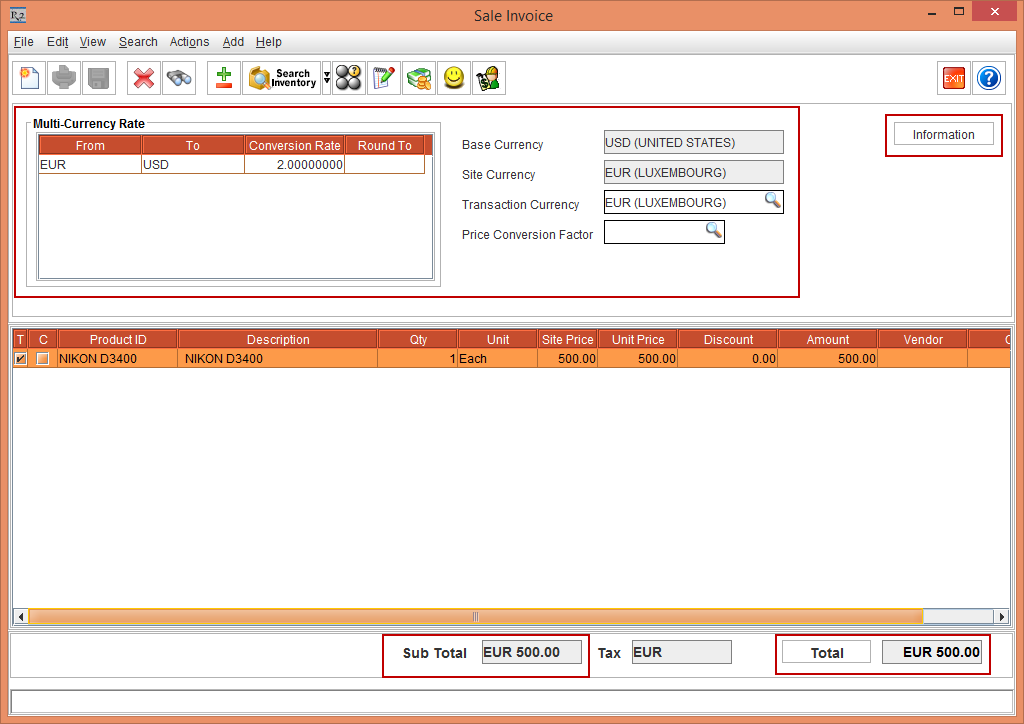
The Multi Currency details are displayed with the Base Currency [USD (UNITED STATES)], Site Currency [EUR (LUXEMBORG)], and Transaction Currency [EUR (LUXEMBORG)], as shown in Figure 2.1.
-
Click the Information button to exit from the Multi Currency.
-
Click the Done icon to generate the Invoice. The Payment window is displayed.
-
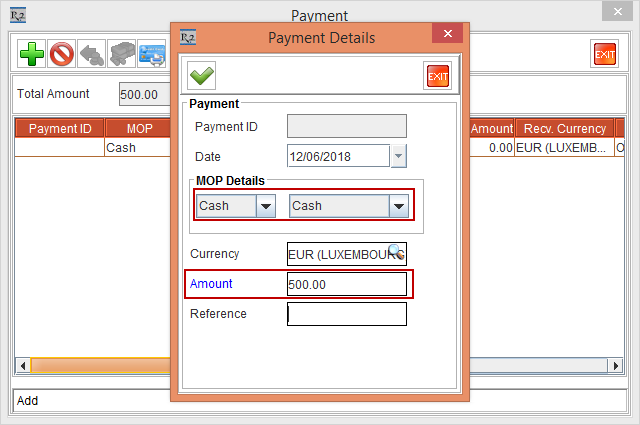
Click Add. The Payment Details window is displayed, as shown in Figure 2.2.
-
Select the MOP Details as Cash and enter the Amount [500.00], as shown in Figure 2.2.
-
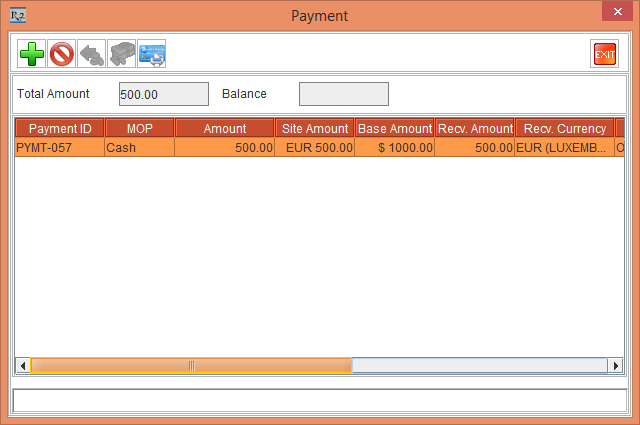
Click OK in the Payment Details window. The Invoice is ready and is displayed in the Payment window, as shown in Figure 2.3.
-
Exit the Payment window. Invoice is generated with the Invoice ID [INV-162], as shown in Figure 2.4.
-
Click OK.

-
Select the Invoicing module.
-
Select the Receivables tab. Click the New icon. The Invoice Batch window is displayed.
-
Click the Add Invoices button. The Invoice List window is displayed.
-
Search for the Invoice [INV-163], as shown in Figure 2.5.
-
Perform a double-click to tag the Invoice [INV-162], as shown in Figure 2.5.

-
Click OK.
-
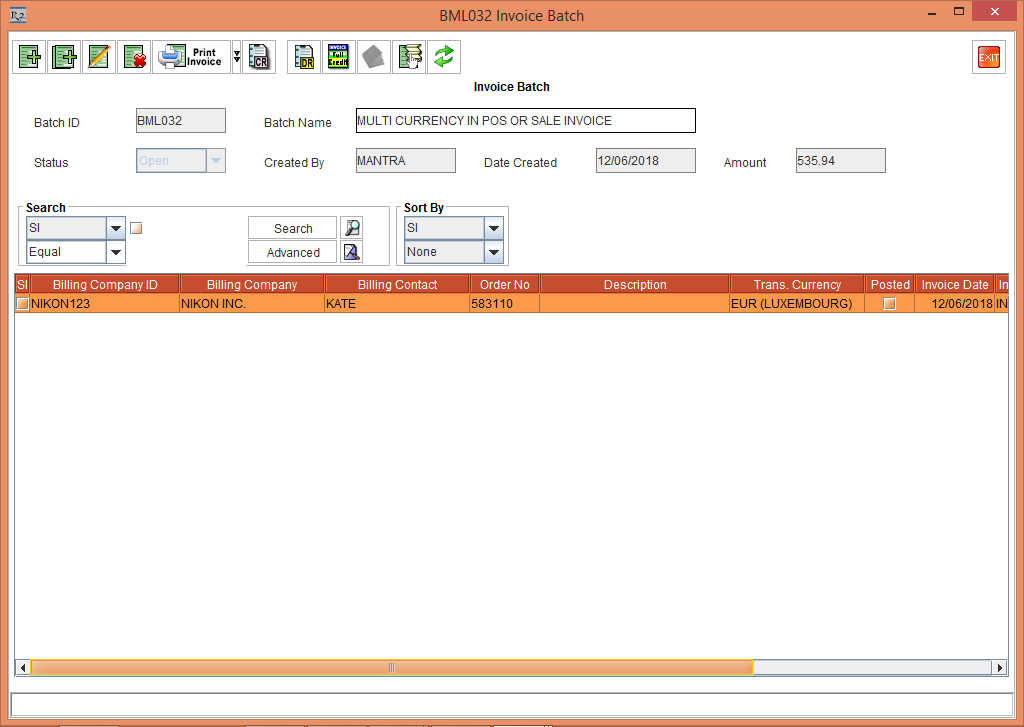
The Invoice Batch [BML032 Invoice Batch] is generated, as shown in Figure 2.6.
-
Exit the Invoice Batch [BML032 Invoice Batch] window.
-
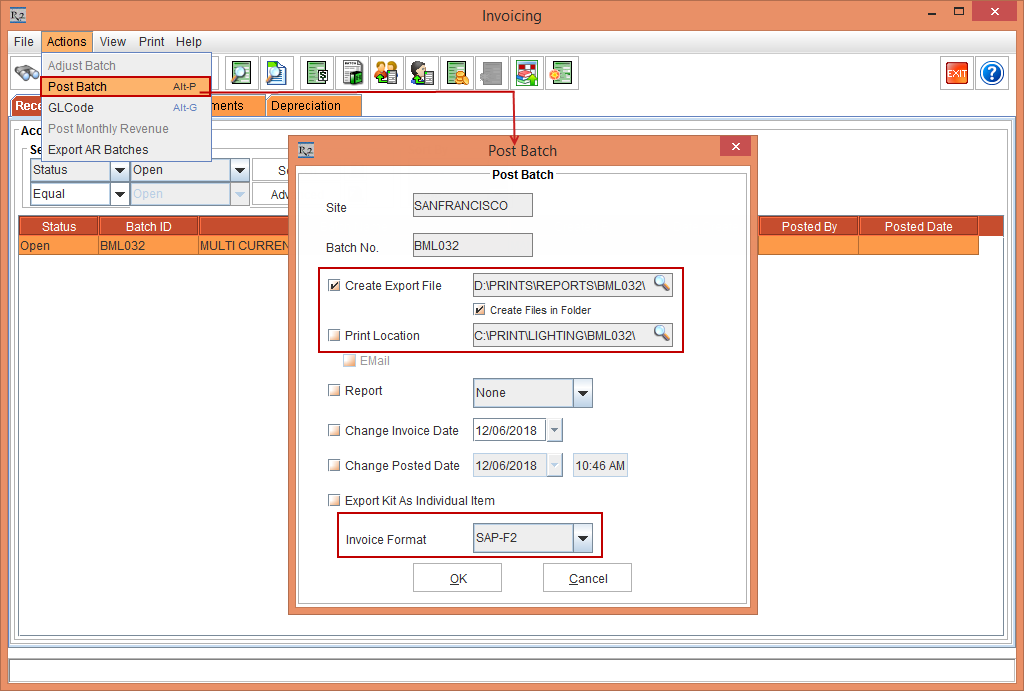
In the Invoicing window, select the Actions menu > Post Batch option. The Post Batch window is displayed.
-
Select the Create Export File check box with the Path [D:\Prints\Reports\BML032] and Invoice Format [SAP-F2], as shown in Figure 2.7.
-
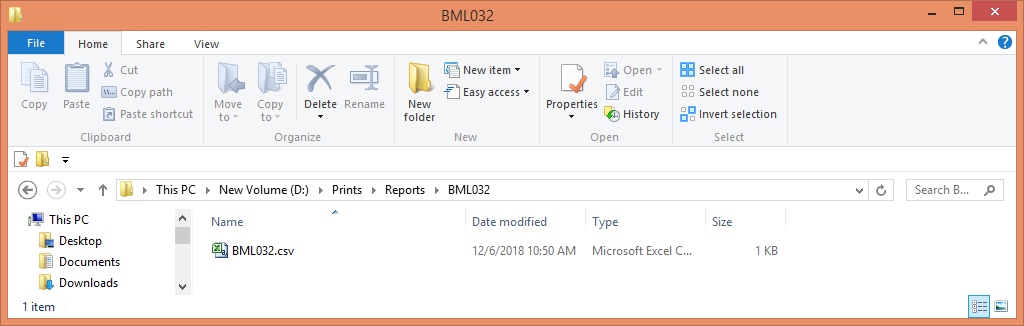
Click OK. The Invoice Batch [BML032] SAP-F2 Invoice integrated export file is posted in .CSV format as BML032.csv in the selected Path [D:\Prints\Reports\BML032], as shown in Figure 2.8.
-
The Status of the Batch ID [BML032] in the Invoicing window is modified to Posted.
-
Open the SAP-F2 Invoice integrated export file [BML032.csv]. The CSV file is displayed with the existing fields and additional field, as shown in Figure 2.9.

-
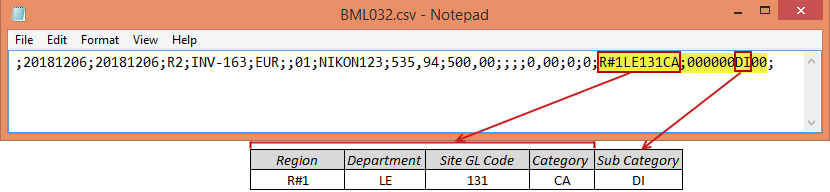
The details of the additional fields provided is explained below:
-
This field data is formed combining multiple segments populated with different data associated with the invoice as:
<Invoice Site’s Region ID><Invoice’s Order Item Line’s Department ID/Invoice’s Order’s Department ID/String ‘XX’><Invoice Site’s GL Code><Invoice Order’s Category ID><Invoice Order’s Sub Category ID>
In Second last column the Invoice’s Site Region ID starts with ‘R’
-
<Invoice Site’s Region ID> - Maximum 5 character long. If R2 has more than 5 Character as Site’s Region ID, only 5 characters are sent from LHS.
-
<Invoice’s Order Item Line’s Department ID> - Maximum 2 character long. If R2 has more than 2 Character as Item's Department ID, only 2 characters are sent from LHS.
-
<Invoice Site’s GL Code> - Maximum 5 character long. If R2 has more than 5 Character as Invoice Site’s GL Code, only 5 characters are sent from LHS.
-
<Invoice Order’s Category ID> - Maximum 2 character long. If R2 has more than 2 Character as POS Category ID, only 2 characters are sent from LHS.
In the last column the Invoice Order’s Sub Category ID
-
<Invoice Order’s Sub Category ID> - Maximum 2 character long. If R2 has more than 2 Character as POS Sub Category ID, only 2 characters are sent from LHS.
-
Exit the CSV file [BML032.csv] details.