Table of Contents
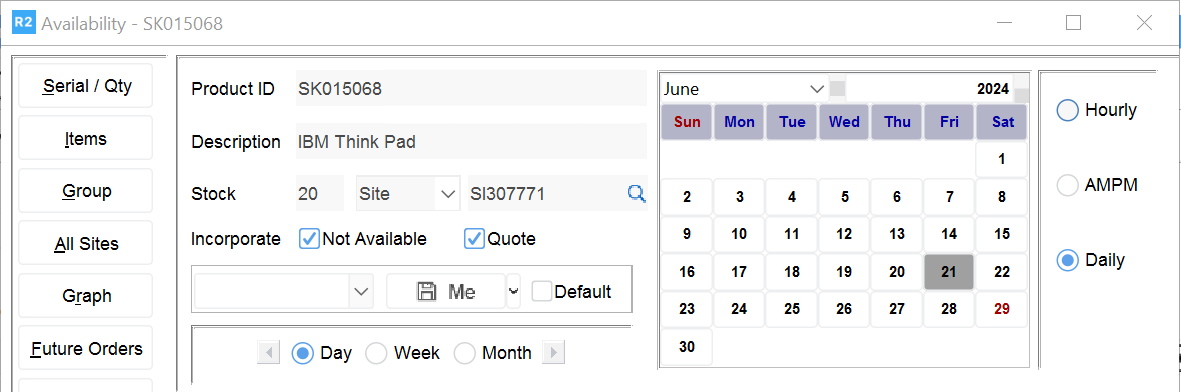
When you first access the Availability window, the availability shown is based on the employee's assigned (Home) site. You may either change the Site, or choose to view availability by Region or AM/PM
Sub Region
The small calendar at the top of the Availability window determines the availability grid start date. For example, if you select October as the month, choose 2004 as the year and then click on 24 in the date area of the calendar, the availability grid will start will October 24, 2004.
The start date defaults to your current system date.
Availability Grid View
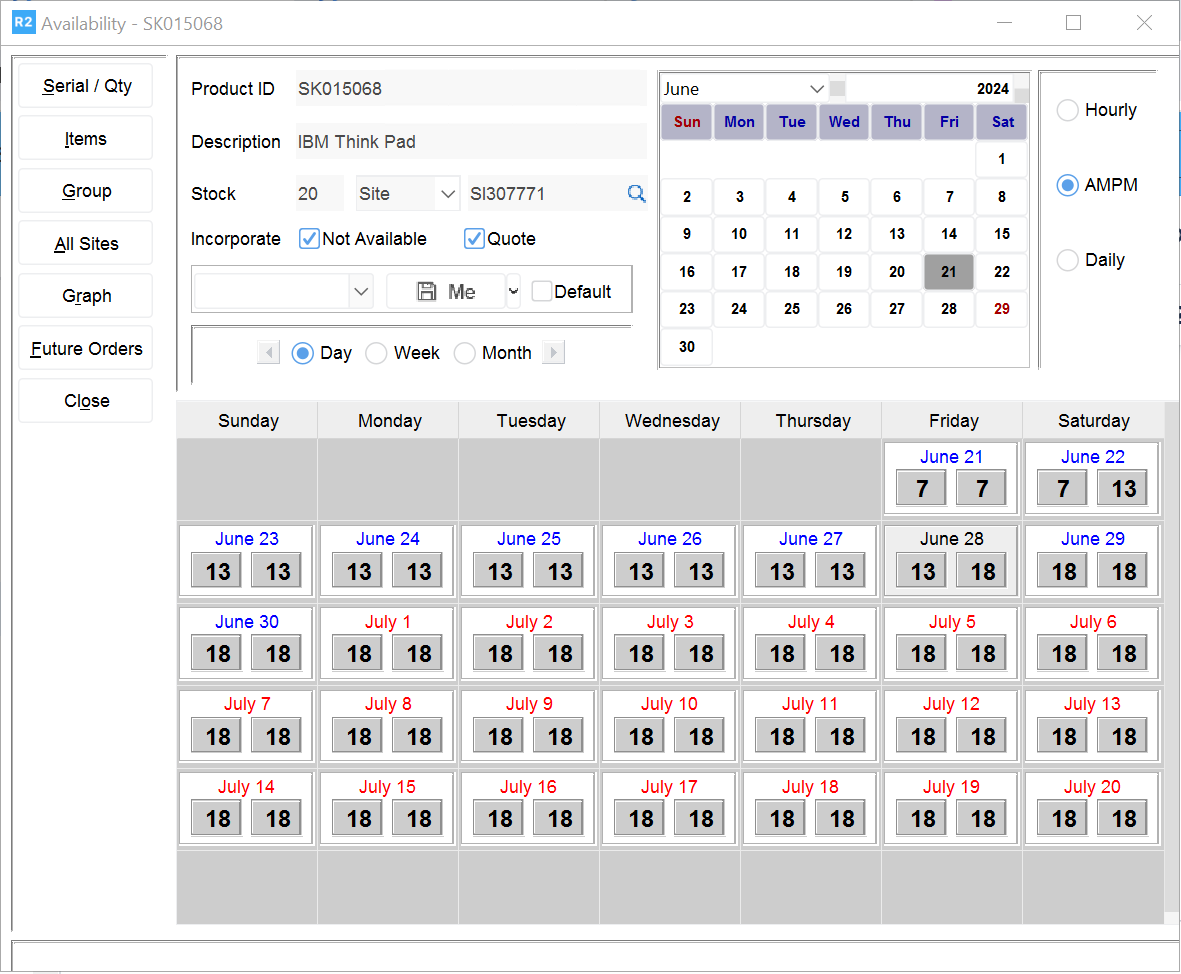
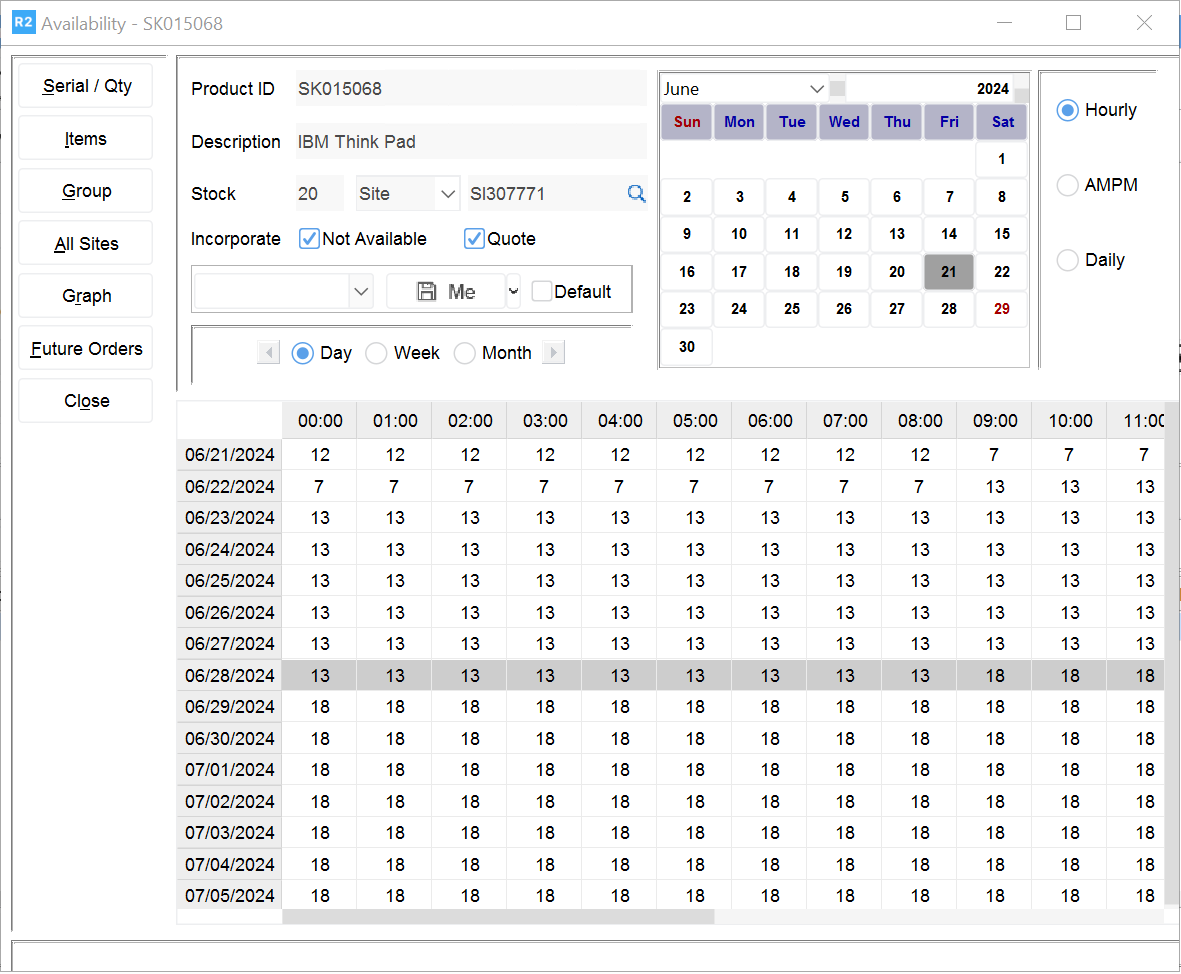
You can change the Availability grid view to half day or hourly by clicking on AM/PM or Hourly in the upper right of the Availability window.
AM/PM splits daily availability into two segments - from midnight to 12:00 noon (AM) and from 12:00 noon to midnight (PM). Availability is shown for one month or 30 days, if the start date is not the first of the month.
Hourly shows availability for each hour for 24 hours. Availability is shown for a two week, 15-day period.
Availability Grip Increment Tools
The three radio buttons shown at the top left of the Availability grid are used to increment the dates shown. To change the dates shown, click on the radio button preceding Day, Week or Month, then click on either the forward (right) or backward (left) arrow to adjust the display dates.
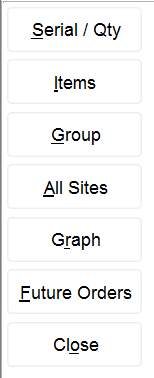
Availability Function Buttons
The availability function buttons let you view availability in different ways - for different Items or item Availability Groups. Each function button is explained in the sections below.
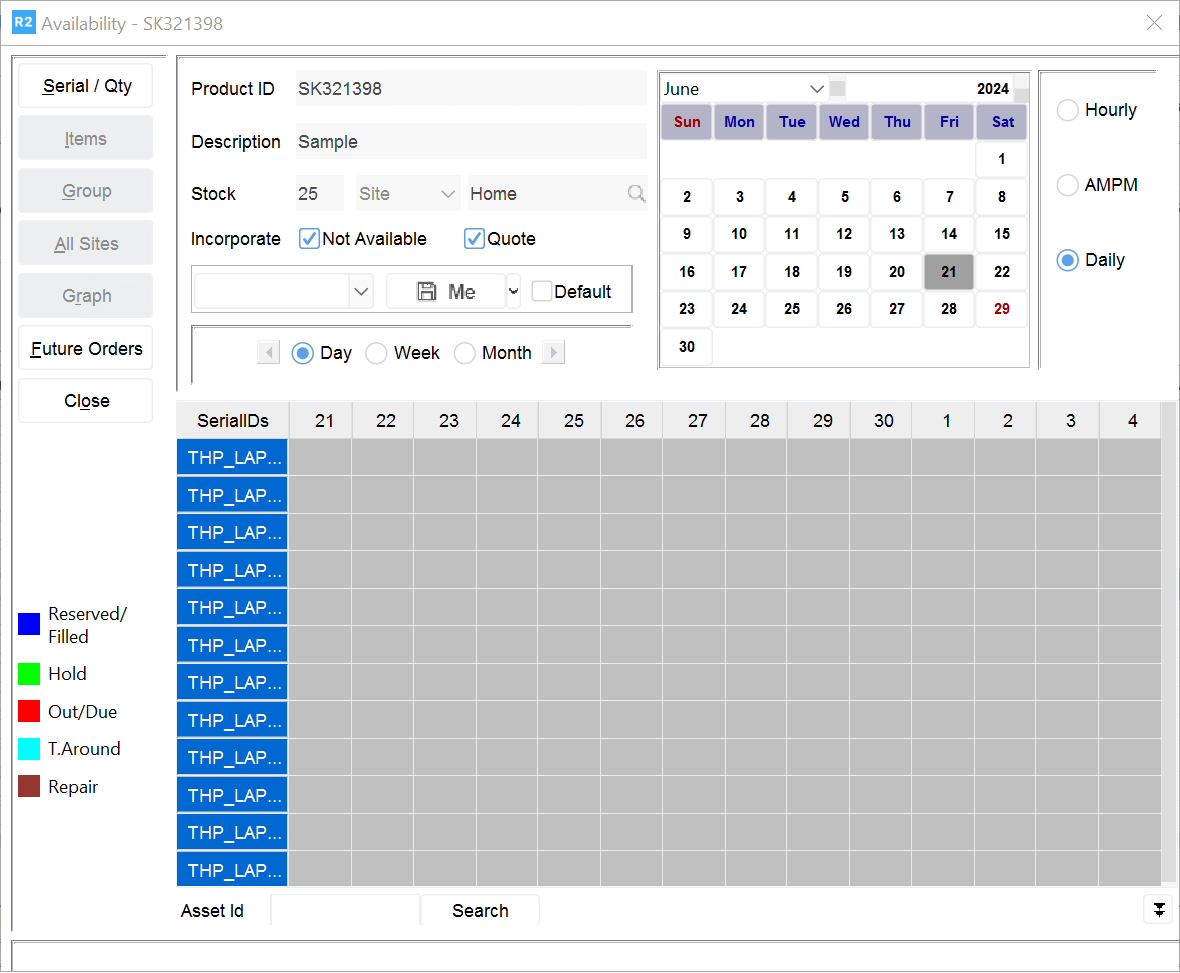
Serialized Item Availability
Serialized items are items that have been assigned an Asset ID. Assign- ing Asset IDs allows R2 to track individual units as opposed to tracking items at the Product ID level. Serialized item availability lets you view, in graphical format, the status of each Asset assigned to a Product ID.
Within the Serial/Qty Availability grid, each possible status of the item is charted in a different color. Possible statuses include Reserved/Filled, Hold, Out/Due and Turn Around.
To check serialized item availability
Begin at the Availability window. Click on the Serial/Qty button
The availability grid changes to display the status of each serialized item (Asset) for the selected Item Product ID.
Click on the Serial/Qty button again to return to the item availability grid.
The Serial/Qty button functions as a toggle between the item avail- ability grid and the Serial/Qty grid.
NOTE: Selecting the Close button from the Serial /Qty grid completely exits from Availability and returns you to the Items search dialog.
Group Availability
The Group function lets you check the status of all items in Availability Group. For example, you could have an Availability Group that includes all televisions. When you view the availability of that group, you are looking at availability for all televisions as a whole. Availability groups are setup specifically for reserving items at a group level.
To check group availability
Begin at the Availability window.
Click on the Group button then select a specific date for Group Availability. A listing of all items in a group for that particular item appears in the box.
Double-click on the group for which you want to view availability. The Availability window now displays Group Availability.
Click Close when finished.
NOTE: To view a group availability breakdown, simply click on any day (hour, or AM/PM) within the availability grid.
Availability by Site
R2 can also show Availability of inventory at other Sites. You may view availability for All Sites, by Region, Sub Region or for a single Site.
To check availability for All Sites
Begin at the Availability window.
Click on the All Sites button
The availability grid changes to include inventory from All Sites.
NOTE: The All Sites button changes to home when you click on it. Click on the Home button to return to the Home site availability grid.
Click on a date or time within the availability grid to view specific site availability. Click Close when finished.
This returns you to the Items search dialog.
To check availability by Region or Sub Region
Begin at the Availability window.
Click on the Site field (below the item Description). A drop-down menu appears
.png?cb=ce03452ce395fd97b9003a3dbb9a173f)
Select either Region or Sub Region.
This changes the availability display by showing the number of items available from your region or sub-region.
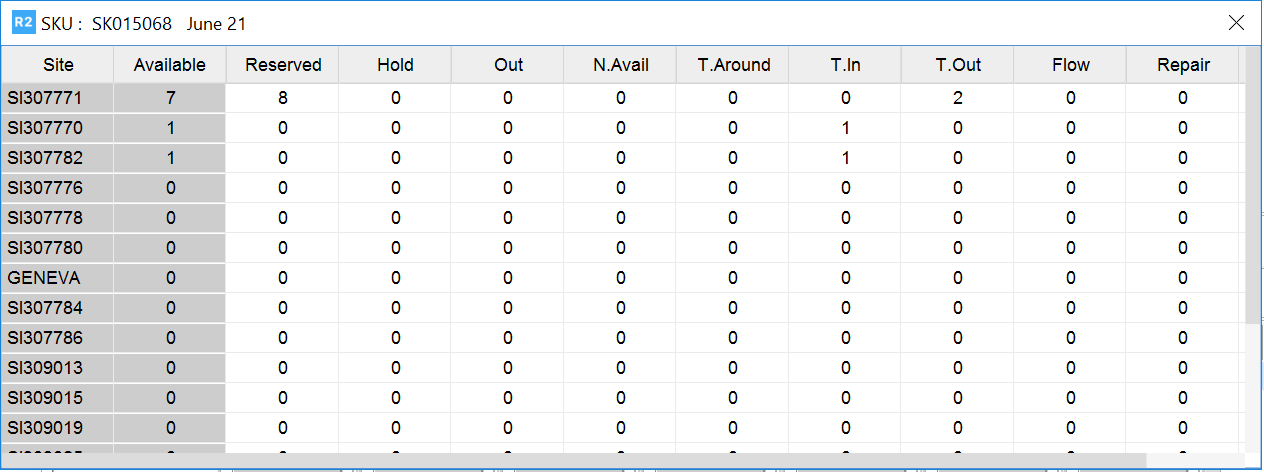
To check availability at other sites
Begin at the Availability window.
Click on the All Sites button. The Availability now shows the number available across all sites. Double click on a specific date and you can view inventory across all sites by location.
Adding Labor to an Order
Adding Labor to an Order To add labor to an order
From the Labor Lines dialog, click on the Labor List icon
The Labor search dialog appears.
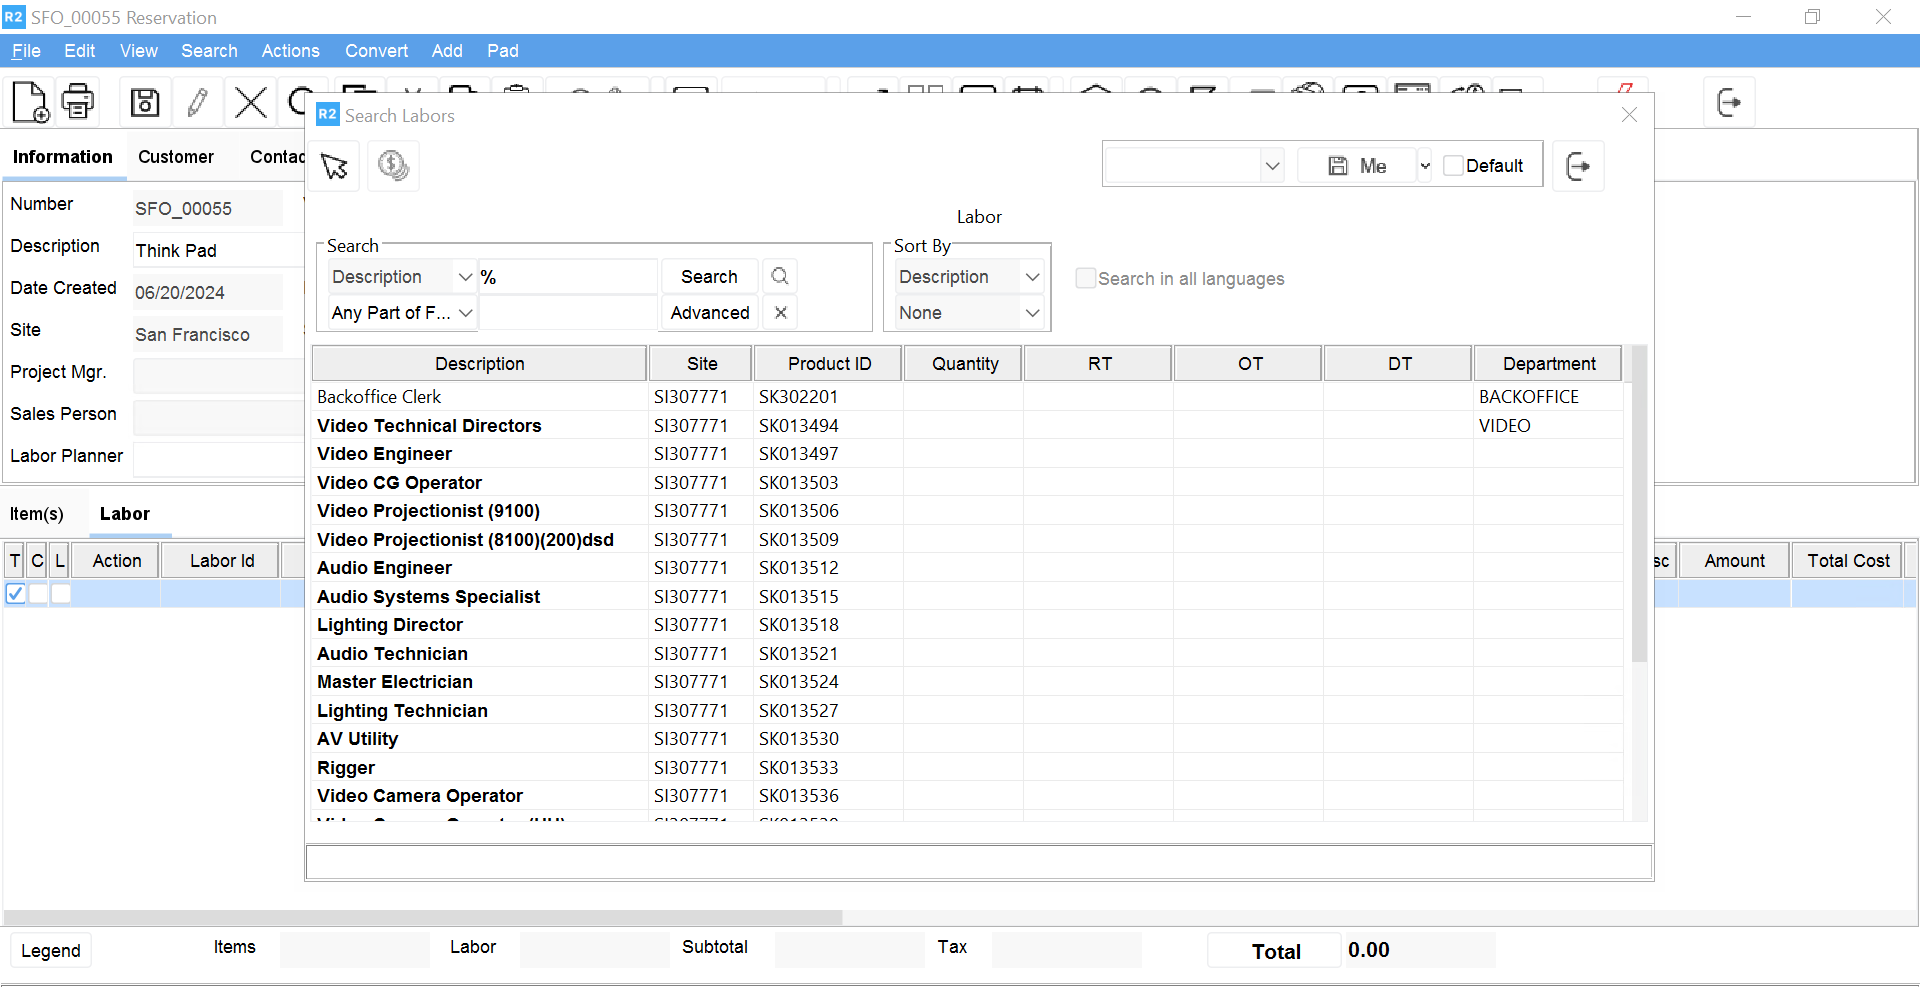
Search for a specific Labor charge or open the entire Labor list. Double-click on each labor type you wish to add.
This tags the labor line, indicating that it will be added to the order. The number 1 appears in the Qty column.
Click on the green check mark for Okay.
The tagged labor lines are added to the Labor Lines dialog. Once you add labor to the Labor Lines window you can modify any of the quantities, labor rates or times as necessary.
Adjusting Labor Rates and Charges
Basic labor rates are entered as Labor records are created. However, you can easily change rates from the Labor Lines dialog as necessary. Additionally, as you create an order you will need to enter the number of Regular Time (RT), Over Time (OT) and Double Time (DT) labor units (hours, days, minutes etc.) that your customer is requesting. You can then verify or adjust labor charges to reflect actual times during Sign Off.