Your first step within the Maintenance module is to set up Sites. Employees, Ids, and Assets are all tied to a Site.
To Add a Site
-
Click on Maintenance > Select Employee sub-menu. The employee window will appear displaying the following icons along the left side: Employees, Ids, and Sites.
-
Click on the sites icon.
-
The title above the Search fields changes to Sites.
-
From the menu bar, select file > New
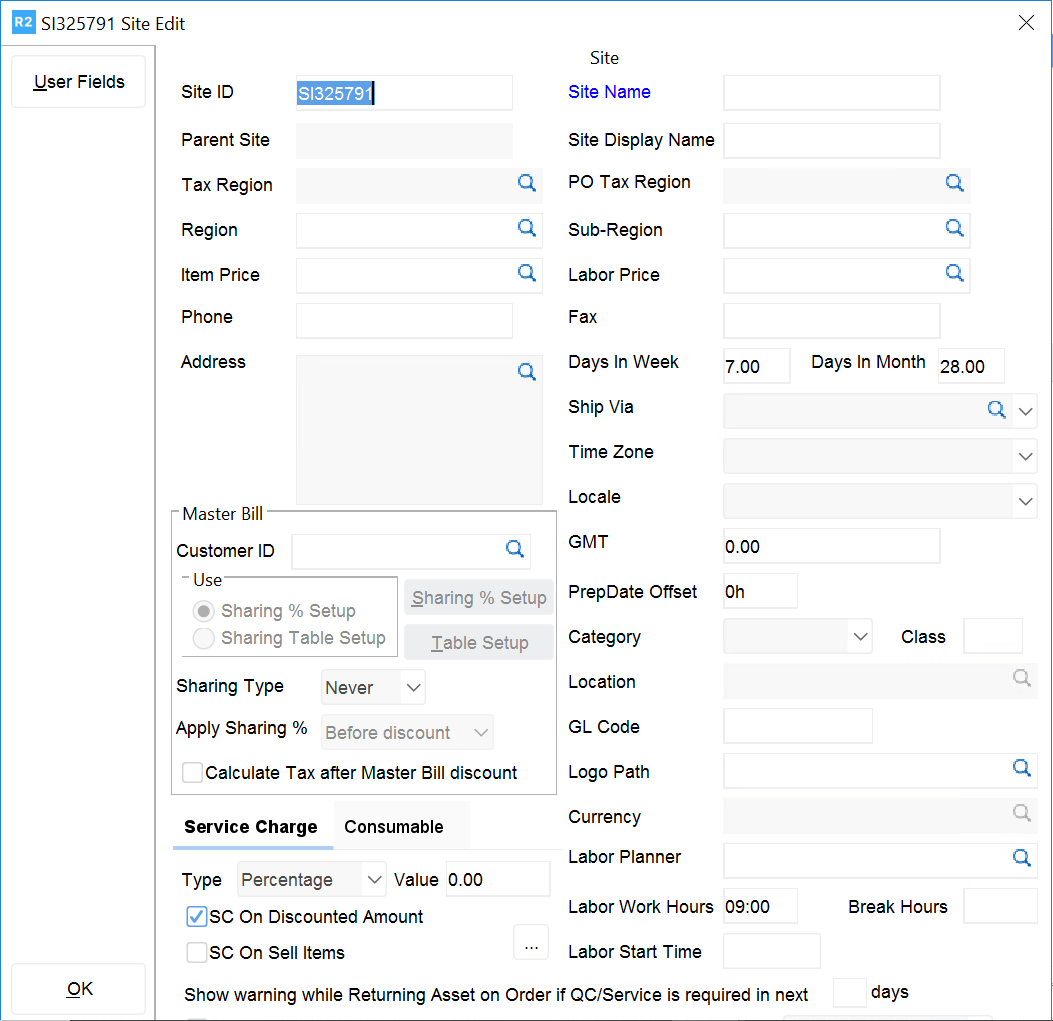
The Site Edit dialog appears.
-
Enter a Site ID and Name
-
Click on the ellipse for Tax Region. Select the desired tax region for the site that is being entered.
-
Region: this is a logical grouping of sites. Click on the ellipse and select a group.
-
Sub-Region: this further categorizes the regions. Click on the ellipse and select a group.
-
Price Group: click on the ellipse and select a pricing group.
-
Address: click the ellipse and enter the address for the site.
-
Phone: enter the site's phone.
-
Fax: enter the site's fax phone.
-
Days in a week: specify the number of days in a week to be charged on the rentals.
-
Time zone: specify the time zone for the site in question.
-
Locale: this is for future implementation.
-
Ship via: select the default ship method for the site.
-
Mater bill: set the default master bill for the site.
-
Prep Date Offset: set the desired prep date offset for the site.