Reference No: R2-3530
Version No: 06.00.04-00
Details
Support has been provided to skip the prompts displayed for various scenarios in the Batch Returns window.
The functionality is explained with a Sample Work Flow in the below mentioned Scenarios:
Scenario I - Skip Prompt while scanning the Non-Serial Item from the same Site [From Order]
Support has been provided to skip the prompt displayed while scanning the Non-Serial Item that is in Out Status in an Order for Damage from the Batch Returns window from the same Site.
Prerequisites
-
Select the Maintenance module > Items tab.
-
Create a Non-Serial Item [ECO SPOT] and receive some Qty.
-
Save and Exit the Maintenance module.
Sample Work Flow
-
Login to the R2 application from the Site [DALLAS]. Select the Account module. The Account window is displayed.
-
Tag a Company [EVERGREEN AV RENTALS] and create a Rental Reservation Order [ORD-1278] for 2 days duration.
-
Search and add the Non-Serial Item [ECO SPOT] with 1 Qty and the Unit Price [200.00].
-
Click the Fill And Ship icon, to Fill and Ship the Non-Serial Item [ECO SPOT]. The Order line Status is modified to Out, as shown in Figure 1.0.

-
Save and Exit the Order [ORD-1278].
-
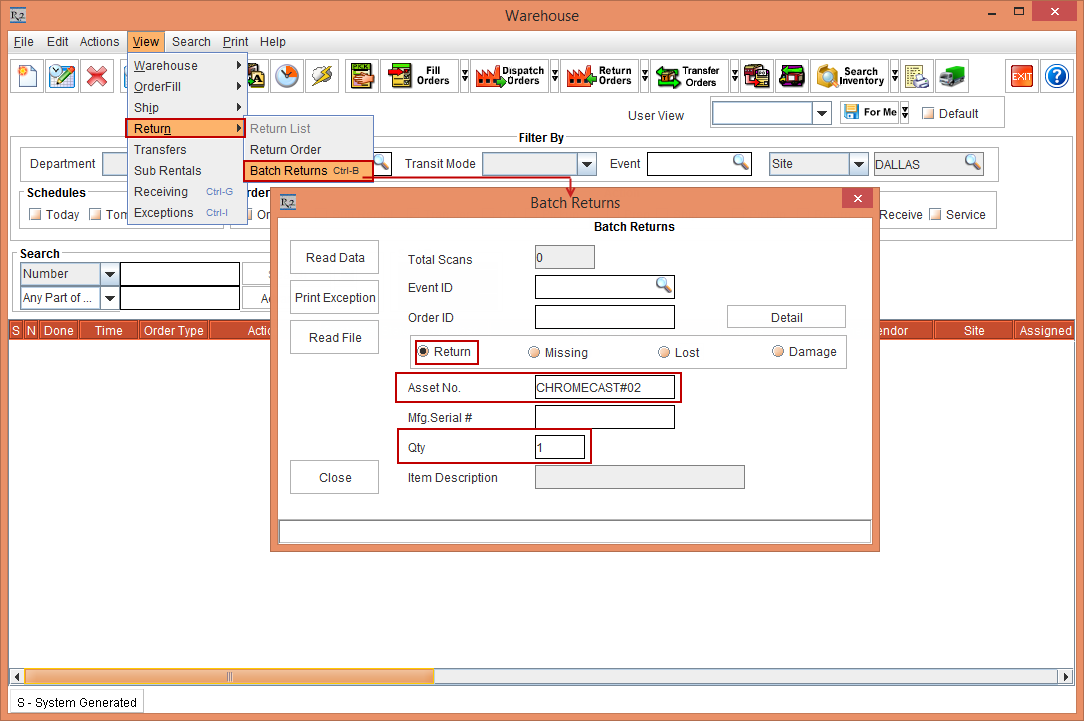
Select the Warehouse module > View menu > Return submenu > Batch Returns submenu. The Batch Returns window is displayed, as shown in Figure 1.1.
-
Enter the Order ID [ORD-1278], select the Damage radio button, and enter the Non-Serial Item [ECO SPOT] ID in the Asset No. field with Qty [1], as shown in Figure 1.1.

-
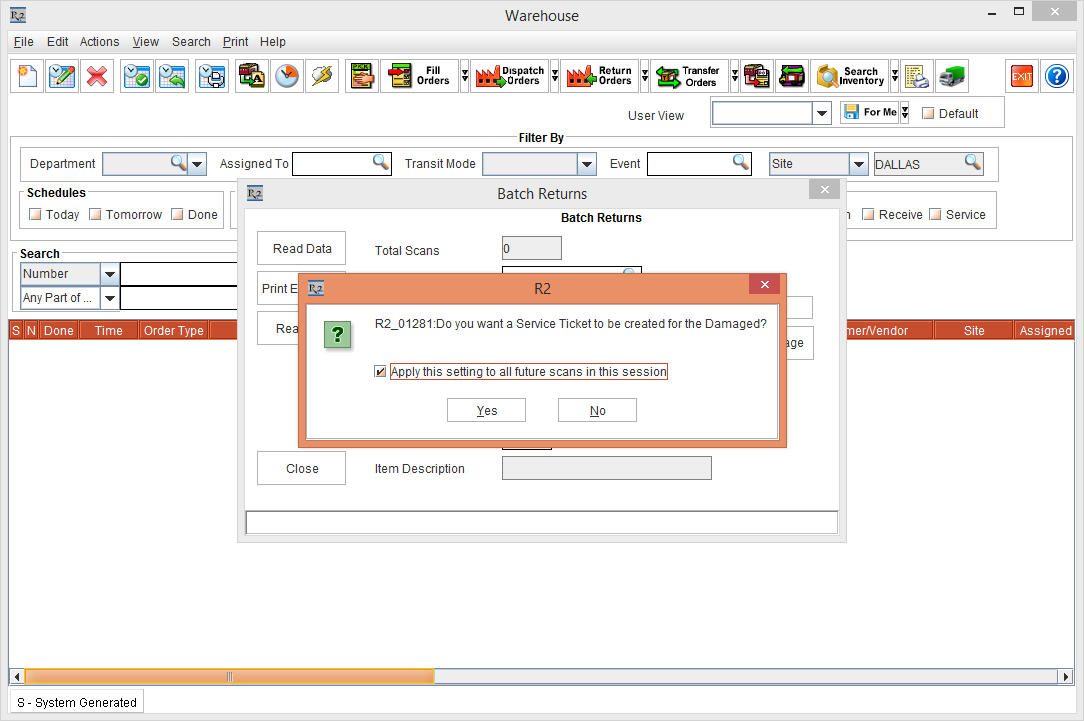
Press the Enter button from the Keyboard. The system displays a prompt with the message "R2_01281:Do you want to a Service Ticket to be created for the Damaged?" with "Apply this setting to all future scans in this session" check box and Yes and No buttons, as shown in Figure 1.2.
-
Select the "Apply this setting to all future scans in this session" check box and click Yes. The prompt disappears.
-
Do not Close the Batch Returns window.
-
Re-enter the Non-Serial Item [ECO SPOT] ID in the Asset No. field with Qty [1] and press the Enter button from the Keyboard. The system displays the status bar message in Red color as "R2_01281:Do you want to a Service Ticket to be created for the Damaged?" as shown in Figure 1.3.
The same selections is applicable for any further scan of the Non-Serial Items without the prompt display, until the Batch Returns window is closed.

-
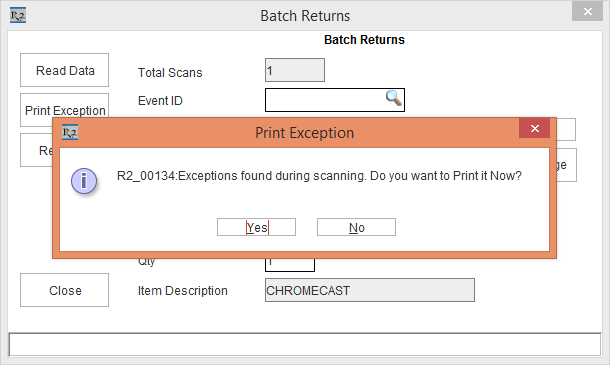
Click Close to close the Batch Returns window. The system displays the exception prompt with the message "R2_00134:Exceptions found during scanning. Do you want to Print it Now" with Yes and No buttons, as shown in Figure 1.4.

-
Click No to cancel the exceptions print.
-
Click Yes to print the exceptions.
Scenario II - Skip Prompt while scanning the Serial Item from different Site
Support has been provided to skip the prompt displayed while scanning the Missing or Lost Serial Item for Return from the Batch Returns window.
Prerequisites
-
Login to the R2 application from the Site [SANFRANCISCO].
-
Select the Maintenance module > Items tab.
-
Create a Serial Item [CHROMECAST] and receive some Qty. of Assets.
-
Edit the Asset [CHROMECAST#09] and select the Status drop-down as Lost. The Remarks window is displayed.
-
Enter the Remarks [The Asset [CHROMECAST#09] is Lost] and click Close.
-
Click OK.
-
Save and Exit the Maintenance module.
Sample Work Flow
-
Login to the R2 application from the Site [DALLAS].
-
Select the Warehouse module > View menu > Return submenu > Batch Returns submenu. The Batch Returns window is displayed, as shown in Figure 2.0.
-
Select the Return radio button, and enter the Serial Item Asset [CHROMECAST#02] ID in the Asset No. field with Qty [1], as shown in Figure 2.0.
-
Press the Enter button from the Keyboard. The system displays a prompt with the message "R2_01712:Asset CHROMECAST#02 is Lost on other Site SANFRANCISCO." with the "Apply this setting to all future scans in this session" check box and Mark as IN and Do Nothing buttons, as shown in Figure 2.1.

-
Select the "Apply this setting to all future scans in this session" check box and click the Mark as IN button.
The same selections of Mark as IN button is applicable for any further scan of the Serial Items without the prompt display, until the Batch Returns window is closed.
-
The system displays another prompt with the message "R2_01711:Asset CHROMECAST#02 belongs to SANFRANCISCO site. Do you want to Return it to DALLAS site?" with the "Apply this setting to all future scans in this session" check box along with Yes, No! Return to Order Site, and Do Nothing buttons, as shown in Figure 2.2.

-
Do one of the following actions:
-
Click Yes to return the Item to the Site [DALLAS].
-
Click No! Return to Order Site to return to the Order Site [SANFRANCISCO].
-
Click Do Nothing to cancel the action.
-
Click the No! Return to Order Site button and select the "Apply this setting to all future scans in this session" check box, as shown in Figure 2.3.
The same selections of No! Return to Order Site button is applicable for any further scan of the Serial Items without the prompt display, until the Batch Returns window is closed.
-
The system exits the Prompt.
-
Enter the Serial Item Asset [CHROMECAST#05] ID in the Asset No. field with Qty [1].
-
Click Close to close the Batch Returns window. The system displays the exception prompt with the message "R2_00134:Exceptions found during scanning. Do you want to Print it Now" with Yes and No buttons, as shown in Figure 2.3.
-
Click No to cancel the exceptions print.
-
Click Yes to print the exceptions.
Scenario III - Skip Prompt while scanning the Serial Item from Same Site
Support has been provided to skip the prompt displayed while scanning the Lost or Missing Serial Item for Return from the Batch Returns window.
Prerequisites
-
Login to the R2 application from the Site [SANFRANCISCO].
-
Select the Maintenance module > Items tab.
-
Create a Serial Item [CHROMECAST] and receive some Qty. of Assets.
-
Edit the Asset [CHROMECAST#04] and select the Status drop-down as Missing.
-
Click OK.
-
Save and Exit the Maintenance module.
Sample Work Flow
-
Login to the R2 application from the Site [SANFRANCISCO].
-
Select the Warehouse module > View menu > Return submenu > Batch Returns submenu. The Batch Returns window is displayed, as shown in Figure 3.0.
-
Select the Return radio button, and enter the Serial Item Asset [CHROMECAST#04] ID in the Asset No. field with Qty [1], as shown in Figure 3.0.

-
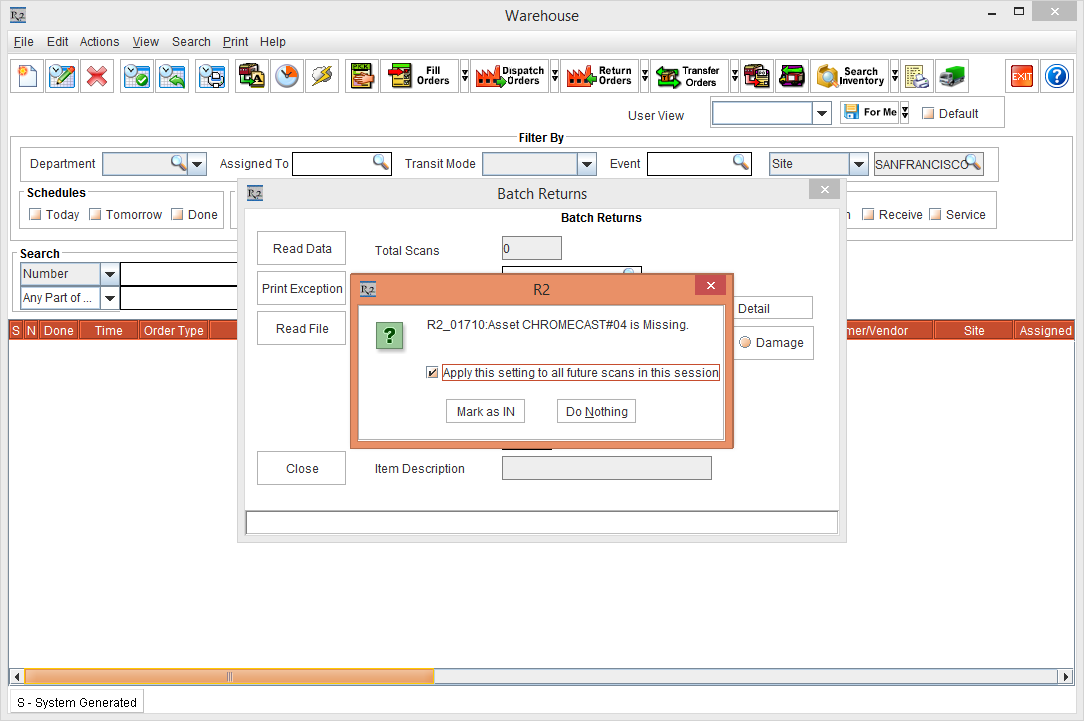
Press the Enter button from the Keyboard. The system displays a prompt with the message "R2_01710:Asset CHROMECAST#03 is Missing." with the "Apply this setting to all future scans in this session" check box and Mark as IN and Do Nothing buttons, as shown in Figure 3.1.
-
Select the "Apply this setting to all future scans in this session" check box and click Mark as IN.
The same selections of Mark as IN button is applicable for any further scan of the Serial Items without the prompt display, until the Batch Returns window is closed.
-
The Asset [CHROMECAST#04] gets returned and a message "Item Returned Successfully" is displayed in Green color as the status bar message within the Batch Returns window, as shown in Figure 3.2.

-
Click Close to close the Batch Returns window. The system displays the exception prompt with the message "R2_00134:Exceptions found during scanning. Do you want to Print it Now" with Yes and No buttons, as shown in Figure 3.3.

-
Click No to cancel the exceptions print.
-
Click Yes to print the exceptions.
Scenario IV - Skip Prompt while scanning the Serial Item from different Site [From Order]
Support has been provided to skip the prompt displayed while scanning the Serial Item that is in Missing or Lost Status in an Order from one Site and Return from different Site from the Batch Returns window.
Prerequisites
-
Login to the R2 application from the Site [SANFRANCISCO].
-
Select the Maintenance module > Items tab.
-
Create a Serial Item [CHROMECAST] and receive some Qty. of Assets.
-
Click OK.
-
Save and Exit the Maintenance module.
Sample Work Flow
-
Login to the R2 application from the Site [SANFRANCISCO].
-
Select the Account module. The Account window is displayed.
-
Tag a Company [EVERGREEN AV RENTALS] and create a Rental Reservation Order [ORD-1291] for 2 days duration.
-
Search and add the Serial Item [CHROMECAST] with 1 Qty and the Unit Price [200.00].
-
Click the Fill And Ship icon, to Fill and Ship the Serial Item [CHROMECAST]. The Order line Status is modified to Out, as shown in Figure 4.0.

-
Select the View menu > Return Order option. The ORD-1291 Return Order window is displayed.
-
Select the Asset [CHROMECAST#07] and click the Missing button. The Status of the Asset [CHROMECAST#07] is modified to Missing, as shown in Figure 4.1.

-
Close the ORD-1291 Return Order window.
-
Close the Order [ORD-1291].
-
Login to the R2 application from the Site [DALLAS].
-
Select the Warehouse module > View menu > Return submenu > Batch Returns submenu. The Batch Returns window is displayed, as shown in Figure 4.2.
-
Select the Return radio button, and enter the Serial Item Asset [CHROMECAST#07] ID in the Asset No. field with Qty [1], as shown in Figure 4.2.

-
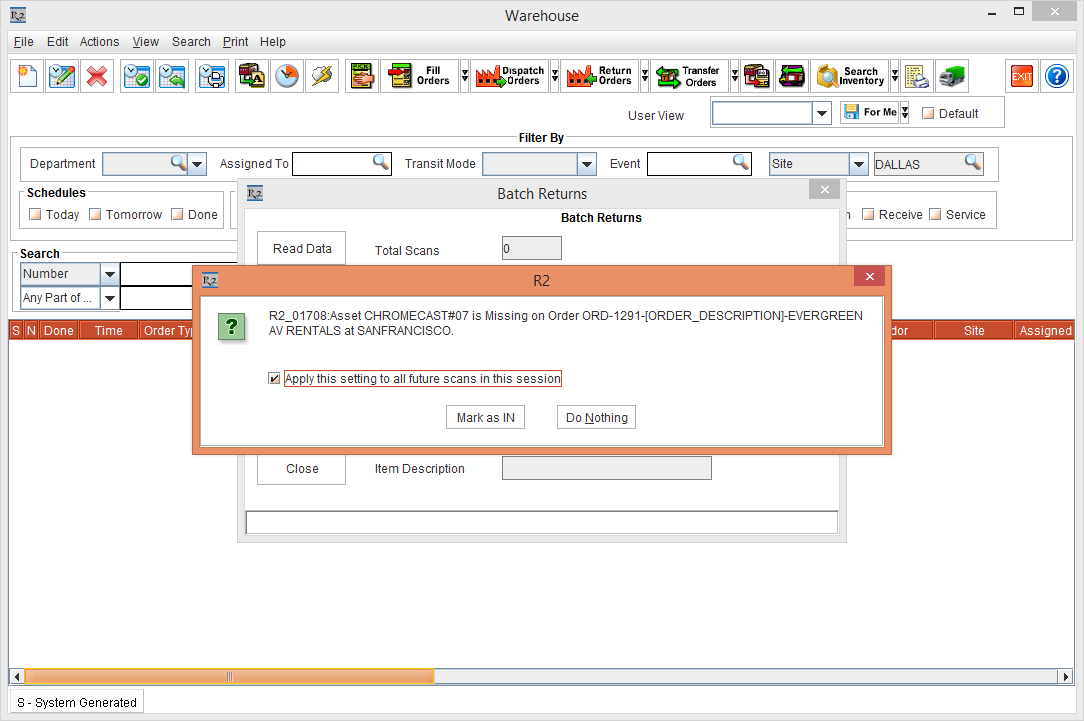
Press the Enter button from the Keyboard. The system displays a prompt with the message "R2_01708:Asset CHROMECAST#07 is Missing on Order ORD-1291-[ORDER_DESCRIPTION]-EVERGREEN AV RENTALS at SANFRANCISCO" with the "Apply this setting to all future scans in this session" check box and Mark as IN and Do Nothing buttons, as shown in Figure 4.3.
-
Select the Mark as IN button along with "Apply this setting to all future scans in this session" check box and click OK.
The same selections of the Mark As IN check box is applicable for any further scan of the Serial Items without the R2 prompt display, until the Batch Returns window is closed.
-
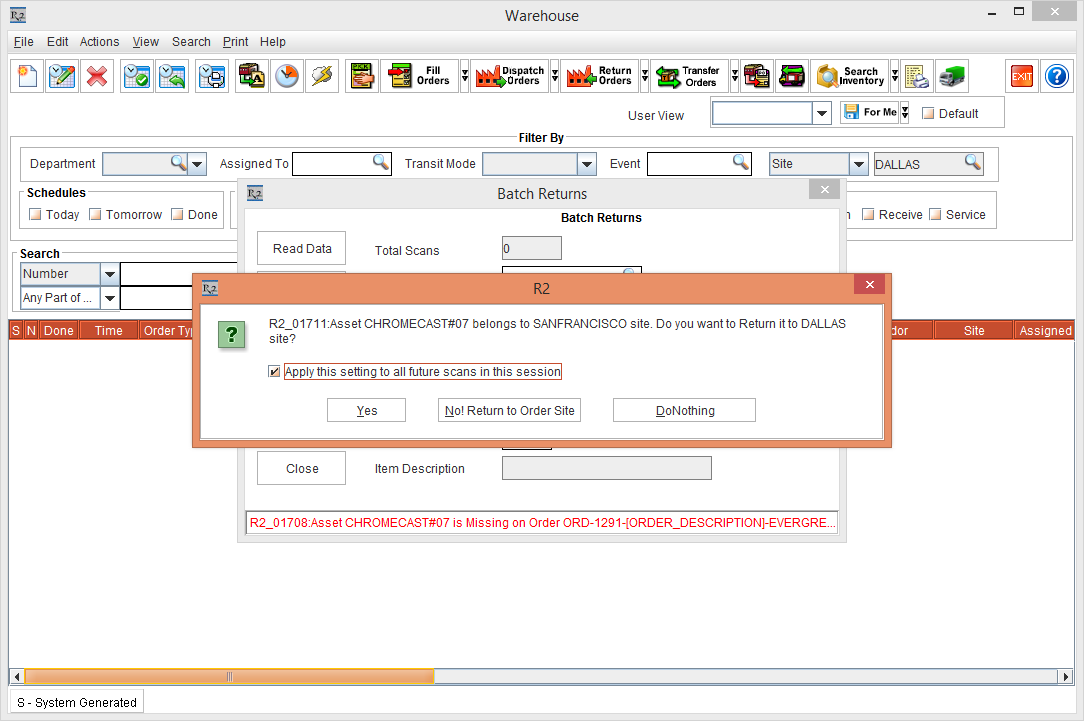
The system displays a prompt with the message "R2_01711:Asset CHROMECAST#07 is belongs to SANFRANCISCO site. Do you want to Return to DALLAS site?" with the "Apply this setting to all future scans in this session" check box and Yes button, No! Return to Order Site button, and DoNothing button, as shown in Figure 4.4.
-
Select the No! Return to Order Site button along with "Apply this setting to all future scans in this session" check box and click OK.
The same selections of the No! Return to Order Site button check boxes is applicable for any further scan of the Serial Items without the R2 prompt display, until the Batch Returns window is closed.
-
The Asset [CHROMECAST#07] is returned to the Order Site [SANFRANCISCO] displaying the Batch Returns window.
-
Click Close to close the Batch Returns window. The system displays the exception prompt with the message "R2_00134:Exceptions found during scanning. Do you want to Print it Now" with Yes and No buttons, as shown in Figure 4.5.

-
Click No to cancel the exceptions print.
-
Click Yes to print the exceptions.
Scenario V - Skip Prompt while scanning the Serial Item from the same Site [From Order]
Support has been provided to skip the prompt displayed while scanning the Serial Item that is in Missing or Lost Status in an Order from the same Site for Return from the Batch Returns window.
Prerequisites
-
Login to the R2 application from the Site [SANFRANCISCO].
-
Select the Maintenance module > Items tab.
-
Create a Serial Item [CHROMECAST] and receive some Qty. of Assets.
-
Click OK.
-
Save and Exit the Maintenance module.
Sample Work Flow
-
Login to the R2 application from the Site [SANFRANCISCO].
-
Select the Account module. The Account window is displayed.
-
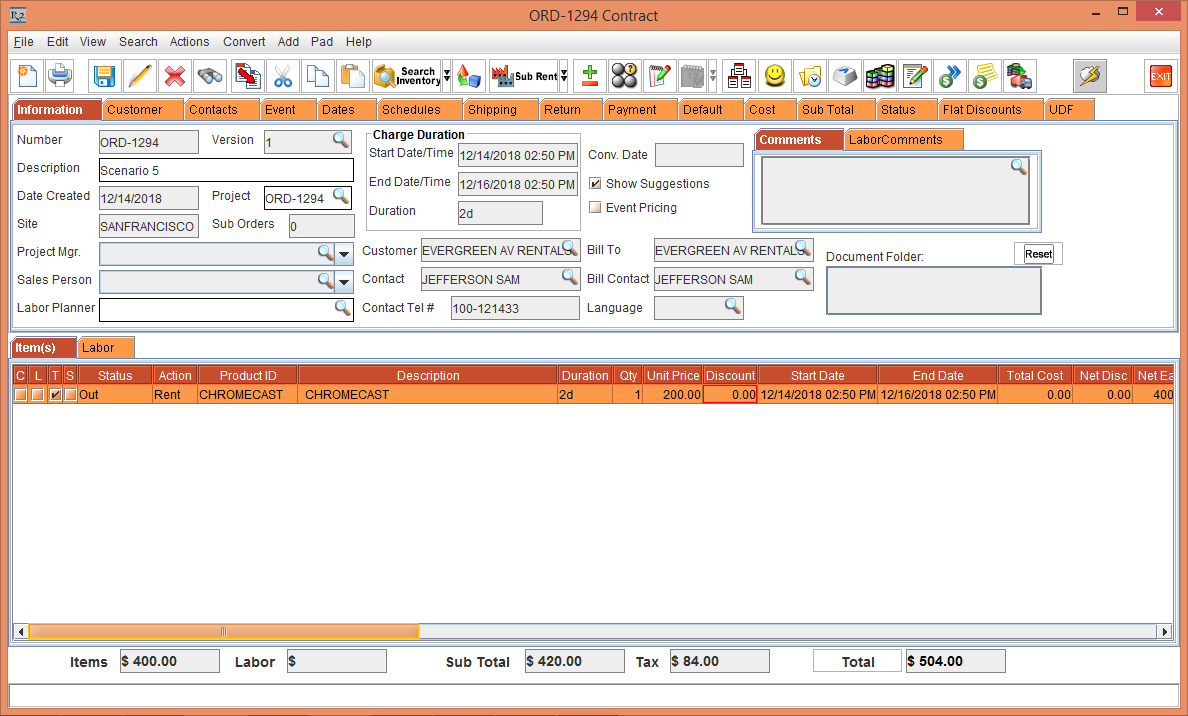
Tag a Company [EVERGREEN AV RENTALS] and create a Rental Reservation Order [ORD-1294] for 2 days duration.
-
Search and add the Serial Item [CHROMECAST] with 1 Qty and the Unit Price [200.00].
-
Click the Fill And Ship icon, to Fill and Ship the Item [CHROMECAST]. The Order line Status is modified to Out, as shown in Figure 5.0.
-
Select the View menu > Return Order option. The ORD-1294 Return Order window is displayed.
-
Select the Asset [CHROMECAST#09] and click the Missing button. The Status of the Asset [CHROMECAST#09] is modified to Missing, as shown in Figure 5.1.

-
Close the ORD-1294 Return Order window.
-
Close the Order [ORD-1294].
-
Select the Warehouse module > View menu > Return submenu > Batch Returns submenu. The Batch Returns window is displayed, as shown in Figure 5.2.
-
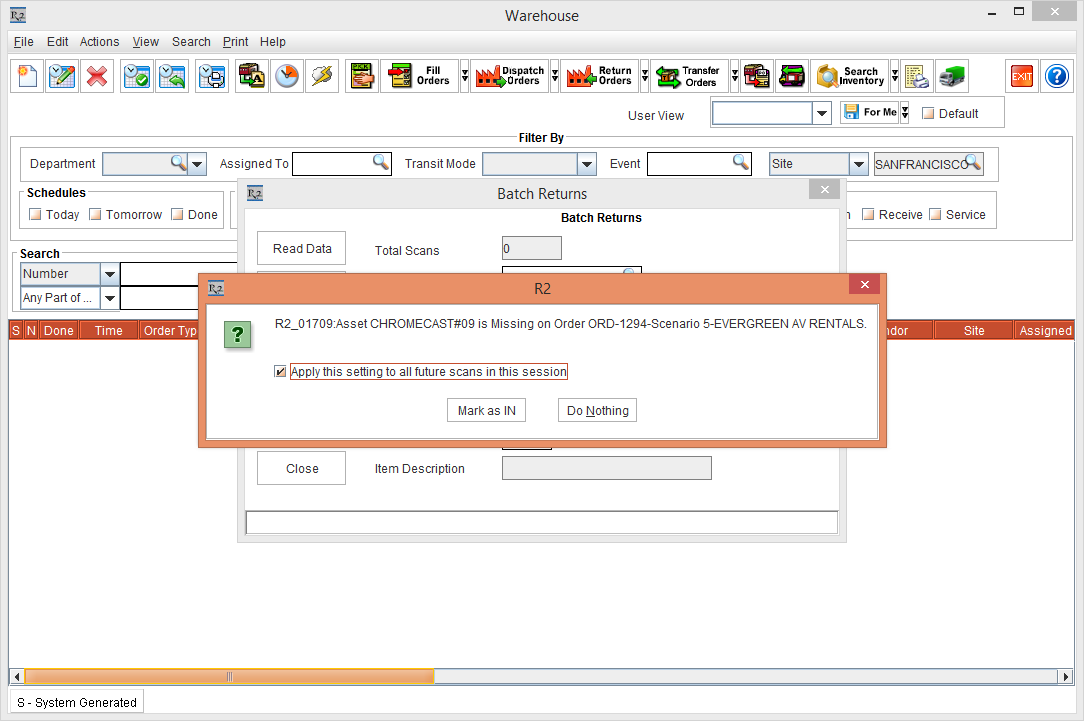
Select the Return radio button, and enter the Serial Item Asset [CHROMECAST#09] ID in the Asset No. field with Qty [1], as shown in Figure 5.2.

-
Press the Enter button from the Keyboard. The system displays a prompt with the message "R2_01709:Asset CHROMECAST#09 is Missing on Order ORD-1294-Scenario 5-EVERGREEN AV RENTALS." with the "Apply this setting to all future scans in this session" check box and Mark as IN and Do Nothing buttons, as shown in Figure 5.3.
-
Select the Mark as IN button along with "Apply this setting to all future scans in this session" check box and click OK.
The same selections of the Mark as IN check box is applicable for any further scan of the Serial Items without the R2 prompt display, until the Batch Returns window is closed.
-
The system returns the Asset [CHROMECAST#09] to the Order Site [SANFRANCISCO] displaying the status bar message "R2_00411: Item Returned Successfully" in the Batch Returns window, as shown in Figure 5.4.

-
Click Close to close the Batch Returns window. The system displays the exception prompt with the message "R2_00134:Exceptions found during scanning. Do you want to Print it Now" with Yes and No buttons, as shown in Figure 5.5.
-
Click No to cancel the exceptions print.
-
Click Yes to print the exceptions.
Scenario VI - Skip Prompt while scanning the Serial Item in IN Status from one Site to Another
Support has been provided to skip the prompt displayed while moving an Asset that is in IN Status from one Site to another Site from the Batch Returns window.
Prerequisites
-
Login to the R2 application from the Site [SANFRANCISCO].
-
Select the Maintenance module > Items tab.
-
Select the Site [SANFRANCISCO].
-
Create a Serial Item [GOOGLEPIXEL] and receive three Assets [GOOGLEPIXEL-05], [GOOGLEPIXEL-06] and [GOOGLEPIXEL-07].
-
Save and Exit the Maintenance module.
Sample Work Flow
-
Login to the R2 application from the Site [DALLAS].
-
Select the Warehouse module > View menu > Return submenu > Batch Returns submenu. The Batch Returns window is displayed, as shown in Figure 1.0.
-
In the Asset No. field, enter the Asset [GOOGLEPIXEL-05], as shown in Figure 6.0.

-
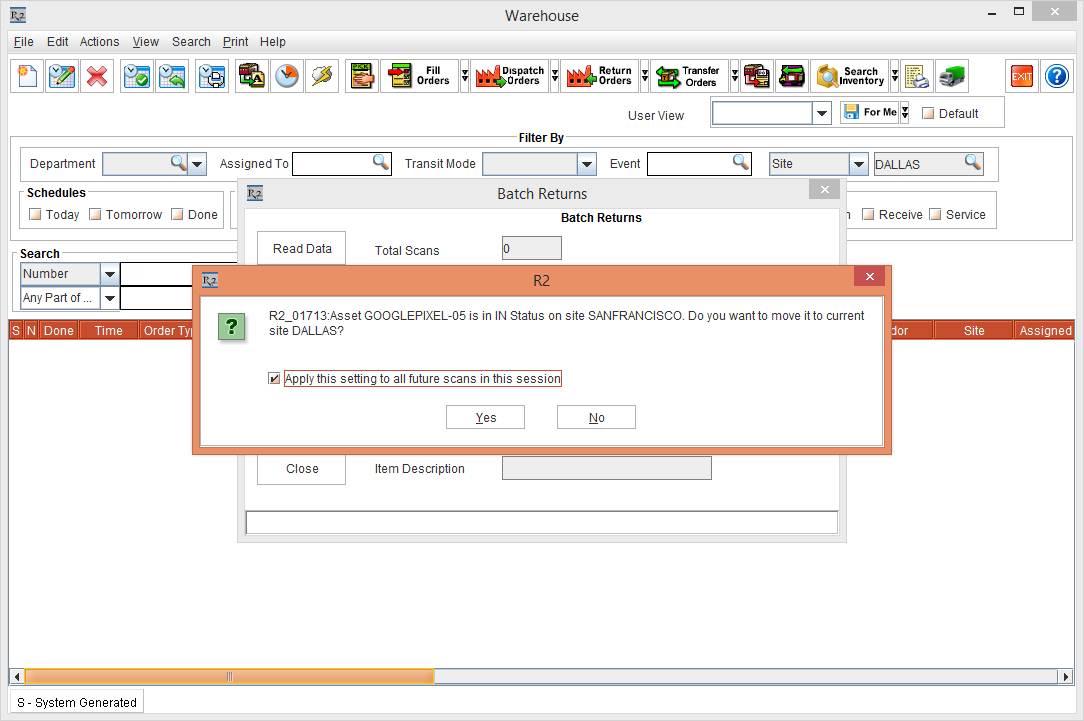
Press the Enter button from the Keyboard. The system displays a prompt with the message "R2_01713:Asset GOOGLE PIXEL-05 is in IN Status on site SANFRANCISCO. Do you want to move it to current site DALLAS?" with "Apply this setting to all future scans in this session" check box and Yes and No buttons, as shown in Figure 6.1.
-
Select the "Apply this setting to all future scans in this session" check box and click Yes. The prompt disappears.
-
Do not Close the Batch Returns window.
-
In the Asset No. field, enter the Asset [GOOGLEPIXEL-07] and press the Enter button from the Keyboard. The system displays the status bar message in Red color as "R2_01713:Asset GOOGLE PIXEL-07 is in IN Status on site SANFRANCISCO. Do you want to move it to current site DALLAS?" as shown in Figure 6.2.

-
Click Close to close the Batch Returns window. The system displays the exception prompt with the message "R2_00134:Exceptions found during scanning. Do you want to Print it Now" with Yes and No buttons, as shown in Figure 6.3.

-
Click No to cancel the exceptions print.
-
Click Yes to print the exceptions.
-
Exit the Warehouse module.