Reference No: 29447
Details
Support is provided for syncing the deleted planned Labor line from R2 as a new Labor Line.
The details are explained in the sample workflow given below:
Prerequisites
-
Login to the R2 application.
-
Select the Maintenance module > Labor tab > click the New icon.
-
Create the Labor Positions [ASSISTINSTALLER-SITE] and [ASSISTANTPRODUCER].
-
Save and Exit the Maintenance module.
-
Select the Configuration module > General tab > select the Split Labor line by quantity check box.
-
Save and Exit the Configuration module.
-
Relaunch the R2 application.
Sample Workflow
-
Select the Account module. The Account window is displayed.
-
Tag a Company [SKY NETWORK TV LTD (NZ)].
-
Create an Order [ORD-550] for 1 day duration.
-
Select the Labor tab. Click the Search Labor icon. The Search Labors window is displayed.
-
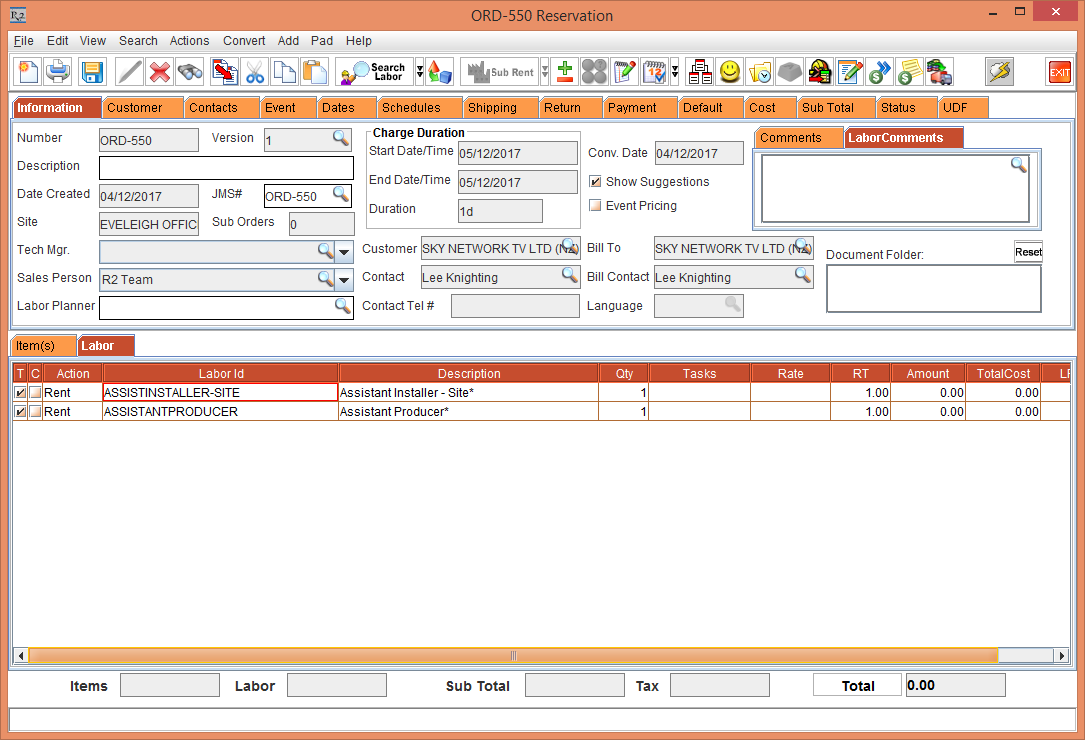
Add the Labor Positions [ASSISTINSTALLER-SITE] and [ASSISTANTPRODUCER] with 1 Qty each, as shown in Figure 1.0.
-
Select the Schedules tab > click the Add icon to add an Order Task.
-
Select the Order Task [Job] for each of the Labor Positions [ASSISTINSTALLER-SITE] and [ASSISTANTPRODUCER].
-
Save and Exit the Order [ORD-550].
-
Login to R2 Labor application.
-
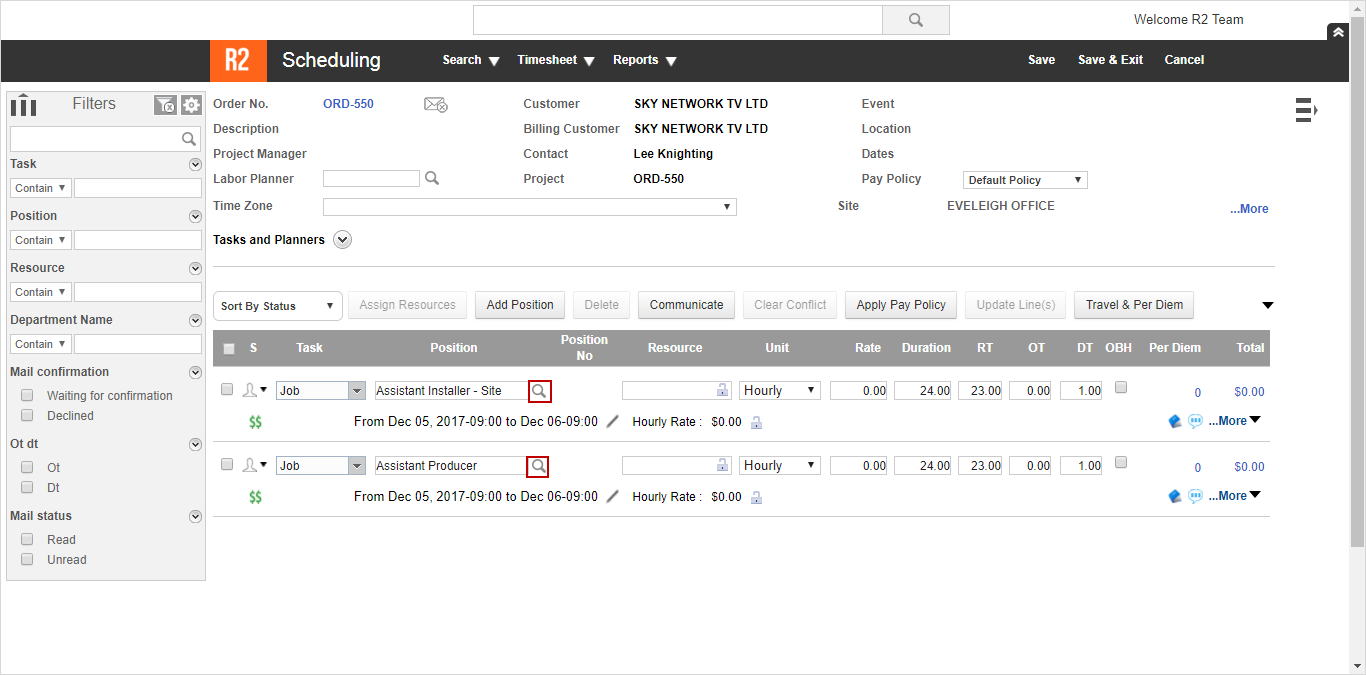
Select Planning > search and open the Order [ORD-550]. The Order [ORD-550] Scheduling window is displayed, as shown in Figure 1.1.
-
Click the Resource importable button, as shown in Figure 1.1.
-
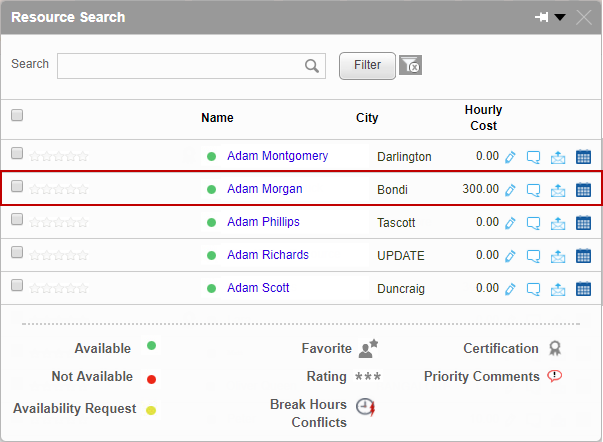
The Resource Search window is displayed, as shown in Figure 1.2.
-
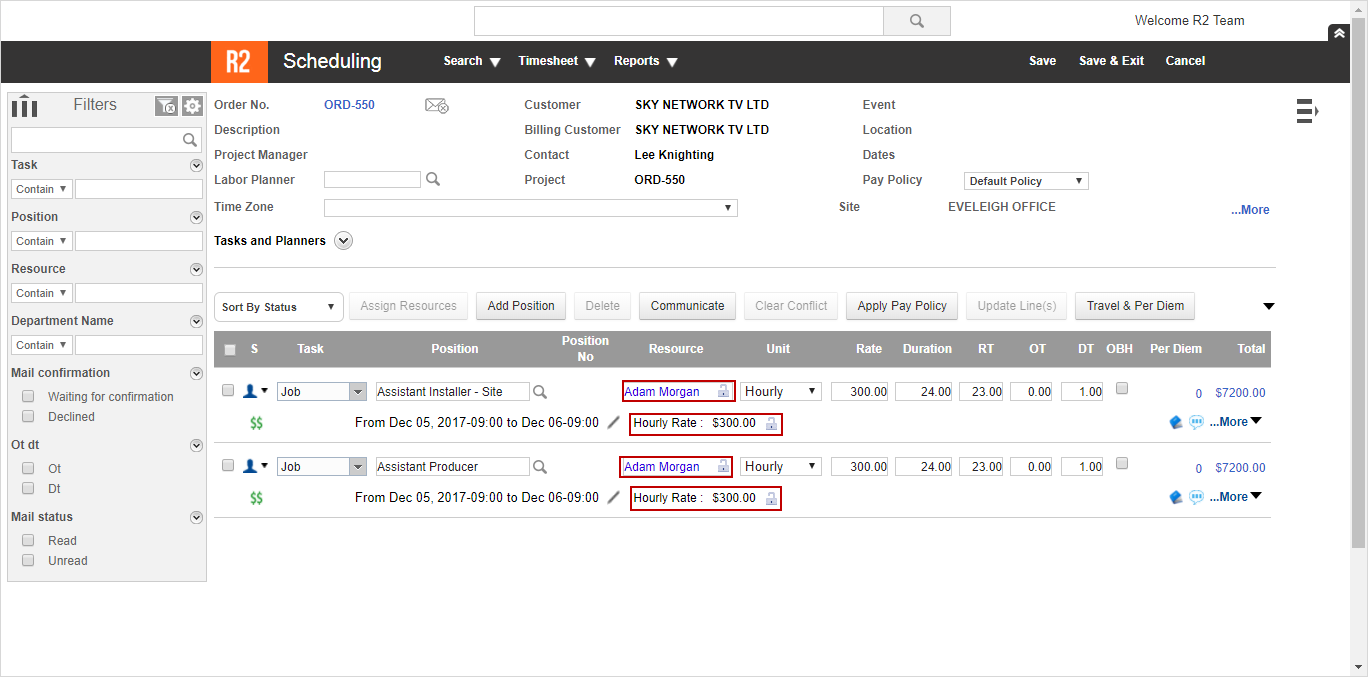
Select a Resource [Adam Morgan] comprising of a predefined Hourly Rate [300.00] and does not have any company tagged where the Resource Type is a Freelancer.
-
The Resource [Adam Morgan] comprising of a predefined Hourly Rate [300.00] is selected, as shown in Figure 1.3.
-
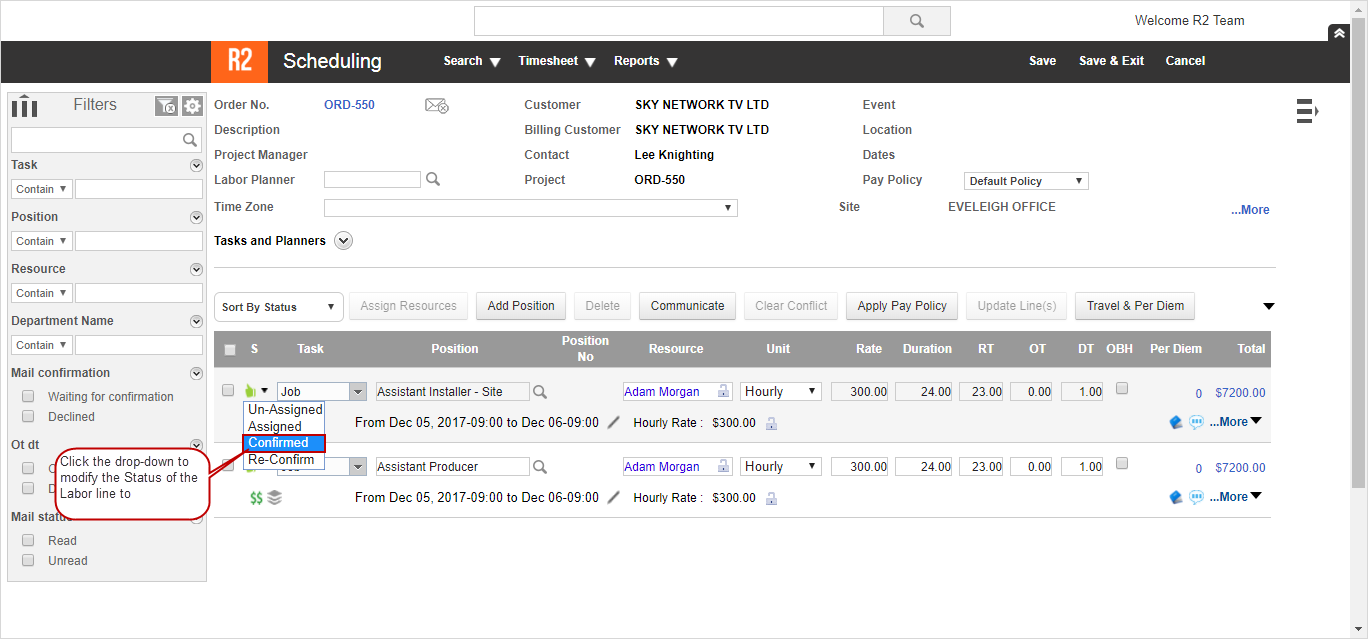
Change the Status of the Labor line to Confirmed,, as shown in Figure 1.4.
-
Save and Exit the R2 Labor application.
-
Login to the R2 application.
-
Select the Account module. The Account window is displayed.
-
Select the Search Orders icon. The Search Orders window is displayed.
-
Search and Open the Order [ORD-550].
-
Select the Labor lines [ASSISTINSTALLER-SITE] and [ASSISTANTPRODUCER] and click the Delete icon.
-
The system displays a prompt with the message "Some of the selected lines are in Planned status. Do you want to delete the selected lines?" with the Yes and No buttons.
-
Select the Yes button. The Labor lines [ASSISTINSTALLER-SITE] and [ASSISTANTPRODUCER] gets deleted.
-
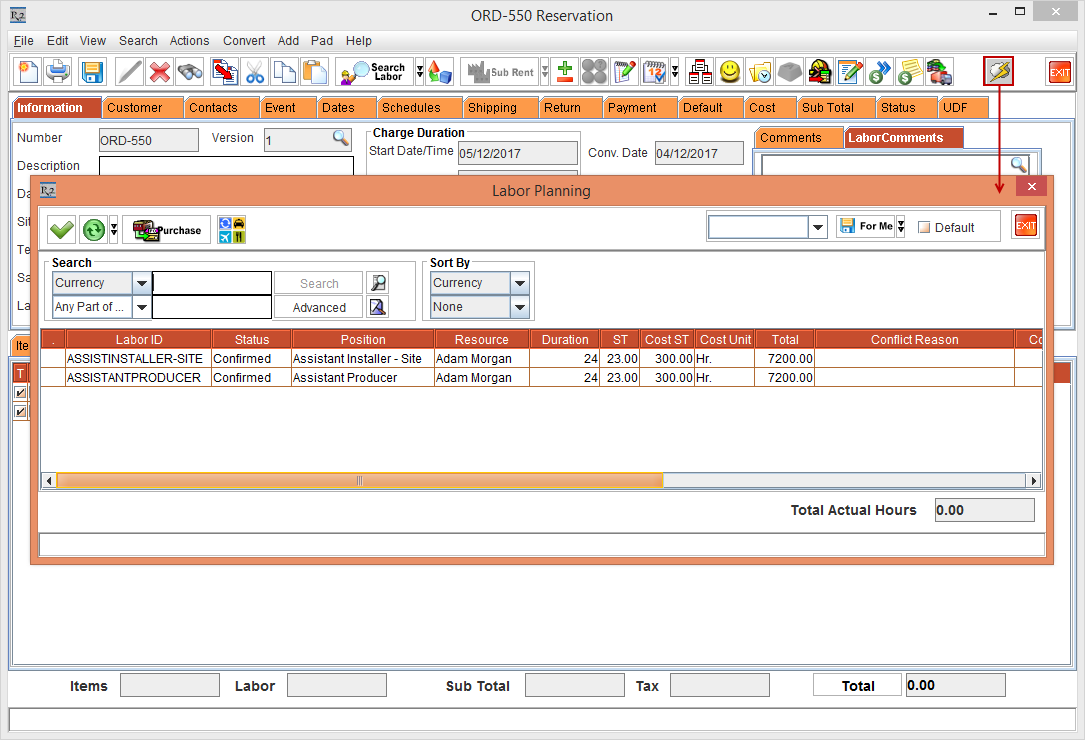
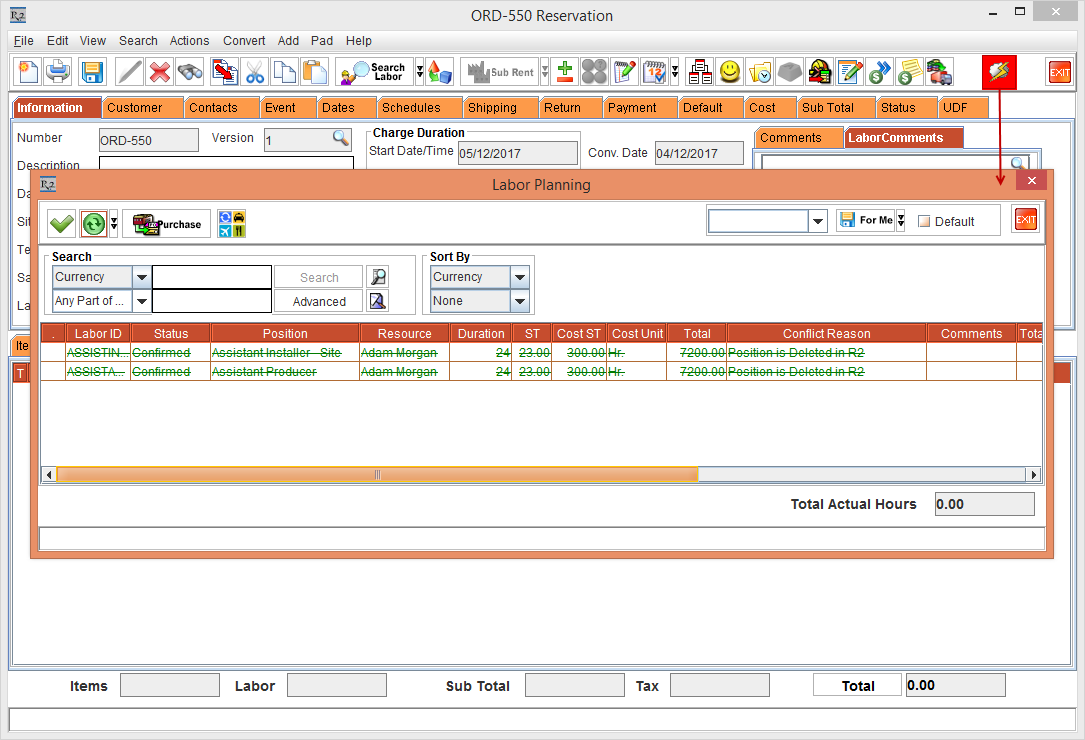
Click the Labor Planning icon that is highlighted in Red color, the Labor Planning window with the Labor lines [ASSISTINSTALLER-SITE] and [ASSISTANTPRODUCER] are displayed as Strikethrough in Green color with the Reason for Conflict [Position is Deleted in R2], as shown in Figure 1.5.
-
Login to R2 Labor application.
-
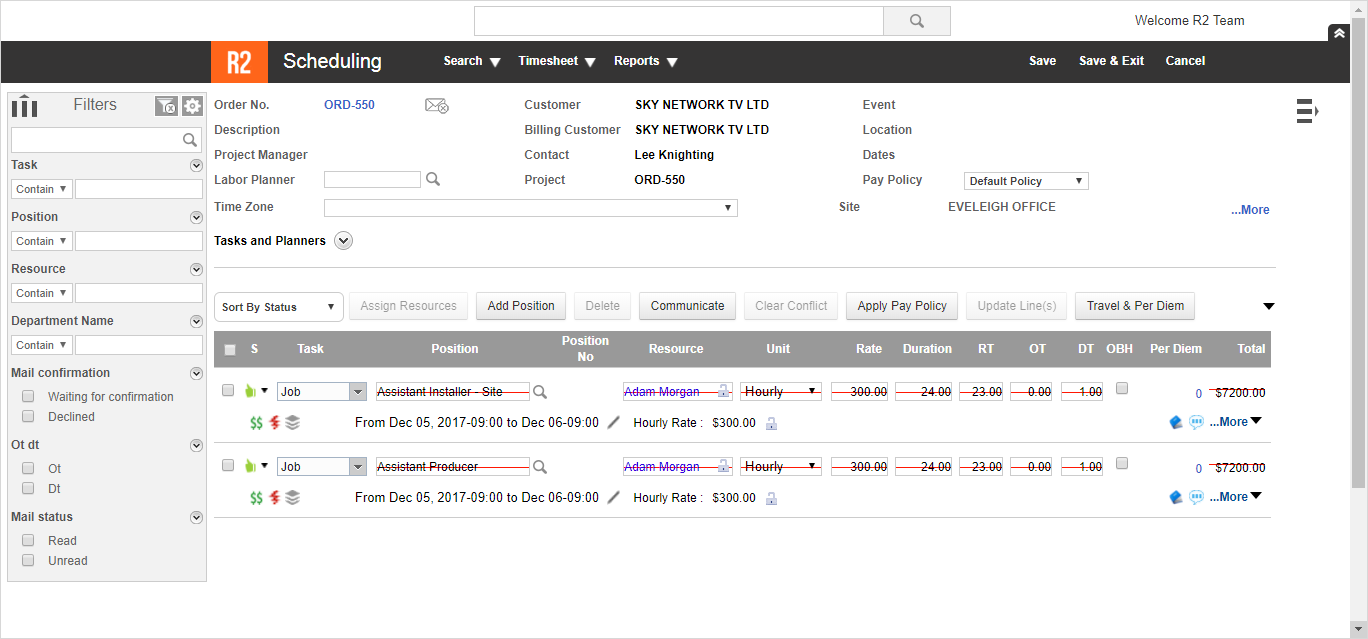
Select Planning > search and open the Order [ORD-550]. The Order [ORD-550] Scheduling window with the Labor lines [ASSISTINSTALLER-SITE] and [ASSISTANTPRODUCER] appearing as Strikethrough in Red is displayed, as shown in Figure 1.6.
-
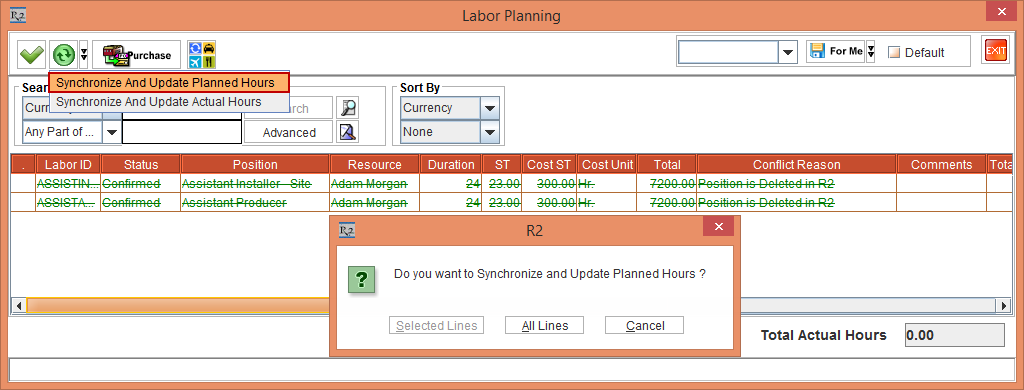
In the R2 application > Order [ORD-550] > click the Labor Planning icon > the Labor Planning window is displayed > select the Synchronize and Update Planned Hours option. The system displays a prompt with the message "Do you want to Synchronize and Update Planned Hours",, as shown in Figure 1.7.
-
Select the All Lines button. The deleted Labor lines [ASSISTINSTALLER-SITE] and [ASSISTANTPRODUCER] is added back to the Order [ORD-550], as shown in Figure 1.8.
-
Save and Exit the Order [ORD-550] in the R2 application.
-
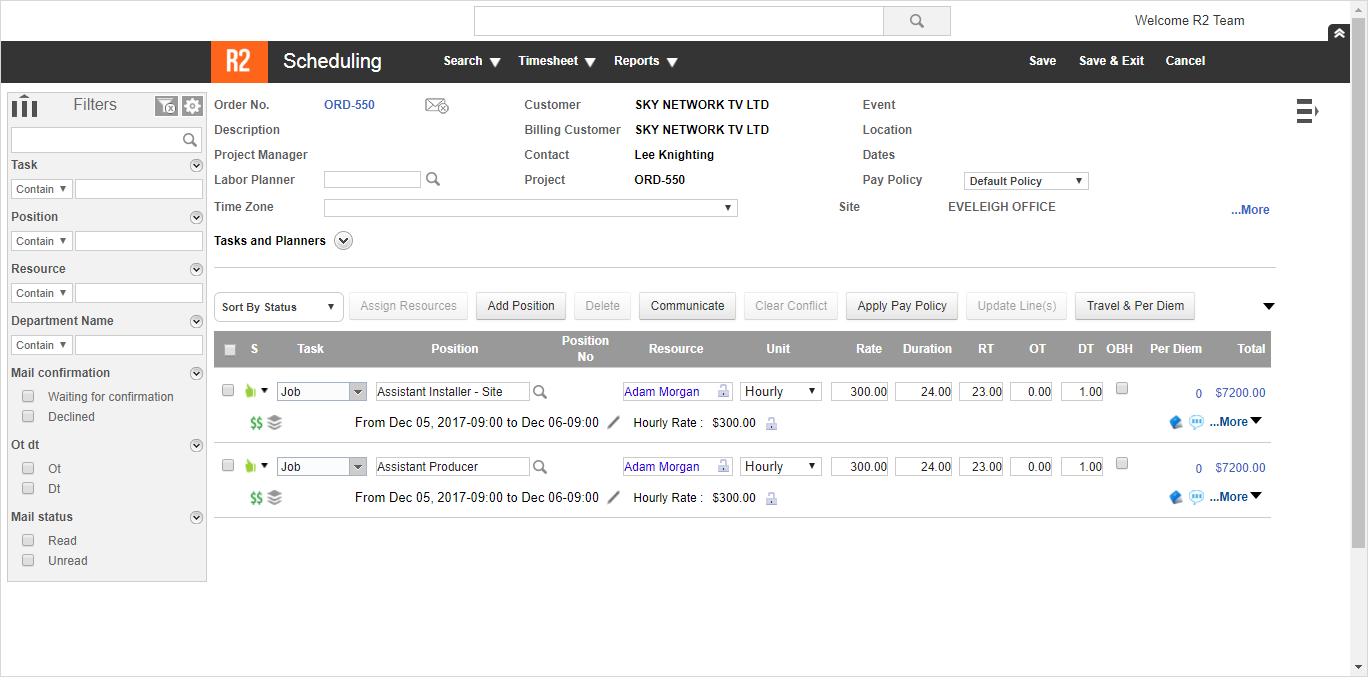
In the R2 Labor application > Planning > search and open the Order [ORD-550]. The Order [ORD-550] Scheduling window with the Labor lines [ASSISTINSTALLER-SITE] and [ASSISTANTPRODUCER] that was appearing as Strikethrough and in Red is now displayed Normal, as shown in Figure 1.9.
-
In the R2 application > Order [ORD-550] > click the Labor Planning icon > the Labor Planning window is displayed. The Labor lines [ASSISTINSTALLER-SITE] and [ASSISTANTPRODUCER] that displayed as Strikethrough in Green color with the Reason for Conflict [Position is Deleted in R2] now appears in Black color and is Normal, as shown in Figure 1.10.